Loading ...
Loading ...
Loading ...

S002
CAUTION:
The power-control button on the device and the power switch on the power supply do not turn off the
electrical current supplied to the device. The device also might have more than one power cord. To
remove all electrical current from the device, ensure that all power cords are disconnected from the
power source.
About this task
Attention:
• Read
“Safety inspection checklist” on page iv and “Installation guidelines” on page 41 to ensure that you
work safely.
• Touch the static-protective package that contains the component to any unpainted metal surface on the
server; then, remove it from the package and place it on a static-protective surface.
Applying thermal grease
1. If the processor to be installed was removed from another system board, wipe the thermal grease from
the processor with an alcohol cleaning pad, and dispose of the cleaning pad after all of the thermal
grease is removed.
Note: If you are applying new thermal grease on the top of the processor, make sure to do it after the
alcohol has fully evaporated.
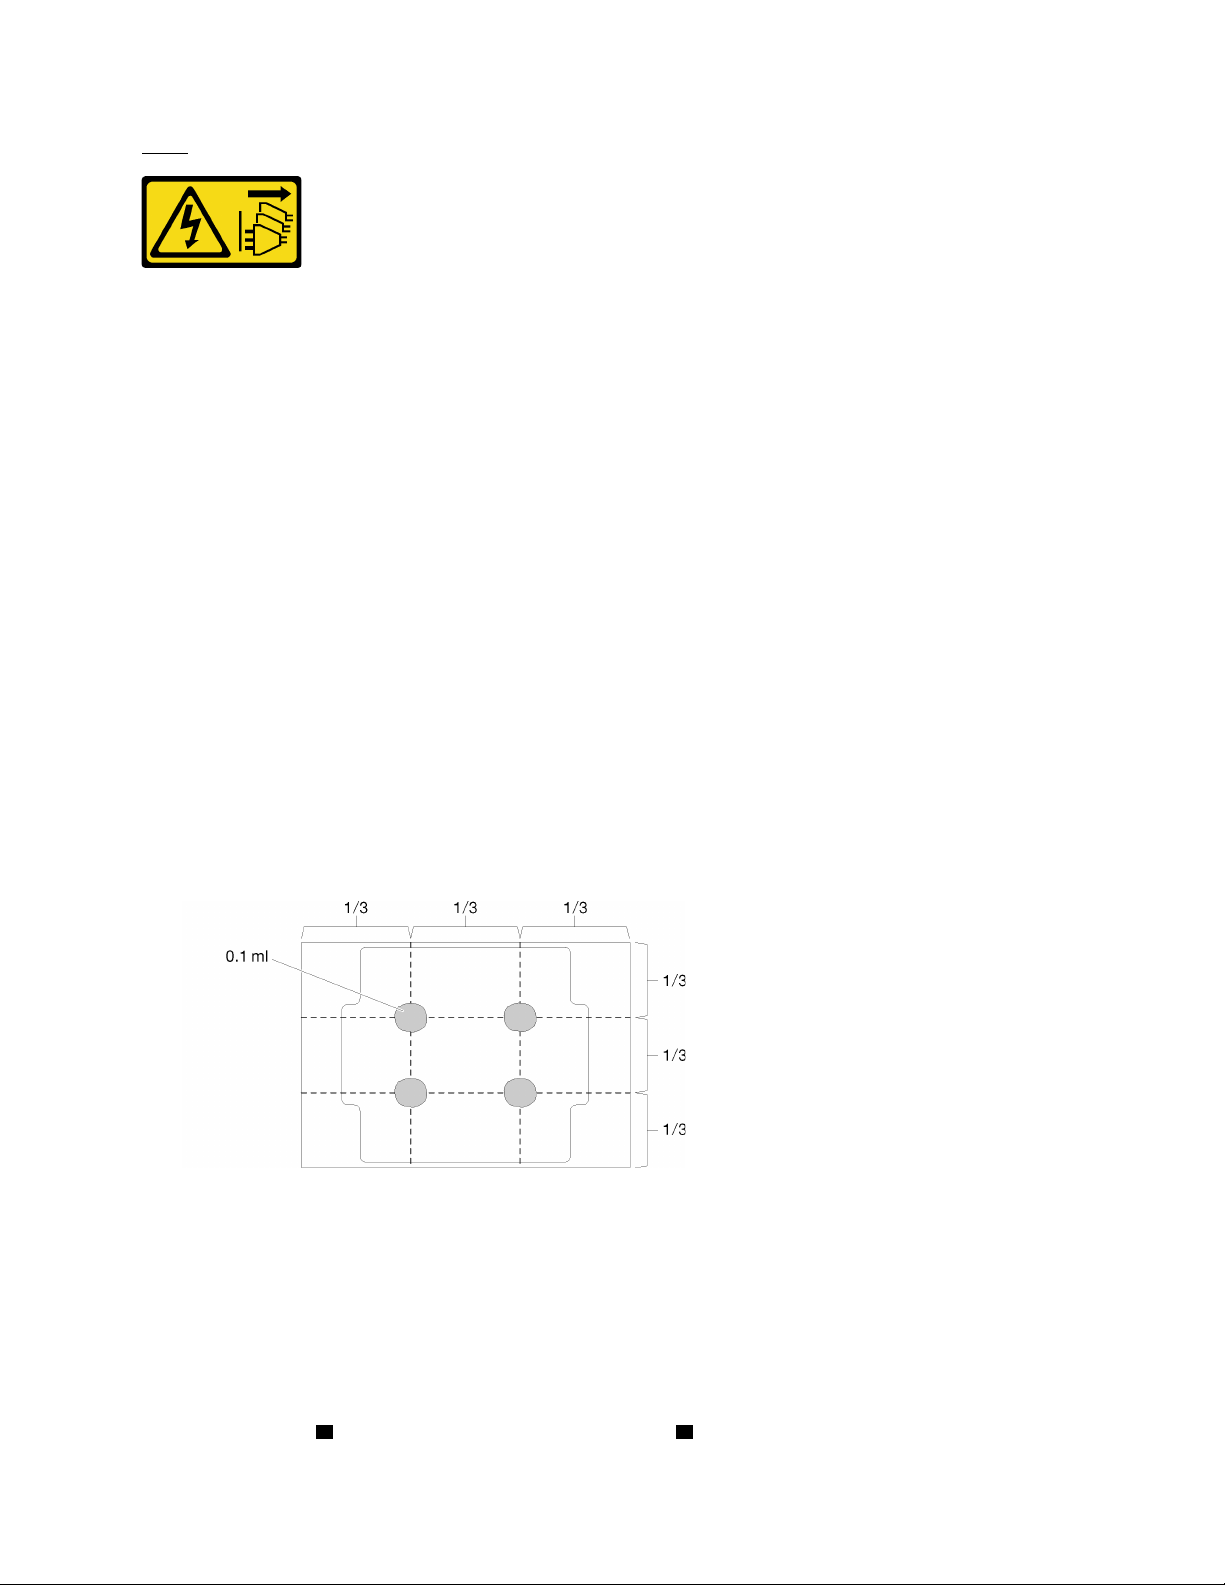
2. Apply the thermal grease on the top of the processor with syringe by forming four uniformly spaced
dots, while each dot consists of about 0.1 ml of thermal grease.
Figure 106. Proper shape of the thermal grease
Watch the procedure
A video of this procedure is available at YouTube:
https://www.youtube.com/playlist?list=PLYV5R7hVcs-
AU3iY3F7lq3qfqr5caGbIu
.
Procedure
Step 1. Hold the processor by both sides, and align the following:
1. Align
1 the small notches on the processor to 2 the tabs on the socket.
Chapter 3. Hardware replacement procedures 137
Loading ...
Loading ...
Loading ...