Loading ...
Loading ...
Loading ...
50
Projection Procedure
Step 2 Select an Input Signal
Select the input signal in the [Input] menu when you want to project a digital PC or
AV equipment signal, or to switch between inputs when multiple computers or
multiple sets of AV equipment are connected.
Skip this step if you have not changed the input signal since the last projection.
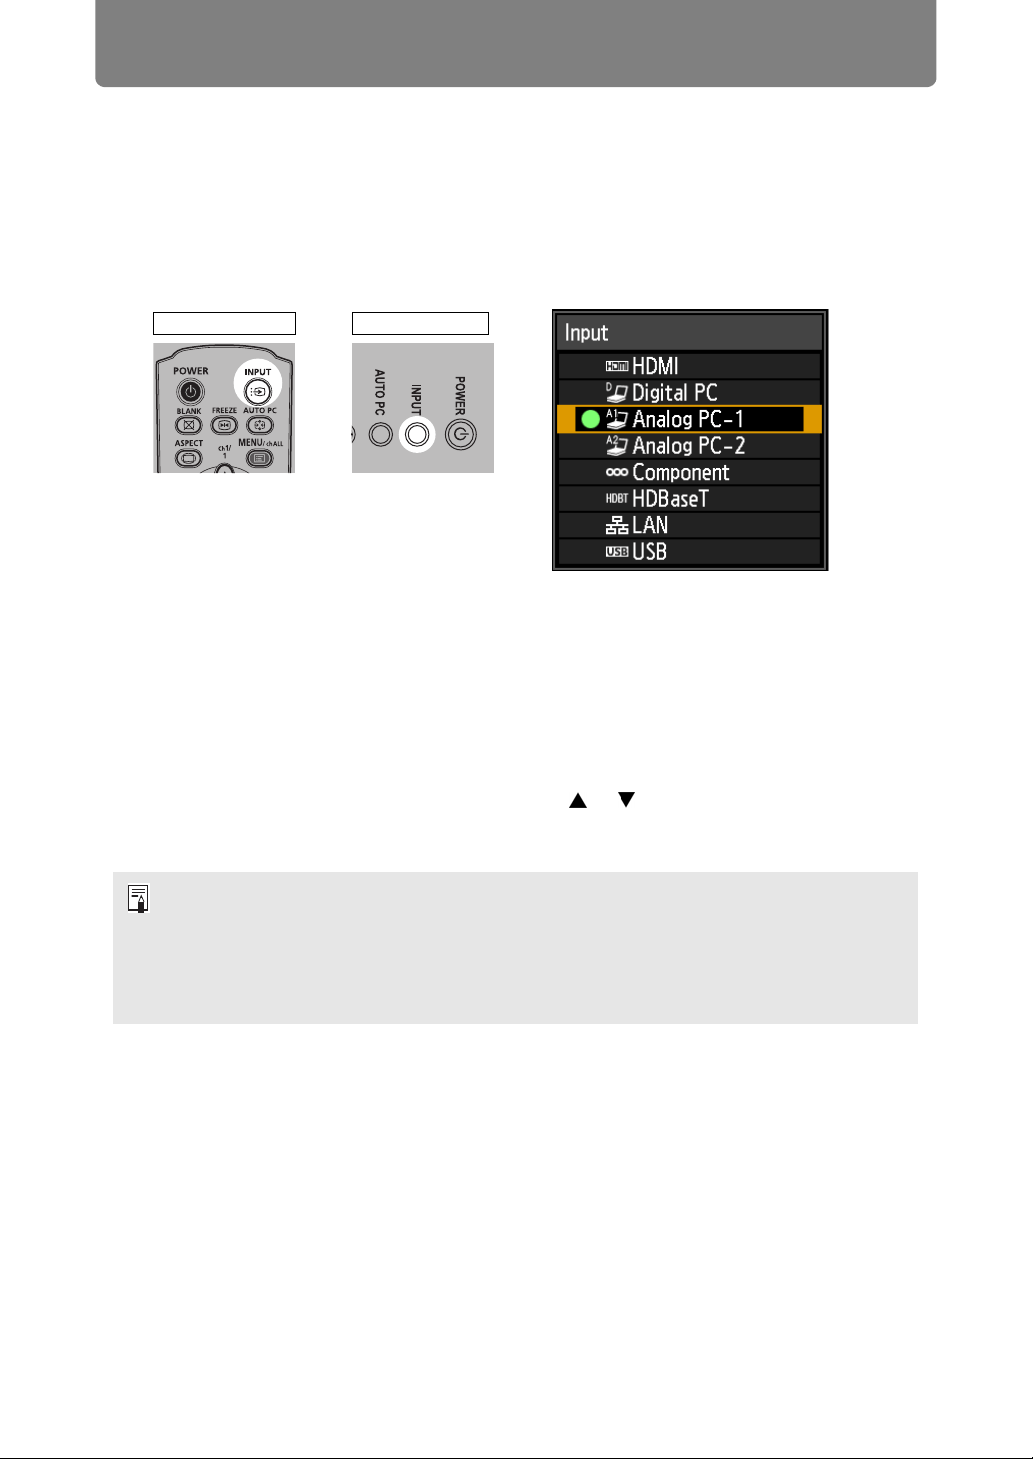
1 Press the INPUT button to display the window shown below.
The currently active input signal is marked with a green circle and enclosed by
a orange border.
Names of input signals available for projection are displayed in white, and
unavailable signal names are grayed out. However, [Digital PC] and [Analog
PC-1] may be grayed out even when available.
2 You can switch the available input signal types by pressing the INPUT
button.
You can select the target input signal with [ ] / [ ].
3 Press the OK button to confirm the input signal type.
• Screens of computers connected to the projector over a network can be projected
when you have selected [LAN] as the input signal. For details, refer to the NMPJ user’s
manual.
• Images on USB flash drives can be projected when you have selected [USB] as the
input signal. For details, refer to “Projecting Images on a USB Flash Drive” (P153).
• In split-screen mode, the side without control rights is identified by a white circle.
Remote control Projector
Loading ...
Loading ...
Loading ...