Loading ...
Loading ...
Loading ...

149
Menu Description
Advanced Guide Menu Description
Controlling the Projector from a Computer
The projector can be controlled from a computer over a wired or wireless network
connection.
1 Turn on the computer and projector.
2 Launch a web browser, enter “http://(projector IP address)” in the
address bar, and press the Enter key.
The projector web screen appears.
3 Click [Projector control] on the web screen.
The password input window appears.
4 Enter the user name and password on the password input window, then
click [OK].
The factory default user name is “root” and the password is “system”.
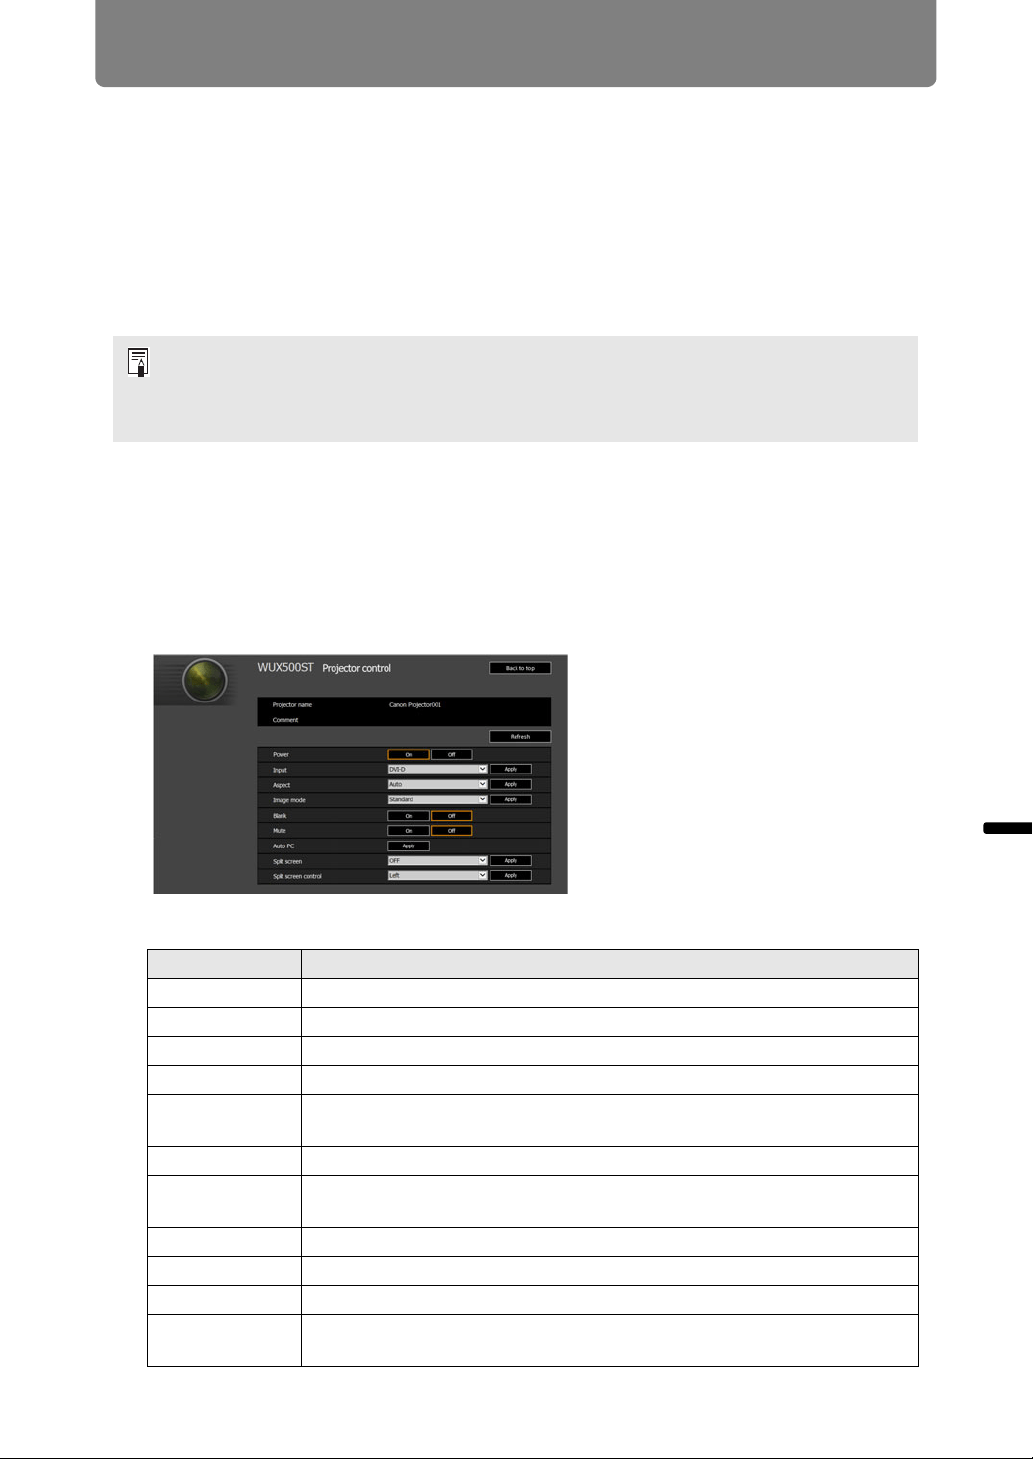
The projector control screen appears.
The projector can be controlled from this screen.
The projector’s own default IP address is 192.168.254.254 for wired connections and
192.168.253.254 for wireless connections. If DHCP settings are used, ask the network
administrator for the projector IP address. It is possible to check the IP address from the
projector menu.
Item Explanation
Projector name The name of the connected projector is displayed. (P144)
Comment Shows notes, such as where the projector is installed. (P144)
Refresh Refreshes the displayed contents with the most recent information.
Power Turns projector power on or off.
Input Select an input signal and click [Apply] to change to that input signal.
(P50)
Aspect Select an aspect and click [Apply] to change to that aspect. (P56)
Image mode Select an image mode and click [Apply] to change to that image mode.
(P61)
Blank Switches the blank setting on or off. (P63)
Mute Switches the mute setting on or off. (P34)
Auto PC Click [Apply] to perform Auto PC adjustment. (P52)
Split screen Select the setting for split-screen mode and click [Apply] to switch to
split-screen projection. (P85, P161)
Loading ...
Loading ...
Loading ...