Loading ...
Loading ...
Loading ...
DO-IT-YOURSELF MAINTENANCEDO-IT-YOURSELF MAINTENANCE
DO-IT-YOURSELF MAINTENANCEDO-IT-YOURSELF MAINTENANCE
DO-IT-YOURSELF MAINTENANCE
6-18
SPECIFICATIONS:SPECIFICATIONS:
SPECIFICATIONS:SPECIFICATIONS:
SPECIFICATIONS:
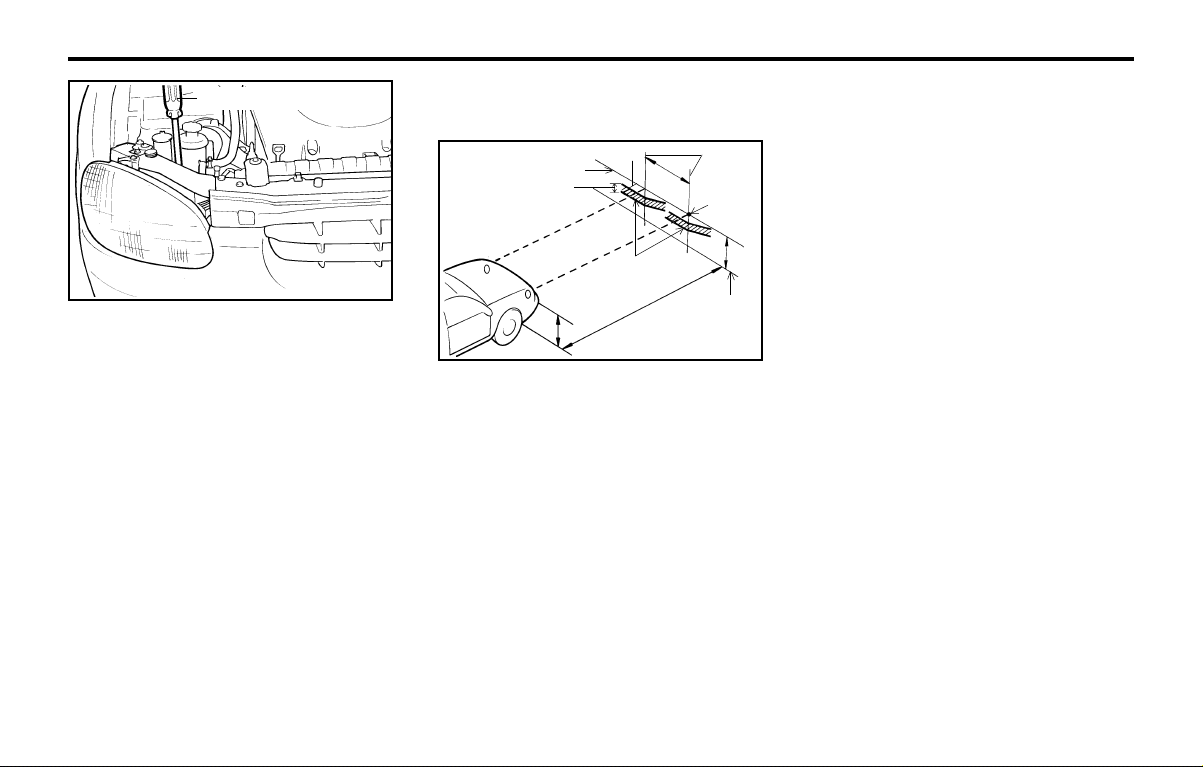
"H"
Horizontal center line of headlights from
ground : 646 mm (25.43 in.)
"W"
Distance between each headlight center:
988 mm (38.89 in.)
"L"
Distance between the headlights and the
wall that the lights are tested against:
3,000 mm (118 in.).
4. Clean the head light lenses and turn on the
headlights (Low beam).
5. Open the hood.
6. Draw the vertical line (through the center of
each headlight beam pattern) and the hori-
zontal line (through the center of each head-
light beam pattern) on the aiming screen.
And then, draw the horizontal parallel line at
30 mm (1.18 in.) under the horizontal line.
7. Adjust each cut-off line of the low beam to
the parallel line with a phillips screwdriver -
VERTICAL AIMING.
8. Adjust each cut-off line of the low beam to
the each vertical line with a phillips screw-
driver - HORIZONTAL AIMING.
G290A02Y
Vertical aiming
G290B02X-GAT
Adjustment After Headlight AssemblyAdjustment After Headlight Assembly
Adjustment After Headlight AssemblyAdjustment After Headlight Assembly
Adjustment After Headlight Assembly
ReplacementReplacement
ReplacementReplacement
Replacement
G290B01Y
Vertical
line
Cut-off line
Ground line
Horizontal line
L
W
H
H
"P"
15mm (0.59in.)
30mm(1.18in.)
If the vehicle has had front body repair and the
headlight assembly has been replaced, the
headlight aiming should be checked using the
aiming screen as shown in the illustration. Turn
on the headlight switch. (Low Beam Position)
1. Adjust headlights so that main axis of light is
parallel to center line of the body and is
aligned with point "P" shown in the illustra-
tion.
2. Dotted lines in the illustration show the cen-
ter of headlights.
Loading ...
Loading ...
Loading ...