Loading ...
Loading ...
Loading ...
Chapter 10
82
Transferring the Label
Layout to the Printer
10
By transferring the created label layout from a
computer to the printer, you can easily use
the touch panel display to print as many
labels as required.
Use P-touch Transfer Manager to transfer
data. For details, see the Software User’s
Guide included on the CD-ROM.
a Connect the printer to the computer with
a USB cable, and then turn on the
printer.
b In P-touch Editor 5.0, open the label
layout to be transferred, and then click
[File] - [Transfer Template] -
[Transfer].
NOTE
•If [Transfer Template] cannot be selected
in P-touch Editor 5.0, make sure that the
layout window in P-touch Editor 5.0 is the
active window.
• If the label layout has already been
transferred to P-touch Transfer Manager,
you can start the application.
• For Windows
®
XP/Windows
Vista
®
/Windows
®
7:
From the Start menu, click [All
Programs] - [Brother P-touch] -
[P-touch Tools] - [P-touch Transfer
Manager 2.1].
P-touch Transfer Manager starts up.
• For Windows
®
8:
Click [P-touch Transfer Manager 2.1]
in the [Start] or [Apps] screen.
P-touch Transfer Manager starts up.
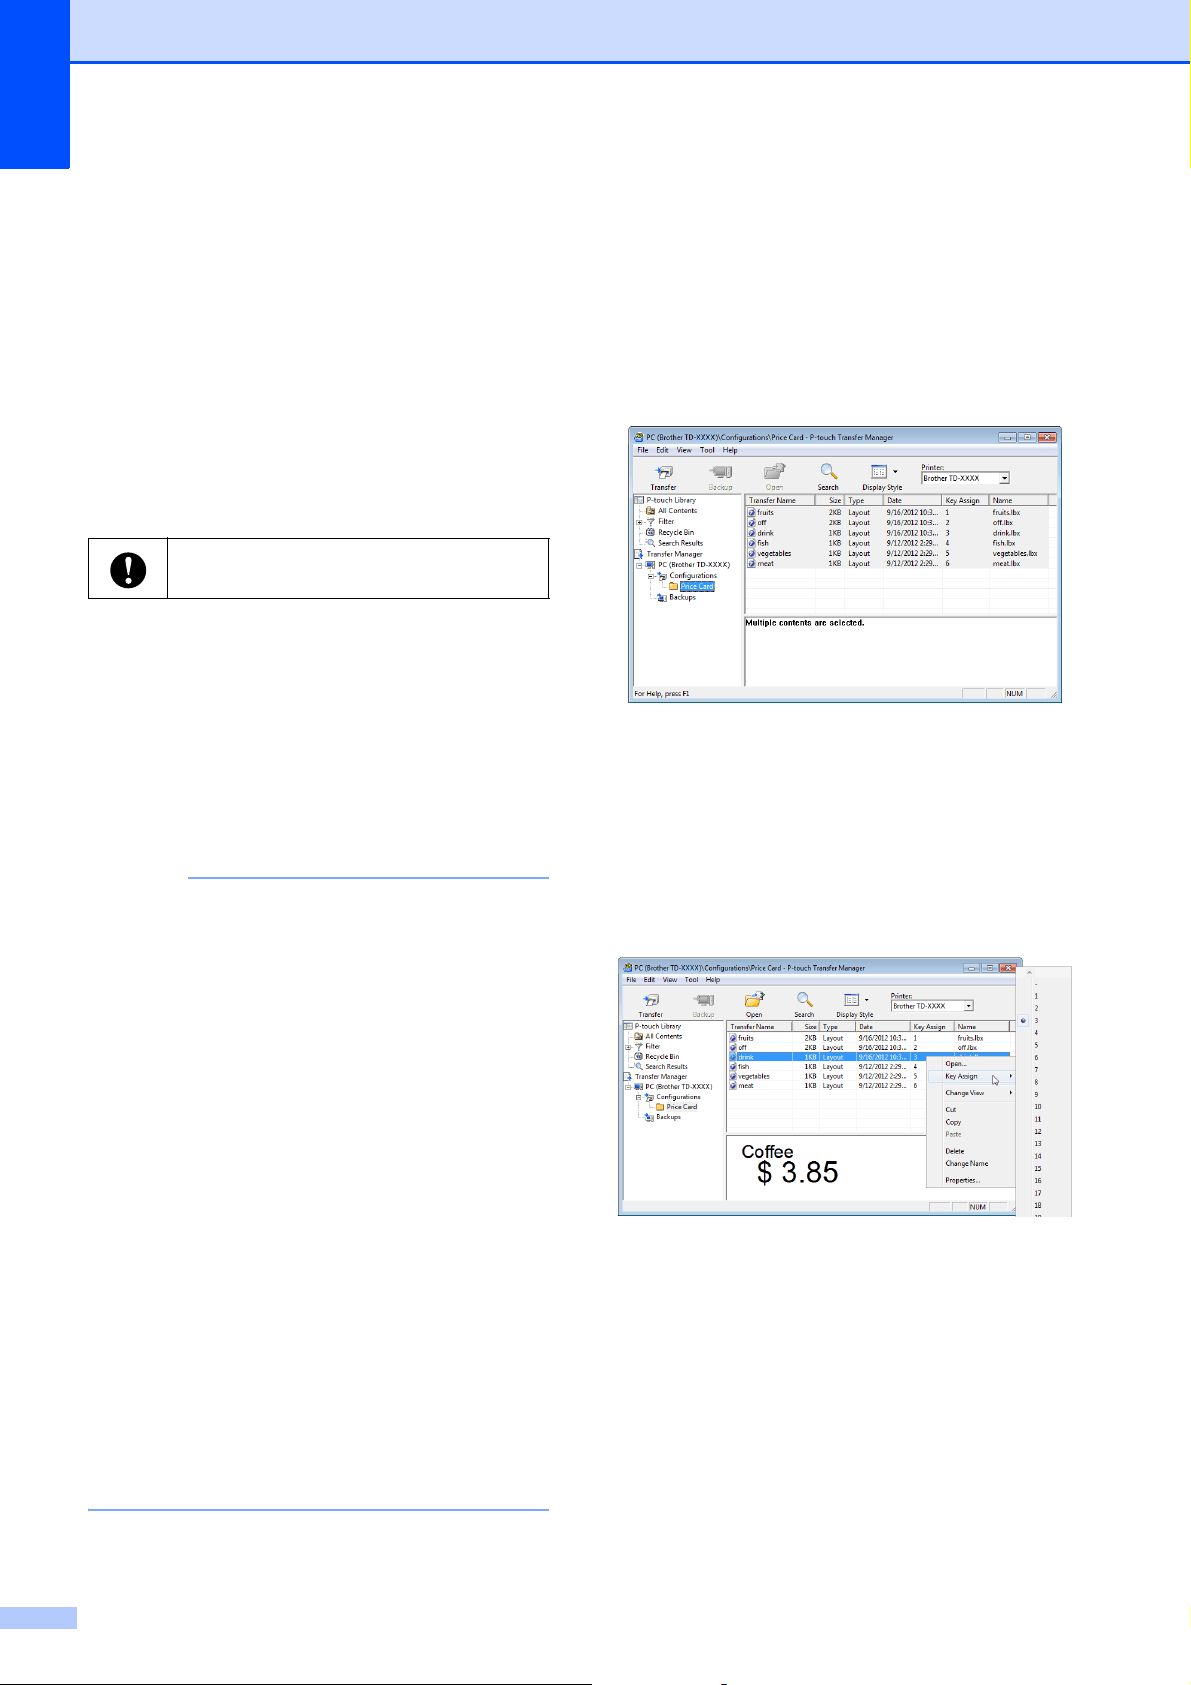
c Select this printer from the [Printer] list.
Right-click [Configurations], click
[New], and then create a new folder with
the desired name. (In this example, the
folder [Price Card] is created.)
Click [Configurations] or [All
contents], and then drag the data to be
transferred to the [Price Card] folder.
d A key number (number of the template
to be registered on the printer) is
assigned to the file in the [Price Card]
folder. To change the number, right-click
the file, click [Key Assign], and then
select the desired number between 1
and 99.
Before transferring data, make sure that
the main screen appears on the LCD.
Loading ...
Loading ...
Loading ...