Loading ...
Loading ...
Loading ...
Printer Setting Tool
45
3
8Option
Click the b button, and then select an
operation.
Click [Register Paper Size With Printer] to
register the settings for the selected paper
format in printer.
Click [Save in Command File] to export the
paper settings as a command file. (The file
extension is “.bin”.)
NOTE
• When the paper format is registered with the
printer and [Exit] is clicked, the [Paper Size
Setup] dialog box appears with the added
paper size in the [Currently Registered Paper
Sizes] list. If the application is running, exit the
application, restart it in order for the new paper
format to appear in the list.
• If the following functions are being used, you
can easily apply their settings to the printer.
• Mass storage feature (page 48)
• Bluetooth (Object Push Profile (OPP))
•Wi-Fi
®
(File Transfer Profile (FTP))
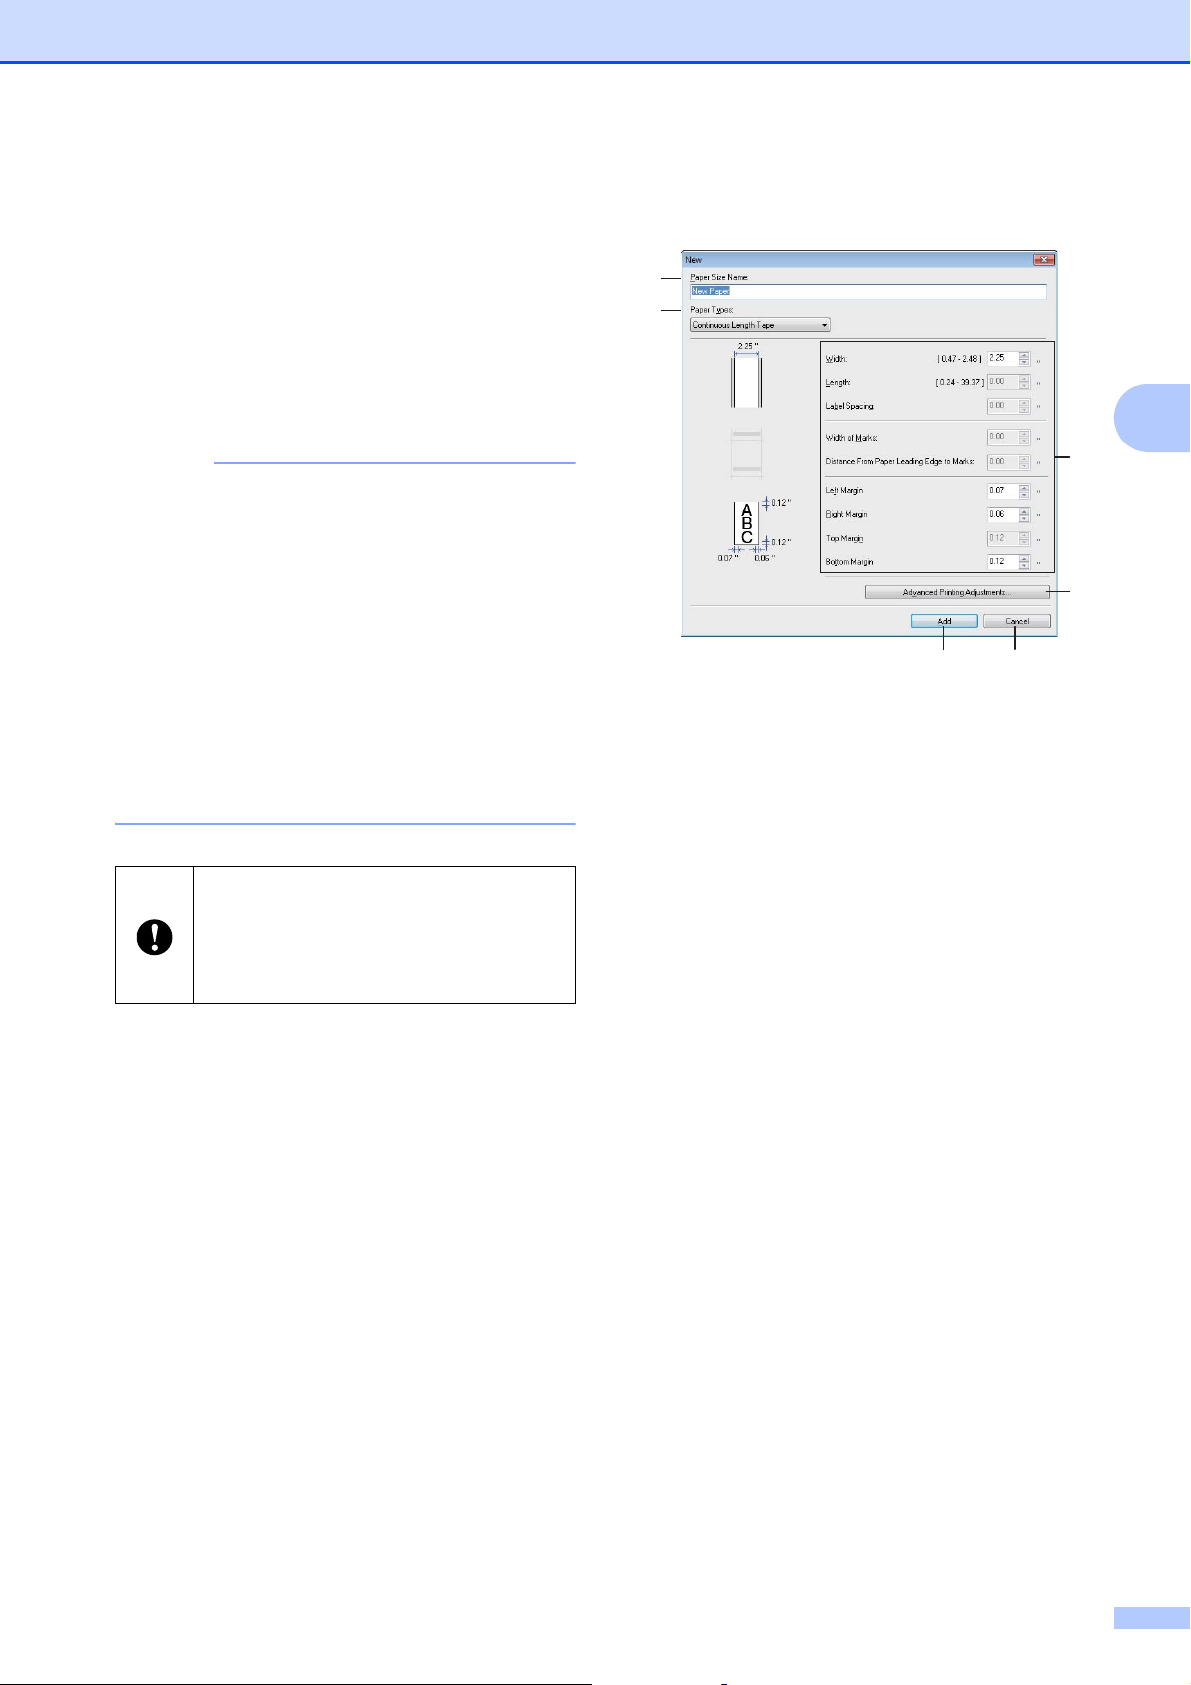
New Dialog Box 3
1 Paper Size Name
Type in the name of the paper format to be
added.
2 Paper Types
Select the paper type.
Available settings: [Continuous Length
Tape], [Media With Marks], [Die-cut Label]
3 Detailed settings
Specify details for the paper format to be
added.
4 Advanced Printing Adjustments
Click this button to display the [Advanced
Printing Adjustments] dialog box and make
advanced printing adjustments for each paper
format. For details, see Advanced Printing
Adjustments Dialog Box on page 46.
5 Cancel
Cancels the settings and closes the dialog box.
The settings will remain unchanged.
6Add
Click this button to add the paper format.
These settings commands are only
intended to be used for applying
settings to a printer. These commands
cannot be imported into [Paper Size
Setup].
3
2
4
56
1
Loading ...
Loading ...
Loading ...