Loading ...
Loading ...
Loading ...
84
j Select [OK] and press ENTER.
To select more sections within the same title, repeat
from step 7.
k When you finish selecting scenes from the
same title, select [Finish] and press ENTER.
The scene list display appears.
• To add other scenes, select [Add Scene].
• To change the scene order, select [Move Scene].
• To cancel all scene selections, select [Erase All].
l Select [OK] and press ENTER.
m Select [OK] and press ENTER.
• To enter a new name for the Playlist title, select [Input].
n Select [Finish] and press ENTER.
You can save the scene list. Select [Yes] on the
confirmation display.
z Hint
Created Playlist titles may have many chapters as each scene becomes a
chapter. When editing on HDD or BD, chapters in the captured scenes
will also be added.
Editing Photo Album
Information
a Press HOME to turn on the Home Menu.
b Select to display the icons.
c Select a folder and press OPTIONS.
The Options menu appears.
d Select [Information/Settings] and press
ENTER.
The album information display appears.
e Press OPTIONS to display the Options
menu.
f Select [Rename Title] and press ENTER.
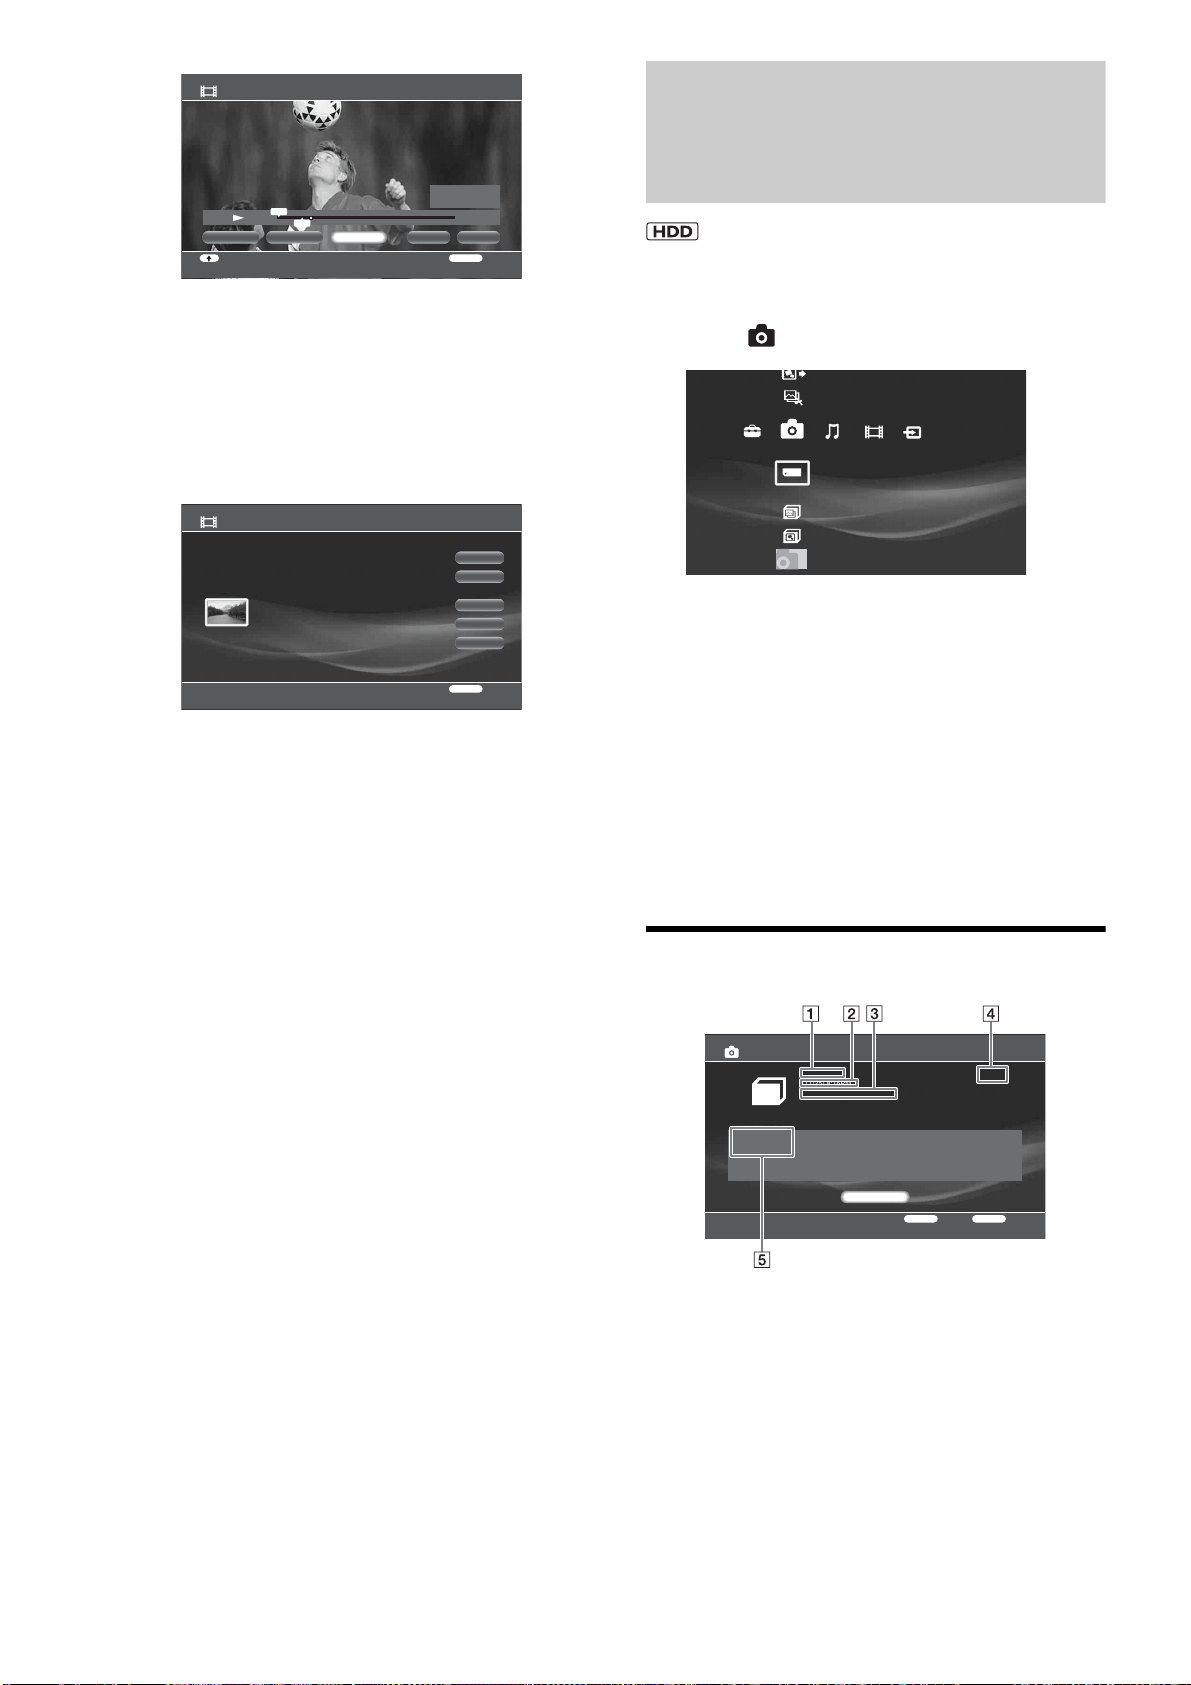
About the photo album information
A Folder name
B Folder creation date
C “x-Pict Story” file creation status
D Folder size
E Number of Files
Create Playlist - Scene Capture HDV 7/13/2007 3:34PM - 3:35PM
RETURN
ReturnMove Point
OKCapture All Finish
HDD
0:00:10:17
0:00:00:00
0:00:08:19
IN
OUT
Set IN
IN
OUT
Set OUT
Create Playlist - Scene List
Total Time 0:00:08 Number of Scenes 1
OK
Finish
RETURN
Return
0:00:00 - 0:00:08 Time 0:00:08
Add Scene
Move Scene
Erase All
HDV 7/13/2007 3:34PM - 3:35PM
Create x-Pict Story HD
Copy x-ScrapBook
x-ScrapBook
x-Pict Story HD
Memory Stick
Photo
Sample Album
Album
Folder Information
RETURN
Finish
OPTIONS
Function
Number of Files
5 Files
Close
CIMG 1884
11/25/ 8:16PM
x-PictStory HD : Not Create
4.3MB
Loading ...
Loading ...
Loading ...