Loading ...
Loading ...
Loading ...
23
Getting Started
Step 3: Installing Tip-Over
Prevention
Without a proper installation, the server unit may fall over
causing an injury. It is strongly recommended that you anchor
the unit to a solid wall or a post with a commercially available
anti-tip-over device.
Please contact a licensed contractor or your dealer with this
installation.
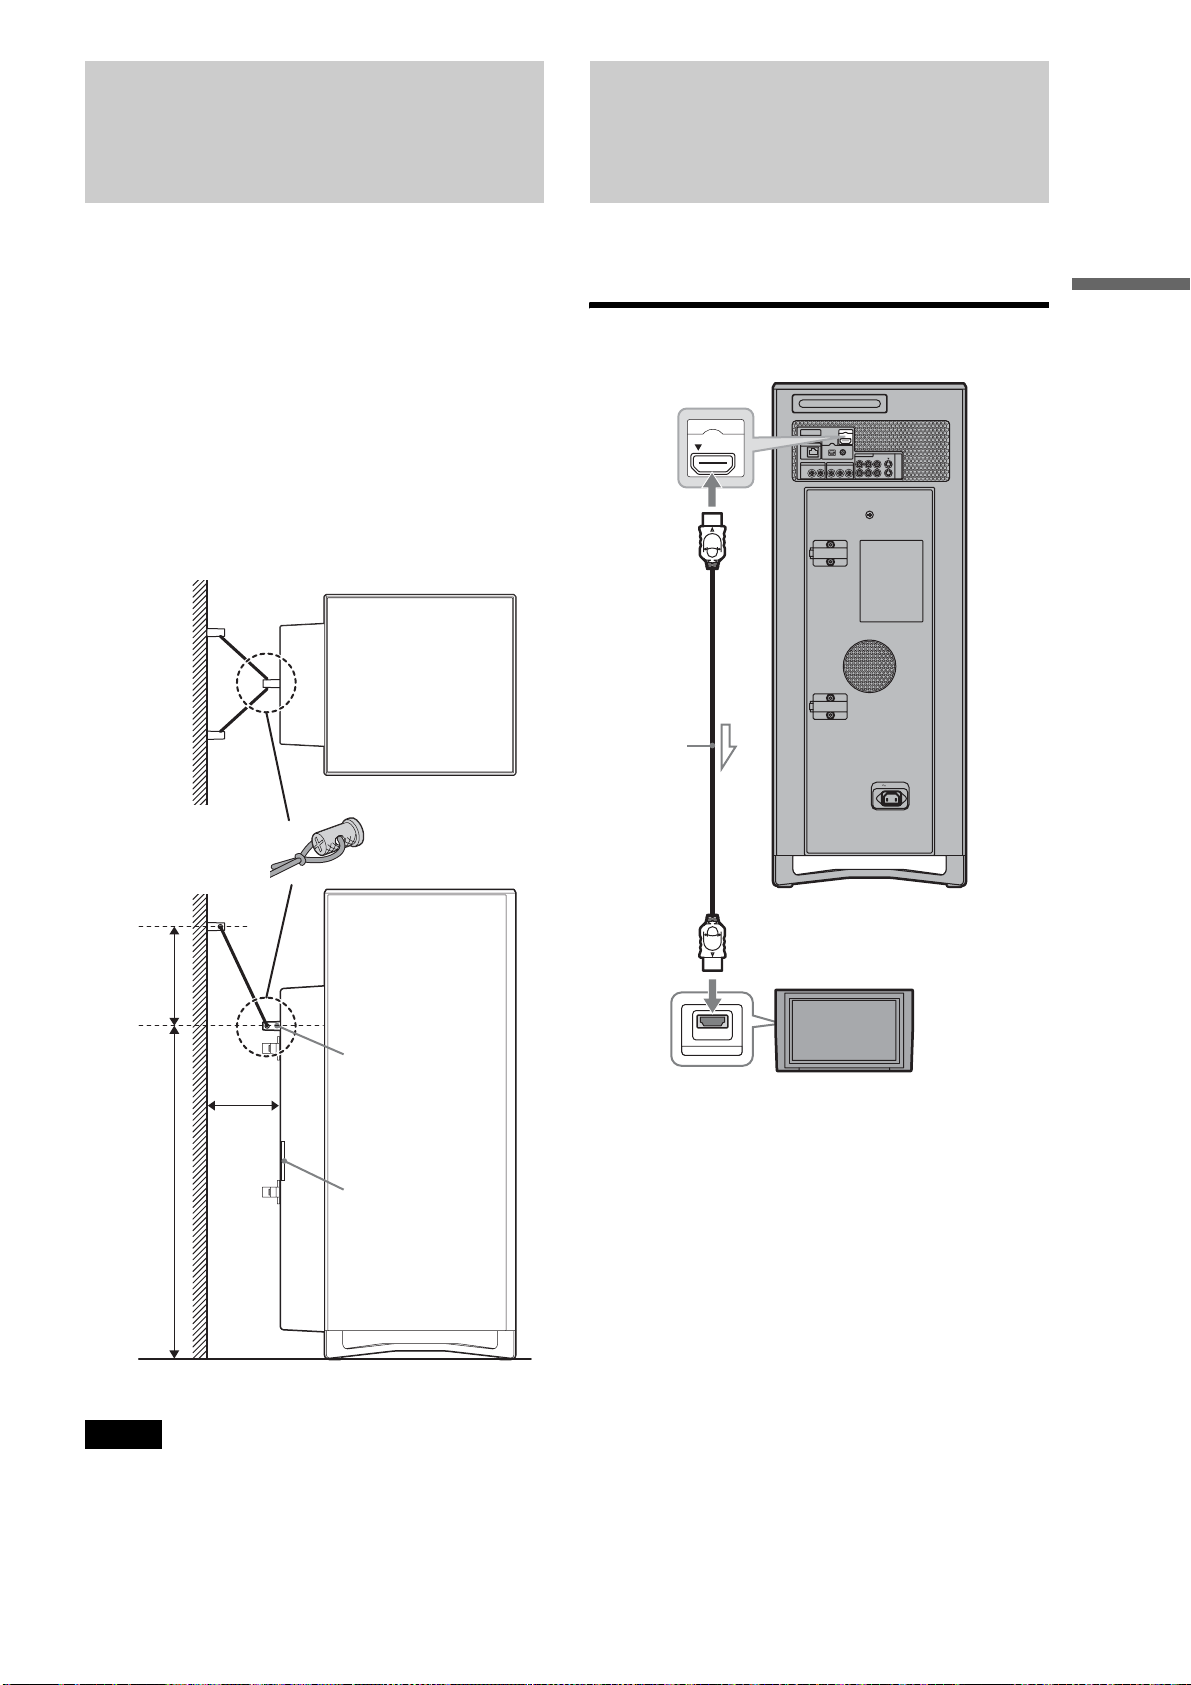
a Attach the device to a solid wall or post.
The device should be located higher than the screw
bolt on the rear of the unit.
b Secure the unit to the device by running the
wire through the hole on the bolt so that it
forms a “V” shape.
Notes
• Make sure when you attach the wire there is sufficient tension between
the unit and the device on the wall.
• Place the unit within 15 inches from the wall.
• When placing the unit, do not block the ventilation holes on the rear,
or a malfunction may result.
Step 4: Connecting to the
TV (or monitor)
This section covers the most frequently used hook-up
configurations. See “Various Connections” (page 100) for other
connection patterns.
Connecting a TV with an HDMI cable
Wire
Screw
Ventilation
A
23 1/2 in.
B
15 in.
Max.
Distance of A should be greater than B.
PUSH/OPEN
AC IN
CONTROL S IN/
IR IN
HDMI OUT
COMPONENT VIDEO OUT
AUDIO OUT
R
R-AUDIO-L VIDEO
LINE
IN 1
OUT
S VIDEO
YPB PR
LAN
(
10/100
)
OPTICAL COAXIAL
DIGITAL OUT
PCM/DTS/
DOLBY DIGITAL
L
HDMI OUT
HDMI IN
To HDMI OUT
HDMI cable
(supplied)
To HDMI
input jack
TV
,continued
Loading ...
Loading ...
Loading ...