Loading ...
Loading ...
Loading ...
51
Importing to HDD
Operations
Tools
The “Tools” menu displays the following commands.
Help
B Sync Folder button
Click here when synchronizing the files in the database with the files in
the source folder. See “To register music files” (page 51).
C Transfer button/Server information
Click here when transferring the selected files to the destination server.
See “To register music files” (page 51).
Also displays the destination server information when available (online/
offline, and the HDD capacity).
D Music List
Use the Music List for file management. The list consists of four tab
sheets: [All], [Available], [Excluded], and [Transferred]. Click on the
tabs to check the following information.
All
Displays all files registered to the database.
Available
Displays files available for transfer (files that have not been
transferred).
Excluded
Displays files excluded from transfer. Reasons are indicated in
[Status].
Transferred
Displays transferred files.
◆About the tabs and displayed contents
Each tab sheet displays the file information under the same
header.
◆Additional right-click options
1 Select a file by clicking the check box.
2 Right-click to display additional options.
z Hints
• If an item does not fit in the line, you can display the entire content by
moving the pointer over the item.
• You can also turn on this window simply by double-clicking on the list.
• Error codes may appear in “Status.” Refer to the server's Operating
Instructions if transfer fails.
To register music files
The software uses a database for transferring music files. The
database records the paths to the actual files on the PC and can
be used for file management. Register the files to the database
first by using the following methods:
–Setting a specific folder as the regular source to sync with.
– Searching for a folder or file.
Items Details
Sync Folder Synchronizes the files in the database with
the files in the source folder (works the
same as the Sync Folder button).
Transfer Starts file transfer. You can also transfer by
clicking the [Transfer] button.
Items Details
Options Displays options for file conversion. Some
files need conversion before transfer. See
“Supported file formats” (page 52).
Initialize Database Erases all database content, including the
server and file registrations. Click [Yes] or
[No] when asked for confirmation.
Items Details
Help Displays the online help.
Product Support Displays the contact information.
About Music
Transfer
Displays information such as the software
version, license, and copyright.
Items Details
Check Boxes Click here to select files for transfer
(check-marked). Grayed out boxes
indicate a file cannot be transferred. Note
that if all boxes are grayed out, no server is
registered or set as a destination.
Name Displays track name, or file name if track
name is unavailable.
Time Displays playback time.
Artist Displays the artist name when available.
Album Displays album name when available.
Last Synched Displays the date registered to the
database.
Date Transferred Displays the date, destination, and status of
transfer.
Status Displays the file status (“Transferred,”
“Available,” “Unavailable (DRM),”
“Content Error,” “Missing Track,”
“Transfer Error,” “Incorrect Setting” ). See
also “Note about non-transferable files”
(page 53).
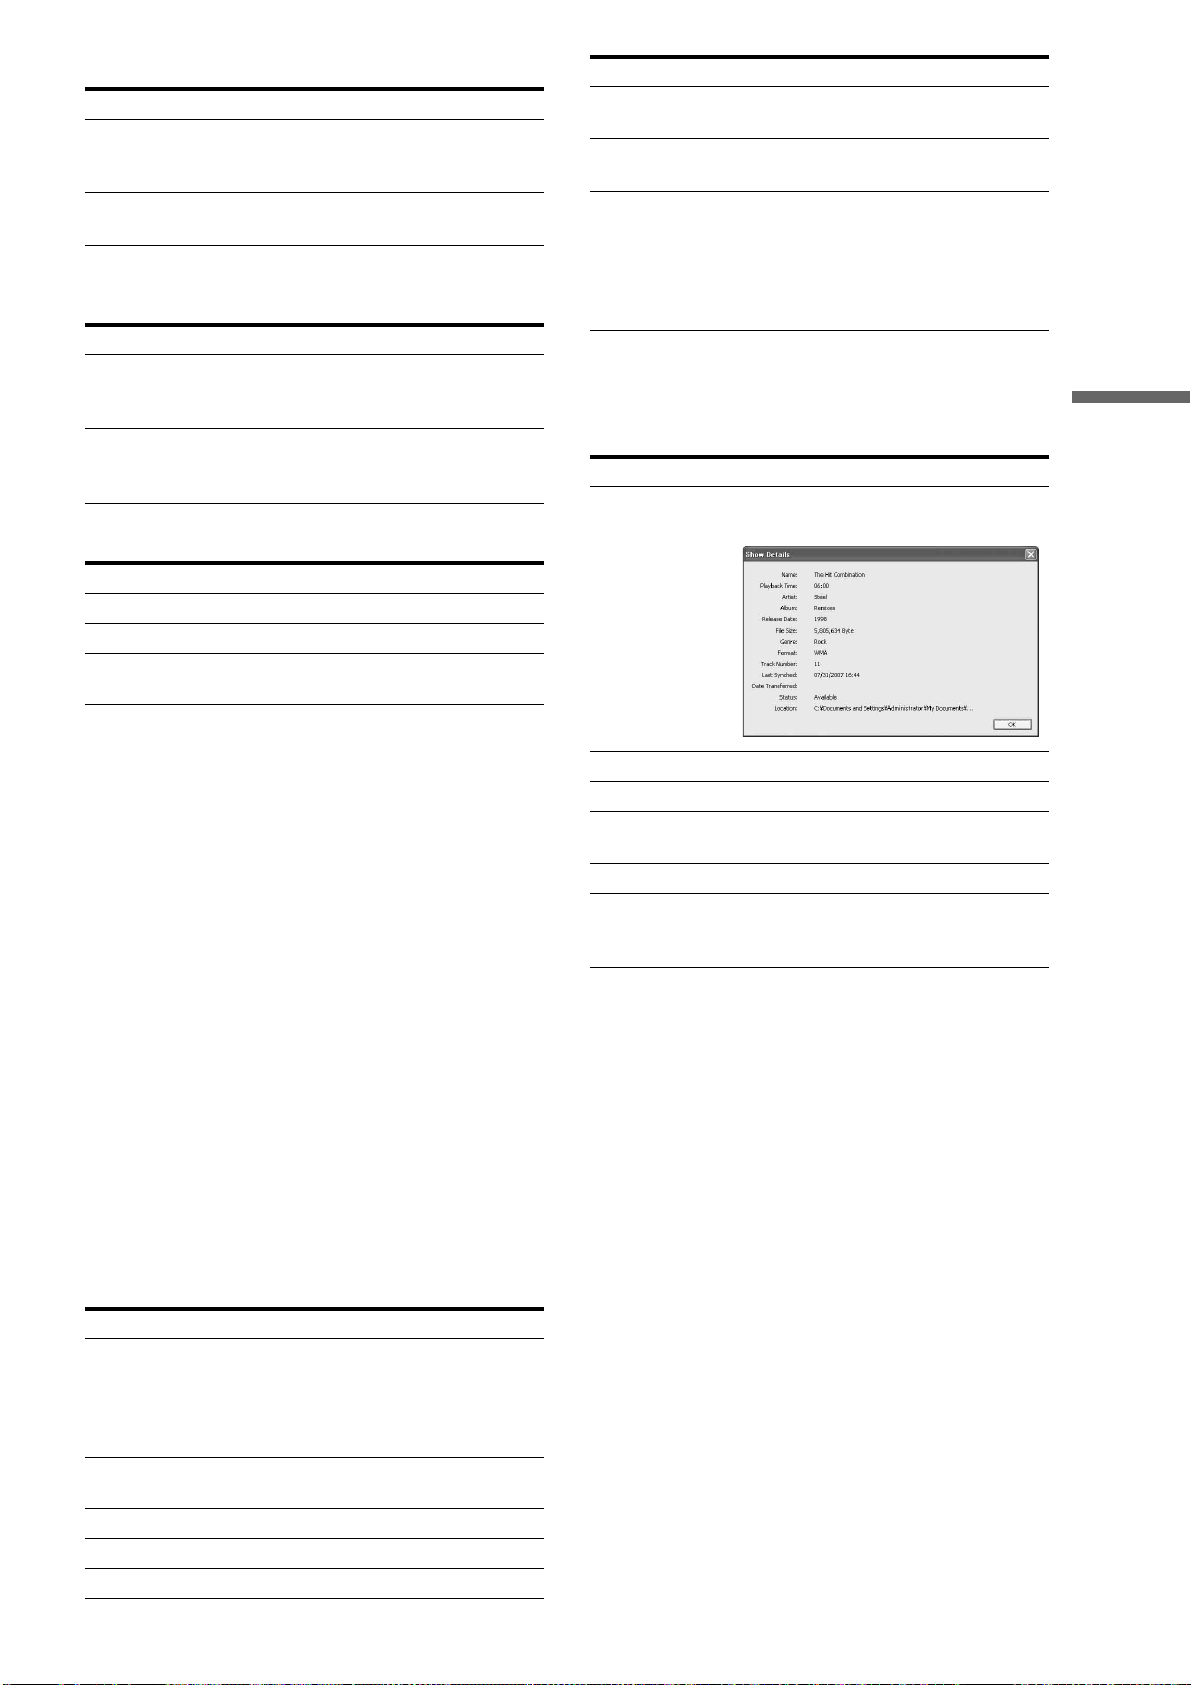
Items Details
Show Details Shows more details about selected tracks,
as follows.
Select Selects a track for transfer.
Clear Cancels the track selected for transfer.
Select All Selects all data for transfer. CTRL + A can
be used as a shortcut.
Clear All Cancels all the current selections.
Erase Erases the file from the database (original
data remains on the PC). You can use
DELETE as the shortcut key.
Items Details
,continued
Loading ...
Loading ...
Loading ...