
Actual total number: Sony HES-V1000 3-098-099-11 (1)
3-098-099-11(1)
2007 © Sony Corporation
3-098-099-11 (1)
Printed in Japan
Printed on 70% or more recycled paper.
2
WARNING
To reduce the risk of fire or electric
shock, do not expose this apparatus to
rain or moisture.
To avoid electrical shock, do not open
the cabinet. Refer servicing to qualified
personnel only.
Batteries or batteries installed apparatus
shall not be exposed to excessive heat
such as sunshine, fire or the like.
CAUTION
The use of optical instruments with this
product will increase eye hazard. As the
laser beam used in this unit is harmful to
eyes, do not attempt to disassemble the
cabinet.
Refer servicing to qualified personnel
only.
This label is located on the laser
protective housing inside the enclosure.
This symbol is intended to alert the
user to the presence of uninsulated
“dangerous voltage” within the
product’s enclosure that may be of
sufficient magnitude to constitute a risk
of electric shock to persons.
This symbol is intended to alert the
user to the presence of important
operating and maintenance (servicing)
instructions in the literature
accompanying the appliance.
CAUTION
You are cautioned that any changes or modifications
not expressly approved in this manual could void
your authority to operate this equipment.
Note
This equipment has been tested and found to comply
with the limits for a Class B digital device, pursuant
to Part 15 of the FCC Rules. These limits are
designed to provide reasonable protection against
harmful interference in a residential installation.
This equipment generates, uses, and can radiate
radio frequency energy and, if not installed and used
in accordance with the instructions, may cause
harmful interference to radio communications.
However, there is no guarantee that interference will
not occur in a particular installation. If this
equipment does cause harmful interference to radio
or television reception, which can be determined by
turning the equipment off and on, the user is
encouraged to try to correct the interference by one
or more of the following measures:
– Reorient or relocate the receiving antenna.
– Increase the separation between the equipment and
receiver.
– Connect the equipment into an outlet on a circuit
different from that to which the receiver is
connected.
– Consult the dealer or an experienced radio/TV
technician for help.
Shielded network cable must be used between
network hub and client in order to comply with the
limits for a digital device pursuant to Subpart B of
Part 15 of FCC Rules.
For customers in the U.S.A
If you have any questions about this product, call
“Home Entertainment Server” Customer Call Center
at 1-877-531-SONY (7669) or visit our web site at
http://www.sony.com/hesupport
The number below is for FCC related matters only.
Regulatory Information
Owner’s Record
The model and serial numbers are located at the rear
of the unit. Record the serial number in the space
provided below. Refer to them whenever you call
upon your Sony dealer regarding this product.
Model No. HES-V1000
Serial No.______________
Important Safety
Instructions
1) Read these instructions.
2) Keep these instructions.
3) Heed all warnings.
4) Follow all instructions.
5) Do not use this apparatus near water.
6) Clean only with dry cloth.
7) Do not block any ventilation
openings. Install in accordance with
the manufacturer’s instructions.
8) Do not install near any heat sources
such as radiators, heat registers,
stoves, or other apparatus (including
amplifiers) that produce heat.
9) Do not defeat the safety purpose of
the polarized or grounding-type
plug. A polarized plug has two
blades with one wider than the other.
A grounding type plug has two
blades and a third grounding prong.
The wide blade or the third prong are
provided for your safety. If the
provided plug does not fit into your
outlet, consult an electrician for
replacement of the obsolete outlet.
10) Protect the power cord from being
walked on or pinched particularly at
plugs, convenience receptacles, and
the point where they exit from the
apparatus.
11) Only use attachments/accessories
specified by the manufacturer.
12) Use only with the cart, stand, tripod,
bracket, or table specified by the
manufacturer, or sold with the
apparatus. When a cart is used, use
caution when moving the cart/
apparatus combination to avoid
injury from tip-over.
13) Unplug this apparatus during
lightning storms or when unused for
long periods of time.
14) Refer all servicing to qualified
service personnel. Servicing is
required when the apparatus has
been damaged in any way, such as
power-supply cord or plug is
damaged, liquid has been spilled or
objects have fallen into the
apparatus, the apparatus has been
exposed to rain or moisture, does not
operate normally, or has been
dropped.
Declaration of Conformity
Trade Name: SONY
Model No. : HES-V1000
Responsible Party : Sony Electronics Inc.
Address : 16530 Via Esprillo, San
Diego, CA 92127 U.S.A.
Telephone No.: 858-942-2230
This device complies with Part15 of the FCC
Rules. Operation is subject to the following two
conditions: (1) This device may not cause harmful
interference, and (2) this device must accept any
interference received, including interference that
may cause undesired operation.
3
Precautions
On safety
• Should any solid object or liquid fall
into the cabinet, unplug the unit and
have it checked by qualified personnel
before operating it any further.
• Do not hang anything on the unit. The
unit may fall over, causing damage or
serious injury.
• Do not allow children to climb on the
server.
On power sources
• The unit is not disconnected from the
AC power source as long as it is
connected to the wall outlet, even if the
unit itself has been turned off.
• If you are not going to use the unit for
a long time, be sure to disconnect the
unit from the wall outlet. To disconnect
the AC power cord, grasp the plug
itself; never pull the cord.
• This unit is for use only with 120 V AC
power source.
• Check the polarity when inserting
batteries.
On placement
• Place the unit in a horizontally flat
position.
Equal to or less than 1 inch.
• Do not place the unit in a location near
heat sources, or in a place subject to
direct sunlight, excessive dust, or
mechanical shock.
• Keep the unit and the discs away from
equipment with strong magnets, such
as microwave ovens, or large
loudspeakers.
• Do not place heavy objects on the unit.
• Install this unit so that the power cord
can be unplugged from the wall socket
immediately in the event of trouble.
• Do not place objects near the buttons
on the top panel which may cause the
unit to malfunction.
• To avoid tipping over and resulting
injuries, take precautions such as
securing the unit with anti tip-over
device. See page 23 for details.
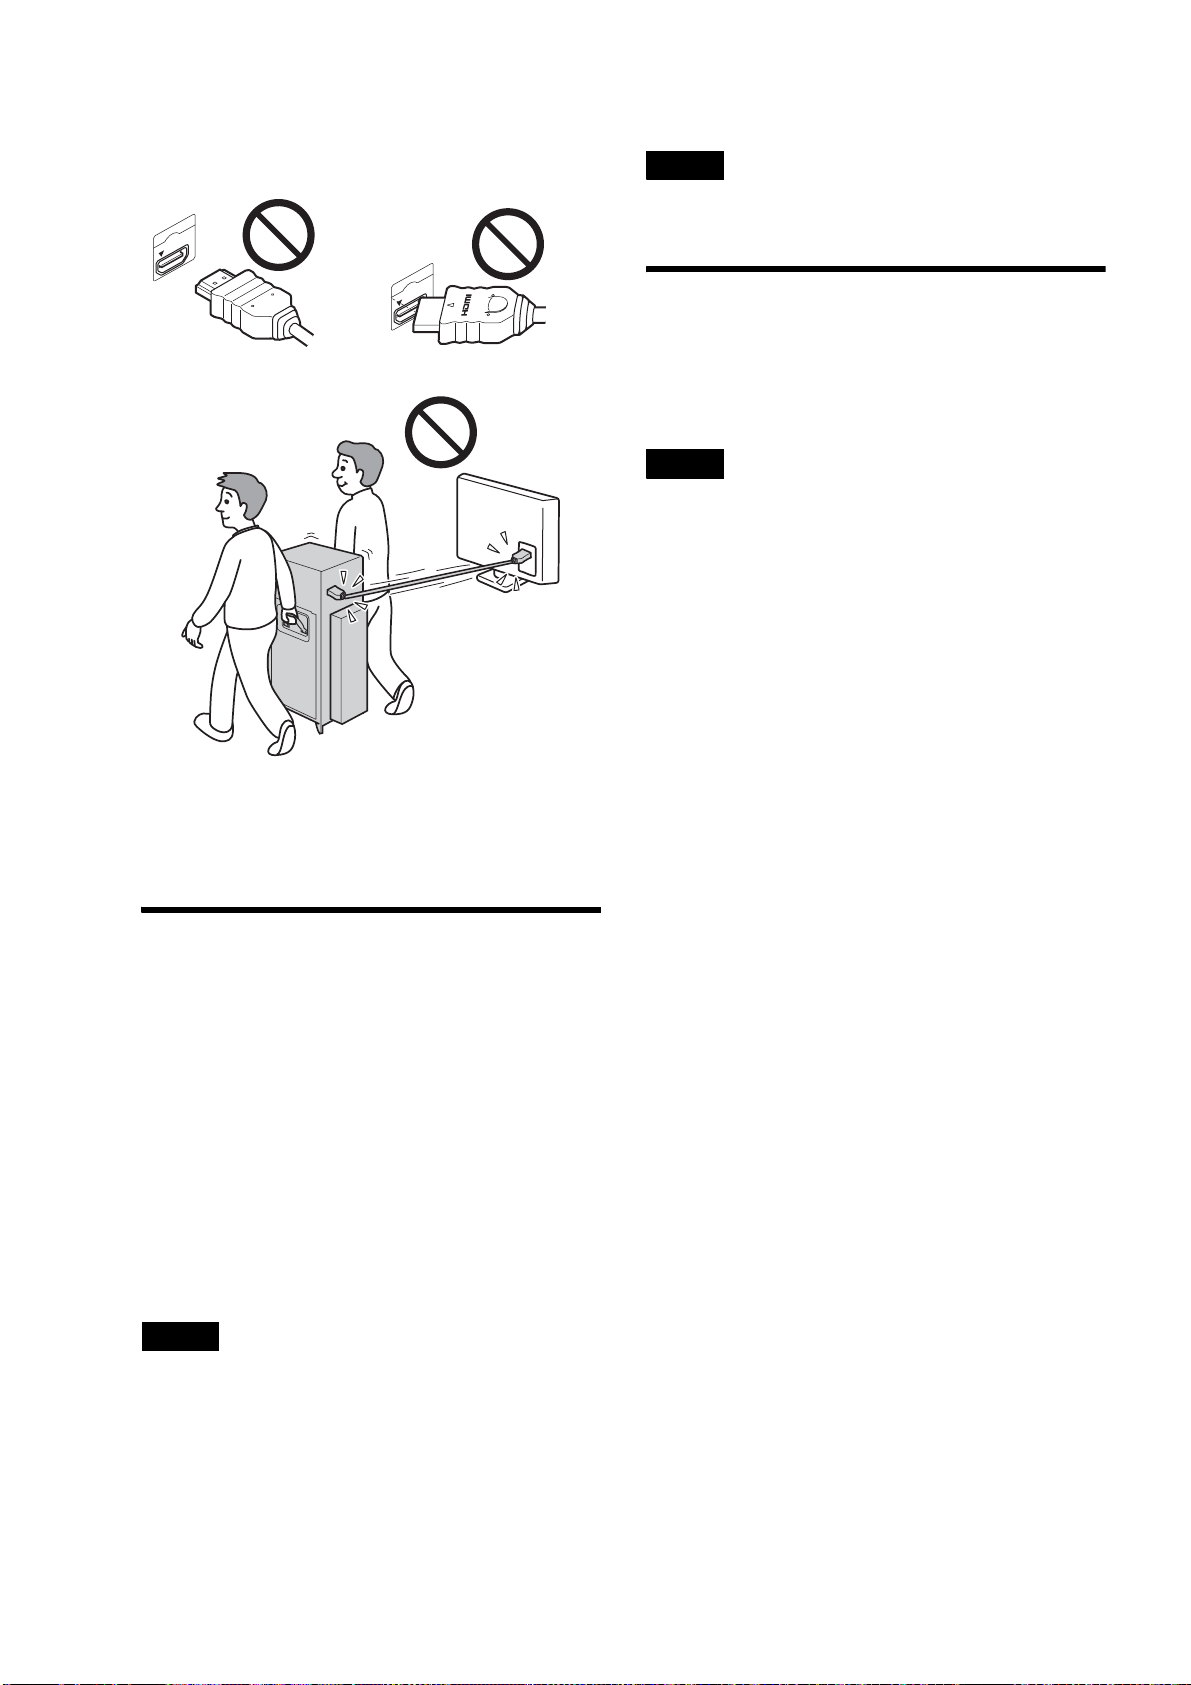
• When moving the unit, detach the glass
panels and grasp the handles on the
sides. Be sure to move it with two
persons or more.
• Do not install this equipment in a
confined space such as a bookshelf or
similar unit.
• Do not block the ventilation hole,
which will cause a malfunction.
On connection
• Do not connect a phone line to the
Ethernet connector on the unit.
Moisture and flammable
objects
• Do not place any objects on the unit.
The unit should not be exposed to
dripping or splashing and no objects
filled with liquids, such as vases,
should be placed on the unit. If any
liquid or solid object falls through
openings in the cabinet, do not operate
the unit. It may result in electric shock
or damage to the unit.
Have it checked immediately by
qualified service personnel.
• To prevent fire, keep flammable
objects (candles, etc.) and electric
bulbs away from the unit.
On operation
• If the unit is brought directly from a
cold to a warm location, or is placed in
a very damp room, moisture may
condense on the lenses and mechanism
inside the unit. Should this occur, the
unit may not operate properly. If this
happens during disc playback, remove
the disc, turn off the unit, and
disconnect the power cord. Then leave
the unit for about six hours so the
moisture inside the unit evaporates.
• When you move the unit, take out any
discs. If you don’t, the disc may be
damaged.
• Do not manually open or apply
pressure to the front panel, which may
cause a malfunction.
• To prevent any interference by
children, use the Child Lock function
(page 12).
• Do not apply pressure or shock to the
unit, and do not move the unit while
operating to avoid a malfunction.
On adjusting volume
Do not turn up the volume while
listening to a section with very low level
inputs or no audio signals. If you do, the
speakers may be damaged when a peak
level section is played.
A thread
A weight
object
• The unit is designed to be operated in
a horizontal position only.
Install in an upright position on a flat
surface with no more than 2 degrees
tilt in any direction. Weight a thread
and drop it from the edge of the top
panel, and securely install the unit so
the distance from the weight to the
unit bottom is kept within 1 inch.
If the unit is inclined, remove the
obstruction or insert a thin plate, etc,
so the unit is stabilized horizontally.
And then check that the unit is flat
and secured.
If place at an incline, the disc changer
may not work properly and may
cause a malfunction.
• Place the unit in a location with
adequate ventilation to prevent heat
build-up in the server.
• Do not place the unit on a soft surface
such as a rug.
• Place the unit at least 12 inches from
the wall.
• Distance from the glass panels to the
wall should be 1/2 inch or more.
,continued
4
On cleaning
• Use the supplied cleaning cloth for
cleaning minor blurs. If the blur is
persistent, use another cloth slightly
moistened with a mild detergent
solution. Do not use any type of
abrasive pad, scouring powder or
solvent such as alcohol or benzine.
• To avoid malfunctioning, disconnect
the power cord when cleaning.
Notes about using the
supplied cleaning cloth
• Make sure the cloth is not dusty before
use.
• Use the cloth only if it is dry. The
material is not designed for use when
wet.
• When the cloth becomes dirty, wash it
in cold water.
On cleaning discs, disc/lens
cleaners
Do not use cleaning discs or disc/lens
cleaners (including wet or spray types).
These may cause the apparatus to
malfunction.
On replacement of parts
In the events that this unit is repaired,
repaired parts may be collected for reuse
or recycling purposes.
About the glass parts on the
unit
Glass is used for the front, top, and side
panels of the unit. Observe the following
and handle with care. If broken, the glass
pieces will scatter and will pose a
danger.
• Do not expose the unit to strong shocks
such as a tip-over or dropping objects.
• Do not scrape the unit with a sharp
object. The scratch may cause the glass
to break.
• Be careful when attaching or detaching
the glass panels. To attach or detach the
glass panels, see page 19.
Notes On Disc
Handling
• To keep the disc clean, handle the disc
by its edge. Do not touch the surface.
• Do not expose the disc to direct
sunlight or heat sources such as hot air
ducts, or leave it in a car parked in
direct sunlight as the temperature may
rise considerably inside the car.
• After ejecting a disc from the server,
store the disc in its case.
• Clean the disc with a cleaning cloth.
Wipe the disc from the center out.
• Do not use solvents such as benzine,
thinner, commercially available disc/
lens cleaners, or anti-static spray
intended for vinyl LPs.
• If you have printed the disc’s label, dry
the label before playing.
• Do not attach a sticker type label on the
disc. The disc changer may be
damaged.
• Do not insert the following
unsupported discs, doing so will
damage the unit or discs.
– Discs whose shapes are nonstandard-
sized or nonstandard-shaped. (card,
heart, star, etc.).
–Discs with a paper sticker or seals.
–Discs with a cellophane tape, or an
adhesive residue of a removed label.
– Discs of non-standard thickness
(thinner than 1.0 mm, or thicker than
1.5 mm).
Notes about discs
• “Photo Movies” created on digital
camcorders cannot be edited on this
server.
• You cannot mix VR mode and Video
mode on the same DVD-RW. To
change the disc’s format, reformat the
disc (page 93). Note that the disc’s
contents will be erased after
reformatting. DVD-Rs (VR mode)
cannot be reformatted.
• It is recommended that you use discs
with “For Video” printed on their
packaging.
• You cannot record or edit DVD-Rs
(Video mode), or DVD-RWs (Video
mode) recorded on other DVD devices.
• You may not be able to record or edit
the following discs if they have been
recorded on other devices:
– BD-REs and BD-Rs.
– DVD+RWs/DVD+Rs recorded in
+VR mode, or recorded on a device
that displays +R/+RW logos.
– DVD-RWs/DVD-Rs recorded in VR
mode.
• If record on a DVD+RW that has
recordings made on other devices, the
server may rewrite its DVD Menu.
• When playing dual layer discs the
picture and sound may be momentarily
interrupted when the layers switch.
• Use of discs containing data recorded
on PCs is not guaranteed. The data may
be erased after use.
• When you plan to copy photos to a
DVD, use an unformatted DVD-R,
DVD+R, DVD-RW, or DVD+RW.
BD-REs and BD-Rs can be used even
when they are formatted.
• Some recorded BD-REs/BD-Rs or
DVD+RWs/DVD+Rs, DVD-RWs/
DVD-Rs/DVD-RAMs, or CD-RWs/
CD-Rs may not play on this server due
to the recording quality or physical
condition of the disc, or the
characteristics of the recording device
and authoring software. And except for
DVD-RWs (VR mode), the disc will
not play if it has not been correctly
finalized. For more information, see
the operating instructions for the
recording device.
• This product is designed to play back
discs that conform to the Compact Disc
(CD) standard.
Recently, various music discs encoded
with copyright protection technologies
are being marketed by some record
companies. Please be aware that
among those discs, there are some that
do not conform to the CD standard and
may not be playable by this product.
• The server’s Disc Information display
may not correctly reflect information if
the disc is recorded on other devices.
• The server does not support the BDMV
format (one of the Blu-ray Disc
™
specifications). You cannot playback
or import BDMV format content edited
on PCs, or copy such content from the
HDD to a disc.
• The server does not support BD-ROM
content that requires Internet
connection.
About recording and playback
• DVD-RWs (VR mode)/DVD-Rs (VR
mode) recorded on this server are
playable only on a DVD-RW (VR
IMPORTANT NOTICE
Caution: This unit is capable of holding
a still video image or on-screen display
image on your television screen
indefinitely. If you leave the still video
image or on-screen display image
displayed on your TV for an extended
period of time you risk permanent
damage to your television screen.
Plasma display panel televisions and
projection televisions are susceptible to
this.

5
mode)/DVD-R (VR mode) compatible
players.
• Before recording important data, make
a trial recording on rewritable media
such as a BD-RE, DVD-RW, or the
HDD.
• Ver.1.0 BD-RE discs are not supported
• Ver.2.1 BD-RE and Ver.1.1 BD-R
discs are played only their first layers.
Notes on DualDiscs
• A DualDisc is a two sided disc product
which mates DVD recorded material
on one side with digital audio material
on the other side. However, since the
audio material side does not conform to
the Compact Disc (CD) standard,
playback on this product is not
guaranteed. And, some discs cannot be
inserted into the server.
• Do not use DualDiscs. The disc may be
damaged if inserted.
Notes About This
Server
If you have any questions about this
product, call “Home Entertainment
Server” Customer Call Center at 1-877-
531-SONY (7669).
About the hard disk drive
The hard disk has a high storage density,
which enables long recording durations
and quick access to the written data.
However, it can easily be damaged by
shock, vibration or dust, and should be
kept away from magnets. To avoid
losing important data, observe the
following precautions.
• Do not apply a strong shock to the unit.
• Do not place the unit in a location
subject to mechanical vibrations or in
an unstable location.
• Do not place the unit on top of a hot
surface, such as a VCR or amplifier
(receiver).
• Do not use the unit in a place subject to
extreme changes in temperature
(temperature gradient less than 75 F°
(10 °C)/hour).
• Do not move the unit with its AC
power cord connected.
• Do not disconnect the AC power cord
while the power is on.
• When disconnecting the AC power
cord, turn off the power and make sure
that the hard disk drive is not operating
(the clock is displayed in the front
panel display and all recording,
copying, or importing has stopped).
• Do not move the unit for one minute
after you have unplugged the AC
power cord.
• Do not attempt to replace or upgrade
the hard disk by yourself, as this may
result in malfunction.
If the hard disk drive should
malfunction, you cannot recover lost
data. The hard disk drive is only a
temporary storage space.
About repairing the hard disk
drive
• The contents of the hard disk drive may
be checked in case of repair or
inspection during a malfunction or
modification. However, the contents
will not be backed up or saved by Sony.
• If the hard disk needs to be formatted or
replaced, it will be done at the
discretion of Sony. All contents of the
hard disk drive will be erased,
including contents that violate
copyright laws.
On recording
Make trial recordings before making the
actual recording.
On compensation for lost
recordings
Sony is not liable and will not
compensate for any lost recordings or
related losses, including when
recordings are not made due to reasons
including recorder failure, or when the
contents of a recording are lost or
damaged as a result of recorder failure or
repair undertaken to the recorder. Sony
will not restore, recover, or replicate the
recorded contents under any
circumstances.
Copyrights
• Television programs, films, video
tapes, discs, and other materials may be
copyrighted. Unauthorized recording
of such material may be contrary to the
provisions of the copyright laws. Also,
use of this recorder with cable
television transmission may require
authorization from the cable television
transmitter and/or program owner.
• This product incorporates copyright
protection technology that is protected
by U.S. patents and other intellectual
property rights. Use of this copyright
protection technology must be
authorized by Macrovision, and is
intended for home and other limited
viewing uses only unless otherwise
authorized by Macrovision. Reverse
engineering or disassembly is
prohibited.
Copy guard function
Since the unit has a copy guard function,
programs received through an external
tuner (not supplied) may contain copy
protection signals (copy guard function)
and as such may not be recordable,
depending on the type of signal.

6
Table of Contents
WARNING ...............................................................2
Important Safety Instructions ...........................2
Precautions ...........................................................3
Notes On Disc Handling .....................................4
Notes about discs ................................................4
Notes About This Server ....................................5
Table of Contents .................................................6
Home Menu Overview .........................................8
Main Features .....................................................10
About This Manual .............................................11
Index to Parts and Controls ............................12
Top panel ...........................................................12
Front panel .........................................................13
Top panel display/front panel display ................14
Rear panel .........................................................14
Remote ..............................................................15
Getting Started
Step-by-step Instructions ................................18
Step 1: Unpacking .............................................19
Step 2: Checking the Accessories ................22
Step 3: Installing Tip-Over Prevention .........23
Step 4: Connecting to the TV
(or monitor)
....................................................23
Connecting a TV with an HDMI cable ................23
About the ‘BRAVIA’ Theatre Sync
™
features
(for HDMI connections only) .........................24
About the x.v.Color ............................................24
Connecting a TV with an audio/video cable .......25
Step 5: Connecting to the Network ...............26
Step 6: Connecting the Power Cord .............27
Step 7: Preparing the Remote ........................27
Step 8: Making the Initial Settings .................28
Setting the server to Eco mode .........................29
Turning off the Power .......................................30
Inserting/Removing Discs and
Memory Cards
Inserting Discs ....................................................32
Registering discs manually ................................33
Ejecting discs .....................................................33
Managing Server Content With the Disc
Information Display
.....................................33
Displaying disc information ................................33
Labeling a disc ...................................................34
Protecting a disc ................................................34
Locking a BD-RE/BD-R .....................................34
Managing Discs ..................................................35
Inserting Memory Cards ...................................36
Importing to HDD
Checking the HDD Information ......................38
Importing Videos ................................................39
Importing videos from discs ...............................39
Importing videos from HDV/DV camcorders ......39
Importing videos from external devices .............40
Playing data while it is being recorded
(Chasing playback) ......................................41
Group names for imported video titles ...............41
Notes about Importing Videos ...........................41
Importing Photos ...............................................42
Importing all content from memory cards
(One-Touch Import) ......................................42
Importing an album ............................................42
Importing a photo ...............................................43
Importing multiple photos ...................................43
About DCF .........................................................43
Notes about photo files ......................................43
Importing Music .................................................45
Importing audio tracks from music CDs .............45
Importing audio files from data discs .................46
Notes and restrictions for music import .............47
About file information retrieval ...........................48
Transferring Music Files From PCs ..............49
Making preparations ..........................................49
Starting “Music Transfer” ...................................49
Using “Music Transfer” ......................................50
Note about non-transferable files .......................53
Enjoying Videos, Photos, and Music
Watching BD/DVD Videos ................................54
Watching Videos on the HDD .........................56
Various Video Playback Operations .............58
Adjusting Pictures and Sound for Videos ...59
Adjusting the picture quality ...............................59
Adjusting the audio quality (Audio Filter) ...........59
Adjusting audio input signals .............................59
Adjusting recording pictures for external input ...60
Viewing Photos Recorded on the HDD ........60
Viewing Photos Recorded on the Removable
Media
...............................................................62
Various Photo Playback Operations .............63
Using “x-ScrapBook” ......................................64
Browsing “x-ScrapBook” album .........................64
Adding video titles to the “x-ScrapBook”
album ...........................................................65
Changing the design theme ...............................65
Using “x-Pict Story HD” ...................................66
Playing a Slideshow ..........................................69
Playing Music CDs, DATA BDs, DATA DVDs,
and DATA CDs
..............................................69
Playing Music Stored on the HDD .................70
Instant music playback using the Music Play
button ...........................................................70
Playing music on the HDD using the Home
Menu ............................................................70
Playing newly registered music stored on the
HDD .............................................................71
Various Music Playback Operations .............73
Playing Music in Other Rooms .......................74
Preparing for the music server function .............74
Playing music on the client devices ...................74
Playing the Same Music on All Client Devices
(“PARTY MODE”)
.........................................75
Preparing for “PARTY MODE” Play ...................75
Playing in “PARTY MODE” ................................75
Organizing Content
Editing Movie Information for BD-ROMs and
DVD-ROMs
.....................................................76
About movie information display ........................77

7
Editing Video Title Information for the HDD/
DATA disc
...................................................... 77
About video title information display .................. 78
Searching for Disc Information ..................... 78
Editing Video Titles ........................................... 79
Before editing .................................................... 79
Erasing titles ...................................................... 80
Erasing/editing sections of a title ....................... 81
Dividing a title .................................................... 82
Combining titles ................................................. 83
Compiling favorite scenes into a single Playlist
title ............................................................... 83
Editing Photo Album Information ................. 84
About the photo album information ................... 84
About the photo file information ........................ 85
Editing Photo Files ........................................... 86
Erasing photos, albums and “x-Pict Story”
files .............................................................. 86
Capturing photos from personal video .............. 86
Copying a photo to another album on HDD ...... 86
Rotating a photo ................................................ 87
Editing Audio Album Information ................. 87
About the music album information display ....... 88
Editing Audio Track Information ................... 88
About the audio track information display ......... 89
Editing Audio Files ........................................... 90
Erasing albums and tracks ............................... 90
Entering Characters ......................................... 90
To enter characters ........................................... 90
Copying to BD/DVD
Checking Disc Information ............................. 92
Copying Videos ................................................. 93
Formatting a BD/DVD ....................................... 93
Copying videos to BD/DVD ............................... 94
Closing a BD ..................................................... 95
Finalizing a DVD ............................................... 95
About Recording Modes ................................. 96
Notes and Restrictions on Importing/
Copying
.......................................................... 98
Notes on general importing/copying .................. 98
Notes on recording modes ................................ 98
Restrictions on importing/copying ..................... 98
Notes on ‘Move’ ................................................ 98
Notes on disc formatting and finalizing ............. 98
Copying Photos ................................................. 99
Copying photos to BD/DVD ............................... 99
Copying “x-ScrapBook” albums to BD/DVD ...... 99
Various Connections
Connecting a TV (or monitor) ...................... 100
About video signals ......................................... 100
Selecting a video cable ................................... 101
Connecting with an HDMI cable ...................... 102
Connecting with a component video cable ...... 103
Connecting with an S Video cable or video
cable .......................................................... 104
[Optional]: If your TV has a CONTROL S
jack ............................................................ 104
Connecting an AV Amplifier ......................... 105
Connecting with an HDMI cable ...................... 105
Connecting with a digital cable ........................ 106
Connecting with an audio cable ...................... 106
Changing the Server Settings
Displaying the Server Settings icon ........... 108
Call Guide .......................................................... 110
Messages ........................................................... 110
Disc Manager ................................................... 110
Import Settings ................................................ 111
Video Settings .................................................. 112
Audio Settings ................................................. 114
Photo Settings ................................................. 115
System Settings ............................................... 116
BD/DVD Viewing Settings ............................. 118
Date and Time Settings ................................. 120
Network Settings ............................................. 121
Easy Setup ........................................................ 123
Resetting ........................................................... 124
Other Remote Uses
Operating Other Devices ............................... 126
Programming AV components to the device
selection buttons ....................................... 127
Operating registered devices ......................... 127
Manufacturer code lists ................................... 127
The Remote Learning Operations ............... 129
Adding a new device selection button ............. 129
Saving Frequent Procedures ....................... 130
Registering a MACRO ..................................... 130
Using a registered MACRO ............................. 131
Additional Information
Basic Troubleshooting .................................. 132
Troubleshooting .............................................. 134
Self-Diagnostic Function ............................... 139
About Software Updates ............................... 140
Updating the software using an update disc ... 140
Updating the server’s software using the
network ...................................................... 141
Glossary ............................................................. 142
Specifications ................................................... 144
About Trademarks and Copyrights ............ 145
About i.LINK ...................................................... 145
i.LINK functions on this server ........................ 145
Required i.LINK cable ..................................... 146
Notes about i.LINK .......................................... 146
About All Media Guide ................................... 146
What is AMG? ................................................. 146
The AMG function on this server ..................... 146
TV Display Viewing Options ......................... 147
About Removable Media and Recording
Modes
........................................................... 148
Recordable/playable discs .............................. 148
Playback compatibility with commercially
available disc packages, and discs recorded
on other devices ........................................ 149
List of recording modes ................................... 150
Supported memory card types ........................ 151
Notes on using “Memory Stick” ....................... 151
Note on using memory cards .......................... 151
Region code .................................................... 152
Language Code List ....................................... 153
Index ................................................................... 154
Starting from HOME
To access numerous functions of the server,
press the ‘HOME’ button on the remote.
Settings Photo Music
8
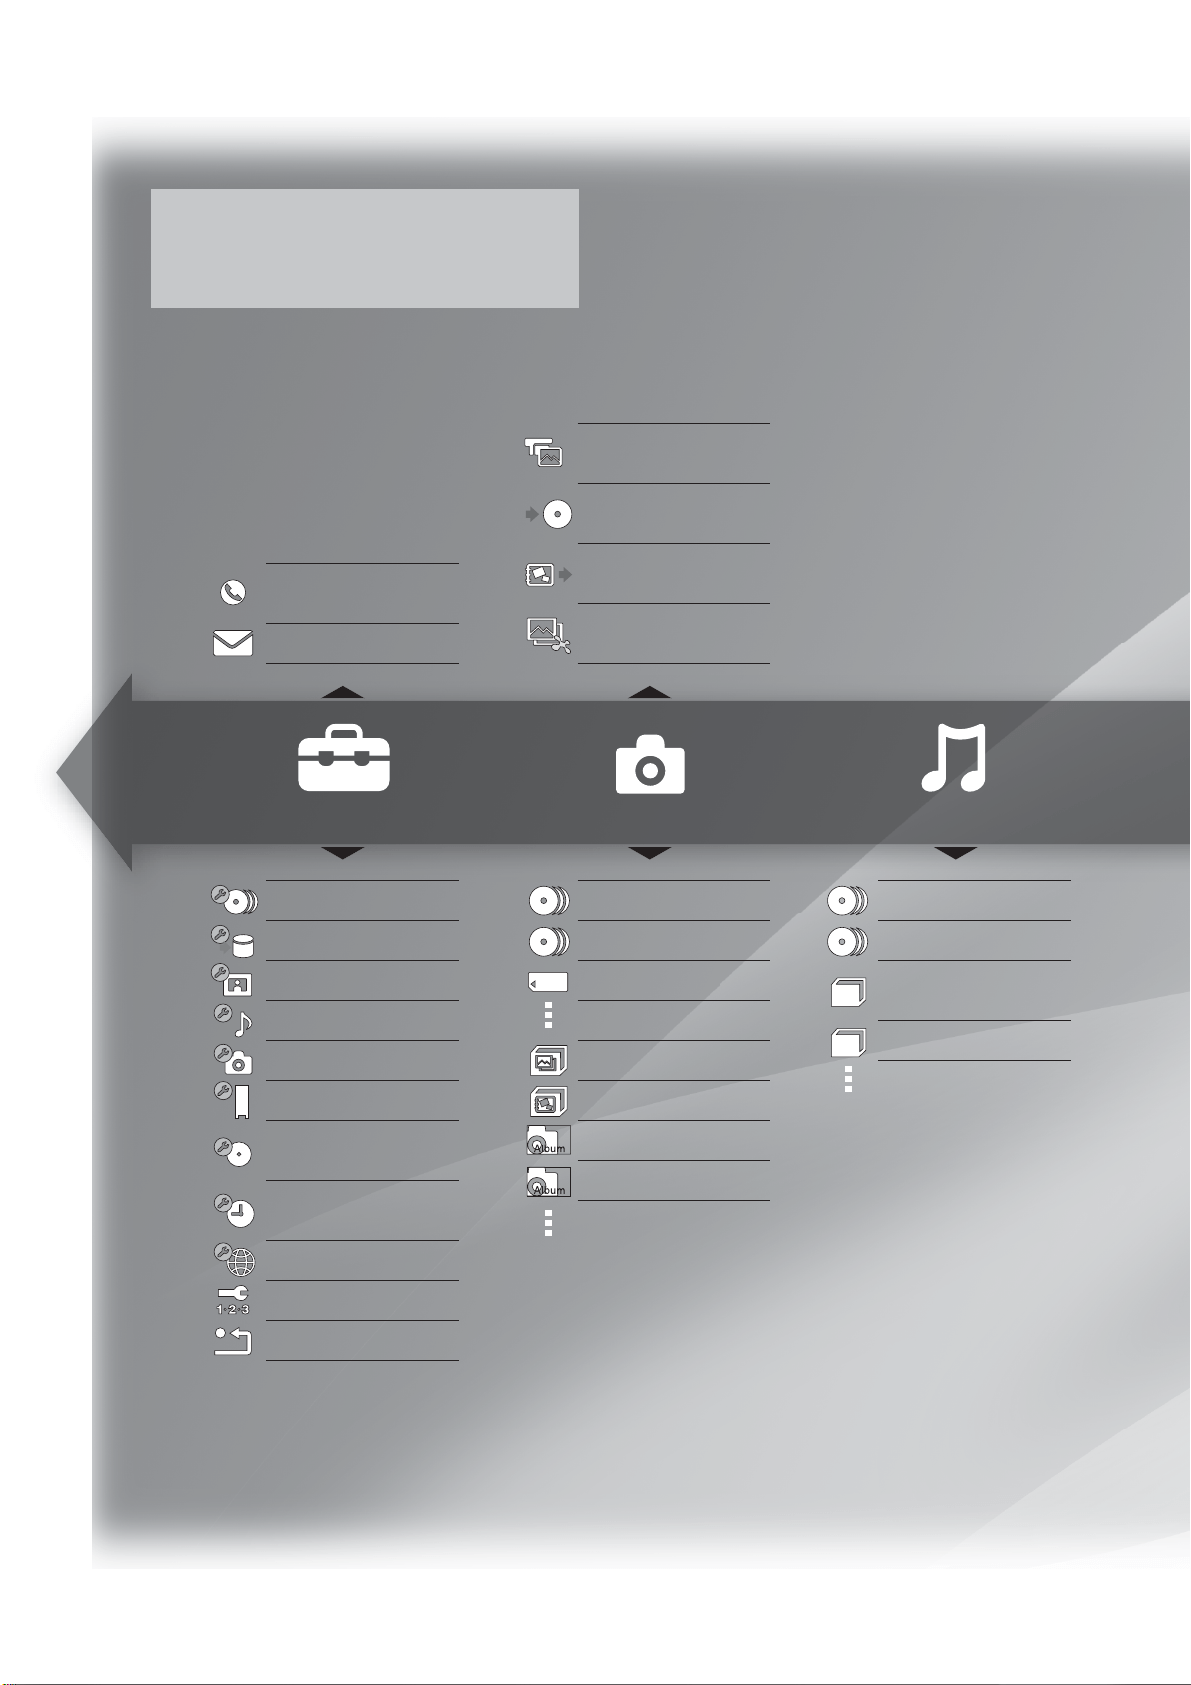
Home Menu Overview
Call Guide (page 110)
Messages (page 110)
Disc Manager (page 110)
Import Settings (page 111)
Video Settings (page 112)
Audio Settings (page 114)
Photo Settings (page 115)
BD/DVD Viewing Settings
(page 118)
Easy Setup (page 123)
Resetting (page 124)
Photo Capture
(page 86)
Copy Photos
(page 99)
Copy x-ScrapBook
(page 99)
Create x-Pict Story HD
(page 66)
Others (page 62)
Photos (page 60)
(Memory Card) (page 62)
x-Pict Story HD (page 66)
x-ScrapBook (page 64)
Sample Album (page 60)
Album (page 60)
Others (page 69)
Music (page 69)
Newly Registered
(page 71)
Album (page 69)
System Settings (page 116)
Date and Time Settings
(page 120)
Network Settings (page 121)
HOME
RETURN OPTIONS
HOME button
Enters the Home Menu.
OPTIONS button
Displays optional functions
when available.
RETURN button
Returns to the previous
display.
Joystick
Moves the highlight to select
and enter an item displayed
on the screen.
Basic button operations
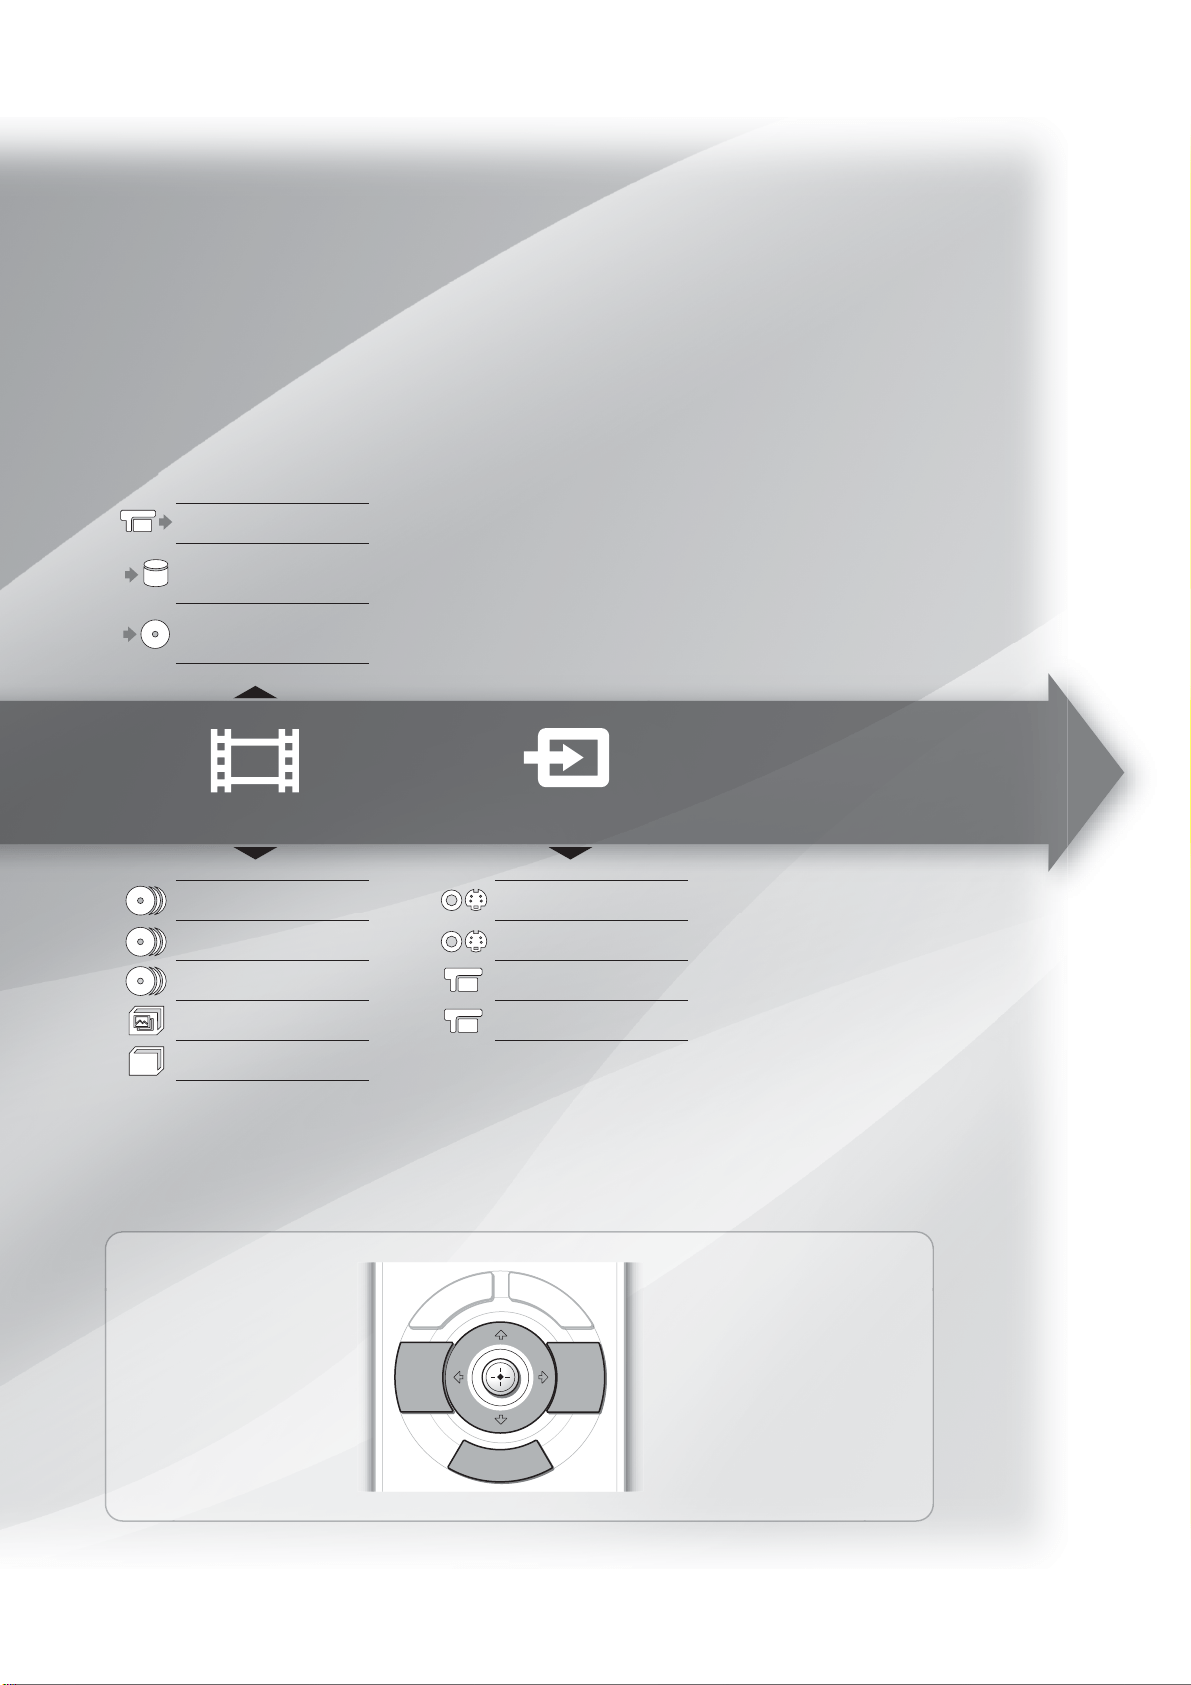
Video External Inputs
9
HDV/DV Import (page 39)
Import Disc to HDD
(page 39)
Copy HDD to Disc
(page 94)
Others (page 56)
Personal Video (page 54)
BD/DVD Movies (page 54)
Personal Video (page 54)
Line 1 (page 40)
Line 2 (page 40)
HDV (page 39)
DV (page 39)
See page 15 for explanations about the other buttons.
x-Pict Story (page 66)
10
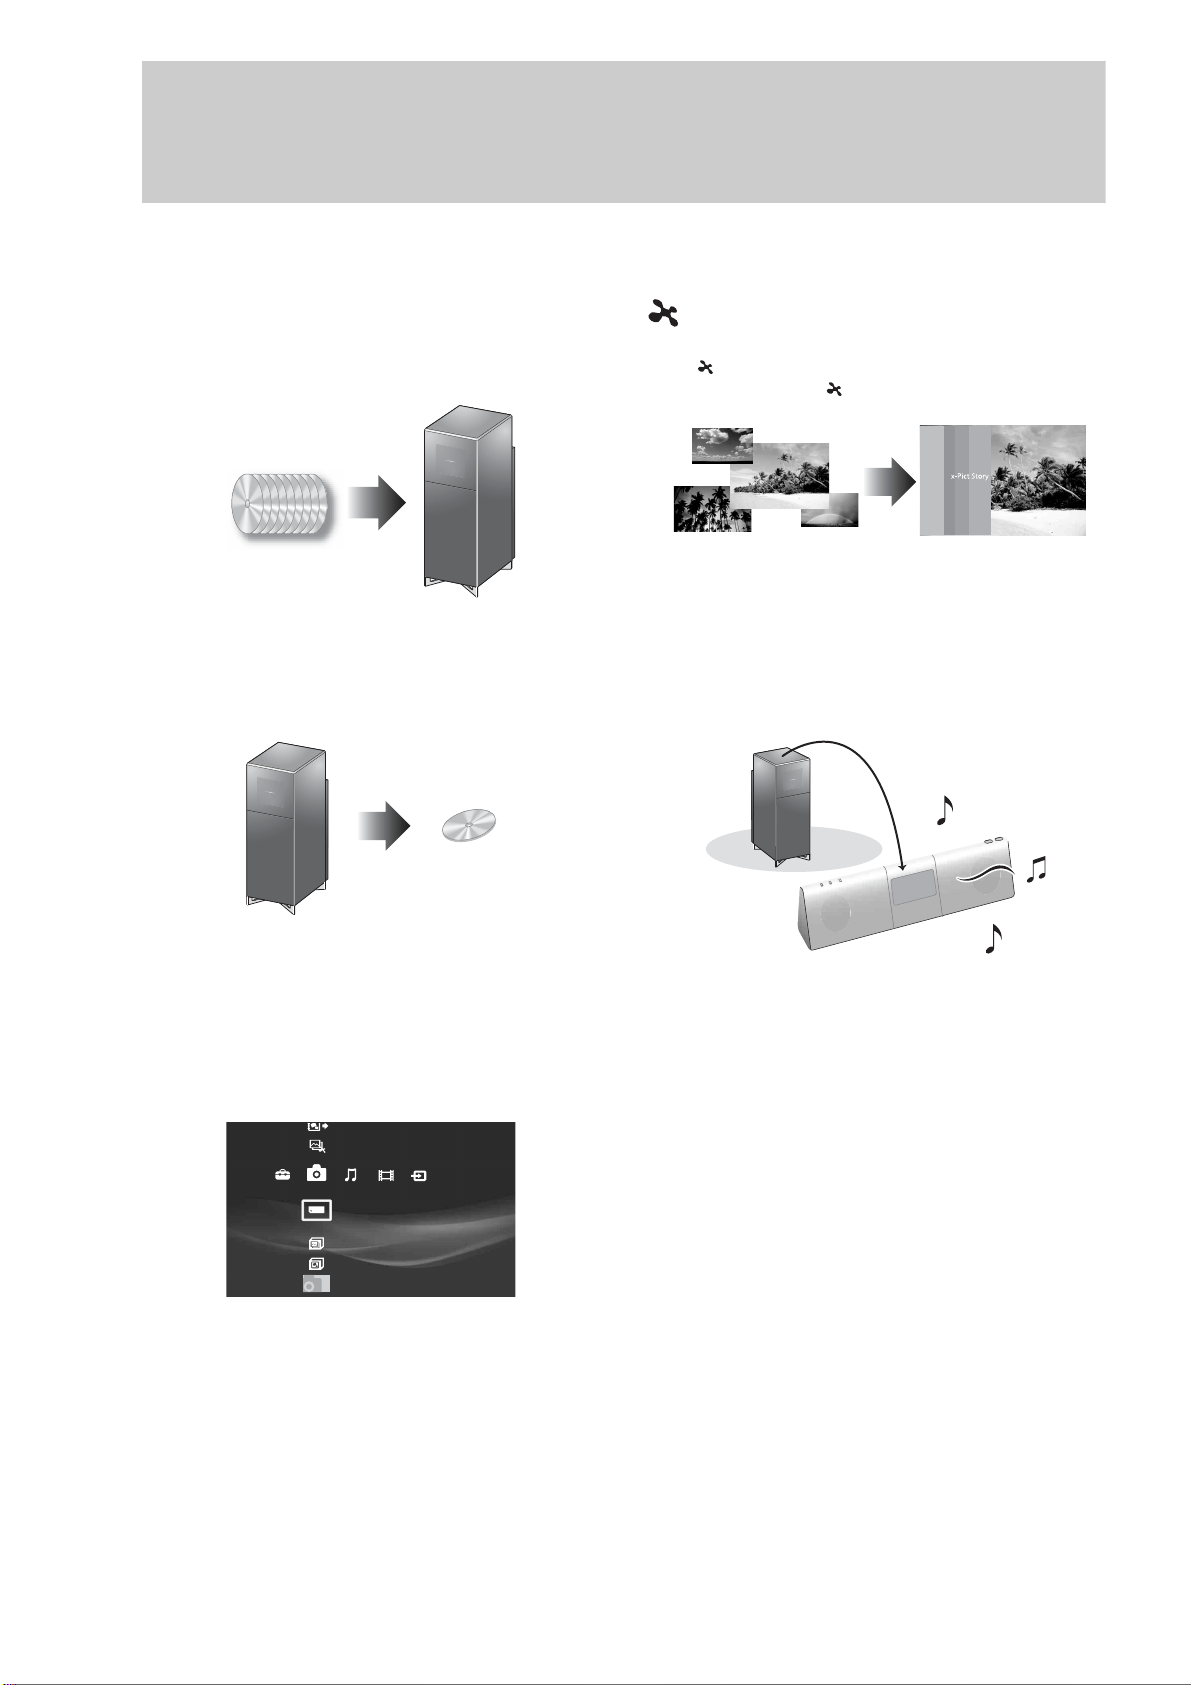
Main Features
Your family movies, memories, videos, and music, all in one.
200 discs BD/DVD/CD changer
Holds up to 200 disc*
1
Blu-ray Disc media, DVDs, and CDs.
Provides full HD 1080p picture quality.
Easy disc copy to BD
Easily copy discs for personal videos. Holds up to 25 GB of data
for rewritable Blu-ray Disc media.
New Experience GUI “XMB”
Sony’s Emmy award winning Xross Media Bar, along with
AMG All Media Guide® metadata Technology. Lets you
quickly find and enjoy all of your content.
500 GB hard disk drive
A 500 GB hard disk drive lets you store up to
137 hours of video*
2
, 2,000 CDs, or 20,000 pictures.
*1
For 12 cm discs, up to 196 can be loaded; for 8 cm discs, up to 4.
*2
When recorded in SR mode.
x-Application
Create original personal movies from your photo collection
using “ x-Pict Story HD”, or explore your memories in a
digital scrapbook using “ x-ScrapBook”.
Music in multiple rooms
Enjoy music in multiple rooms with a wireless audio system. It’s
great for parties.
HDMI digital interface
HDMI(High Definition Multimedia Interface) is smart, easy,
high-quality way to connect to your HDTV sets, AV amplifiers
and monitors.
HDMI carries both the digital video and digital audio signals
over a single cable.
You can be sure that the highest quality signals are passing
between source components and displays in your system.
HDMI Control (‘BRAVIA’ Theatre Sync)
‘BRAVIA’ Theatre Sync Function makes operations simple by
connecting Sony components that are compatible with the
HDMI Control function with an HDMI cable.
Create x-Pict Story HD
Copy x-ScrapBook
x-ScrapBook
x-Pict Story HD
Memory Stick
Photo
Sample Album
Album
11
About This Manual
• In this manual, the internal hard disk drive is written as
“HDD,” and “disc” is used as a general reference for the HDD,
BDs, DVDs, or CDs unless otherwise specified by the text or
illustrations.
• Instructions in this manual describe the controls using the
displays or the remote. You can also use the controls on the unit
if they have the same or similar names as those on the remote.
• The on-screen display illustrations used in this manual may not
match the graphics displayed on your TV screen.
• The product names, brand names, service names, etc., used in
this document are trademarks or registered trademarks of
respective companies or organizations.
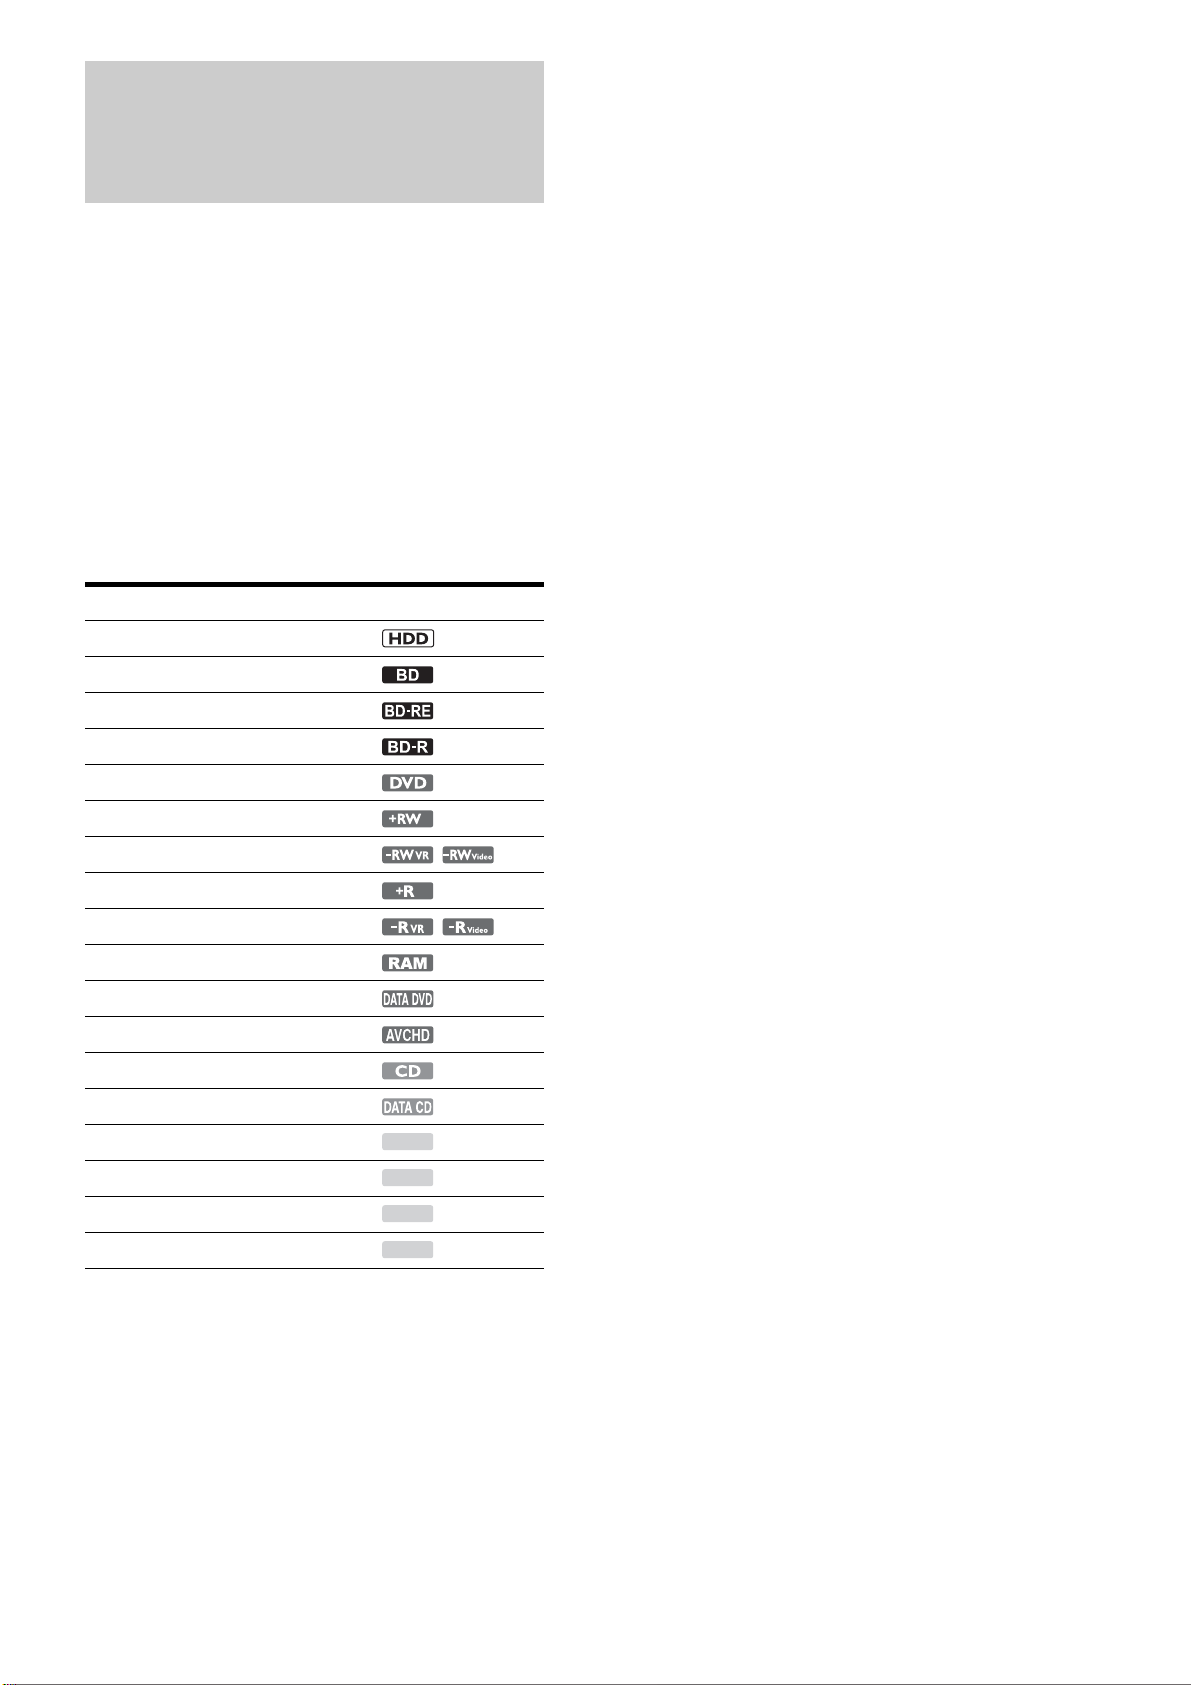
About media icons
The following media icons are used within the manual to
indicate the function availability.
See page 148 for details about usable discs and their limitations.
Disc Type Disc Icon
HDD (internal hard disc drive)
BD-ROM
BD-RE
BD-R
DVD VIDEO
DVD+RW
DVD-RW (VR mode/Video mode)
DVD+R/DVD+R DL
DVD-R (VR mode/Video mode)
DVD-RAM
DATA DVD
Discs containing AVCHD files
Music CD
DATA CD
Memory Stick
CompactFlash
®
card
SD memory Card
xD-Picture card™
M.S.
CF
SD
xD
12
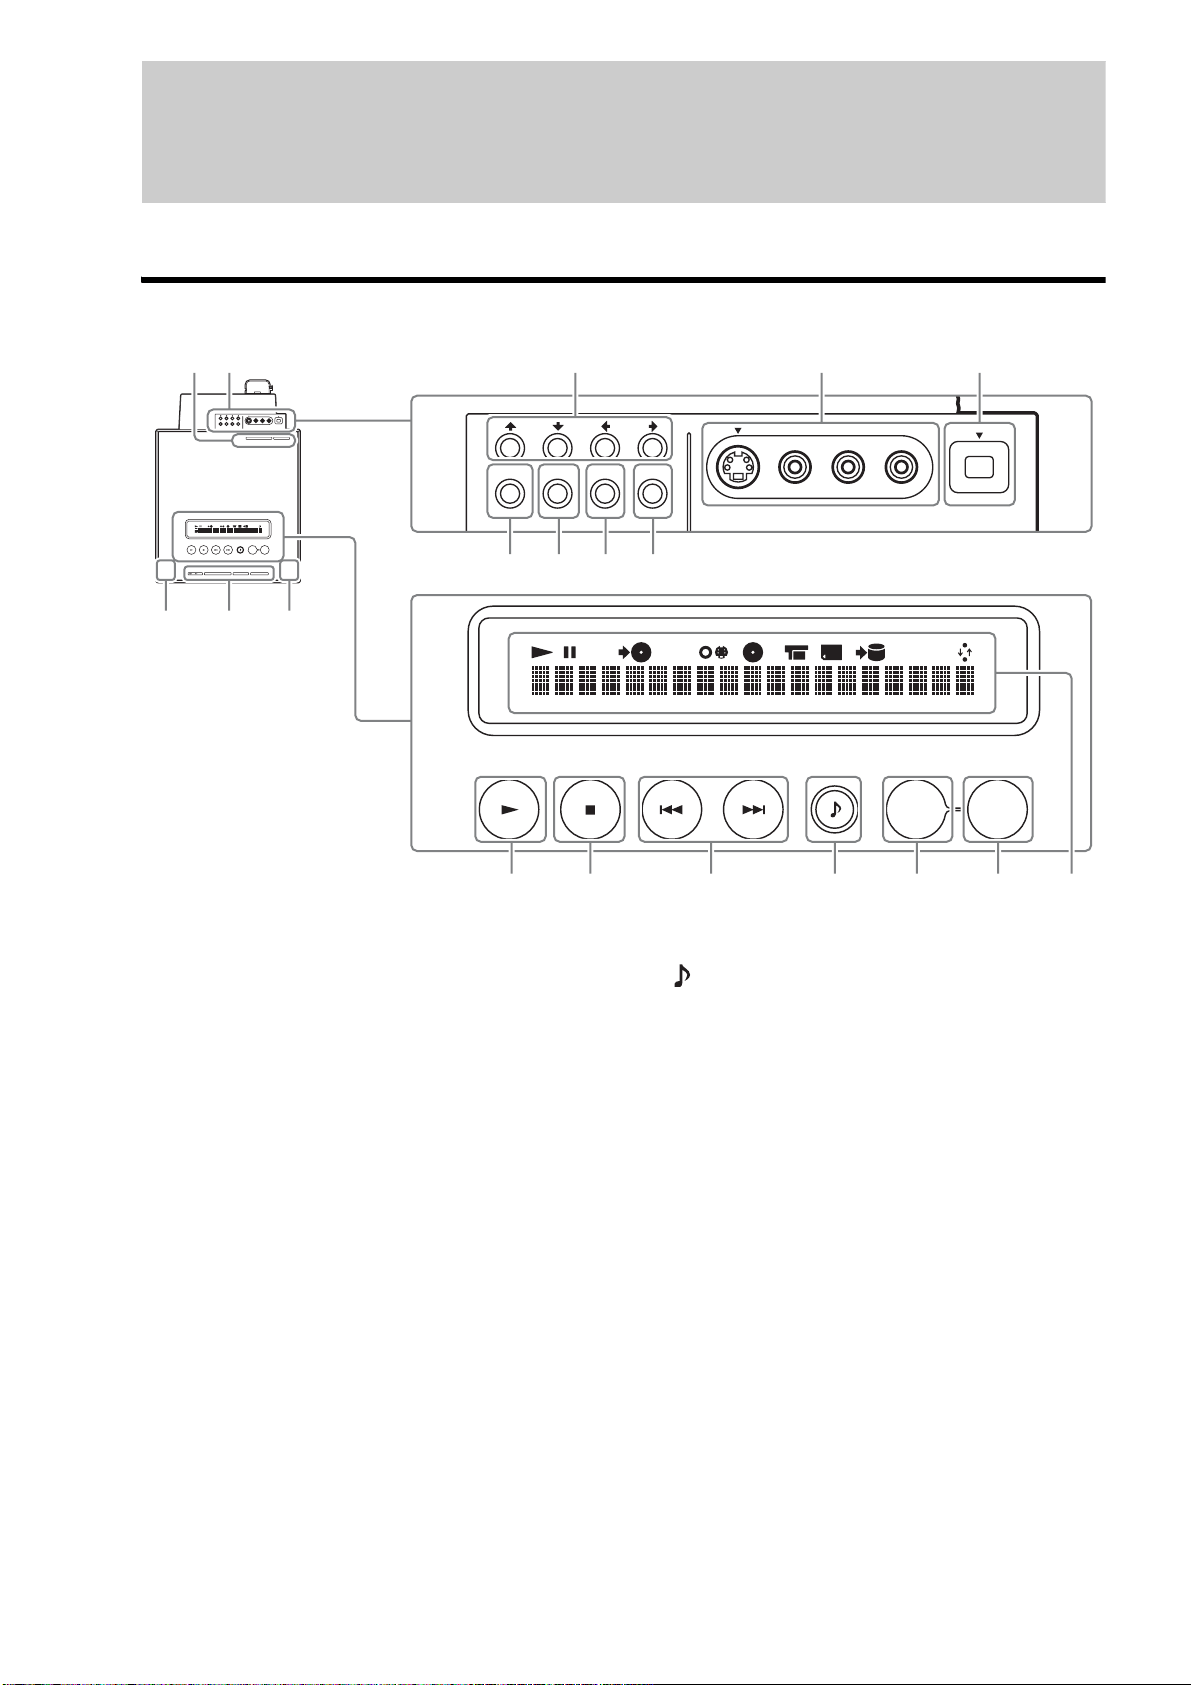
Index to Parts and Controls
Buttons on the remote and the unit have the same function if they have the same or similar name.
For details, see the pages in parentheses.
Top panel
A Retractable input and control panel indicator
– Lights up when the control panel is open.
B Retractable input and control panel
– This can be opened or closed when pressed from
the rear of the server.
C Mm<, buttons
D LINE IN 2 (S VIDEO, VIDEO, AUDIO L/R (monaural))
jacks
– These jacks are recommended for temporary
connections to camcorders, etc.
E HDV 1080i/DV IN jack (i.LINK jack) (39)
F RETURN button (9, 103)
G OPTION button (9, 55)
H HOME button (8)
I ENTER button (15, 103)
J N (play) button (69)
K x (stop) button (73)
– You can lock or unlock the front panel by pressing
down this button for more than 10 seconds when
the panel is closed (Child Lock). Note that this will
not work if the button is pressed when the panel is
open.
L ./>(previous/next) buttons (73)
M (music play) button (70)
N IMPORT SELECT button (40, 42)
– Selects a source for import.
O IMPORT button (40, 42)
P Top panel display (14)
– Even when you turn on the top panel display by
pressing CONTROL ON/OFF, the display will
switch to the front panel display if you do not
operate for more than 60 seconds.
Q \/1 (power) button (28)
R Memory Stick/CF/SD/xD-Picture Card indicators
– All indicators light up when the front panel slides
downward, exposing the card slots. Only the
indicators for the inserted memory cards remain lit
after the panel is closed.
S CONTROL ON/OFF button
– Locks the buttons on the server unit, switching the
top and the front panel displays.
z Hint
Listed as 0 to qg are the buttons operable only when they are lit. To
turn these buttons on and off, press CONTROL ON/OFF.
CF
STD/DUO
xD-Picture CardSD
IMPORT
IMPORT
SELECT
LINE IN 2
S VIDEO
RETURN OPTION HOME ENTER
VIDEO R AUDIO L
(
MONO
)
HDV 1080i/DV IN
RETURN OPTION HOME ENTER
IMPORT
IMPORT
SELECT
312
6
qlqj qk
0qa qs qd qgqhqf
789
45
Press PUSH/OPEN
on the rear
13
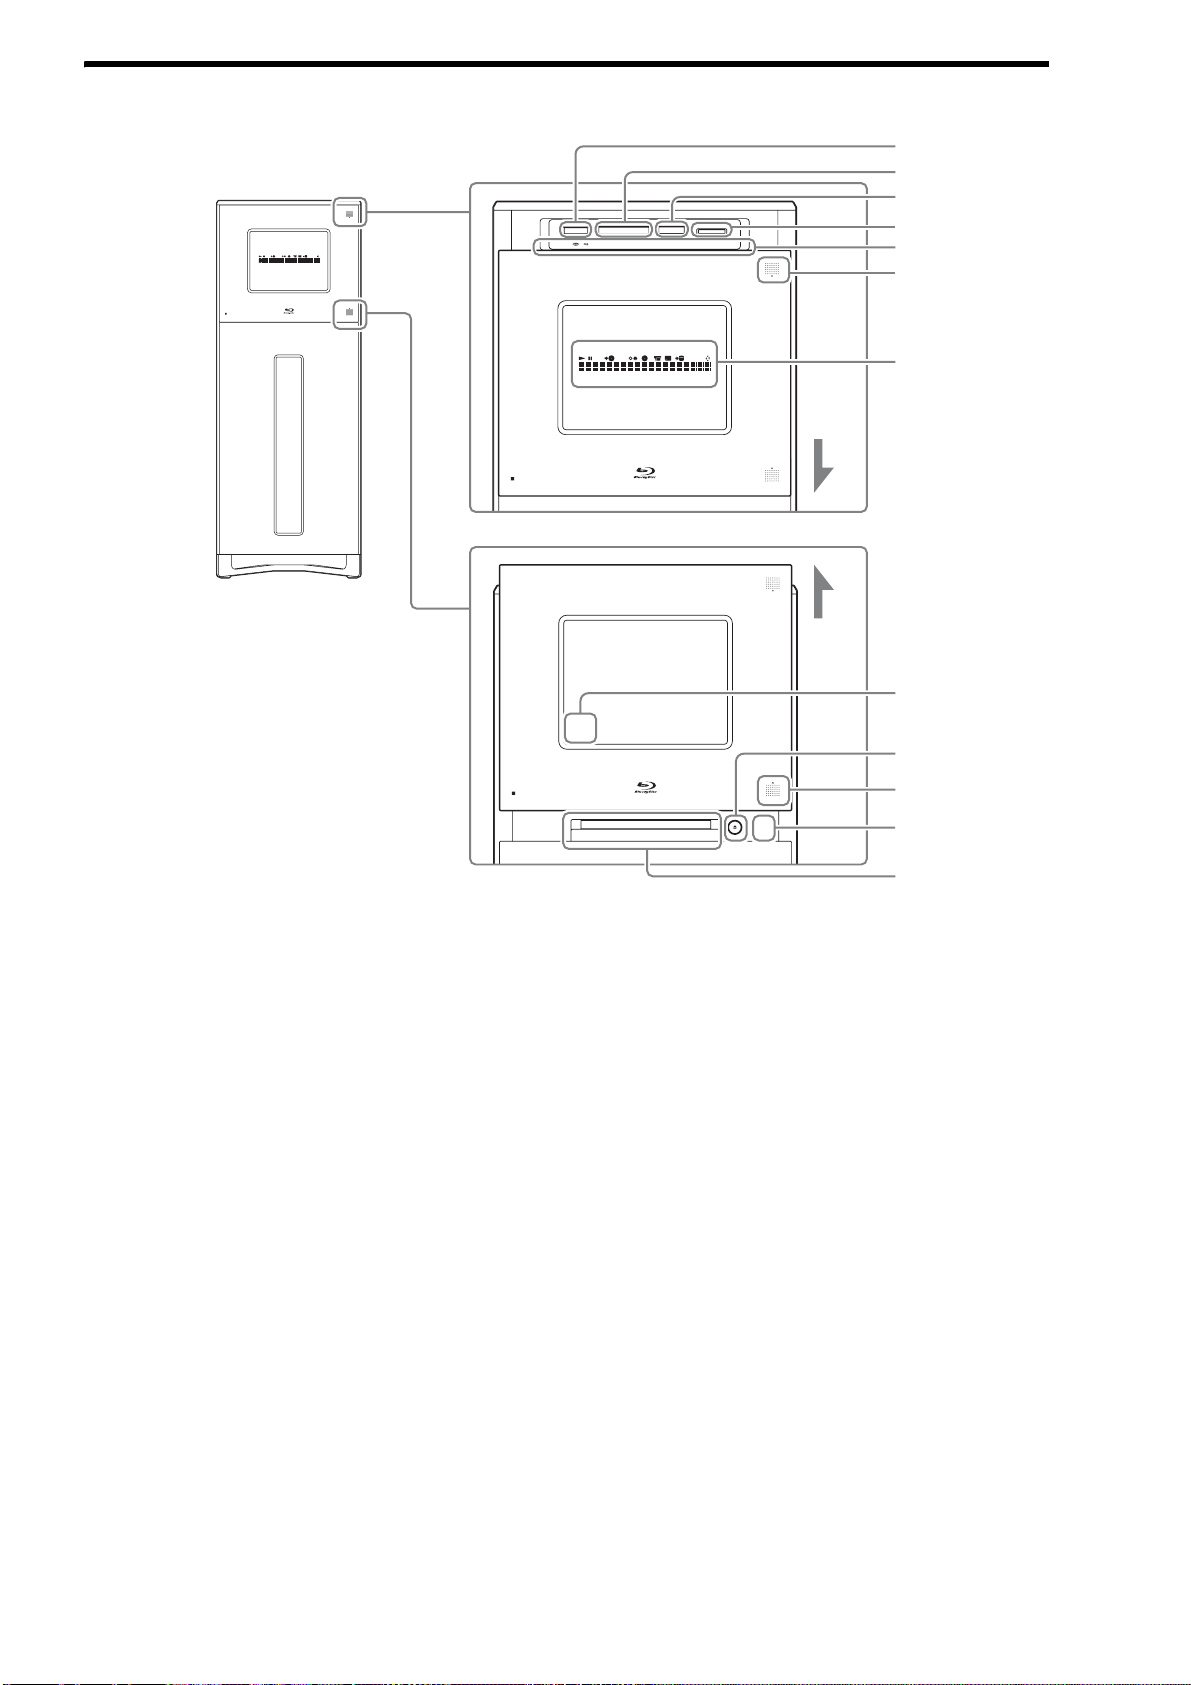
Front panel
A Memory Stick slot (36)
B CF slot (36)
– CompactFlash
®
slot
C SD slot (36)
–SD memory Card slot
D xD-Picture Card slot (36)
– xD-Picture Card™ slot
E Memory Stick/CF/SD/xD-Picture Card LED indicators
– Lights up when the memory cards are inserted, and
keeps flashing when the cards are being accessed.
Do not eject the cards while the indicator is
flashing.
F MEMORY CARD OPEN/CLOSE button (for card slot)
(36)
G Front panel display (14, 116)
H Remote sensor (27)
I Z (Disc tray OPEN/CLOSE) button (32)
J DISC OPEN/CLOSE button (for disc tray) (32)
K Busy LED indicator
– The disc tray does not respond even if you press Z
when this is lit.
L Disc tray (32)
DISC
OPEN/CLOSE
MEMORY CARD
OPEN/CLOSE
DISC
OPEN/CLOSE
MEMORY CARD
OPEN/CLOSE
CF xD-Picture CardSD
DISC
OPEN/CLOSE
6
4
5
7
q
s
9
8
3
2
1
0
qa
,continued
14
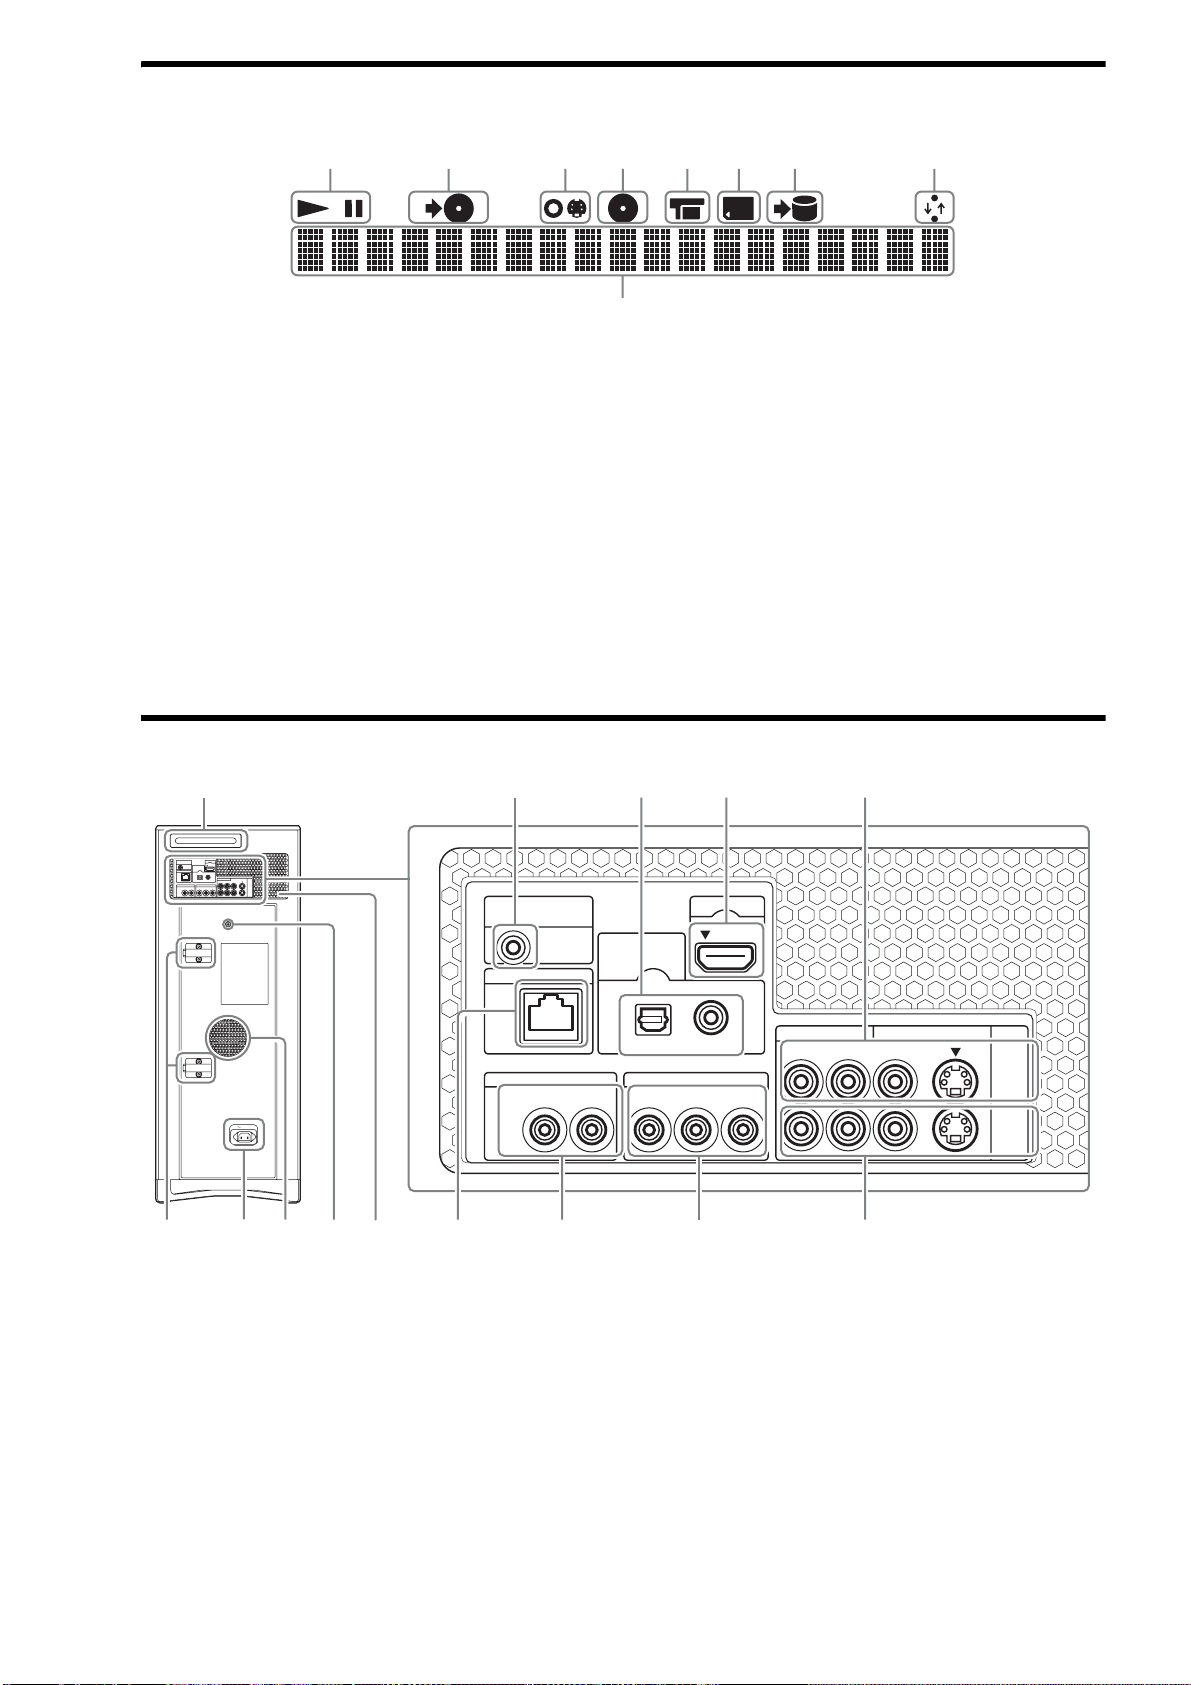
Top panel display/front panel display
The top and front panel displays are identical and show the same contents.
A Playback status (Play/Pause)
B Copy indicator
– Lights up while copying to a
disc.
C Line
– Lights up when the source is
the input from the LINE IN
jacks.
D Disc
– Lights up when the source is
a disc.
E HDV/DV
– Lights up when the source is
the input from the HDV/DV
IN jack.
F Memory card
– Lights up when the source is
a memory card.
G Import indicator
– Lights up while importing to
the HDD.
H Network connection indicator
– Lights up when network
communication is occurring.
I Main display
– Displays the following
information:
Title/track number
Elapsed playback time/
remaining time
Current time
and other messages.
z Hint
You can change the brightness of the front
panel display by pressing DIMMER or by
using the [Brightness of Front Panel] in
[System Settings] (page 116).
Rear panel
A PUSH/OPEN button for the LINE
IN 2 jacks and the display
operation buttons (operable
from the top — see “Top panel”)
(12)
B CONTROL S IN/IR IN jack (104)
C DIGITAL OUT (OPTICAL/
COAXIAL) jacks (106)
D HDMI OUT jack (102)
E LINE IN 1 (AUDIO L/R, VIDEO, S
VIDEO) jacks (40)
F Cable clamps
– Be sure to run the connecting
cables through the cable
clamps. Also, after running
the cables, check that the
cables are not loose and that
the ventilation hole is not
blocked.
G AC IN terminal (27)
H Ventilation holes
– Do not block the ventilation
holes, which will cause a
malfunction.
I Screw bolt for tip-over
prevention (23)
J LAN terminal (26)
K AUDIO OUT (L/R) jacks (103)
L COMPONENT VIDEO OUT (Y, P
B,
P
R) jacks (103)
M LINE OUT (AUDIO L/R, VIDEO, S
VIDEO) jacks (104, 106)
1234 7658
9
PUSH/OPEN
AC IN
CONTROL S IN/
IR IN
HDMI OUT
COMPONENT VIDEO OUT
AUDIO OUT
R
R-AUDIO-L VIDEO
LINE
IN 1
OUT
S VIDEO
YP
B PR
LAN
(
10/100
)
OPTICAL COAXIAL
DIGITAL OUT
PCM/DTS/
DOLBY DIGITAL
L
CONTROL S IN/
IR IN
HDMI OUT
COMPONENT VIDEO OUT
AUDIO OUT
R
R-AUDIO-L VIDEO
LINE
IN 1
OUT
S VIDEO
YP
B
P
R
LAN
(
10/100
)
OPTICAL COAXIAL
DIGITAL OUT
PCM/DTS/
DOLBY DIGITAL
L
1
678 89 0 qa qs qd
3245
15
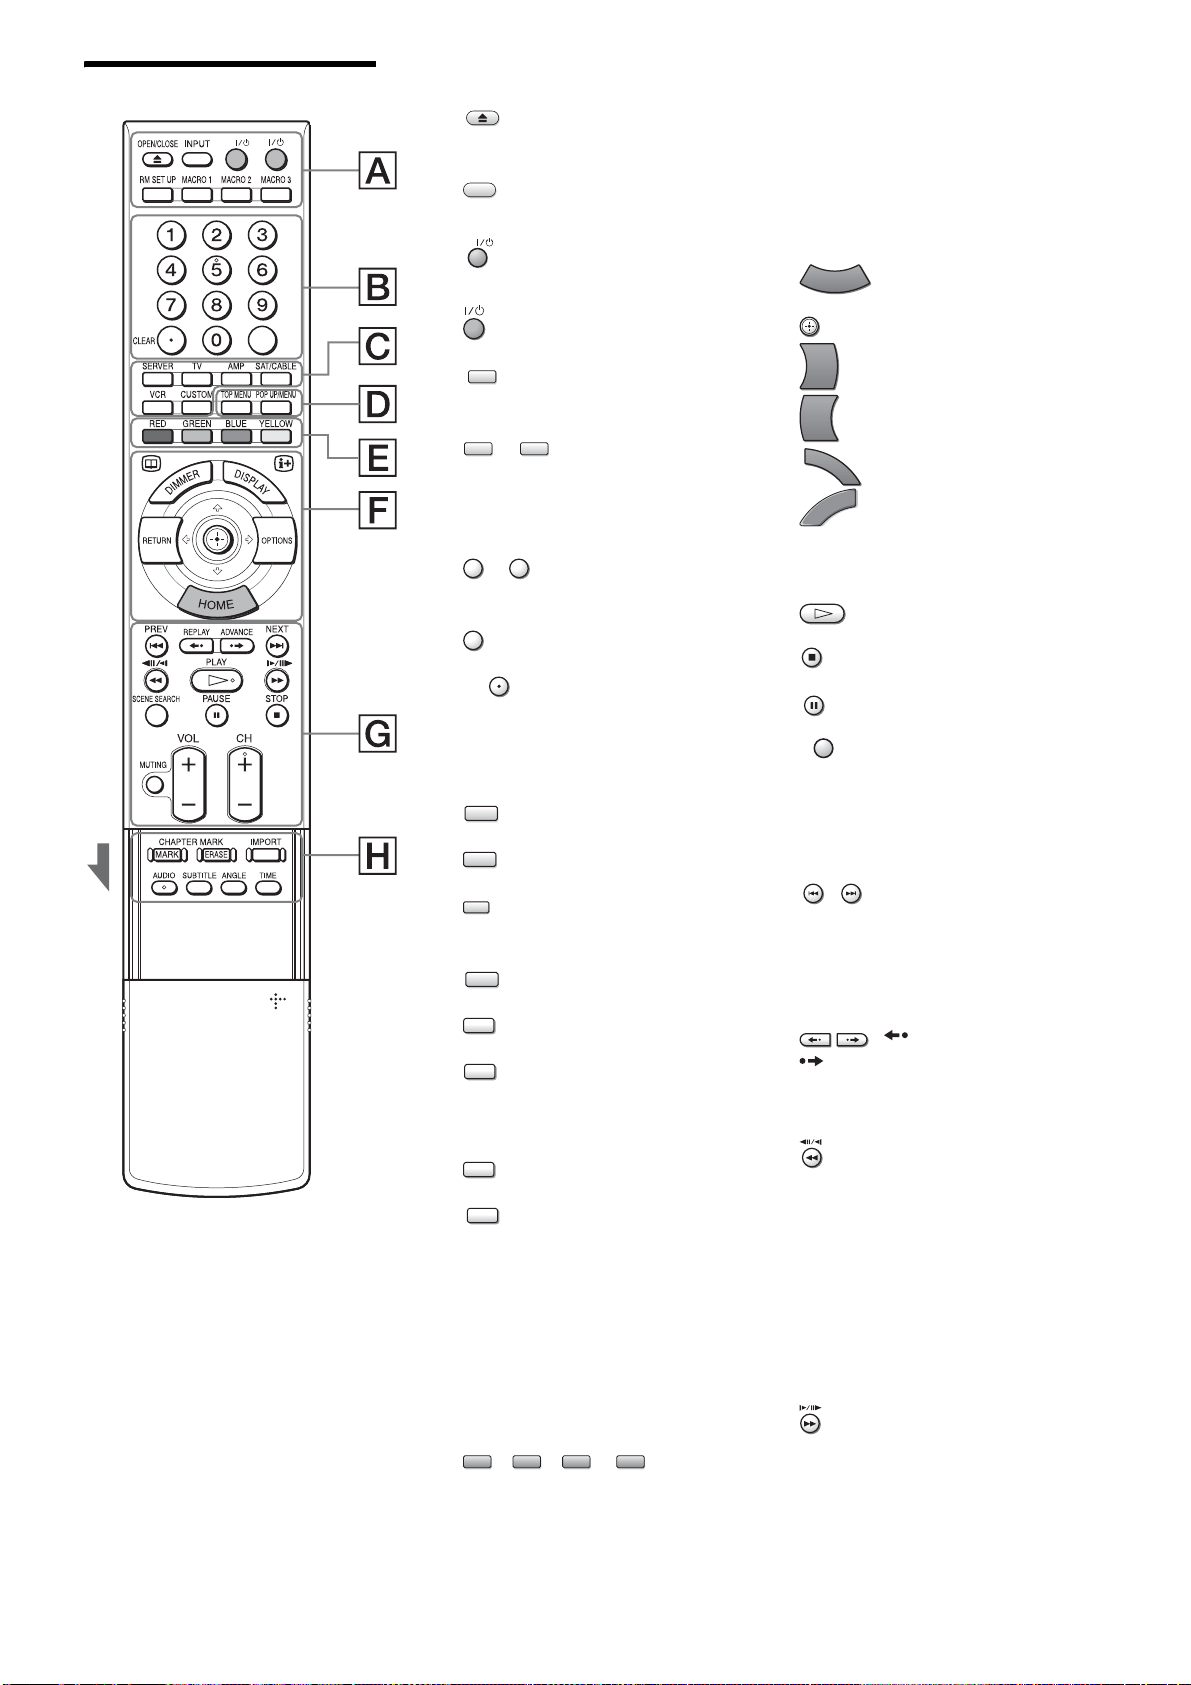
Remote
* Use the tactile dot as a reference when
operating the server.
A For startup operations
: ZOPEN/CLOSE button
(32)
: INPUT button
– Switches the input source.
: AV \/1 (power) button
(126)
: \/1 (power) button (28)
: RM SET UP (remote
setup) button (126)
– : MACRO (1/2/3)
buttons (130)
B For entering numbers
– : Number buttons*
(90, 118, 126)
: SET button (90, 129)
: CLEAR button (90,
129)
C For device selection
: SERVER button (126)
: TV button (126)
: AMP (amplifier) button
(126)
: SAT/CABLE button (126)
: VCR button (126)
: CUSTOM button (126)
D For BD/DVD operations
: TOP MENU button (55)
: POP UP/MENU button
(55)
E For selecting devices/
menu items
– Short cut keys for selecting
items on some BD’s menus
(can also be used for BD’s
Java interactive operations).
/ / / :
Color buttons (RED/GREEN/
BLUE/YELLOW) (90, 126)
F For display operations
– Press HOME to enter the
server’s start menu (Home
Menu) and use the Joystick to
operate. ‘Select’ the
displayed item by tilting the
Joystick <,Mm and then
press it down to ‘ENTER.’
: HOME button (9)
: Joystick (9)
: OPTIONS button (9)
: RETURN button (9)
: DISPLAY button (73)
: DIMMER button (14)
G For other viewing
: H (play) button* (69)
: x (stop) button (58, 73)
: X (pause) button (58, 73)
: SCENE SEARCH button
(58)
– Enters the Scene Search
mode. Search for a scene
quickly by pressing </,.
/: .PREV
(previous)/>NEXT buttons
(58, 73)
– Skips to the previous/next
chapter, track, or file.
: Instant Replay/
Instant Advance button
– Replays or briefly fast
forwards a scene.
: c/t/m Fast-
Reverse/Scan/Slow play button
(58, 73)
– Fast reverses when pressed
during playback.
Plays in slow motion
backwards when pressed in
pause mode.
The speed changes when
pressed repeatedly.
: M/T/C Fast-
Forward/Scan/Slow play button
(58, 73)
– Fast forwards when pressed
during playback.
Plays in slow motion when
SET
AV
OPEN/CLOSE
INPUT
AV
RM SET UP
MACRO 1 MACRO 3
0 9
SET
CLEAR
SERVER
TV
AMP
SAT/CABLE
VCR
CUSTOM
TOP MENU
POP UP/MENU
RED GREEN BLUE YELLOW
HOME
OPTIONS
RETURN
D
I
S
P
L
A
Y
D
I
M
M
E
R
PLAY
STOP
PAU SE
SCENE SEARCH
PREV
NEXT
REPLAY
ADVANCE
,continued

16
pressed in pause mode.
The speed changes when pressed repeatedly.
/ : CH (channel) +/–* buttons
– Selects the TV channels up and down.
/ : VOL (volume) +/– buttons
– Adjusts the volume.
: MUTING button
– Mutes the sound.
H For video title options
/ : CHAPTER MARK (MARK/ERASE) buttons
(81)
: IMPORT button (40, 42)
– Performs the same function as the IMPORT button
on the top panel.
: AUDIO button*
– Selects the sound track or the language track.
: SUBTITLE button
– Selects the subtitle language.
: ANGLE button
– Switches to other viewing angles when available.
: TIME button
– Switches the panel display to show elapsed
playback time or remaining time.
CH
VOL
MUTING
MARK
ERASE
IMPORT
AUDIO
SUBTITLE
ANGLE
TIME

17
18
Getting Started
Follow steps 1 to 8 to hook up and adjust the
settings of the server.
For jack and button names, see “Index to
Parts and Controls” (page 12).
Notes
• Plug cables securely to prevent unwanted noise.
• Refer to the instructions supplied with the components to
be connected.
• A TV with a video input jack is required to connect to this
server.
• Be sure to disconnect the power cord of each component
before connecting.
• To avoid electrical damage to the server and the external
devices, do not apply too much pressure on the connecting
cables.
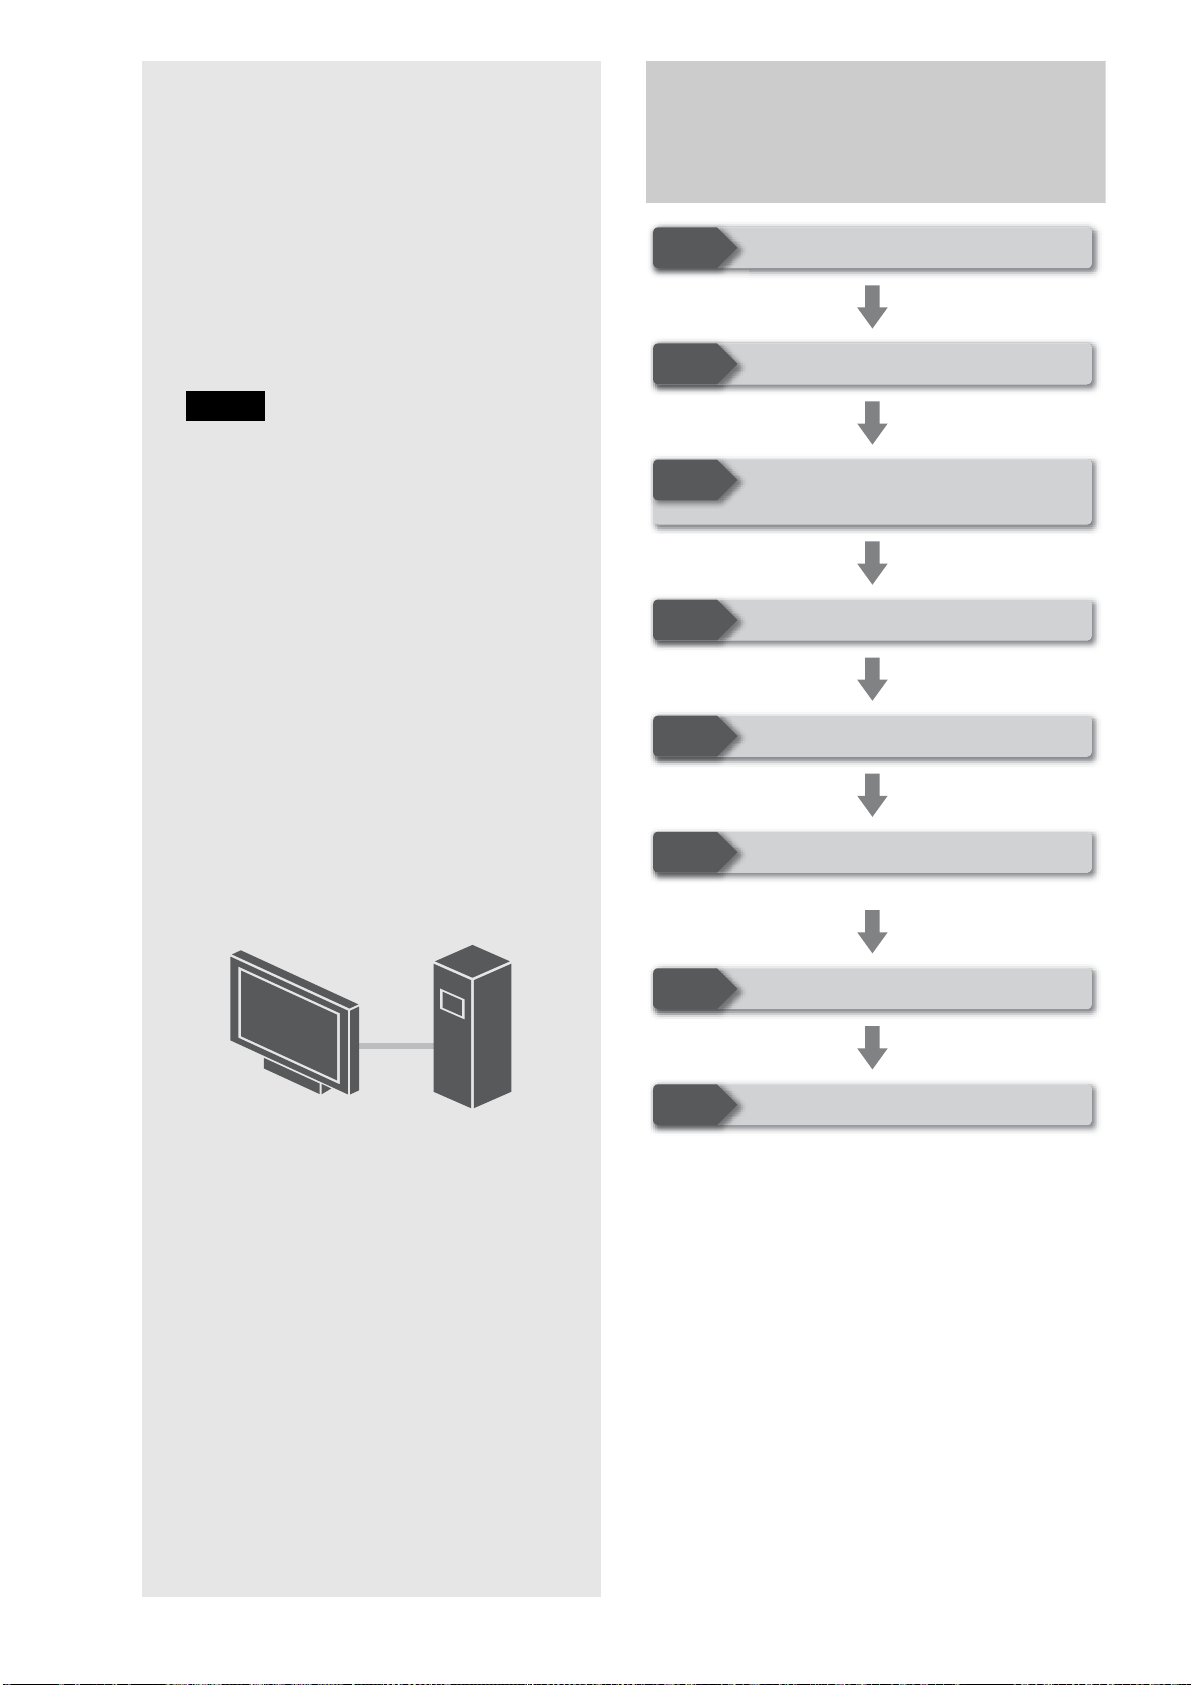
Step-by-step Instructions
Connect the power cord last to protect the internal HDD.
Step 1
Step 2
Step 3
Step 4
Step 5
Step 6
Step 7
Step 8
Unpacking (page 19)
Checking the Accessories (page 22)
Installing Tip-Over Prevention
(page 23)
Connecting to the TV (page 23)
Preparing the Remote (page 27)
Making the Initial Settings (page 28)
Connecting to the Network (page 26)
Connecting the Power Cord (page 27)
• Step-by-step Instructions. . . . . . . . . . . . . . . . 18
• Step 1: Unpacking . . . . . . . . . . . . . . . . . . . . . 19
• Step 2: Checking the Accessories. . . . . . . . . . 22
• Step 3: Installing Tip-Over Prevention . . . . . . 23
• Step 4: Connecting to the TV (or monitor) . . . 23
• Step 5: Connecting to the Network . . . . . . . . . 26
• Step 6: Connecting the Power Cord . . . . . . . . 27
• Step 7: Preparing the Remote. . . . . . . . . . . . . 27
• Step 8: Making the Initial Settings . . . . . . . . . 28
• Turning off the Power. . . . . . . . . . . . . . . . . . . 30
19
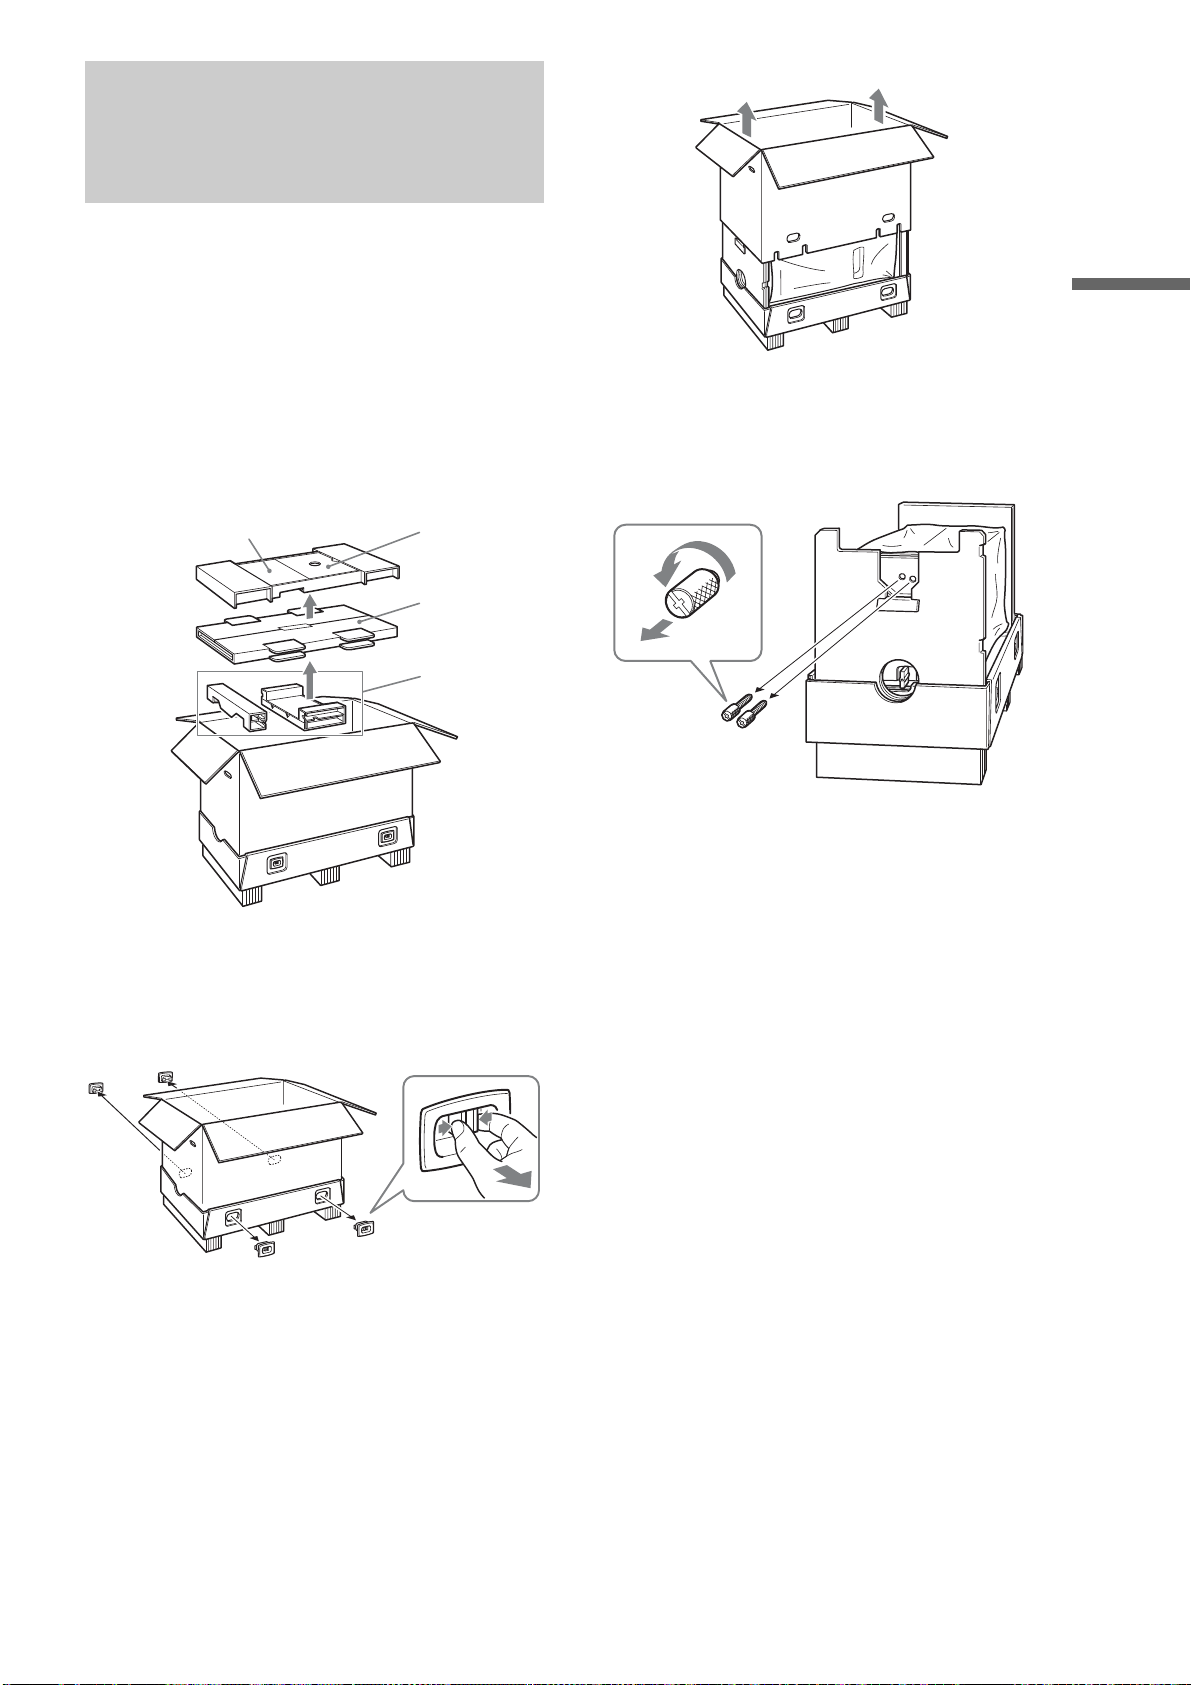
Getting Started
Step 1: Unpacking
This box contains accessories, padding materials, and the server
unit. Since the unit is large and heavy, make sure to work with
another person, and follow the procedures in this document as
described.
a Remove the accessories and the glass panels.
A Remove the accessory pack.
Do not discard; the boxes contain accessories and
Operating Instructions.
B Remove the glass panel cushioning.
C Remove cushions.
Handle the glass panels with care.
b Remove the upper carton.
A Remove four plastic tabs located at the bottom
of the carton.
The upper box is detached from the pallet.
B Lift the upper carton.
c Remove the lock screws.
A On the bottom of the unit (not the box), you
should find two lock screws.
B Unscrew counter-clockwise and remove them.
Store the lock screws in a safe place as you will need
them when transporting the unit. These screws are
necessary to prevent damage to the disc pickup
mechanism during shipping and transport.
Accessory pack
Glass panels
Cushions
Operating Instructions
To pull out the joints
1 Grasp the middle
of the tab.
2 Pull out.
,continued

20
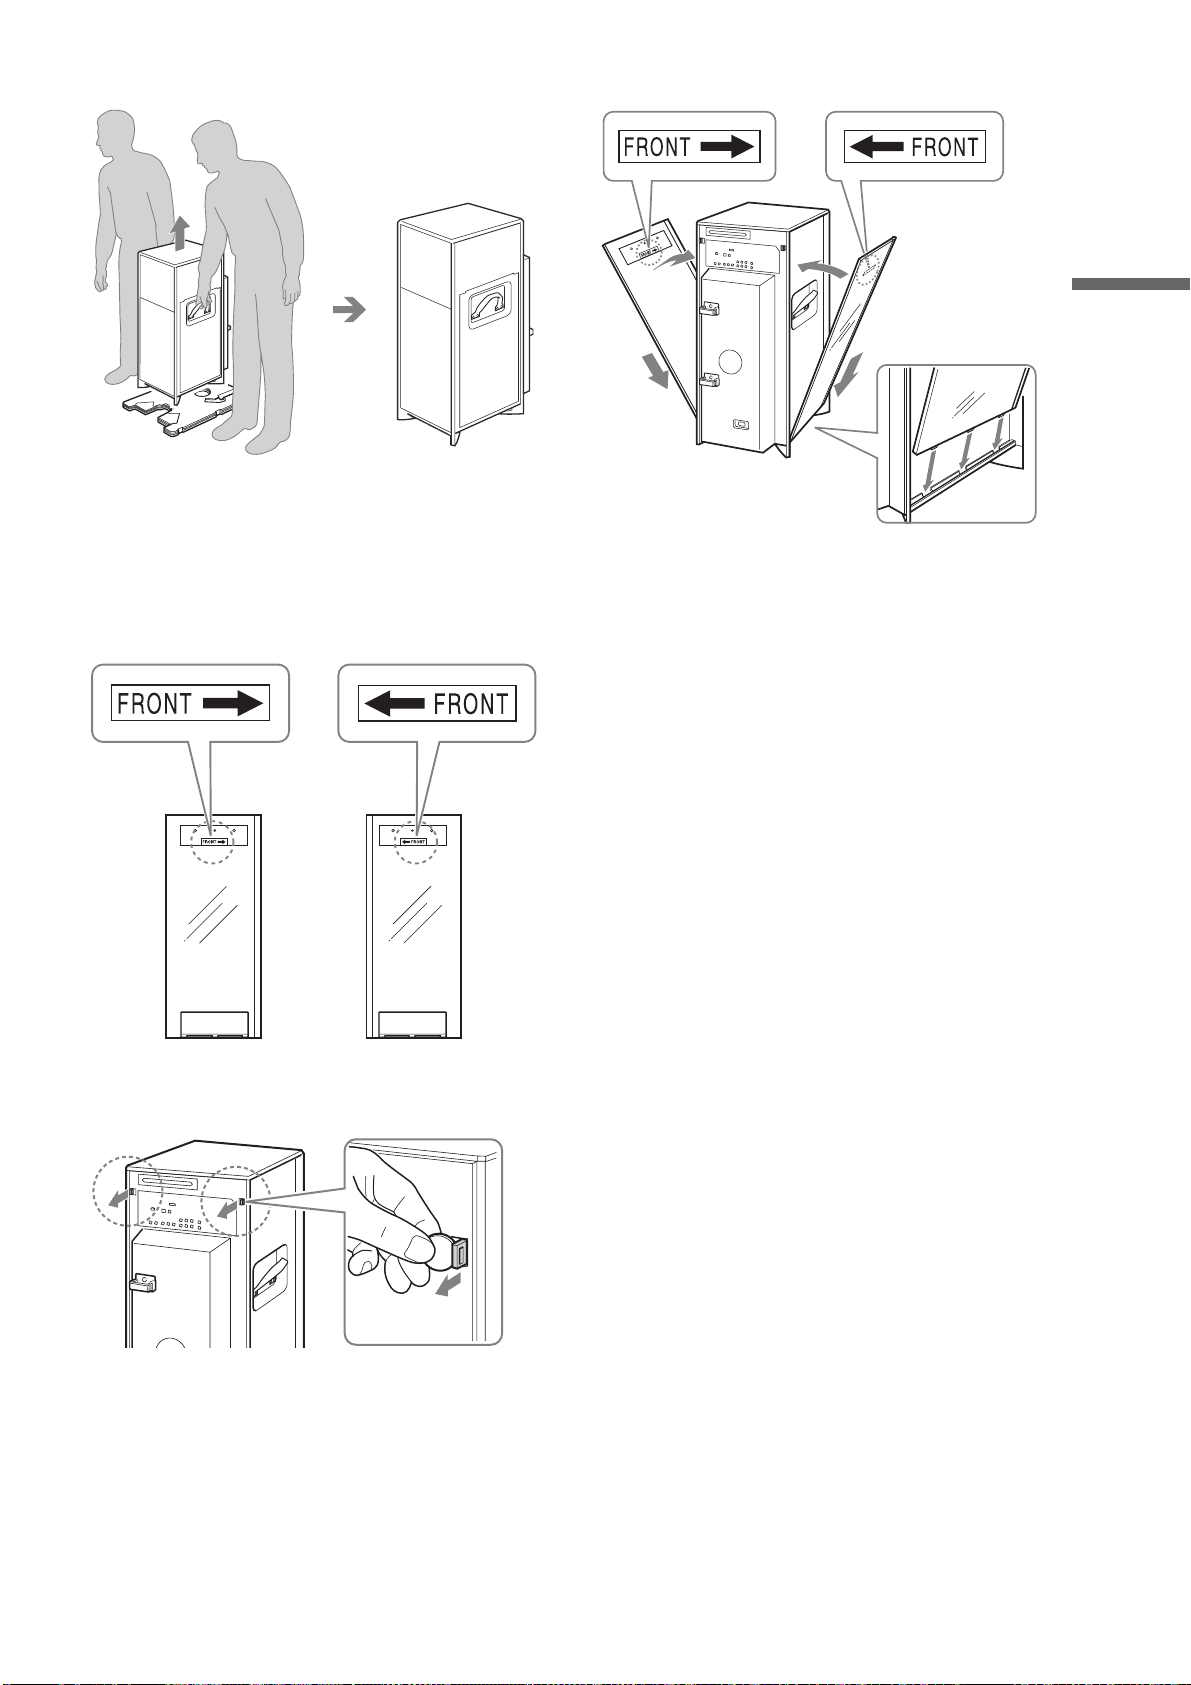
d Remove the lock stick.
A On the bottom of the unit (the same place as
step 3), you should find a lock stick.
B Unlock the lock stick by turning the stick
clockwise 90 degrees and remove it.
Store the lock stick in a safe place as you may need it
when transporting the unit. The lock stick is
necessary for securing the unit to the packing
material to prevent damage of the mechanical block
during shipment and transportation.
C Close the three holes (including the holes in
step 3) with the supplied dust-tight seals.
The dust-tight seals are included in the accessory
box.
e Place the unit upright.
With two persons, bring the unit gradually into the
upright position (pallet at the side).
• Make sure to move the unit with at least two persons.
The unit weighs 48 kg (105 3/4 lb).
• Move the unit slowly and carefully so the unit does not
drop out and fall over.
• Refer to the above illustration so as not to hold the
wrong side of the unit.
f Remove the pallet.
A Remove the cushioning from the top of the
unit.
B Remove the pallet while another person is
holding up the unit.
g Remove the cover sheet, and place the unit.
A Remove the white cover sheet.
Dust-tight seals
Pallet
Pallet
21
Getting Started
B Move the unit to the place of installation.
Be sure to grasp the handles when moving the unit.
Install the unit on a flat surface in a stable place.
h Attach the glass panels.
A Check the orientation indicated on the glass
panels.
Right side panel will only fit right side and left panel
will fit only left side. (They are not interchangeable.)
B Remove the tape that covers the panel lock
lever (painted in red), and pull out the lever
with a coin or flathead screwdriver, etc.
C Insert the panel’s projecting tabs on the
bottom edge into the three slots on the unit.
To move the unit, detach the glass panels and grasp
the handles underneath.
2
1
,continued
22
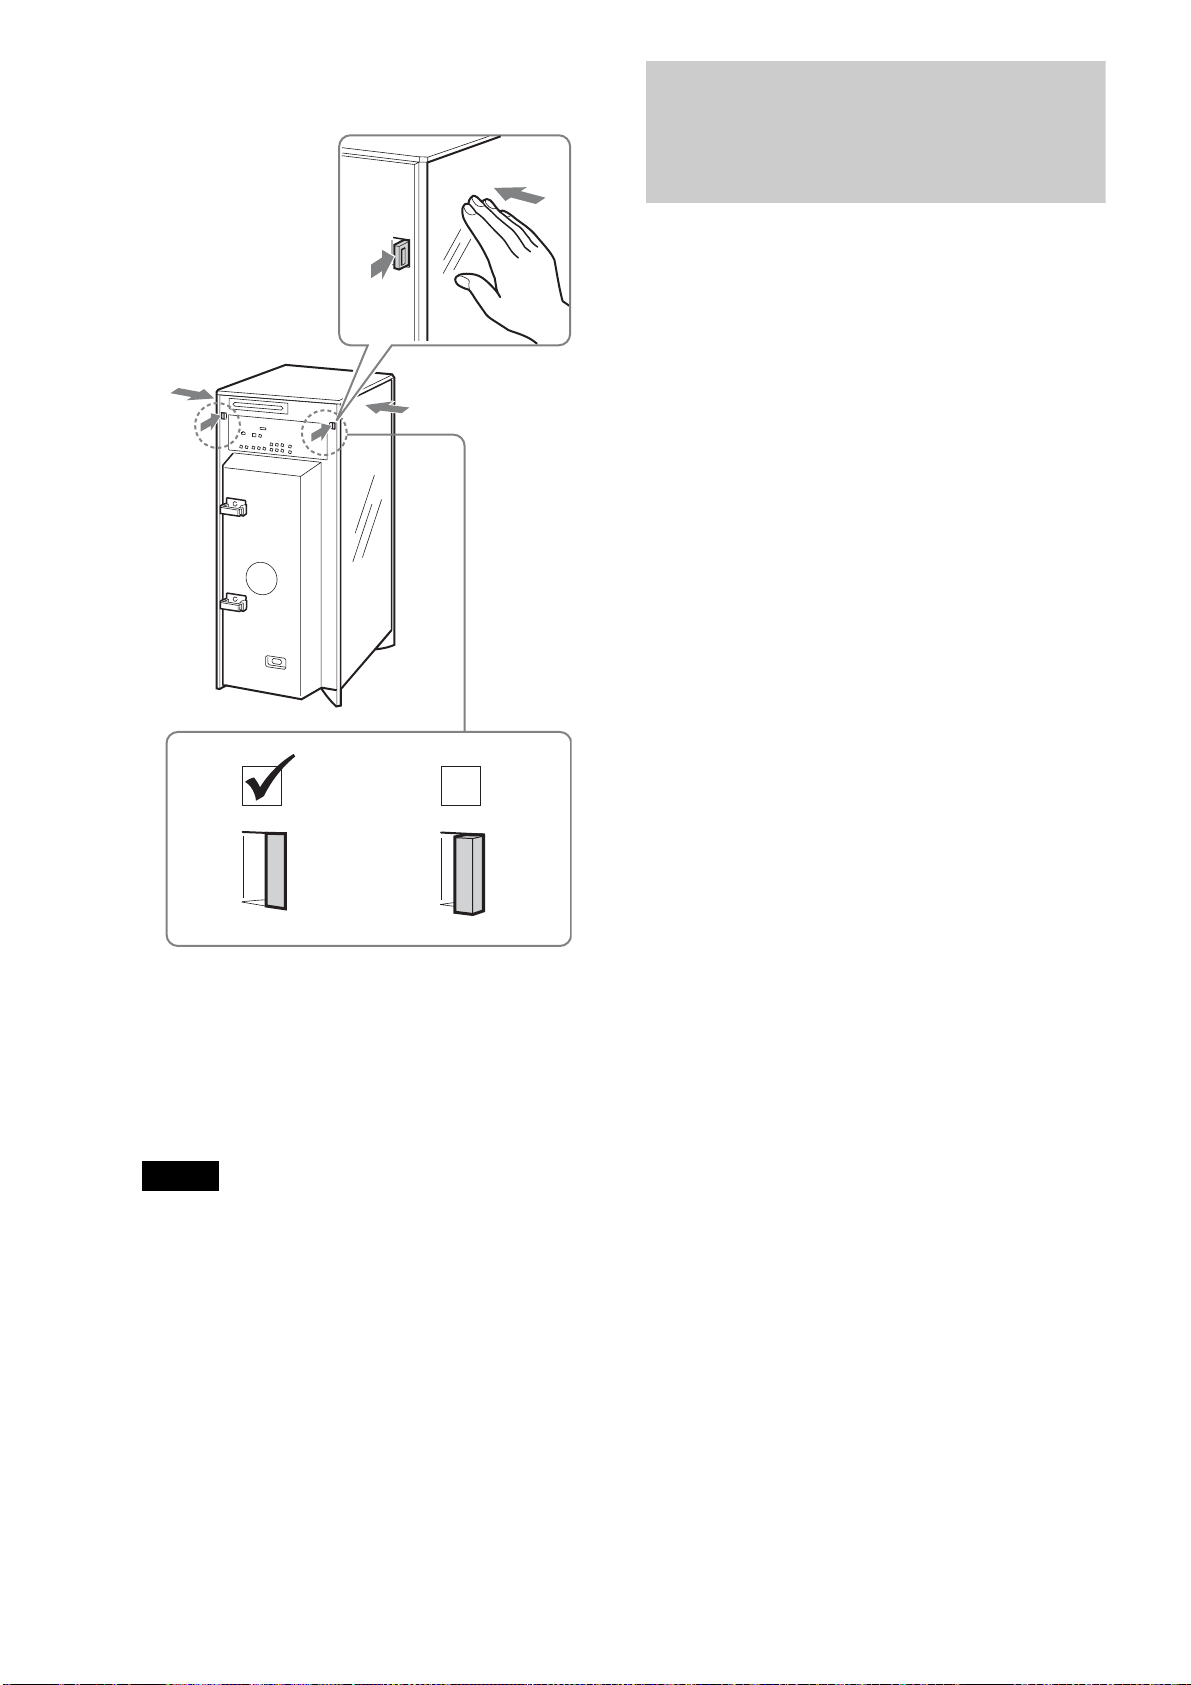
D Holding the glass panel to the side, push the
lever back to its original position.
The panel is locked.
Push the lever all the way through till it remains flush
the back panel surface.
E Repeat steps 1 to 4 to attach the other panel.
Use the supplied cleaning cloth to wipe the glass
surfaces. The cleaning cloth is included in the
accessory pack.
Note
If the unit is brought director from a cold to a warm location, or is placed
in a very damp room, moisture may condense on the unit. If this happens,
leave the unit without connecting the power cord for about six hours,
until the moisture evaporates.
Observe the following precautions when
moving the unit.
• Be sure to remove all discs before turning off the power.
• Attach the two lock screws and the lock stick to the unit.
Be sure to disconnect the power cord when attaching them.
Use the supplied carton and cushions for transportation.
Step 2: Checking the
Accessories
The following items are supplied in the accessory pack:
• Audio/video cable (phono plug × 3) (1)
• LAN cable with Ferrite Clamp (Ferrite EMC Filter) (1)
• HDMI cable (1)
• Power cord (1)
• Remote commander
®
(remote control) (1)
• Size AA (R6) batteries (2)
• Cleaning cloth (1)
• Dust-tight seals (6)
• “Music Transfer” installation CD (1)
Push the lever inside
2
1
Lever not engaged, panel not
firmly locked
23
Getting Started
Step 3: Installing Tip-Over
Prevention
Without a proper installation, the server unit may fall over
causing an injury. It is strongly recommended that you anchor
the unit to a solid wall or a post with a commercially available
anti-tip-over device.
Please contact a licensed contractor or your dealer with this
installation.
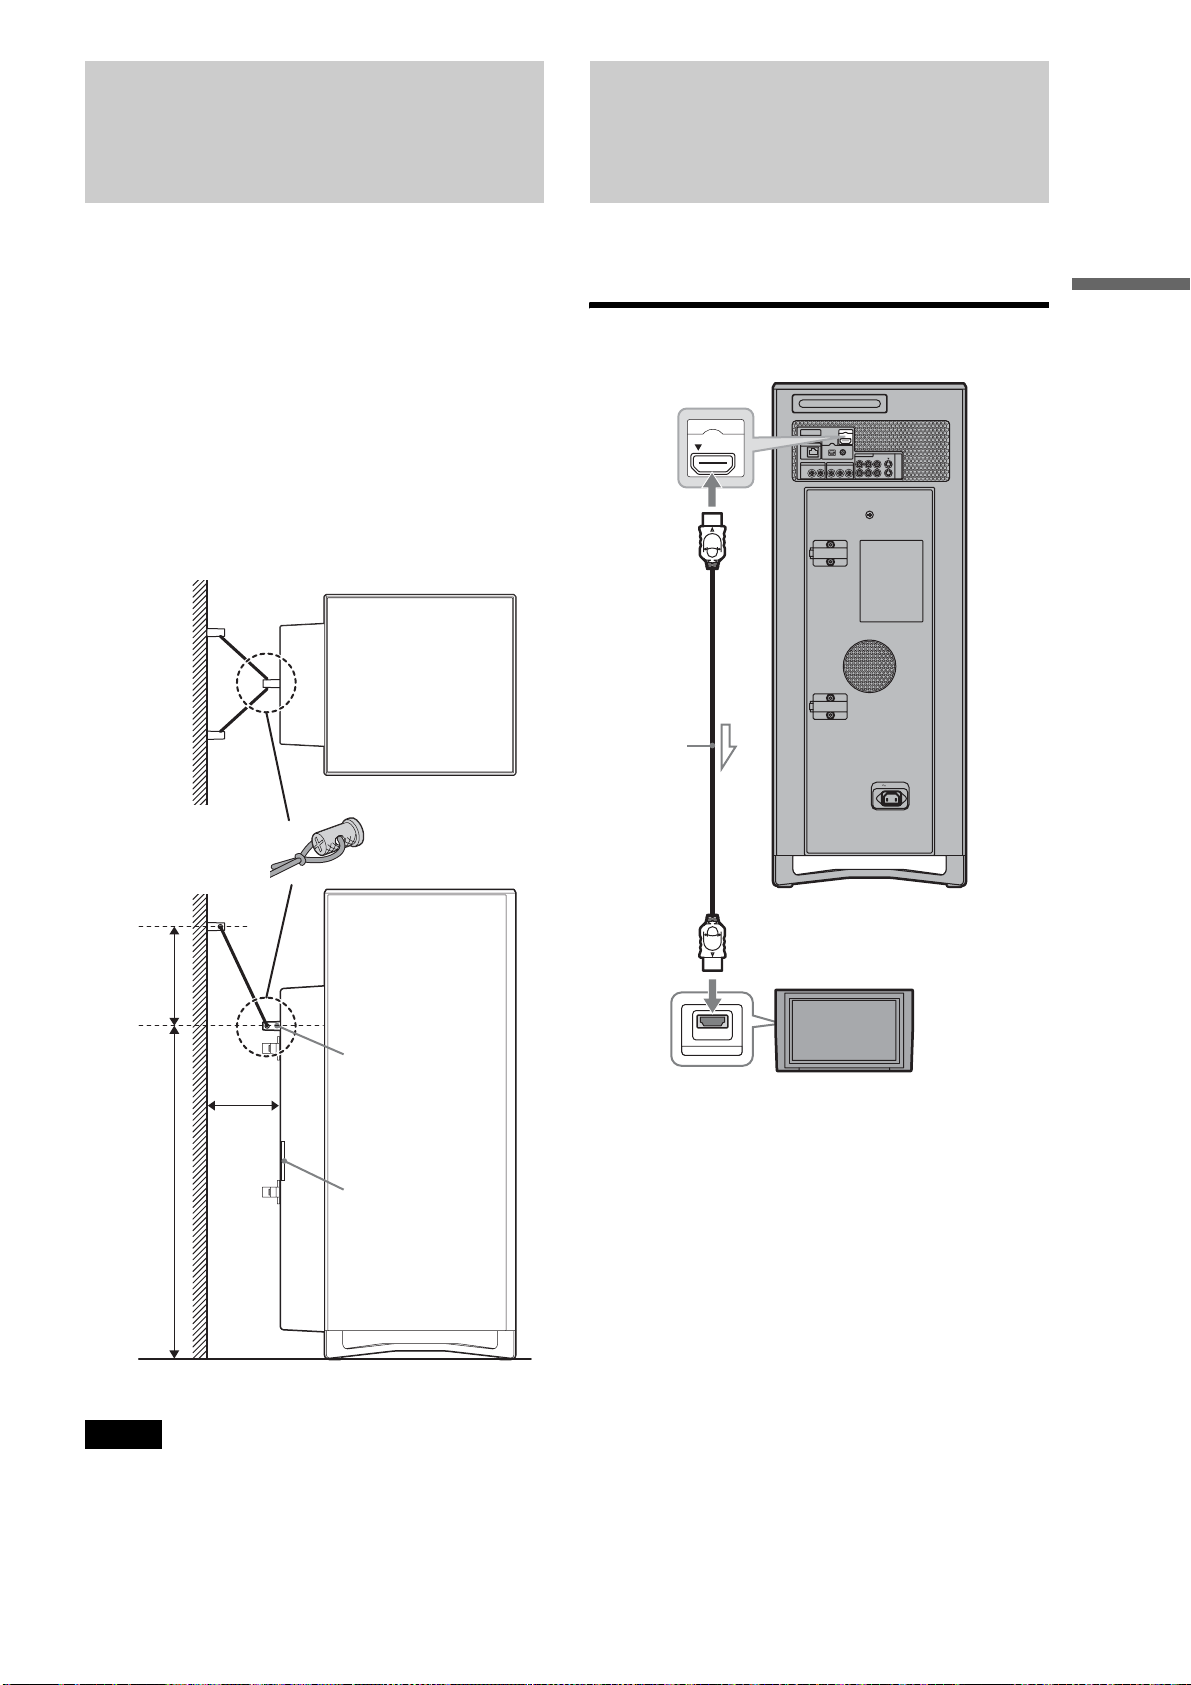
a Attach the device to a solid wall or post.
The device should be located higher than the screw
bolt on the rear of the unit.
b Secure the unit to the device by running the
wire through the hole on the bolt so that it
forms a “V” shape.
Notes
• Make sure when you attach the wire there is sufficient tension between
the unit and the device on the wall.
• Place the unit within 15 inches from the wall.
• When placing the unit, do not block the ventilation holes on the rear,
or a malfunction may result.
Step 4: Connecting to the
TV (or monitor)
This section covers the most frequently used hook-up
configurations. See “Various Connections” (page 100) for other
connection patterns.
Connecting a TV with an HDMI cable
Wire
Screw
Ventilation
A
23 1/2 in.
B
15 in.
Max.
Distance of A should be greater than B.
PUSH/OPEN
AC IN
CONTROL S IN/
IR IN
HDMI OUT
COMPONENT VIDEO OUT
AUDIO OUT
R
R-AUDIO-L VIDEO
LINE
IN 1
OUT
S VIDEO
YPB PR
LAN
(
10/100
)
OPTICAL COAXIAL
DIGITAL OUT
PCM/DTS/
DOLBY DIGITAL
L
HDMI OUT
HDMI IN
To HDMI OUT
HDMI cable
(supplied)
To HDMI
input jack
TV
,continued
24
Notes on connecting to the HDMI OUT jack
Observe the following as improper handling may damage the
HDMI OUT jack and the connector.
• Carefully align the HDMI OUT jack on the back of the server
and the HDMI connector by checking their shapes. Make sure
the connector is not upside down or tilted.
• Be sure to disconnect the HDMI cable when moving the server.
• Do not place the server where the HDMI OUT jack and HDMI
cable are subject to wear or abuse.
• Do not pinch, bend, or twist the HDMI cable excessively.
Doing so may damage the HDMI OUT jack or the HDMI
cable.
About the ‘BRAVIA’ Theatre Sync
™
features (for HDMI connections only)
By connecting Sony components that are compatible with the
HDMI Control function with an HDMI cable (supplied),
operation is simplified as below:
• One-Touch Play
With a single touch of the power, HOME or H button, the
input selector on the TV or the AV amplifier is automatically
switched to the server. Press [/1 when the server is turned off,
or press HOME or H when the server is turned on to activate
One-Touch Play.
• System Power-Off
When you turn off the TV, the receiver and connected
equipment are also turned off simultaneously.
The server keeps playing music if you turn off the TV while the
server is playing music.
Notes
• The HDMI Control operation is possible for up to three players
including this server.
• When connecting or disconnecting the HDMI plug, be sure to set
[HDMI Control] to [On].
To prepare for the ‘BRAVIA’ Theatre Sync
features
Set [HDMI Control] to [On] (page 116).
Note
Depending on the connected component, the HDMI Control function
may not work. Refer to the operating instructions supplied with the
component.
About the x.v.Color
• x.v.Color is a more familiar term for the xvYCC standard
proposed by Sony, and is a trademark of Sony.
• xvYCC is an international standard for color space in video.
This standard allows for a wider color range than the currently
used broadcast standard.
Note
This server supports playback of video contents on discs recorded with
“x.v.Color” technology. To watch video content recorded with
“x.v.Color” technology, check if your TV or AV devices support this
feature.
HDMI OUT
HDMI OUT
25
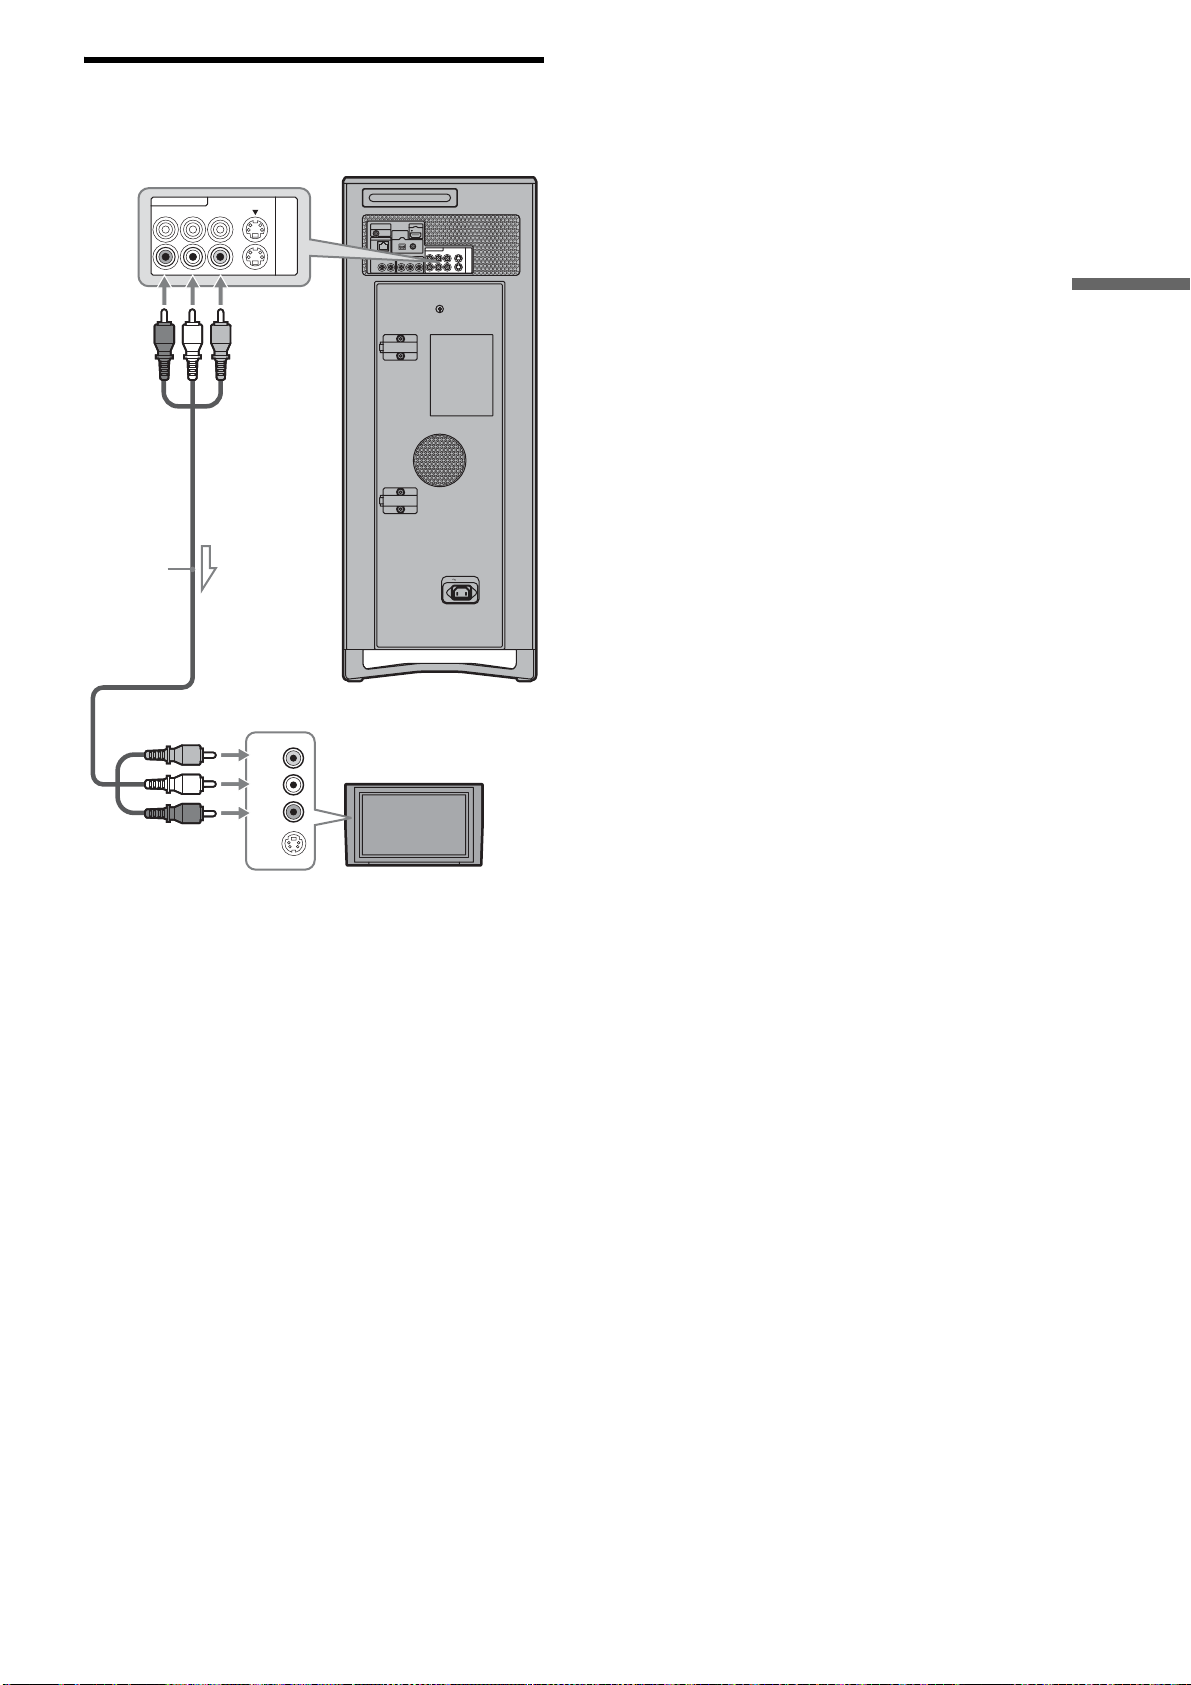
Getting Started
Connecting a TV with an audio/video
cable
PUSH/OPEN
AC IN
CONTROL S IN/
IR IN
HDMI OUT
COMPONENT VIDEO OUT
AUDIO OUT
R
R-AUDIO-L VIDEO
LINE
IN 1
OUT
S VIDEO
YP
B PR
LAN
(
10/100
)
OPTICAL COAXIAL
DIGITAL OUT
PCM/DTS/
DOLBY DIGITAL
L
S VIDEO
(R)
AUDIO
(L)
VIDEO
R-AUDIO-L VIDEO
LINE
IN 1
OUT
S VIDEO
Server
To LINE OUT
AUDIO/VIDEO
Audio/video
cable
(supplied)
To audio input jacks
TV
To video input jack
26
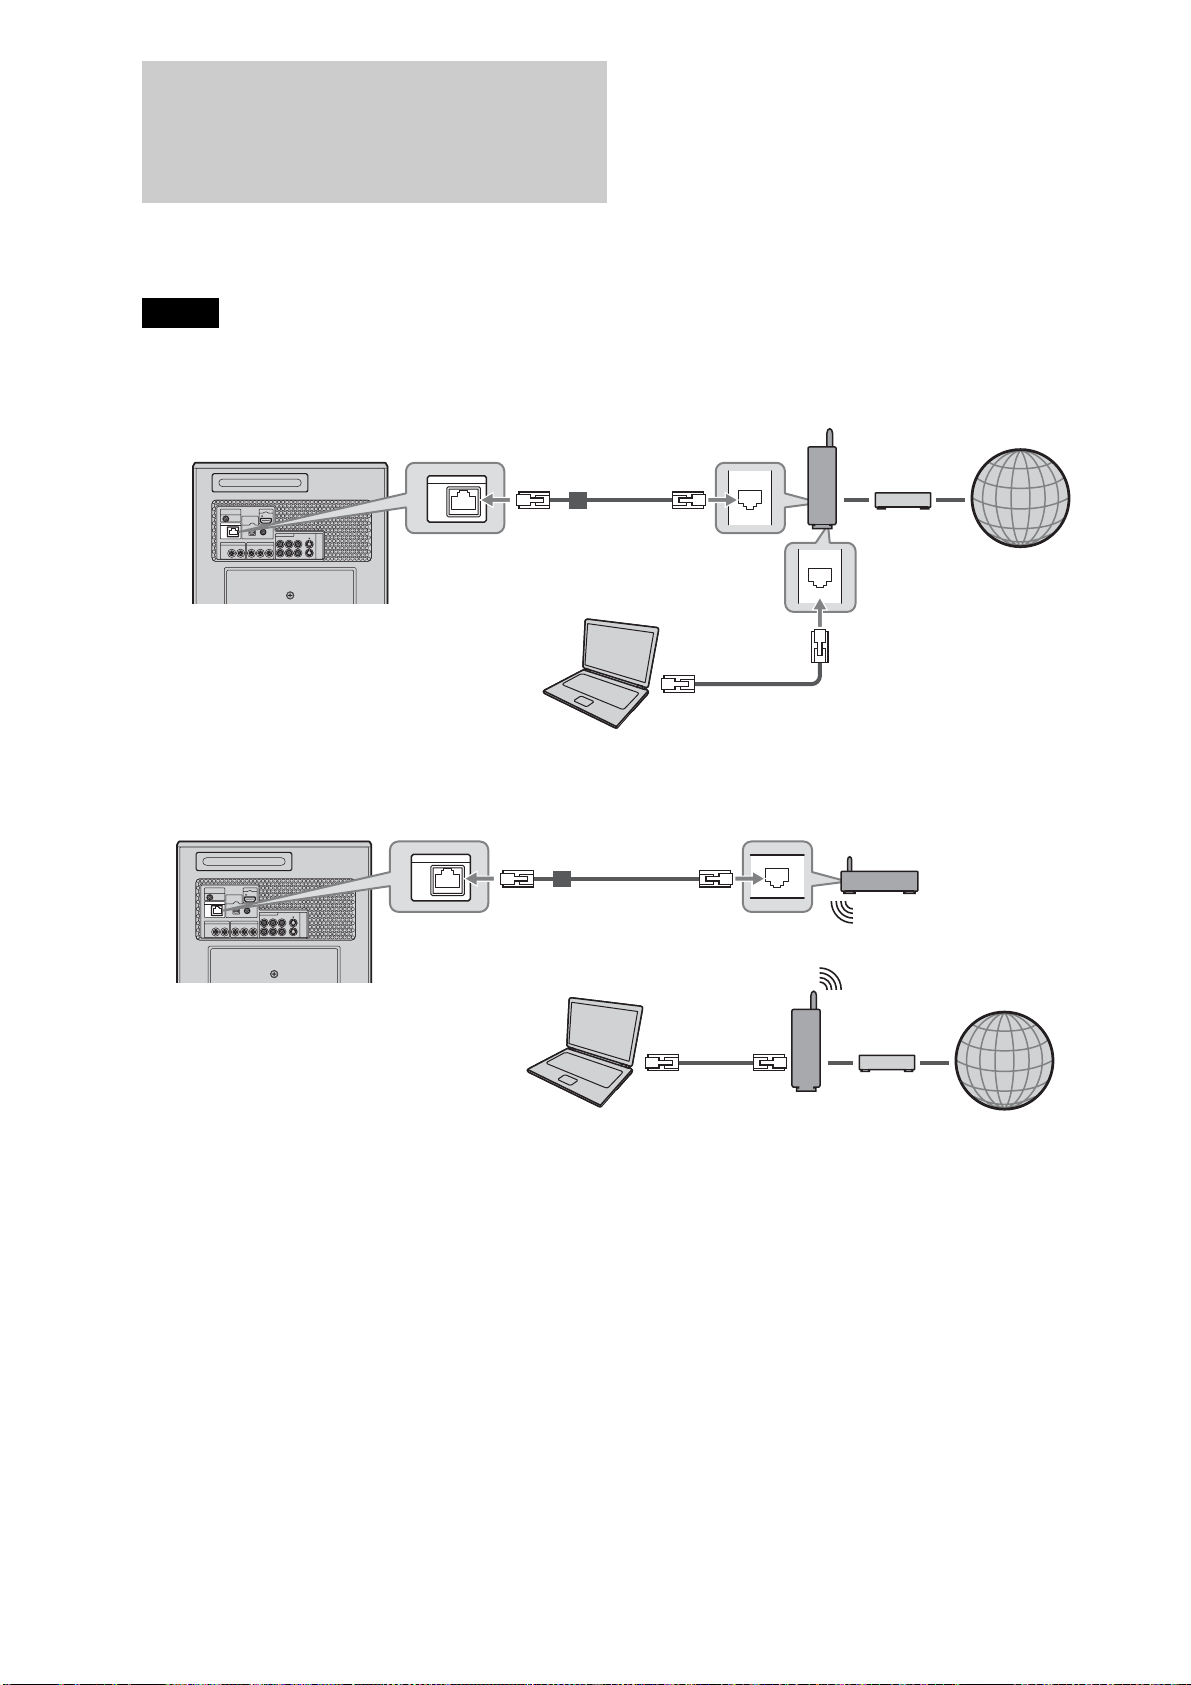
Step 5: Connecting to the
Network
Connect the LAN terminal on the server to your Internet source using an Ethernet cable. See also “Network Settings” for necessary
network settings (page 121).
The supplied LAN cable has a ferrite clamp. Use the plug with the clamp when connecting to the LAN terminal on the server.
Note
Refer also to the instructions supplied with the router or the gaming adaptor.
When connecting to a router directly
When using a gaming adapter as a wireless bridge
PUSH/OPEN
CONTROL S IN/
IR IN
HDMI OUT
COMPONENT VIDEO OUT
AUDIO OUT
R
R-AUDIO-L VIDEO
LINE
IN 1
OUT
S VIDEO
YP
B
P
R
LAN
(
10/100
)
OPTICAL COAXIAL
DIGITAL OUT
PCM/DTS/
DOLBY DIGITAL
L
LAN
(
10/100
)
LAN
LAN
To LAN terminal
Wireless Router
Ferrite clamp
(Closest to the server)
Modem
Server
Internet
PC
LAN cable (not supplied)
PUSH/OPEN
CONTROL S IN/
IR IN
HDMI OUT
COMPONENT VIDEO OUT
AUDIO OUT
R
R-AUDIO-L VIDEO
LINE
IN 1
OUT
S VIDEO
YP
B
P
R
LAN
(
10/100
)
OPTICAL COAXIAL
DIGITAL OUT
PCM/DTS/
DOLBY DIGITAL
L
LAN
(
10/100
)
LAN
To LAN terminal
Modem
Server
Internet
Wireless Router
PC
Ferrite clamp
(Closest to the server)
Gaming adaptor
LAN cable
(not supplied)
27
Getting Started
Step 6: Connecting the
Power Cord
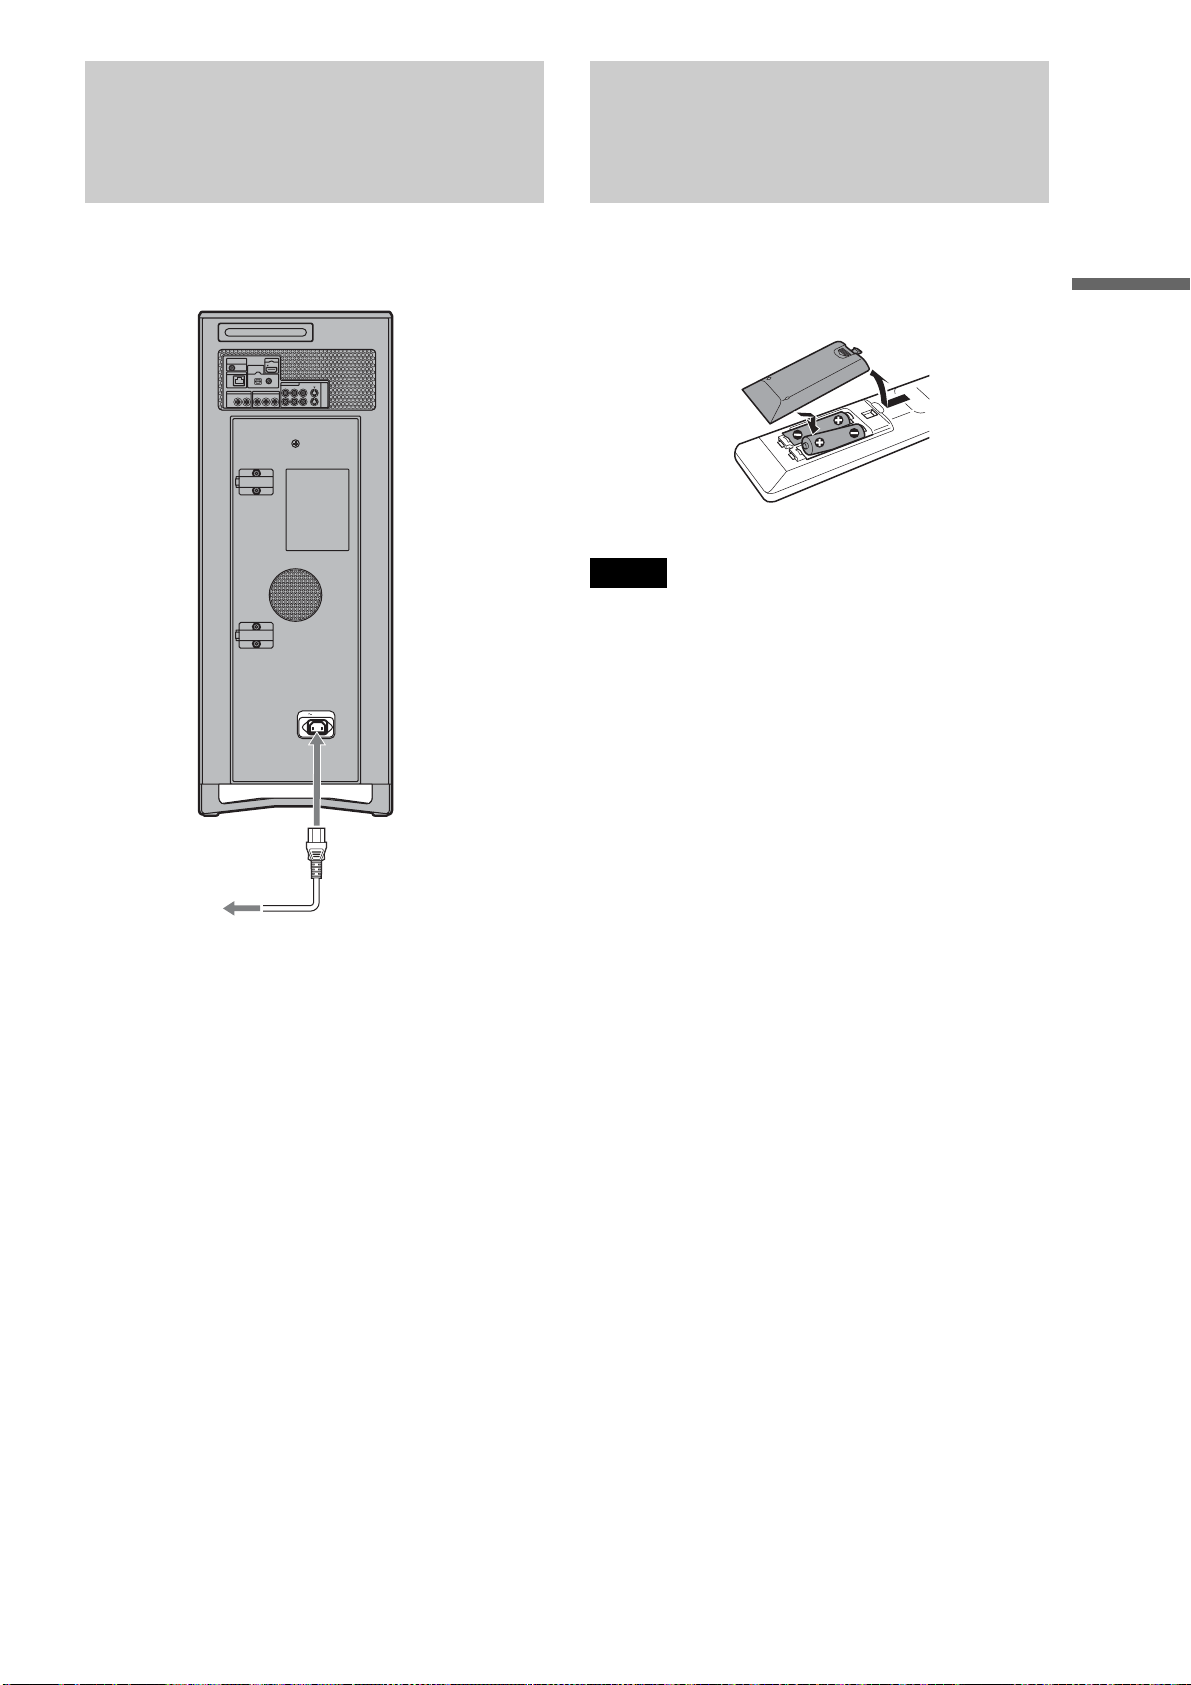
After all of the other connections are complete, connect the
supplied power cord to the AC IN terminal of the server. Then
plug the server and TV power cords into the AC outlet.
Step 7: Preparing the
Remote
You can control the server using the supplied remote. Insert two
Size AA (R6) batteries by matching the 3 and # ends on the
batteries to the markings inside the battery compartment. When
using the remote, point it at the remote sensor on the server
(page 13).
PUSH/OPEN
CONTROL S IN/
IR IN
HDMI OUT
COMPONENT VIDEO OUT
AUDIO OUT
R
R-AUDIO-L VIDEO
LINE
IN 1
OUT
S VIDEO
YP
B PR
LAN
(
10/100
)
COAXIAL
DIGITAL OUT
PCM/DTS/
DOLBY DIGITAL
L
OPTICAL
AC IN
to AC outlet
to AC IN
Notes
• Do not leave the remote in an extremely hot or humid place.
• Do not drop any foreign object into the remote casing, particularly
when replacing the batteries.
• Do not expose the remote sensor to direct sunlight or a lighting
apparatus. Doing so may cause a malfunction.
• If you do not use the remote for an extended period of time, remove the
batteries to avoid possible damage from battery leakage and corrosion.
28
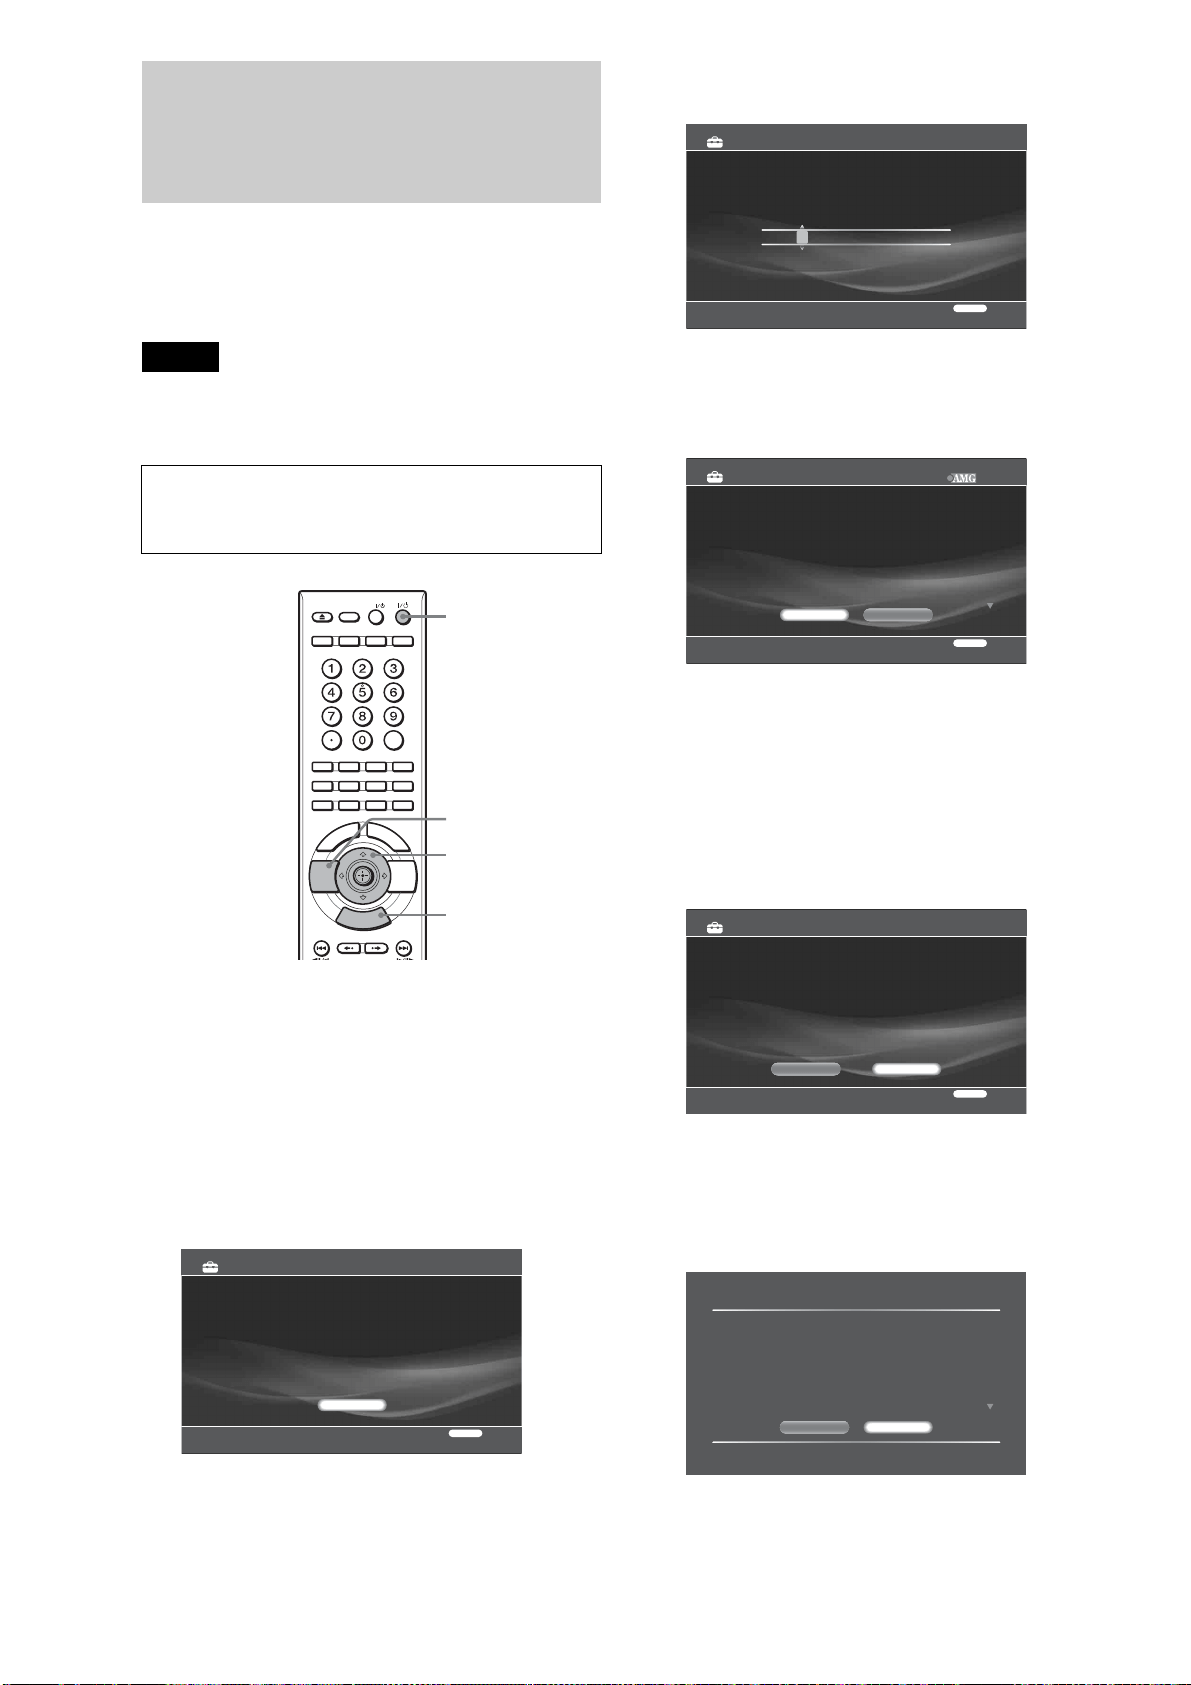
Step 8: Making the Initial
Settings
Follow the steps below to make the minimum number of basic
adjustments for using the server. These steps are recommended
setup procedures.
See “Server Settings” (page 108) to make other optional
settings.
Note
If you cancel the Easy Setup halfway, the default settings remain
effective, and the server’s network functions (server function and AMG
data search function) may be disabled.
a Turn on the TV.
b Press [/1 to turn on the server.
The server turns on after a moment.
c Switch the input selector on your TV so that
the signal from the server appears on your
TV screen.
To access the Easy Setup, press HOME, select
[Settings] – [Easy Setup] (page 123).
d Select [Start] and press ENTER.
The clock settings display appears.
e Set the date and time by pressing Mm and
press ENTER.
The All Media Guide Settings display appears.
All Media Guide (AMG) is a technology and content
database provider offering music and movie related
data (metadata) for your commercially produced
discs.
f Select [Agree] to use the AMG database and
press ENTER.
The music server function display appears.
g Select [On] to turn on the music server
function and press ENTER.
This setting is required for music sharing (page 74),
“Music Transfer” (page 49).
h Select [Change] on the confirmation screen
and press ENTER.
When turned on for the first time
The server automatically turns off after 110 seconds, so turn
it on again. The Easy Setup display appears after 70 seconds.
SET
AV
RETURN
HOME
"/1
</M/m/,,
ENTER (Press)
RETURN
HOME
Easy Setup steps you through the basic setup.
You can manually change the configurations later in the Settings category.
- Date and Time Settings
- All Media Guide Settings
- Music Server Settings
RETURN
Finish
Easy Setup
Start
Set the current date and time. Press ENTER to complete the setting.
RETURN
Return
Easy Setup - Date and Time Settings 1/4
7 / 9 / 2007 3 : 37 AM
Please read the following Terms of Use and press Agree or Decline to continue.
AMG Flow-Down License Terms (Terms of Use)
"This application incorporates software and technology of All Media Guide, LLC.
(""AMG""). The AMG software and technology (collectively, the ""AMG Technology"")
allows End Users to access music and movie related data (""AMG Data"") over the
Internet and otherwise from proprietary AMG databases (the ""AMG Databases"")
located on AMG servers (the ""AMG Servers"") and to perform other functions.
You may access and use AMG Data only by means of the intended End User
functions of this application software.
You agree that you will use the AMG Data, the AMG Technology, and the AMG
Servers for your own personal non-commercial use only. You agree not to assign,
copy, transfer or transmit the AMG Data to any third party. You agree not to use or
Agree
Easy Setup - All Media Guide Settings 2/4
RETURN
Return
Decline
Set the Music Server functions.
If you are not using, select [Off].
RETURN
Return
Easy Setup - Music Server Settings 3/4
On Off
Music Server Function
"When [Music Server Function] is set to [On], the unit becomes
accessible by other devices on the network. Without proper security
precautions, the unit may be affected by access or attack from a third
party, resulting in falsification or destruction of recorded data."
To prevent such access or attack, register the devices that you want to
allow access.
Manual (recommended):Allows access for registered deices only.
Auto: Allows access for all devices on the network, up to 10 devices.
Set these only when using in a secured network.
Do Not ChangeChange

29
Getting Started
A message appears notifying that [Standby Mode] in
[System Settings] was set to [Standard].
The default setting is [Eco].
• The [Standard] setting consumes more power than the
[Eco] setting.
• Setting [Music Server Settings] to [On] will
automatically set [Standby Mode] to [Standard]. See
page 122 for details about [Music Server Settings].
i Select [Close] and press ENTER.
j Select if you want to change the method for
client device registration and press ENTER.
Client registration is required to allow DLNA
compatible network audio devices and “Music
Transfer” to access the server's music content from
other rooms.
In this manual, “client device” refers to devices that
receive and play music content on the home network.
Home Entertainment Server, that shares music in
response to the client’s request is called “server.”
k Select [Finish] and press ENTER.
• To use the AMG database or the music server function,
press HOME, select [Settings] – [Network Settings] –
[Music Server Settings] and make necessary changes
(page 121).
z Hints
• If you want to reset these settings to their factory defaults, select
[Settings] – [Resetting] – [Reset to Factory Default] (page 124).
• You can re-run Easy Setup by selecting [Settings] – [Easy Setup]
(page 123).
• To keep the power consumption to the minimum when the server is
turned off, set [Standby Mode] to [Eco] (see below).
Setting the server to Eco mode
a Press HOME to turn on the Home Menu.
b Select [Settings] to display the icons.
c Select [System Settings] and press ENTER.
d Select [Standby Mode] and press ENTER.
e Select [Eco] and press ENTER.
Standby Mode Switching
To activate the Music server function even when
the power is off, [Standby Mode] under [System
Settings] was changed to [Standard].
Close
Select the client registration method.
If you are making this setting letter, select [Manual].
ManualAuto
Easy Setup - Client Registration
RETURN
Return
4/4

30
Turning off the Power
To turn off the power, press [/1 on the left bottom of the top
panel or [/1 on the remote.
[/1 on the top panel turns green to red, and “POWER OFF”
flashes on the front panel display.
Do not disconnect the power cord while “POWER OFF” is
flashing as it causes a malfunction.
To make sure that the power is completely off, wait until the
current time appears on the front panel display.
(Note that nothing will appear on the front panel display while
the power is off if you have set [Brightness of Front Panel] in
[System Settings] to [Dim] (page 116).
However, you can turn off the power by pressing [/1 while the
server is running the following operations.
–Photo Import
–Music Import
– Music transfer from PC
–Music Share
–Disc finalize
– HDD to disc copy
The above operations will continue until complete even in the
standby mode. While the server is running the operations,
indicators on the top or front panel display (page 14) light up. Do
not disconnect the power cord during the operations.

31
Getting Started
32
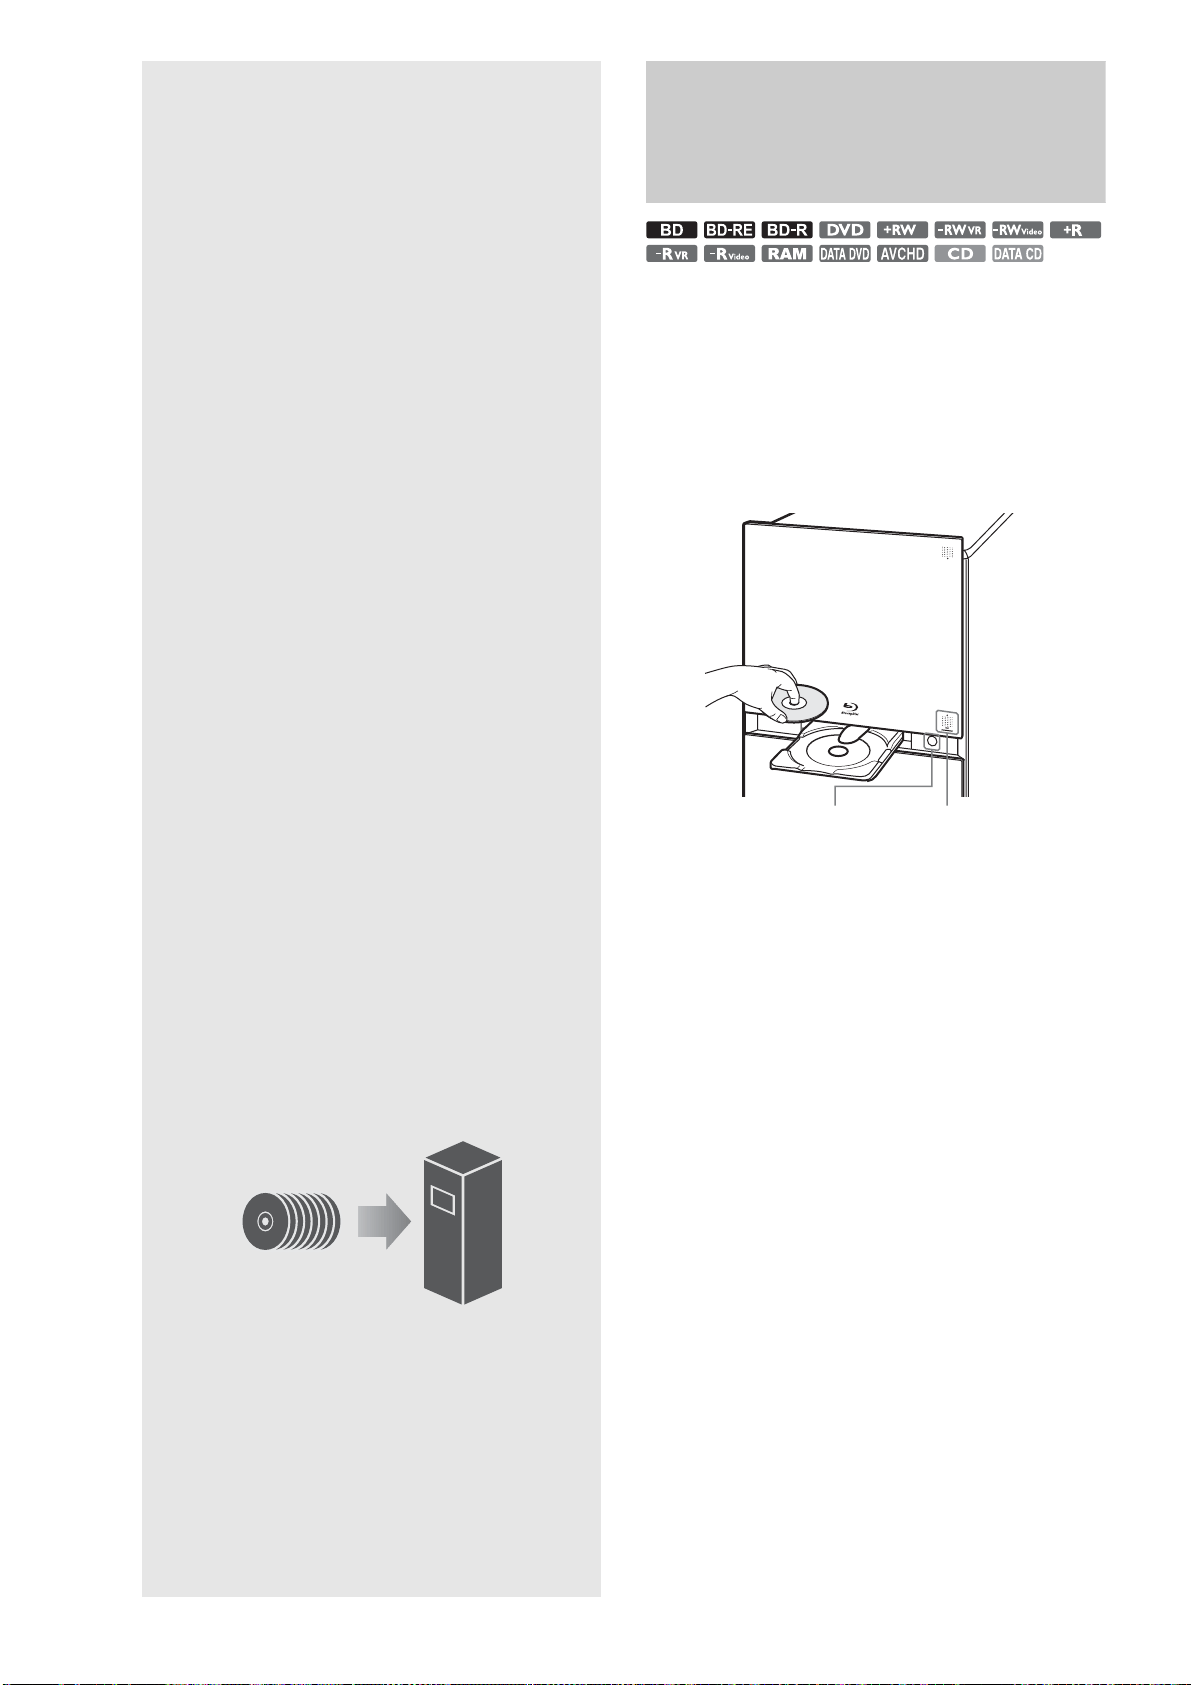
Inserting/
Removing Discs
and Memory
Cards
Inserting Discs
a Press \/1 to turn on the server.
b Touch DISC OPEN/CLOSE on the bottom
right of the front panel.
The front panel slides open, and the disc tray extends.
c Place the disc on the disc tray with the
playback/recording side facing down.
d Touch DISC OPEN/CLOSE on the bottom
right of the front panel.
Both the disc tray and panel will close.
The server loads the disc and registers it to the
internal database. In addition, the server accesses the
AMG database for disc information depending on the
disc. You can view the registered disc listings by
selecting [Loaded Disc] of [Disc Manager]
(page 110).
The disc will be ejected if the changer is full.
When inserting multiple discs
Wait until the busy LED indicator turns off.
Open the disc tray by pressing Z while keeping the
front panel open. Note that Z does not work while
the busy indicator is turned on.
z Hints
• For 12 cm discs, up to 196 can be loaded; for 8 cm discs, up to 4.
• When you have finished configuring [All Media Guide Settings] and
[Internet Settings] properly before inserting multiple discs, you can
collectively acquire AMG data for the inserted discs. You will need to
search the AMG database for each disc in other cases.
• The AMG disc description is not provided for content copied on a
recordable media such as a CD-R/CD-RW and DVD-R. Note that no
data can be acquired for music content imported to the HDD.
• The number of the displayed cover arts of music CDs, DVD-ROMs
and BD-ROMs are limited. Such cover arts are displayed while the
corresponding CDs, DVD-ROMs and BD-ROMs remain in the
changer. About AMG, see page 146 for details.
• Do not place multiple discs on the disc tray at the same time.
• For details about discs, see “Notes On Disc Handling” (page 4).
DISC OPEN/CLOSEZ
• Inserting Discs . . . . . . . . . . . . . . . . . . . . . . . . 32
• Managing Server Content With the Disc Information
Display. . . . . . . . . . . . . . . . . . . . . . . . . . . . 33
• Managing Discs . . . . . . . . . . . . . . . . . . . . . . . 35
• Inserting Memory Cards. . . . . . . . . . . . . . . . . 36

33
Inserting/Removing Discs and Memory Cards
Registering discs manually
You can register discs that failed to register at the time of
loading.
Normally the server recognizes and registers the inserted discs
automatically. However, the automatic registration does not
occur if the drive is occupied or if any other function is being
processed. In this case, you will need to register the disc
manually.
a Press HOME to turn on the Home Menu.
b Select to display the icons.
c Select [Disc Manager] and press ENTER.
d Press OPTIONS to display the Options
menu.
e Select [View by Group] and press ENTER.
f Select [Unknown Disc] and press ENTER.
The [Unknown Disc] List appears.
g Select a disc to register and press ENTER.
h Select [Load] and press ENTER.
Ejecting discs
a Press HOME to turn on the Home Menu.
b Select to display the icons.
c Select [Disc Manager] and press ENTER.
The Disc Manager display appears with one of the
disc listings: [Loaded Disc], [Blank Disc],
[Unreadable Disc], [Unknown Disc]. If the disc you
want to eject is not listed, change the list display by
pressing OPTIONS. For details about [Disc
Manager], see page 110.
d Select the disc you want to eject.
e Select [Eject] and press ENTER.
To lock/unlock the front panel (Child Lock)
When the front panel is closed, touch x on the top panel for 10
seconds or more.
When the front panel is locked, “LOCKED” appears on the top
panel display; when unlocked, “UNLOCKED” appears.
To play the inserted disc
You can play the disc without turning on the Home Menu.
When the disc tray is extended, touch H on the top panel.
Managing Server Content
With the Disc Information
Display
The Disc Information display shows disc information as well as
settings applicable to individual discs.
Displaying disc information
z Hint
To manage multiple discs at once, use the Disc Manager display
(page 35).
a Press HOME to turn on the Home Menu.
b Select , , or .
c Select and press ENTER.
d Select and press OPTIONS.
e Select [Information/Settings] and press
ENTER.
The Disc Information display appears. The display
differs depending on the disc type and recording
format.
◆Example: Display for a BD-R
A Disc Name
B Media
C Title Total
Original title total/Playlist title total*
* for BD-RE, BD-R only
D Protection
Shows if the disc is protected or not.
E Lock
Shows if the disc is locked or not.
F Rec Date
Most recent and the oldest dates.
G Remaining
• Bar indicator for disc capacity
• Disc’s remaining capacity/total capacity
• Possible continuous recording time
Disc information may not be correct if the disc is recorded on other
devices.
H Data Folder
DR
: 35H11M
23.4 / 25.0GB
LR
XR
ER
SR
Disc Information
Disc Name
Media
Title Total
Protection
Remaining
BD-R Data Folder None
Original 2 / Playlist 0
Unprotected
Lock Invalid: No operating restrictions.
7/ 6/2007 - 7/13/2007
Rec Date
: 3H21M
DR
: 2H07M : 6H36M
: 13H06M : 26H07M
Name Input
Protect
Lock
BD Close
Format
RETURN
Finish
Close
,continued
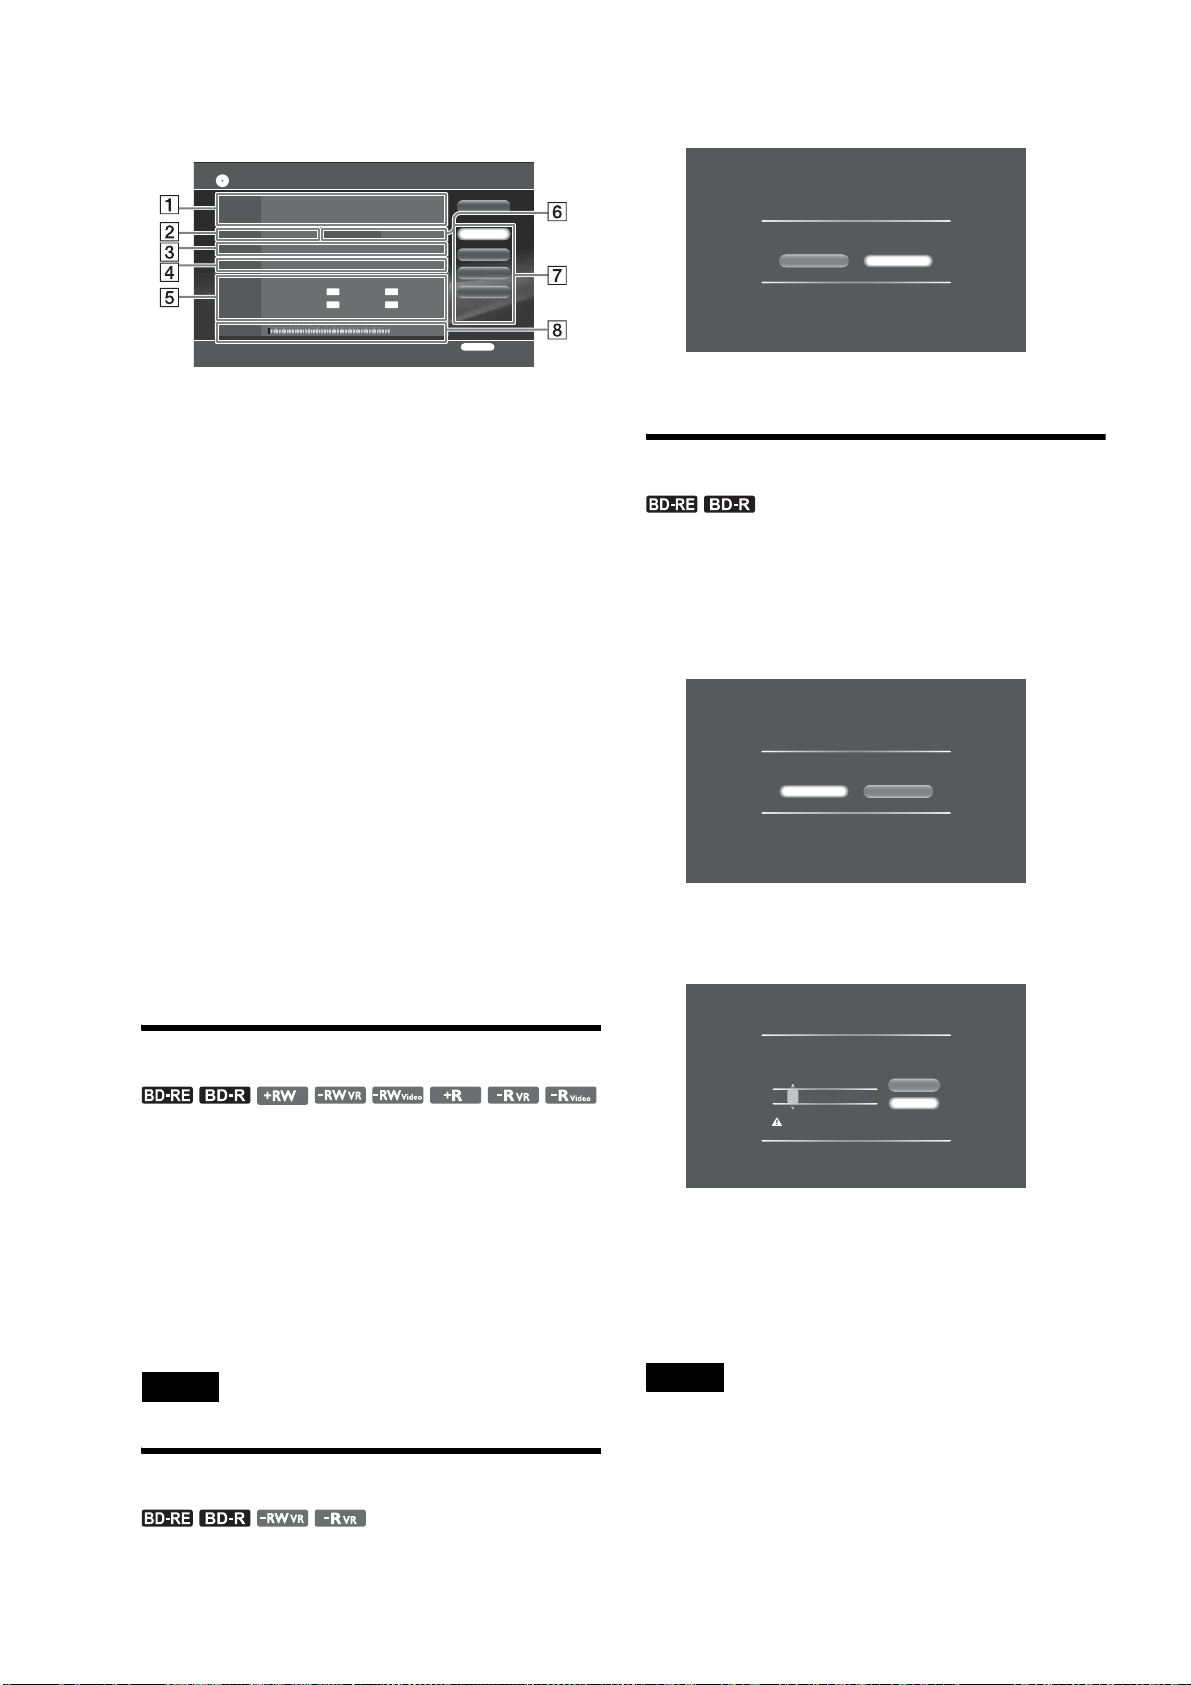
34
Shows if the disc contains folders (BD-RE, BD-R only).
I Disc settings
◆Example: Display for a DVD-RW
A Disc Name
B Media
C Title Total
Original title total/Playlist title total*
* for DVD-RW (VR mode), DVD-R (VR mode) only
D Rec Date
Most recent and the oldest dates.
E Recordable Time
• Possible continuous recording time
Disc information may not be correct if the disc is recorded on other
devices.
F Format
Format: Indicates the recording format (VR or Video mode) for
DVD-RW and DVD-R.
G Disc settings
Selectable items vary depending on the disc type. See pages 35 for
details.
• Name Input
• Protect (write-protect)
• Finalize
• DVD Menu (DVD only)
• Format
H Remaining
• Bar indicator for disc capacity
• Disc’s remaining capacity/total capacity
Disc information may not be correct if the disc is recorded on other
devices.
Labeling a disc
Name or rename the disc using the Disc Information display.
a On the Disc Information display, select
[Name Input] and press ENTER.
The on-screen keyboard appears.
b After entering the disc name, select [Finish]
and press ENTER.
See page 90 for character input.
Note
You cannot label a disc if the disc is finalized.
Protecting a disc
Protect important discs against accidental erasure and alteration.
a On the Disc Information display, select
[Protect] and press ENTER.
The protection display appears.
b Select [On] and press ENTER.
Locking a BD-RE/BD-R
Set a password to control playback of recordable BDs.
a On the Disc Information display, select
[Lock] and press ENTER.
The lock display appears.
b Select [Yes] and press ENTER.
The password display appears.
c Enter a password using the number buttons,
select [OK], and press ENTER.
After you remove the disc, the disc will become
unplayable without the password.
To unlock, repeat the steps and select [Yes] in step 2.
Notes
• You will need the password for playback as well as for unlocking the
disc.
• Do not forget the password, as the password setting cannot be cleared
without the password.
• Do not forget the password. The password will be required when you
play the locked BD-RE/BD-R again on the server.
• When [Standby Mode] is set to [Standard], the disc may play without
the password if you turn off the power after unlocking the disc.
4.4/4.7GB
LP
XP
EP
SP
Disc Information
Disc Name
Media
Title Total
Rec Date
Remaining
DVD-RW Format Video
2
7/13/2007
Recordable
Time
: 0H59M : 1H59M
: 4H01M : 5H56M
Name Input
Finalize
DVD Menu
Format
RETURN
Finish
Close
Protect
Set protection for this disc.
OffOn
Disc Lock Settings
Currently the disc is not locked.
Do you want to set a password and lock the disc?
NoYe s
Set Password
The disc will be locked so the content cannot be
viewed. Set the password required to operate.
Operation will not be possible if you forget the
password.
- - - -
Cancel
OK
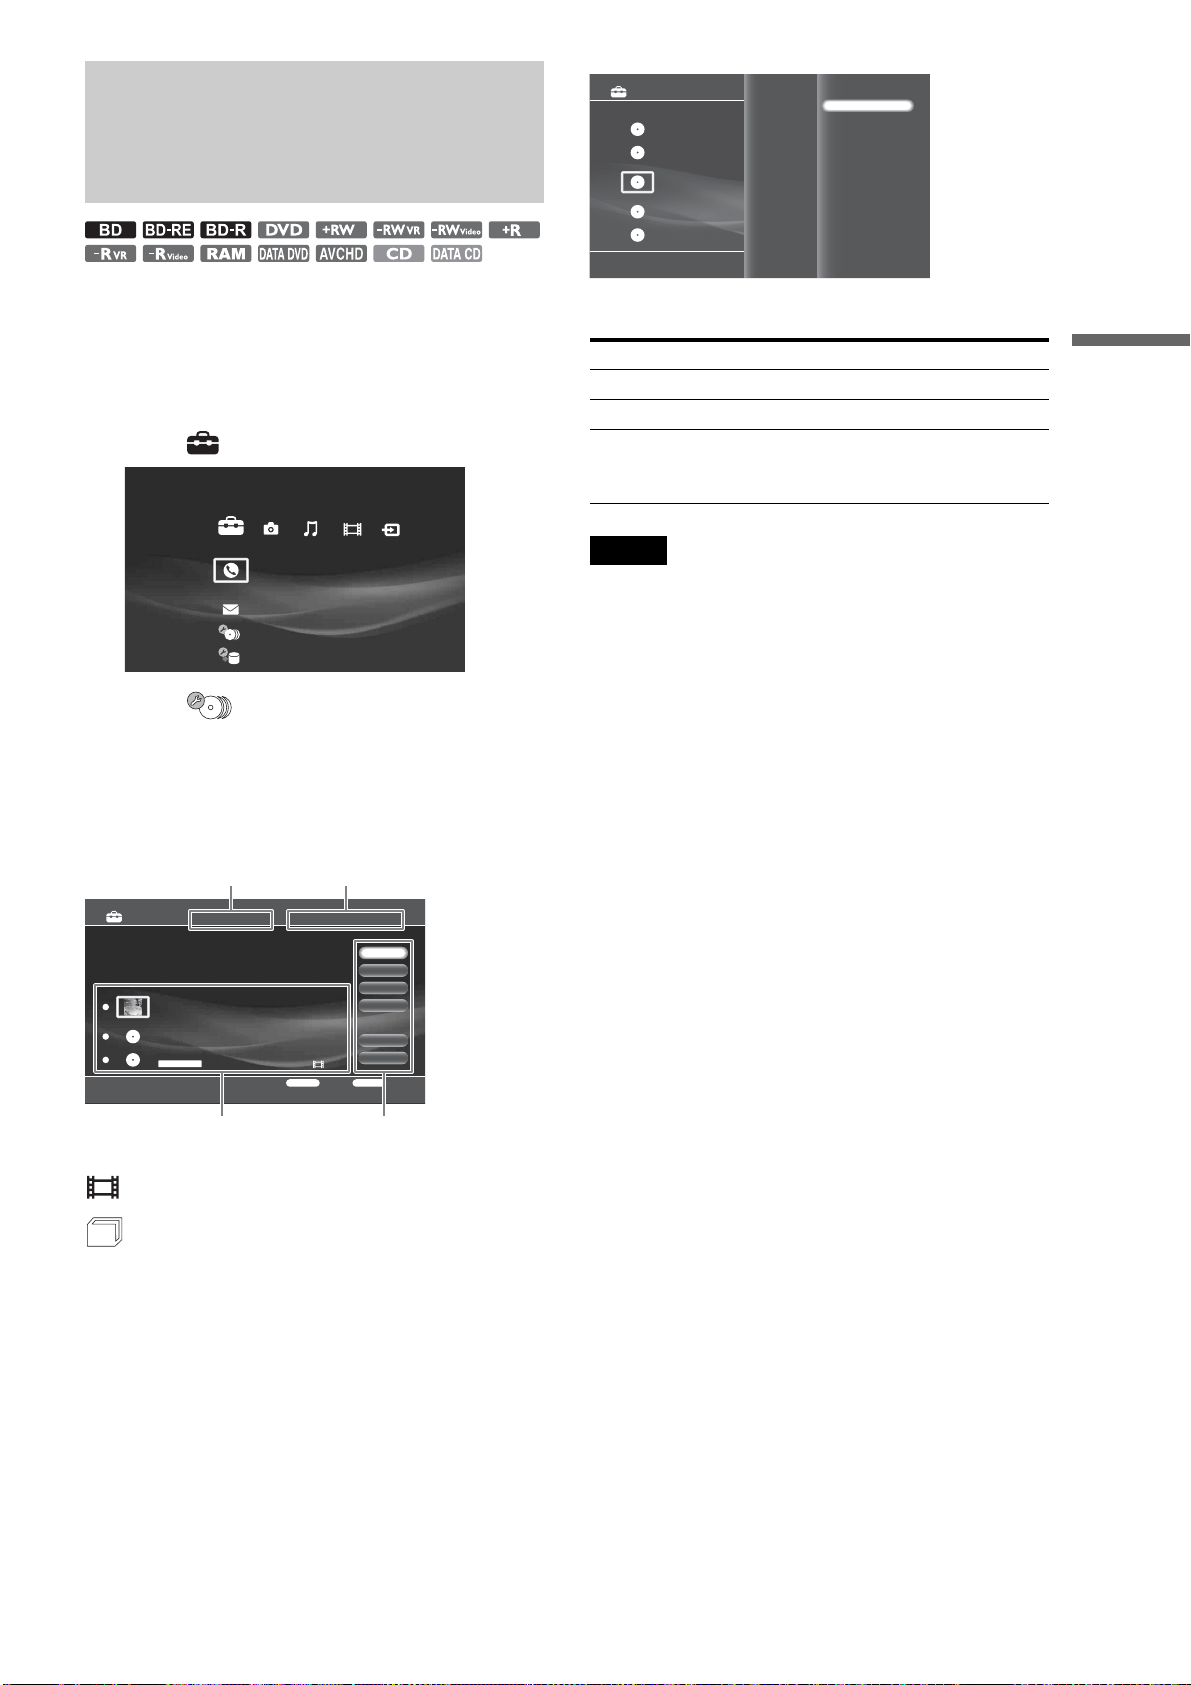
35
Inserting/Removing Discs and Memory Cards
Managing Discs
In Disc Manager, you can view the list of discs in the changer
and apply settings to discs.
a Press HOME to turn on the Home Menu.
b Select to display the setup options.
c Select (Disc Manager) and press
ENTER.
The Disc Manager display appears with one of the
disc listings: [Loaded Disc], [Blank Disc],
[Unreadable Disc], or [Unknown Disc].
◆Example: Loaded Disc List
◆About icons on the content display area
: Video is recorded.
: Music or photo data are recorded.
To switch to another list
1 After step 3, press OPTIONS.
The Options menu appears.
2 Select [View by Group] and press ENTER.
3 Select the list name.
Note
Discs that contain no data will be assigned to [Loaded Disc] after being
formatted.
◆To select all discs
Select [Select All].
◆To cancel all discs
Select [Clear All].
◆To exit Disc Manager
Select [Close].
◆To eject discs
Select the discs and press ENTER. Then select [Eject]. The discs
will be ejected in turn.
◆To view disc information or apply settings
Select a disc, press ENTER, and select [Information]. The disc
information display appears (see page 33).
◆To format a disc
Select a disc, press ENTER, and select [Format Disc] (page 93).
◆To register disc information
Select [Load]. Depending on the disc type, the server accesses
the AMG database for disc information and saves it.
z Hint
Some settings and operations may not be available depending on the
types of discs in the changer. For example, the Loaded Disc list provides
all settings except [Load] while it is selectable on the Unknown Disc list
for multiple discs.
Call Guide
Settings
Disc Manager
[Loaded Disc] 3 Discs
Select a disc.
Eject
Information
Formal Disc
Select All
Clear All
RETURN
Finish
OPTIONS
Function
Number of Stored Disc 3 Discs
The Best of Cinnamon roll
Paddy bird
Disc 3
DVD
Slash [Blu-Ray]
D:Paul Bullock C:Sandra Haggis, Don Dillon, Matt Cheadle
Close
Disc TotalList name/listings
Recorded content list area Selectable items
Loaded Disc – All registered discs in the changer.
Blank Disc – Unformatted discs.
Unreadable Disc – Error discs.
Unknown Disc – Discs that have not been registered yet.
The listings will move to the Loaded Disc
list after disc registration.
Close
Eject
Informathion
Formal Disc
Select All
Cancel All
Disc Manager
[Loaded Disc] 9 Discs
Select a disc.
Number of Stored Disc 10 Discs
RETURN
Finish
OPTIONS
Function
Loaded Disc
Blank Disc
Unreadable Disc
Unknown Disc
View by Group

36
Inserting Memory Cards
Insert the memory cards as follows.
a Touch MEMORY CARD OPEN/CLOSE on
the front panel.
The front panel opens to reveal the card slots.
b Insert the memory card into the
corresponding memory card slot.
The indicator for the inserted memory card lights up
on the top panel.
Note that:
– With a Memory Stick or an SD memory Card, push the card until it
clicks.
– When removing a CF card later, press the button beside the slot.
c Touch MEMORY CARD OPEN/CLOSE to
close the front panel.
z Hint
See “Supported memory card types” (page 151) for supported memory
cards.
Notes
• Do not remove or insert memory cards while the Memory Stick/CF/
SD/xD-Picture Card LED indicators are flashing as the cards are being
accessed.
• Be sure to insert the memory card into the corresponding slot. Inserting
a wrong card may cause a malfunction.
Notes about “Memory Stick” card slot
• This server is equipped with a system which automatically
measures the size of an inserted Memory Stick media. This
way both standard-size “Memory Stick” and smaller “Memory
Stick Duo” can be used on this product without any Memory
Stick Duo Adaptor.
• Do not insert two or more pieces of media at the same time. It
might cause damage to the product.
• Check the orientation before use.
• When you use “Memory Stick Micro” (“M2”) on this product,
please make sure to attach the media into an M2 Standard-size
Adaptor or M2 Duo-size Adaptor.
• If you attempt to insert a “Memory Stick Micro” without
attaching to the M2 adapter, there is a possibility that it cannot
be pulled out.
• “Memory Stick Micro” may not operate properly when the
media is put into M2 Duo-size Adaptor and then inserted into
a Duo Adaptor. Use only one adaptor.
• “Memory Stick Duo”, “Memory Stick Micro”, “M2 Duo-size
Adaptor” should be kept away from small children to prevent
them from accidentally swallowing the the media and the M2
Adaptor.
M.S. SD xDCF
CF xD-Picture CardSD
DISC
OPEN/CLOSE
MEMORY CARD OPEN/CLOSE
xD-Picture Card
miniSD Card
SD Memory Card
CompactFlash Card
MicroDrive
Memory Stick Duo
Memory Stick

37
Inserting/Removing Discs and Memory Cards
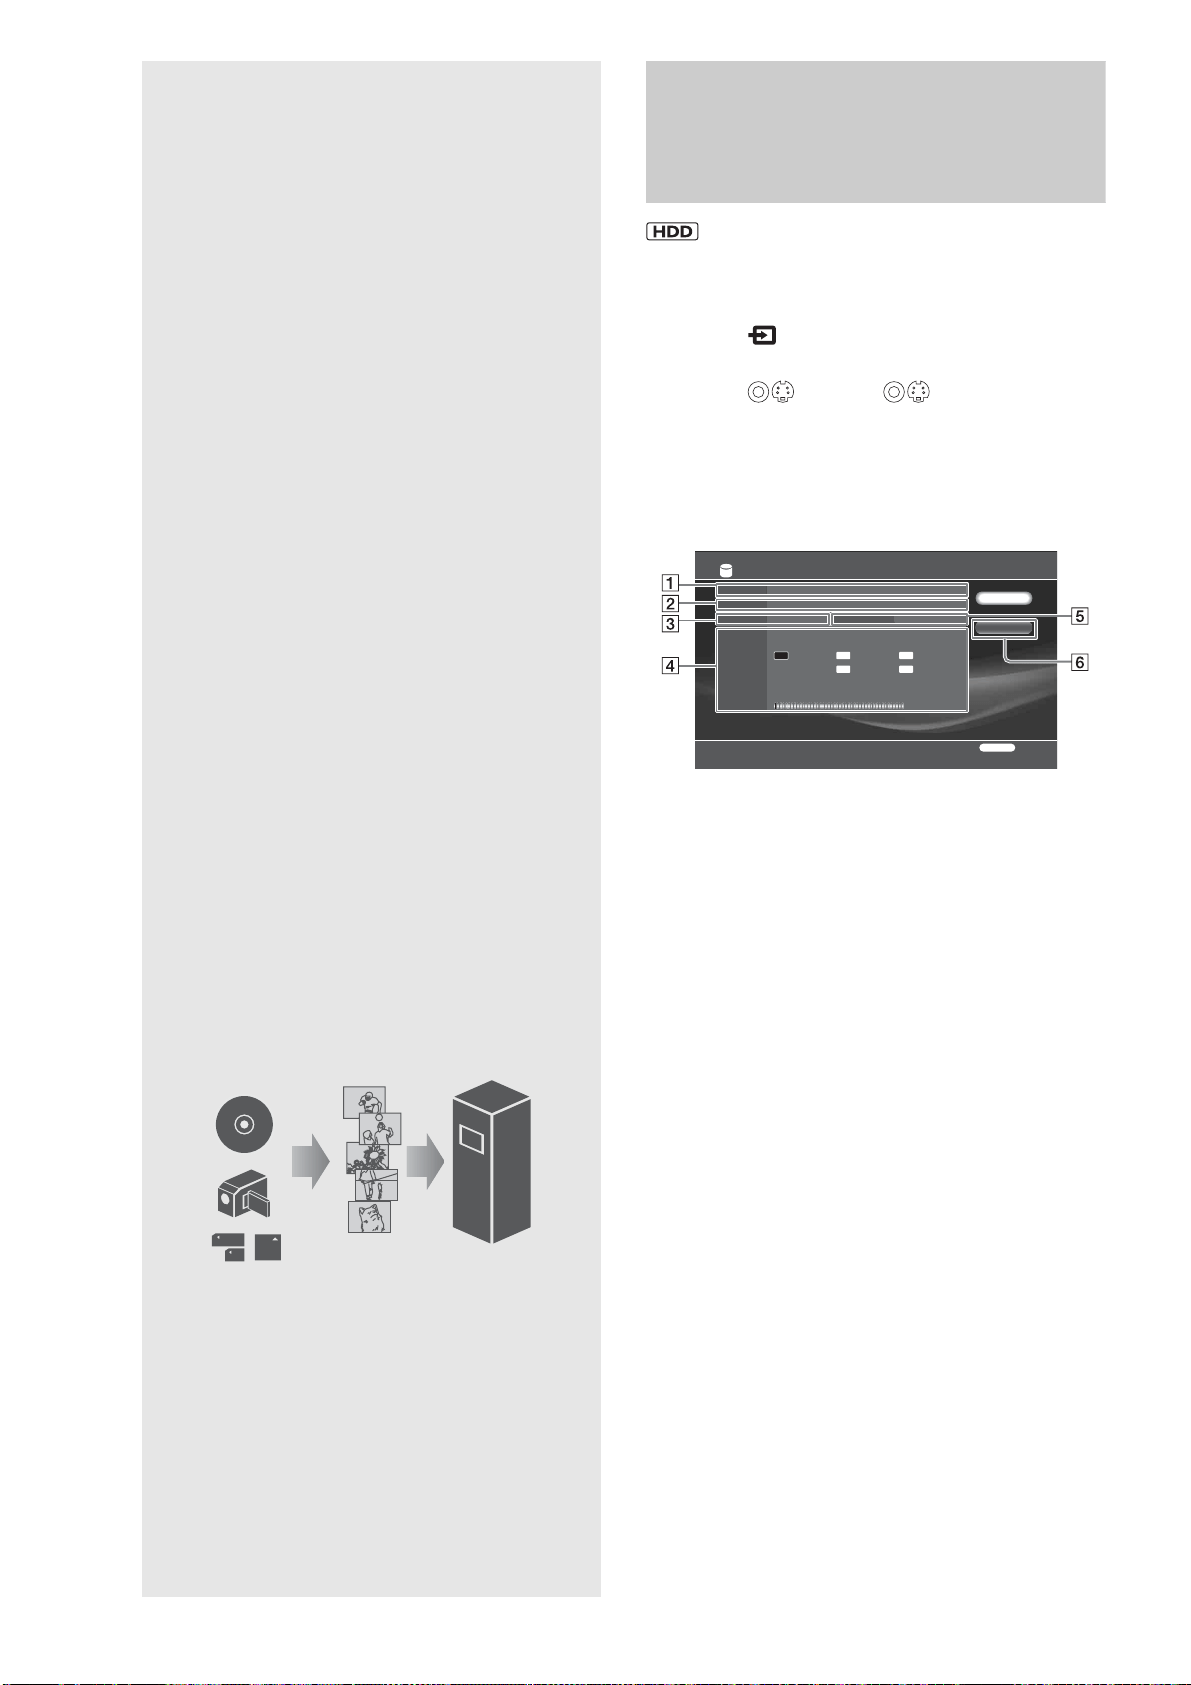
38
Importing
to HDD
Checking the HDD
Information
a Press HOME to turn on the Home Menu.
b Select to display the icons.
c Select (Line1), (Line2) and press
ENTER.
d Press OPTIONS.
e Select [HDD Information] and press ENTER.
A Media
Disc type
B Title Total
Original title total/Playlist title total
C Albums
Number of photo albums
D Remaining (approx)
• Bar indicator for HDD capacity
• HDD remaining capacity/total capacity
• Possible continuous recording time
E Files
Number of photo files
F Erase All
Erases all titles except the protected titles on the HDD.
Music files and photo files will not be erased.
HDD
Original 24 / Playlist 9
Media
Title Total
Remaining
15
: 35H11M : 55H39M
: 216H55M
: 109H22M
: 432H20M
388.1/400GB
LR
XR
ER
SR
DR
HDD Information
Close
Erase All
FilesAlbums 3
RETURN
Finish
• Checking the HDD Information. . . . . . . . . . . . 38
• Importing Videos . . . . . . . . . . . . . . . . . . . . . . 39
• Importing Photos . . . . . . . . . . . . . . . . . . . . . . 42
• Importing Music. . . . . . . . . . . . . . . . . . . . . . . 45
• Transferring Music Files From PCs. . . . . . . . . 49
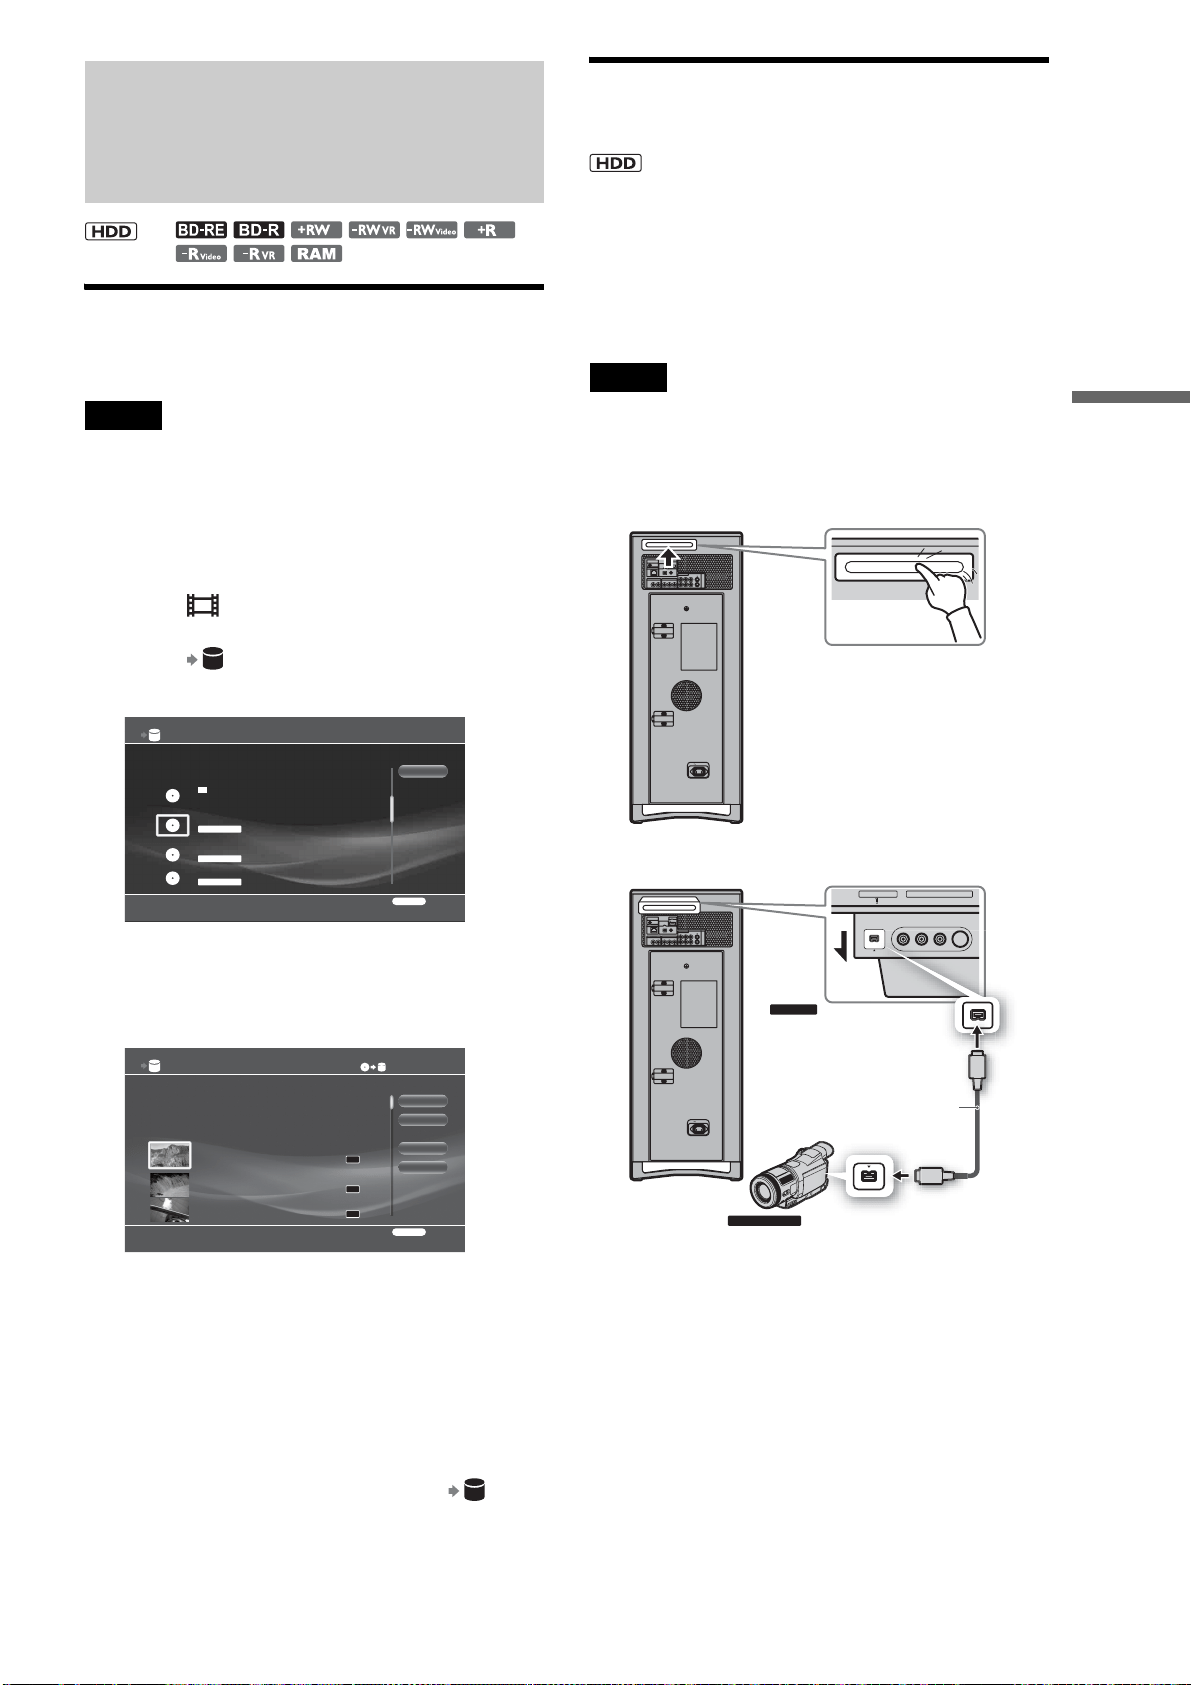
39
Importing to HDD
Importing Videos
Importing videos from discs
You can import video titles recorded on discs. The server
supports the BDAV format content.
Notes
• You cannot import from discs recorded in AVCHD format.
• The server does not support the BDMV format (one of the Blu-ray Disc
specifications). You cannot import BDMV format content edited on
PCs, or copy such content from the HDD to a disc.
a Press HOME to turn on the Home Menu.
b Select to display the icons.
c Select to import and press ENTER.
The disc selection display appears.
d Select a disc to import from and press
ENTER.
The title selection display appears.
e Select titles to import (30 titles max to be
copied at a time to HDD) and press ENTER.
The titles are numbered in the selected order.
• To cancel all selections, select [Clear All].
• To make detailed settings for import, select [Settings].
f Select [Start] and press ENTER.
Import continues even if you turn off the server.
To check progress, press HOME, select and
press ENTER.
Importing videos from HDV/DV
camcorders
When you connect a digital camcorder to the HDV 1080i/DV IN
jack on the server and start importing, the server rewinds the
HDV/DV tape to the beginning and copies the entire tape.
If the camcorder is compatible with HDV format (1080i), you
can import the HD (High-Definition) quality videos to the HDD
with no deterioration. See also your camcorder’s manual for
details.
Note
Time required for import differs depending on the content and the
format.
To prepare for import
1 Press PUSH/OPEN on the rear of the server.
The retractable jack and control panel pops open.
2 Connect the camcorder’s HDV/DV output jack
(i.LINK jack) and the server’s HDV 1080i/DV IN
jack.
<
0.0GB
Title Import - Select Disc
Number of Titles:7
7/ 6/2007 - 7/13/2007
Number of Titles:2
Select the source disc.
Cancel
RETURN
Finish
BD-RE
7/13/2007
Number of Titles:0
DVD-RW VIDEO
Unknown disc. Load now.
Blank(Formatted) Disc 4
DVD-R VR
?
Title Import
Select the title.
Start
Finish
Settings
Clear All
RETURN
Finish
Remaining:385.5GB0.0GB
DR
DR
DR
HDV 7/13/2007 3:34PM - 7/13/2007 3:35PM
7/13/2007 3:34PM ( 0H01M) HDV
ORG
HDV 7/13/2007 3:34PM - 7/13/2007 3:35PM
7/13/2007 3:34PM ( 0H01M) HDV
ORG
HDV 7/13/2007 3:34PM - 7/13/2007 3:35PM
7/13/2007 3:34PM ( 0H01M)
ORG
PUSH/OPEN
CONTROL S IN/
IR IN
HDMI OUT
COMPONENT VIDEO OUT
AUDIO OUT
R
R-AUDIO-L VIDEO
LINE
IN 1
OUT
S VIDEO
YP
B PR
LAN
(
10/100
)
COAXIAL
DIGITAL OUT
PCM/DTS/
DOLBY DIGITAL
L
OPTICAL
AC IN
PUSH/OPEN
PUSH
CONTROL S IN/
IR IN
HDMI OUT
COMPONENT VIDEO OUT
AUDIO OUT
R
R-AUDIO-L VIDEO
LINE
IN 1
OUT
S VIDEO
YP
B PR
LAN
(
10/100
)
COAXIAL
DIGITAL OUT
PCM/DTS/
DOLBY DIGITAL
L
OPTICAL
AC IN
PUSH/OPEN
S VIDEO VIDEO L(MONO) AUDIO R
LINE IN 2 HDV 1080i/DV IN
to HDV/DV output jack (i.LINK jack)
OPEN
OPEN
OPEN
to HDV 1080i/DV IN jack
CAMCORDER
SERVER
i.LINK cable
(not supplied)
,continued
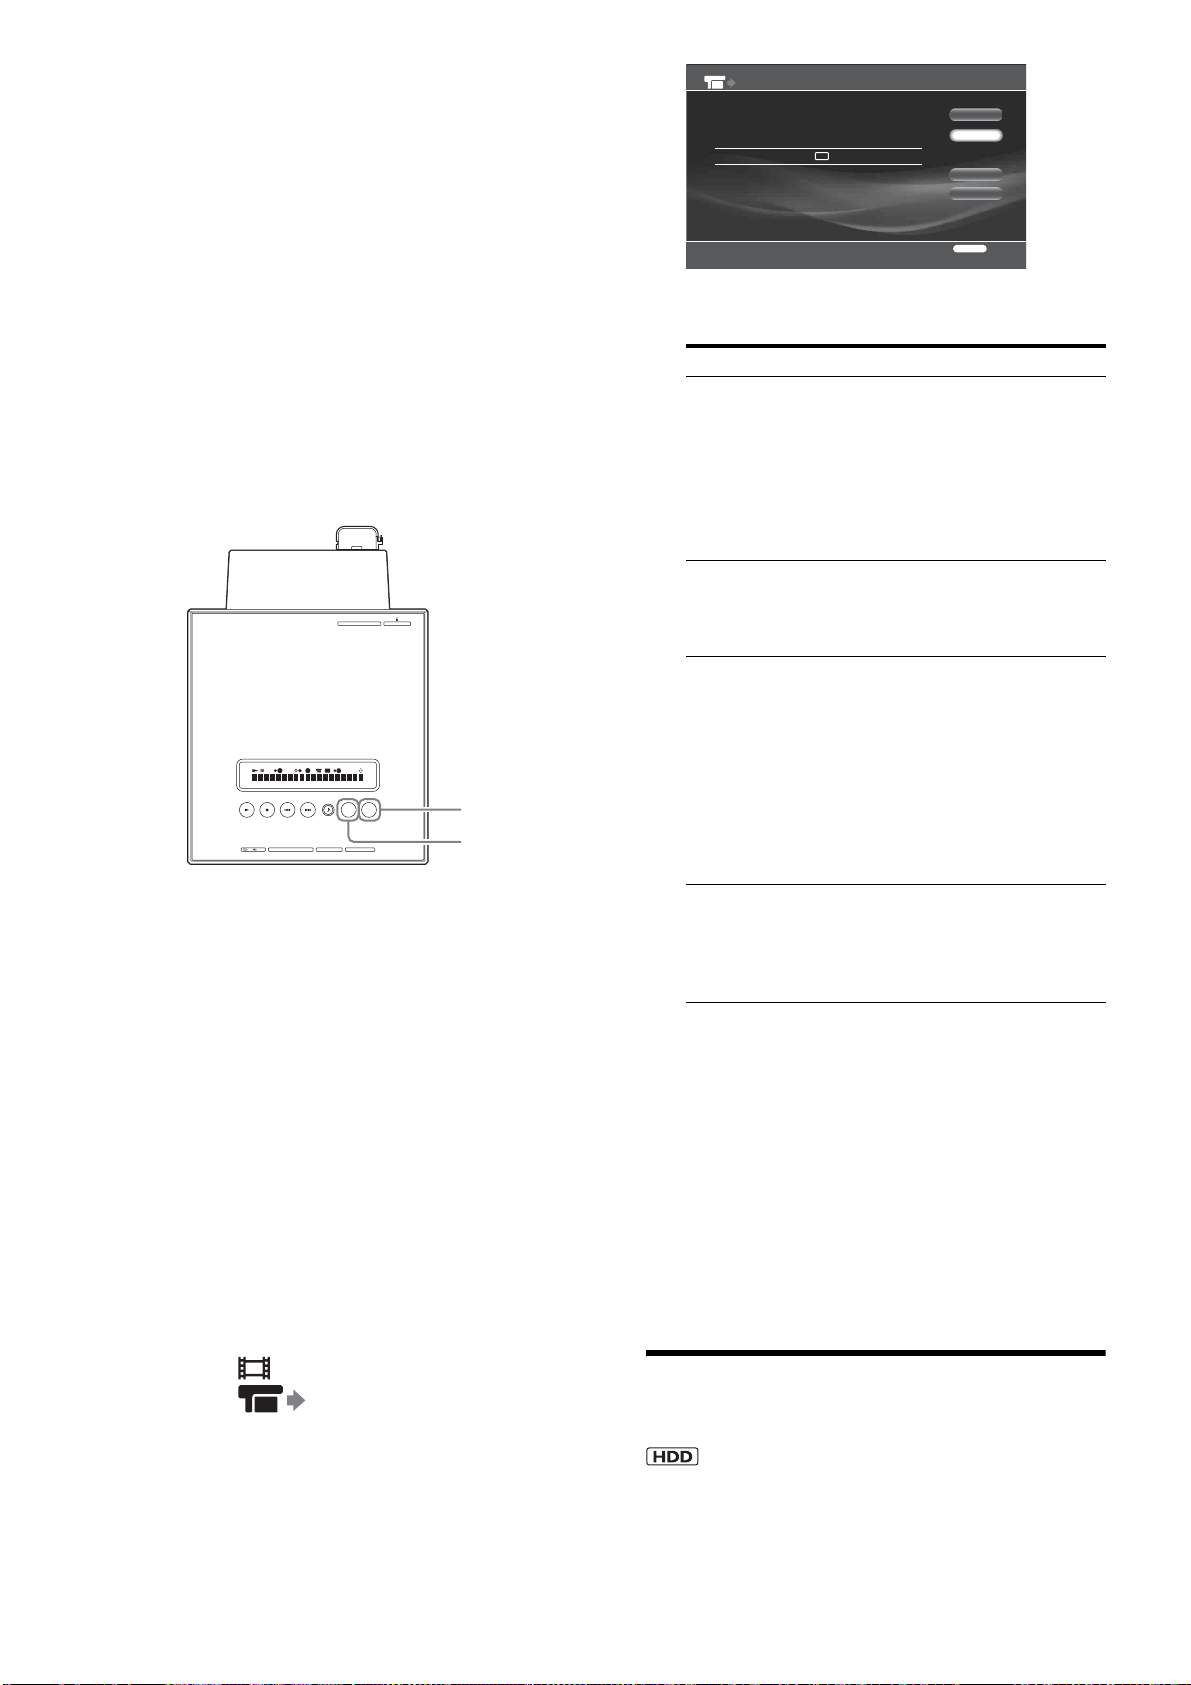
40
◆To record from the HDV1080i/DV IN jack
Since the HDV1080i/DV IN jack complies with the i.LINK
standard, the jack can record digital signals from other i.LINK
devices. For more information about i.LINK, see page 145.
The server supports the following formats:
– DV format
– HDV format (1080i)
z Hint
You can edit the content after importing videos to the HDD (page 79).
To import using the IMPORT button on the top
panel (One-Touch Import)
1 Insert an HDV/DV format tape to the camcorder.
Set the camcorder to playback mode when editing or
recording on the server’s side. Playback operations
such as rewind, etc., on the camcorder are
unnecessary.
2 Touch IMPORT SELECT on the top panel until
“HDV/DV” appears on the top panel display.
3 Touch IMPORT.
You can use the remote's IMPORT button instead.
z Hints
• The following setting items are available in [Import Settings]. Press
HOME and select [Settings] – [Import Settings] (page 111):
– Recording signals in [HDV/DV import Settings] ([HDV] or [DV])
– Recording mode for DV signals ([XR], [SR], [LR], or [ER]). See
page 150 for recording modes.
– For details about Playlist creation and Playlist titles, see page 79.
To import from a camcorder using the Home
Menu
1 Insert an HDV/DV format tape to the camcorder.
Set the camcorder to playback mode when editing or
recording on the server’s side. Playback operations
such as rewind, etc., on the camcorder are
unnecessary.
2 On the server’s remote, press HOME to turn on
the Home Menu.
3 Select to display the icons.
4 Select (HDV/DV Import) and press
ENTER.
The HDV/DV import display appears.
5 Press <, to select each of the following items,
and select a setting by pressing Mm.
6 Select [Start] and press ENTER.
◆How a title is divided into chapters
When recording from HDV/DV tape to the HDD, each shooting
becomes one chapter.
Or, chapters are made as set in [Auto Chapter Mark] (page 111).
◆To stop importing
Press IMPORT.
Or press OPTIONS, select [Stop Import] and press ENTER.
Then select [Yes] on the confirmation screen and press ENTER
again.
Note that pressing x will not work and that when [Playlist
Settings] is set to [Create Video Title], it may take more than five
minutes before import is stopped.
Importing videos from external
devices
You can record videos from a tuner or a VCR when they are
connected to the server.
If you are connecting a camcorder, use the HDV1080i/DV IN
jack (see “Importing videos from HDV/DV camcorders” on
(page 39).
CF
STD/DUO
xD-Picture CardSD
IMPORT
IMPORT
SELECT
LINE IN 2
S VIDEO VIDEO R AUDIO L
(
MONO
)
HDV 1080i/DV IN
IMPORT
IMPORT SELECT
Items Settings
HDV/DV [DV] will be automatically selected when
a DV device is connected. If you connect
an HDV device, manually select [HDV]
or [DV] according to the signal to import.
• HDV: Select this when recording
signals recorded in HD quality.
• DV: Select this when importing
conventional DV signals to HDD.
Rec Mode Select from [XR], [SR], [LR], [ER]. This
setting is fixed to DR when importing
from HDV devices.
See page 150 for recording modes.
Audio Settings
(for DV only)
Select the audio input setting and press
ENTER. The default setting is [Stereo 1].
• [Stereo 1]: Records the audio signals
that are originally recorded.
Select this for DV tapes.
• [Mix]: Record both Stereo 1 and 2.
[Stereo 2]: Records only the audio
added after the shooting.
Select [Mix] or [Stereo 2] only when
you added audio after the shooting.
Playlist Settings Select if you want to make a Playlist title
for each recording date.
Up to 30 Playlist titles can be made in one
import, and a Playlist title can contain up
to 99 scenes.
XR
HDV/DV Import
Connected Device
HDV/DV
DV
Rec Mode
Recorded Audio: Stereo 1
HDD Free Space: 384.4GB [ 55H07M]
Create Playlist by Date: No
Start
Finish
Audio Settings
Playlist Settings
RETURN
Finish

41
Importing to HDD
a Press HOME to turn on the Home Menu.
b Select to display the icons.
c Select from Line1, Line2, HDV, or DV
according to the connection and press
ENTER.
Video content from the external device appears.
d Press OPTIONS to display the Options
menu.
e Set the connected device to playback pause
mode.
f Select [Import to HDD], and then press the
play or pause button on the external device.
To stop recording, press OPTIONS and select [Stop
Import].
z Hints
• You can adjust the video quality and the size before recording
(page 60).
• When using the IMPORT button on the server, you can select the
recording mode. Press HOME, and select [Settings] – [Import
Settings] – [External Input Rec mode] ([XR], [SR], [LR], or [ER]).
Notes
• You cannot turn off the power during import.
• The HDD records up to 300 titles. Although the actual number may be
lower depending on the use.
• A title that exceeds eight hours cannot be imported.
• Any video titles from the HDD cannot be copied to a BD-R/BD-RE if
the total playback time of the selected titles exceeds 12 hours.
• Import from a commercially available BD-ROM or a DVD VIDEO is
not allowed.
Playing data while it is being recorded
(Chasing playback)
a Press HOME to turn on the Home Menu.
b Select to display the icons.
c Select the input currently being imported,
and press OPTIONS.
The Options menu appears.
d Select [Chasing Playback] and press ENTER.
Notes
• Playback picture pauses if you catch up the point of current recording.
• The function become available one minute after the recording has
started.
Group names for imported video titles
On the Home Menu, imported video titles are grouped as below.
Notes about Importing Videos
• Connection to Sony DV/Digital8 format camcorders and Sony
digital HD camcorders has been confirmed. MICROMV
format camcorders cannot be connected to the server’s i.LINK
jack as their i.LINK jack differs in signal format. Use an S
VIDEO jack or an audio/video jack for connection.
• HDV/DV import is not available when the server is importing
or copying.
• The HDV 1080i/DV IN jack on the server is for input only. No
signals can be output.
• You cannot use the HDV 1080i/DV IN jack when:
–The output jack on the digital video camera is not compatible
with the HDV 1080i/DV IN jack on the server. Connect the
device to the LINE IN jack, and follow the steps in
“Importing videos from external devices” (page 40).
–The recordings on the tape contain copy protection signals.
• The server is not interoperable with other i.LINK devices or a
server of the same model.
• Data in the cassette memory of the tape are not recorded.
• Importing and copying will end if the tape contains a blank that
lasts five minutes or more.
• When importing from DV devices, the server records the blank
section on the DV tape for five minutes before finishing
recording. To stop importing, press IMPORT. When importing
from HDV devices, no blank section will be recorded.
• If the picture configuration is changed midway or a blank is
contained on the source data, the imported or copied content
may be affected.
• Check that the clock of the digital camcorder is correctly set. If
incorrect, Playlist making and Auto Chapter Mark function
will not work for HDD import.
• The dated Playlist function may not work properly if the tape
contains blanks, or data mixed with HDV and DV signals.
• The imported/copied pictures and sound may be interrupted
momentarily, when the source data is:
– Recorded in multiple recording modes.
–Contains multiple picture configurations.
–Contains blanks.
– Contains both HDV and DV signals.
Categories Details
“x-Pict Story” Video titles created from “x-Pict Story
HD” (or its Playlist titles).
Personal Video Includes video titles imported from discs
or external devices via the LINE 1/LINE
2, or DV/HDV input jacks. (Playlist titles
also belong to this group).
Categories Details
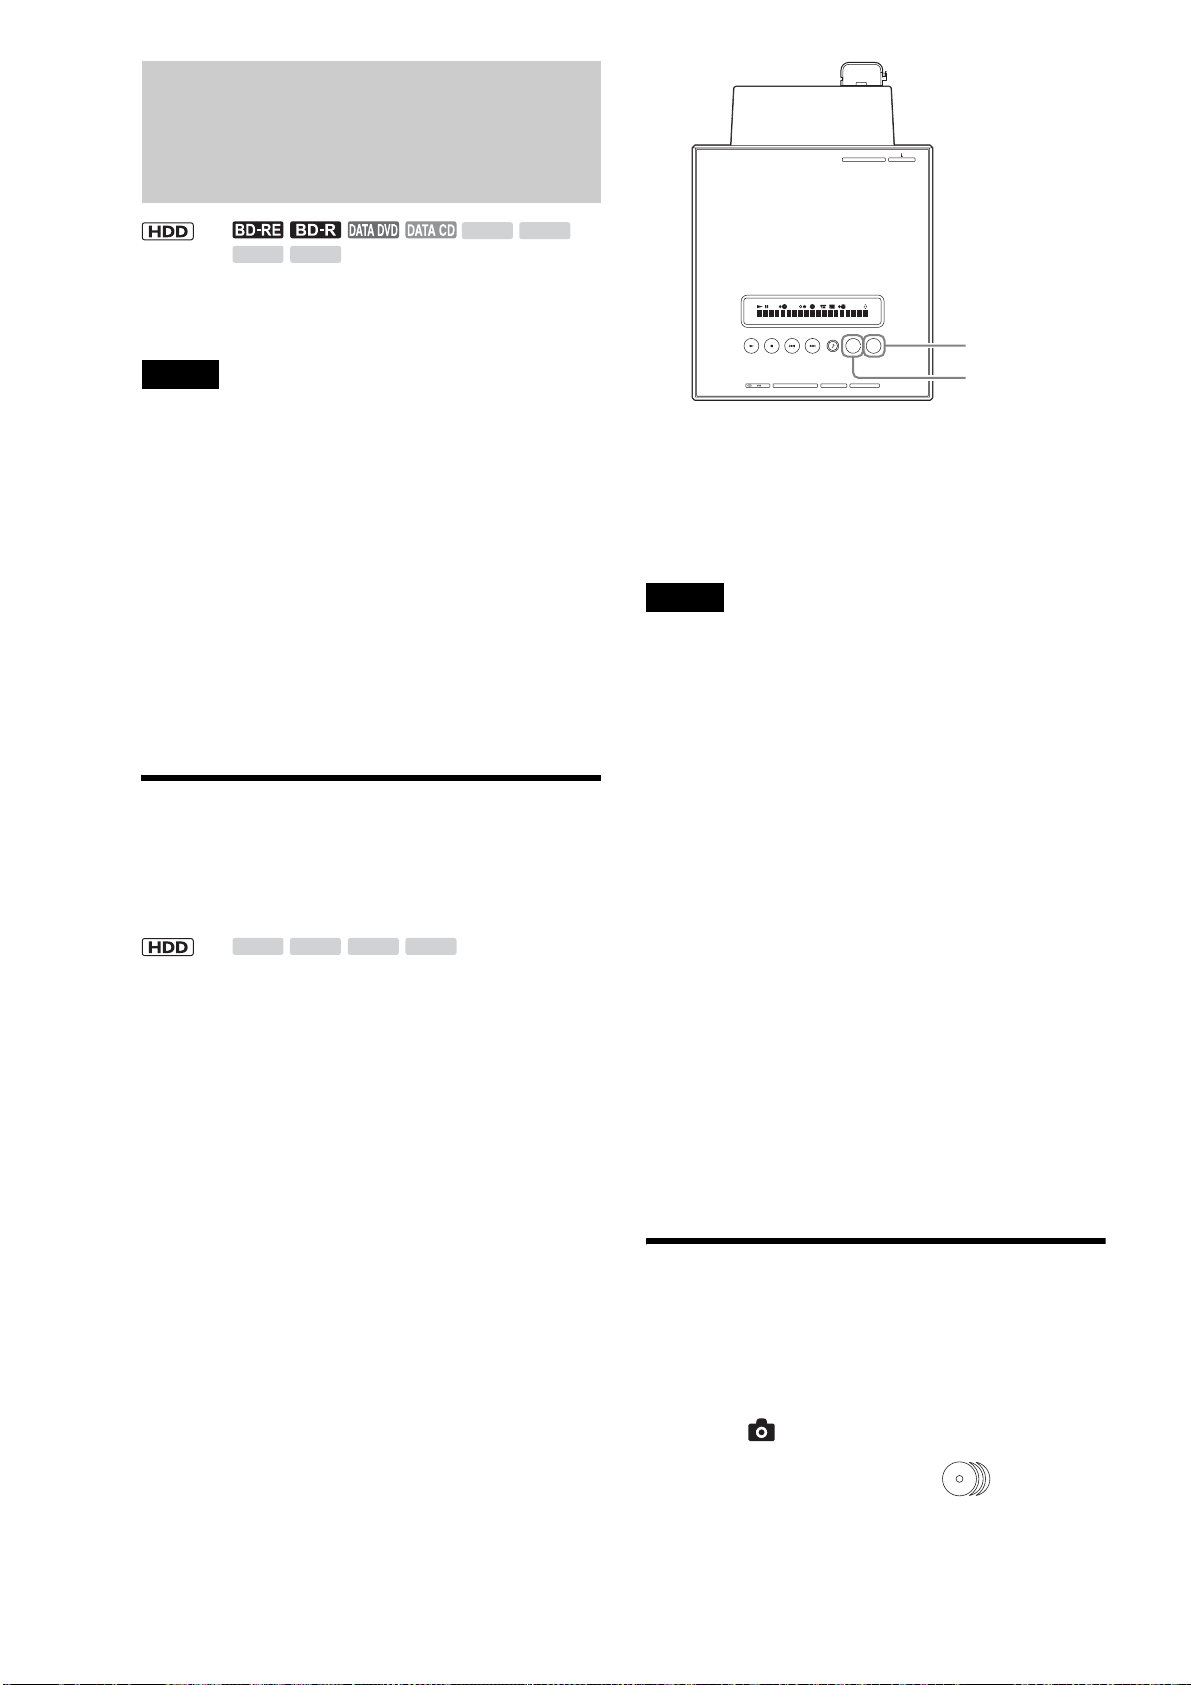
42
Importing Photos
z Hint
You can turn off the server by pressing \/1 during photo import. The
operation continues even when the power is off.
Notes
• Do not eject a memory card while its card indicator is flashing. The
data may be damaged.
• The server recognizes files saved on up to the 4th layer (the root disc
and memory card are the 1st layer).
• Up to 500 files can be imported to the HDD at one time.
• If you import more than 200 photos to the server at one time, the server
groups each 200 photos into a folder. The server can accommodate a
maximum of 20,000 files.
• If more than 500 files (including files other than JPEG format) are
contained in a folder, some files and folders may not be displayed.
• Some files may not be displayed if more than 4,000 files (including
files other than JPEG format) are contained in a folder on a single
DVD/CD (except BDs).
• If the file name overlaps with an existing file name on the destination
disc, the imported file name will be numbered with a suffix, (1), (2),
etc. Also, since file names are limited to 16 characters, if files you are
copying have longer names, the server recognizes them having the
same name and numbers them with a suffix.
Importing all content from memory
cards (One-Touch Import)
Insert your Memory Stick, SD memory Card, CompactFlash
card, or xD-Picture card into the server. The import procedures
are as follows.
a Touch MEMORY CARD OPEN/CLOSE on
the unit.
The front panel opens to reveal the memory card
slots.
b Insert a memory card into the corresponding
card slot.
The indicator(s) for the inserted card type lights up
on the top panel.
c Touch IMPORT SELECT on the unit
repeatedly until the card type appears on the
display window.
d Touch IMPORT on the unit.
You can use the remote’s IMPORT button instead.
To stop importing halfway, touch IMPORT again.
z Hint
Imported folders are named automatically. To rename, see page 90.
Notes
• Photos are imported only from memory cards. (Files located up to the
3rd layer of the DCF compliant DCIM folder.)
• The IMPORT button does not work while importing from other media
is in progress.
• During import, the server creates a new folder for each 200 photo files.
This grouping applies even when the files are grouped differently in the
source memory card.
• Do not remove a memory card while its card indicator is flashing. The
data may be damaged.
• Auto Grouping at the time of import is performed according to the
settings made in [Settings] – [Import Settings] – [Auto-Group to
Albums] ([On] or [Off]).
• When the source contains more than 3,000 files, only the first 3,000
files are imported.
• When the folders in the source memory card contain more than 500
files, only the first 500 files are imported.
• The server retains up to 900 photo folders (DCF) on the 3rd layer of the
Home Menu. No further import can be performed beyond this limit.
• Auto Grouping* will be canceled if it results in a folder containing
more than 200 files. Files are imported without being grouped.
• If the destination folder contains a file of the same name, the server
adds a number to the end of the file name before importing (e.g.,
“….1”,“….2”,etc.).
• When the Auto Grouping function is not used, the imported photo
folder will have the same folder name as the first folder in the source
DCF folder.
• One-Touch Photo Import may not work while the server is performing
other operations.
* Auto Grouping (or Clustering) refers to automatic grouping of photos
in a folder by events.
Importing an album
The server displays file folders of discs and memory cards as
albums.
a Press HOME to turn on the Home Menu.
b Select to display the icons.
c Select the media to import, (Photos) or
a memory card icon and press ENTER.
M.S.
SD xD
CF
<
M.S. SD xDCF
<
CF
STD/DUO
xD-Picture CardSD
IMPORT
IMPORT
SELECT
LINE IN 2
S VIDEO VIDEO R AUDIO L
(
MONO
)
HDV 1080i/DV IN
IMPORT
IMPORT SELECT
43
Importing to HDD
d Select or a folder to import and press
OPTIONS.
The Options menu appears.
e Select [Import] and press ENTER.
A message appears asking if you want to auto-group
the photos in the album by events.
f Select [Yes] and press ENTER.
If you do not want to auto-group photos, select [No].
g On the confirmation screen, select [Yes] and
press ENTER.
All photos are intelligently grouped by events
according to the shooting date and time.
Importing a photo
a Press HOME to turn on the Home Menu.
b Select to display the icons.
c Select the media to import, (Photos) or
a memory card icon and press ENTER.
d Select or a folder and press ENTER.
e Select a photo to import and press
OPTIONS.
The Options menu appears.
f Select [Import] and press ENTER.
g On the confirmation screen, select [OK] and
press ENTER.
To import to a new album, select [New Album].
h Select the destination album and press
ENTER.
Importing multiple photos
a Press HOME to turn on the Home Menu.
b Select to display the icons.
c Select the media to import, (Photos) or
a memory card icon and press ENTER.
The album selection display appears.
d Select or a folder and press ENTER.
The photo thumbnails appear.
e Press OPTIONS.
The Options menu appears.
f Select [Still Pictures] – [Import Multiple] and
press ENTER.
The file selection display appears.
g Select photos to import and press ENTER.
A check mark appears next to the selected photo.
To select all photos, select [Select All].
To cancel all selections, select [Clear All].
h Select [OK] and press ENTER.
i Select a setting in [Auto-Group to Albums]
and press ENTER.
j Select [Yes] and press ENTER.
k Select the destination album and press
ENTER.
About DCF
DCF is the abbreviation for “Design rule for Camera File
System”.
It is the standard that has been regulated by Japan Electronic
Industry Development Association, or JEIDA, to promote
environments mainly for users to easily utilize image files, such
as ones from digital still cameras, among related products. DCF
standards, however, do not guarantee complete compatibility
among products.
Notes about photo files
• Photos edited on PCs may not be playable.
• Voice Memo is not supported.
• Some photos may be slow to appear, and may be slower when
the following operations are performed if there are many
Cinnamon roll
Slideshow
Import
Information/Settings
Slideshow Pace
Import Multiple Disks
RETURN
Finish
0.0GB 388.1GB
View
Slideshow
Import
Information/Settings
Still pictures
Slideshow Pace
Cinnamon roll
6/ 3/2007 4:00PM
JPG
Import Multiple Disks
RETURN
Finish
0.0GB 388.1GB
View
Slideshow
Import
Information/Settings
Still pictures
Slideshow Pace
Cinnamon roll
6/ 3/2007 4:00PM
JPG
,continued

44
photos (files). Since it is not a malfunction, do not turn off the
power while:
–displaying thumbnails*
–playing a slideshow
* Thumbnails may appear slowly depending on the photo size and the
location saved.
• When viewing a photo shot with 16:9 (HDTV size) setting on
a TV, black bands may appear on the top, bottom, left, and right
of the photo. See [Video Output Aspect Ratio] (page 112) and
change the server’s output aspect ratio setting to 16:9. To
change the viewing mode setting, see your TV’s manual.
Supported discs and photos
• The server plays JPEG image files that conform to the DCF*
image file format.
* “Design rule for Camera File system”; Image standards for digital
cameras regulated by JEITA (Japan Electronics and Information
Technology Industries Association).
• Some functions may not work correctly for JPEG images that
do not conform to DCF format (still images edited with a PC,
etc.).
• Thumbnails will not appear on the list and the file will not play
if the size is larger than 10 MB.
• Thumbnails may appear slowly if the file size is large.
• The following files appear on the photo list display but cannot
be played or imported to the HDD.
– JPEG files whose size is 4,097 x 6,145 dots or more.
– JPEG files whose size is 15 dots or less.
– Progressive JPEG files.
• Files will not be displayed on the photo list nor played.
– BD-REs/BD-Rs recorded in a format other than UDF 2.5.
• Discs may not play depending on their condition.
Notes about photo import to the HDD
• When a folder is selected for import, only the photos directly
under the folder can be imported. Any subfolders and photos
within the subfolder will not be imported.
• Photos may not be displayed if the memory card contains files
other than photo files.
• The server imports up to 500 photos to the HDD at one time.
When the IMPORT button is used, up to 3,000 files can be
imported (only JPEG files of DCF format will be imported).
• If more than 200 photos are imported at one time, the photos
are grouped into folders and saved on the HDD. The server can
accommodate up to 20,000 files.
• With photos captured from digital video cameras, the date
information is the shooting date of the original video title when
captured from HDV video, and the date of import when
captured from DV videos.
• Import of one photo file takes about ten seconds. It may take
more than 30 minutes for the server if many photos are
imported at one time.
• When the destination album on the HDD has a photo of the
same name, a number will be added to the name of the
imported photo ((1), (2)…). Since the number of characters is
limited to 16, if many photos have similar long names with
differing affixes, they may be named the same with differing
numbers.
Location of files and folders
When directly under the root (removable media itself) is 1st
layer, the server recognizes data saved up to 4th layer.
Notes on importing files and folders from discs
and memory cards
• Some files and subfolders may not be displayed if more than
500 files and subfolders are included in one folder.
• Some files may not be displayed if more than 4,000 files* and
subfolders are recorded on a CD/DVD (except BD).
• Folders saved on the 4th layer will not be displayed.
* Including files other than JPEG.
When naming files and folders
• Names of albums and photos saved on the HDD can be no more
than 16 characters.
• Do not use characters such as these: [<] [>] [|] ["] [/] [?] [*] [']
[ ] [\] [:] [•] [.] [ ] (space).
• File and folder names may not be displayed correctly if it does
not comply with ISO 9660 Level 1, Level 2, and its extended
format (Joliet).
JPG
JPG
JPG
1
2
3
4
JPG
2
4
4
JPG
JPG
1
1
1st layer
Displays data up to here
45
Importing to HDD
Importing Music
◆When importing from music CDs (page 45)
Content of single or multiple discs can be imported to the HDD
at one time. Selection of specific title(s) for import is also
supported. Import will be done at approximately 8x speed. The
server saves the content from a Music CD as LPCM or MP3
files. For selection of the LPCM and MP3 import formats, see
[Import Setting] of [Music Import Settings] (page 111).
◆When importing from data discs (page 46)
You can import by disc, folder, or track. (Multi-Disc Import is
not available.)
WAV (.wav) and MP3 (.mp3) are the supported source formats
(page 47).
◆After importing from discs
The most recent 30 tracks will be displayed in the [Newly
Registered] folder. You can play these tracks in the same way as
the other tracks on the HDD or the discs. See “Playing newly
registered music stored on the HDD” (page 71).
◆When importing from a PC
“Music Transfer” software (supplied) allows for importing
music files from PCs. See page 49 for details.
z Hint
You can turn off the server by pressing \/1 during music import. The
operation continues even when the power is off.
Notes
• Tracks in the [Newly Registered] folder are linked to the original files
on the HDD. If you erase the original files on the HDD, the tracks will
be erased from the [Newly Registered] folder.
• Do not import music from DTS format music CDs. If the imported
track is played, a loud noise may be output.
Importing audio tracks from music CDs
You can import multiple or single disc contents at one time, or
by selecting tracks on the disc. Import will be done at
approximately 8x speed.
z Hint
Before importing to the HDD, search the AMG database for disc
information (title, cover art, etc.).
To edit the acquired metadata, see page 87.
To import content from multiple discs
1 Press HOME to turn on the Home Menu.
2 Select to display the icons.
3 Select (Music) and press ENTER.
4 Select and press OPTIONS.
The Options menu appears.
5 Select [Import Multiple] and press ENTER.
The disc selection display appears.
6 Select discs to import and press ENTER.
A check mark appears next to the selected title.
• To select all discs select [Select All].
• To clear all checkmarks, select [Clear All].
7 Select [OK] and press ENTER.
Disc Import starts and the following display appears
with a progress bar.
To import content from a single disc
1 Press HOME to turn on the Home Menu.
2 Select to display the icons.
3 Select (Music) and press ENTER.
4 Select and press OPTIONS.
The Options menu appears.
5 Select [Disc Import] and press ENTER.
The following confirmation display appears.
6 Select [OK] and press ENTER.
To import a single track
1 Press HOME to turn on the Home Menu.
2 Select to display the icons.
<
<
0.0GB
Select the source disc.
Cancel
Select All
Clear All
RETURN
Finish
CD-R DATA
Disc 10
--------
CDDA
The Best of Cinnamon roll
Paddy bird
Import Multiple Discs
385.5GB
OK
RETURN
Finish
OPTIONS
Function
Importing... To stop, select [Stop].
Number of Imported Discs/Total number of Discs: 0 / 2
Number of Imported Tracks: 0
0%
Import Multiple Discs
Album Name: The Best of Cinnamon roll
Track Name: A free wing
File Format After Import:
Data Size After Import: 6.5MB
Album Name After Import: The Best of Cinnamon roll
Stop
MP3
Import Multiple Disks
0.0GB 388.1GB
RETURN
Finish
-----------------
Disc 1
CDDA
Sort By
Import Multiple
Play
Disc Import
Information/Settings
Eject
0.0GB
Disc Import
This disc will be imported.
Album Name:Disc 1
Total Number of Tracks: 13Track(s) ( 0:46:46)
File Format After Import:
Data Size After Import:89.7MB
Import Status:
RETURN
Finish
388.1GB
OK Cancel
MP3
,continued
46
3 Select (Music) and press ENTER.
4 Select and press ENTER.
The CD track list appears.
5 Select a track and press OPTIONS.
The Options menu appears.
6 Select [Track Import] and press ENTER.
The following confirmation display appears.
7 Select [OK] and press ENTER.
Importing audio files from data discs
You can import by disc, folder, or track. (Multi-Disc Import is
not available.)
To import content from a single disc
1 Press HOME to turn on the Home Menu.
2 Select to display the icons.
3 Select (Music) and press ENTER.
4 Select and press OPTIONS.
The Options menu appears.
5 Select [Disc Import] and press ENTER.
The following confirmation display appears.
If the content is locked, a confirmation screen
appears asking if you want to unlock and continue.
6 Select [OK] and press ENTER.
To import a folder
1 Press HOME to turn on the Home Menu.
2 Select to display the icons.
3 Select (Music) and press ENTER.
4 Select and press ENTER.
5 Select a folder to import and press OPTIONS.
The Options menu appears.
6 Select [Folder Import] and press ENTER.
The following confirmation display appears.
7 Select [OK] and press ENTER.
To import a single track
1 Press HOME to turn on the Home Menu.
2 Select to display the icons.
3 Select (Music) and press ENTER.
4 Select and press ENTER.
5 Select a folder and press ENTER.
The Track List appears.
6 Select a track and press OPTIONS.
The Options menu appears.
Import Multiple Disks
0.0GB 388.1GB
RETURN
Finish
Sort By
Import Multiple
--------, --------, --------
Tra ck 1
Play
Track Import
Information/Settings
1
2
3
4
5
0.0GB
Track Import
This track will be imported.
Track Name: A free wing
Album Name: The Best of Cinnamon roll
Track Number: 1(03:24)
File Format After Import:
Data Size After Import: 36.0MB
RETURN
Finish
388.1GB
OK Cancel
MP3
Music
Import Multiple Disks
0.0GB 388.1GB
RETURN
Finish
Paddy bird
The Best of Cinnamon roll
CD-R
Sort By
Play
Disc Import
Information/Settings
Eject
0.0GB
Disc Import
This disc will be imported.
Disc Name: The Best of Cinnamon roll
Total File Size: 31.2MB
Import Status:
RETURN
Finish
365.5GB
OK Cancel
MP3
Cinnamon roll
Play
Folder Import
Information/Settings
0.0GB
Folder Import
This folder will be imported.
Folder Name: Cinnamon roll
Total tracks of a current folder: 5
Total File Size: 31.2MB
RETURN
Finish
385.5GB
OK Cancel
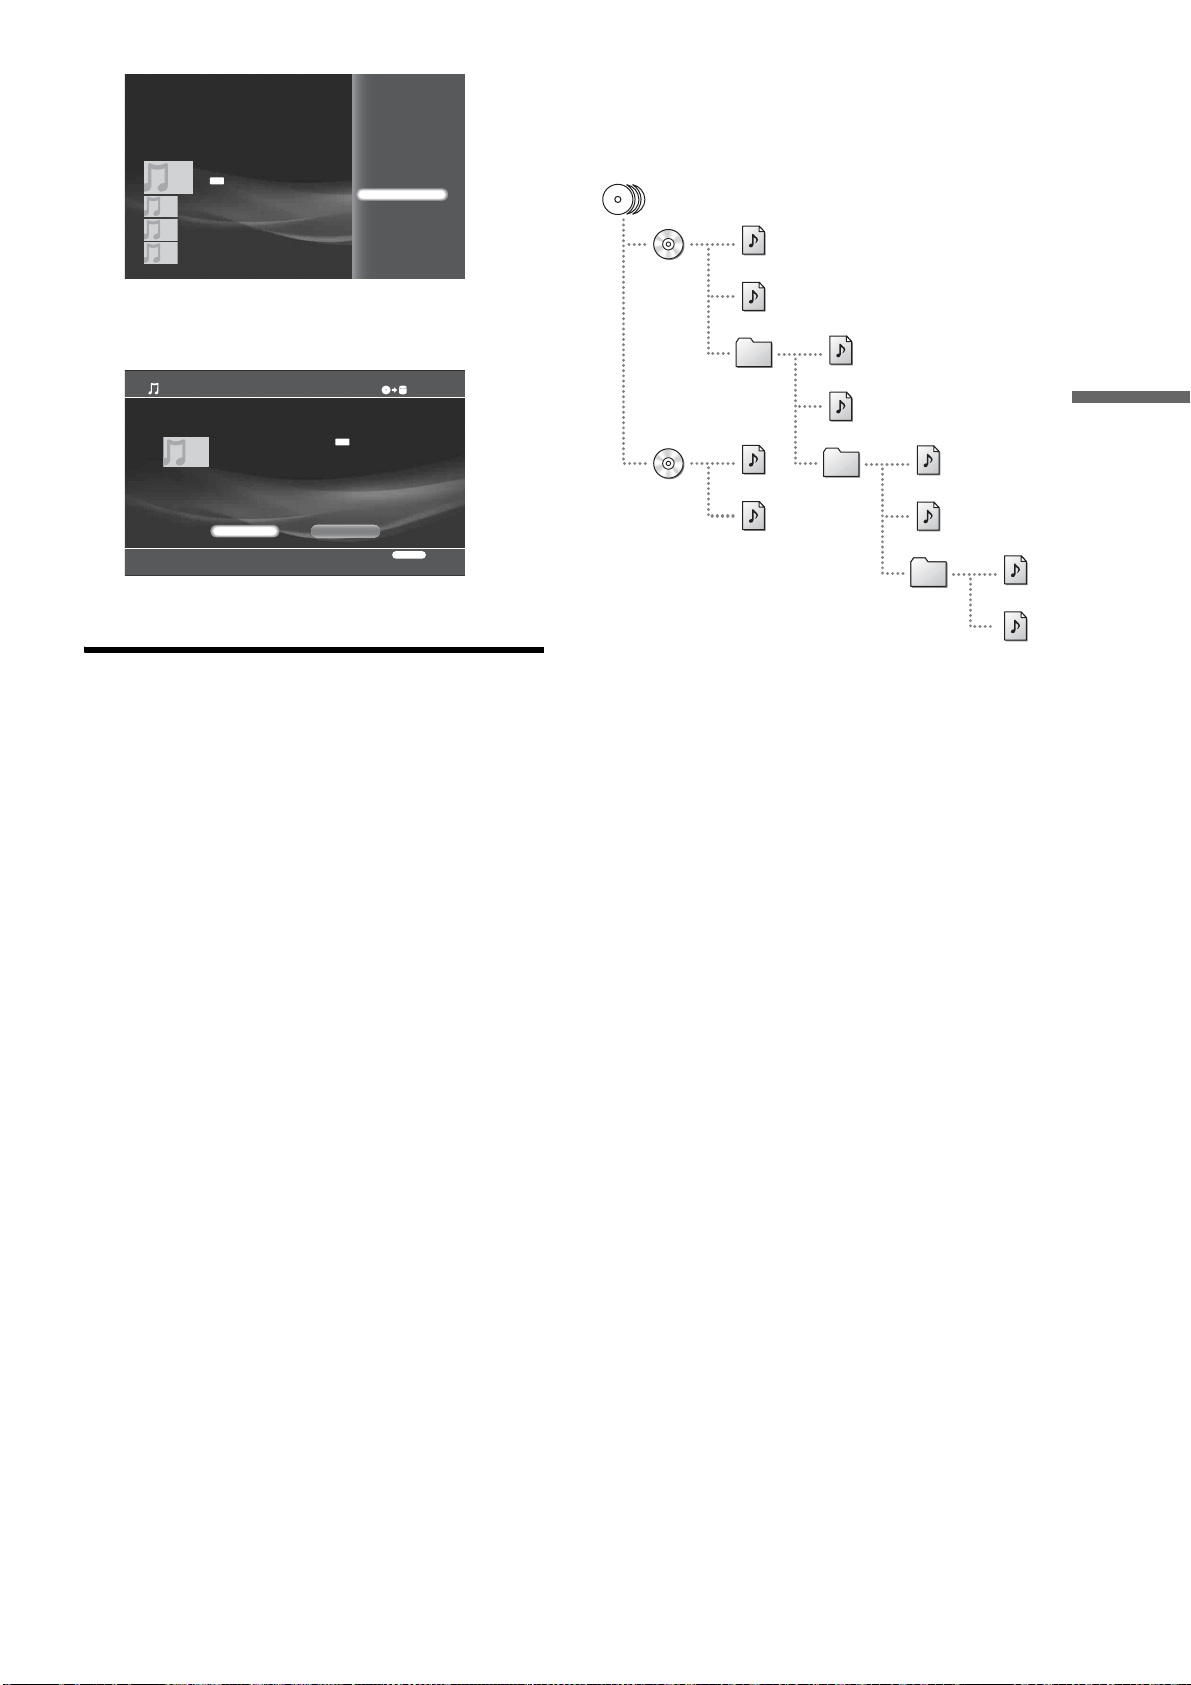
47
Importing to HDD
7 Select [Track Import] and press ENTER.
The following confirmation display appears.
8 Select [OK] and press ENTER.
Notes and restrictions for music
import
• Up to 1,000 tracks can be imported to one album. If more tracks
are imported, a new album of the same name suffixed by a
number will be created, and the rest of the tracks will be copied
to the new album.
• You cannot import if the HDD contains more than 2,000
albums, or 2,000 artist information listings, or 40,000 tracks.
• Content information may not be retrieved from MP3 files.
• Content information may not be displayed correctly if retrieved
from the AMG database or MP3 files.
• Music content imported from music CDs will be stored on the
HDD in the following formats.
–LPCM:
Quantization bit rate: 16 bit
Channel: Stereo (2ch)
Sampling frequency: 44.1 kHz
–MP3:
Channel: Stereo (2ch)
Sampling frequency: 44.1 kHz
Bit rate*: 96/128/160/192/256 kbps
* Bit rate for MP3 files is selectable in [Settings] – [Import Settings] –
[Music Import Settings] – [MP3 Conversion Rate].
• Files that you can import from data discs should be in the
following formats:
– WAV:
Extension: .wav
Quantization bit rate: 16 bit
Channel: Stereo (2ch)
Sampling frequency: 44.1 kHz
Playback time: 75 minutes 30 seconds (max)
–MP3:
Extension: .mp3
Supported codec: MPEG-1 Audio Layer III
Channel: Monaural (1ch)/Stereo (2ch)
Sampling frequency: 32/44.1/48 kHz
Bit rate: 32/40/48/56/64/80/96/112/128/160/192/224/256/
320 kbps
Playback time: 2 hours and 30 minutes (max)
• Each folder is recursively imported when importing entire data
disc content. This recursive import does not occur when
importing selected folders within a data disc.
• The following restrictions apply for data disc import:
–Tracks on the 5th layer or under are not importable.
–Some files may not be imported if the file/folder total within
a folder exceeds 1,000 on the disc. Keep the number of files
and folders under 1,000.
Play
Track Import
Information/Settings
01 Trust in Me
7/18/2007 3:15AM
MP3
Music
Music
Music
Music
0.0GB
Track Import
This track will be imported.
Track Name: Trust in Me
File Format After Import: 128kbps
File Size: 3.2MB
Sampling Frequency: 44.1 kHz
RETURN
Finish
385.5GB
OK Cancel
MP3
Music
1
1
1
2
2
2
3
3
3
4
4
1
1
,continued

48
About file information retrieval
Content information is retrieved, and displayed as follows. Numbers in parentheses indicate priority.
*1
Automatically named within the imported folder.
*2
A new album suffixed by a number is created when the number of tracks in the album exceeds 1,000.
*3
Will be mapped over the server's genre list.
Music CDs MP3 Files WAV Files
Track names (1) Displays the AMG data, or
(2) “Track 1”, “Track 2”...
(1) Displays the data from file,
or
(2) File name without extension
File name without extension
Album names (1) Displays the AMG data, or
(2) “Album”, “Album 2”...
*1
(1) Displays the data from file,
or
(2) “--------”
*2
“--------”
*2
Artist names for tracks and
albums
(1) Displays the AMG data, or
(2) “--------”
*1
(1) Displays the data from file,
or
(2) “--------”
*1
a
“--------”
Genre (1) Displays the AMG data, or
(2) “No Genre”
(1) Displays the data retrieved
and converted from the file
*3
, or
(2) “No Genre”
“No Genre”
Track number Track number (1) Displays the data from file,
or
(2) (no track number)
(no track number)
Release date (1) Displays the AMG data, or
(2) (no release date)
(1) Displays the data from file,
or
(2) (no release date)
(no release date)

49
Importing to HDD
Transferring Music Files
From PCs
“Music Transfer” is software dedicated to transferring music
stored on your PC to the Sony Home Entertainment Server
(hereafter “Server”). The software sets a destination server,
registers music files on the PC to its database, and transfers the
registered files to the server.
1 Install “Music Transfer” on your PC.
2 Register the PC to the server.
3 Register the server(s) to “Music Transfer.”
4 Register music files on the PC to the “Music
Transfer” database and transfer them to the
selected destination server.
5 Enjoy the transferred music on the server.
Making preparations
System Requirements
•CPU
– 800 MHz Pentium Processor or higher
•Memory
– 512 MB or more
• Required HDD capacity
– 50MB or more
•OS
– Windows Vista Ultimate
– Windows Vista Business
– Windows Vista Home Premium
– Windows Vista Home Basic
– Windows XP Professional Edition, SP2
– Windows XP Home Edition, SP2
– Windows XP Media Center Edition 2005 with KB900325
– Windows XP Media Center Edition 2004 with KB830786
– Windows 2000 Professional, SP4
To install “Music Transfer”
◆Before installing the software
Close all applications that are currently running. And since an
administrator right is required for installation, you may need to
log on entering the administrator’s user name and password.
1 Start the PC and log on using the administrator’s
name.
2 Insert the supplied CD-ROM “Music Transfer
Ver.1.00” into the CD driver on your PC.
Installation starts automatically.
If the installation does not start, click [My
Computer], – designated CD drive – [Music
Transfer], and then double-click [setup.exe].
3 Click [Next] to proceed.
When EULA (End User License Agreement)
appears, click [Accept] after reading the content to
accept the terms.
4 Follow the on-screen instructions.
5 When installation is complete, run the application
by clicking [Start] – [All Programs] – [Music
Transfer] – [Music Transfer].
You may need to re-start the PC in some settings.
Starting “Music Transfer”
a Click [Start] in the lower-left corner of the
desktop, and point to [All Programs] –
[Music Transfer], and then click [Music
Transfer].
“Music Transfer” starts, searches for a server, and
opens the main window.
See “To select the server” below and “Guide to the
main window” (page 50) for details.
z Hint
You can also start “Music Transfer” by double-clicking on the [Music
Transfer] icon, if it is located on the desktop.
To register a PC to the server
• When [Settings] – [Network Settings] – [Music Server
Settings] in [Client Registration] is set to [Auto]
This operation is not necessary as the PC is registered to the
server automatically.
• When [Settings] – [Network Settings] – [Music Server
Settings] in [Client Registration] is set to [Manual]
The PC needs to be registered to the server by following the
steps below.
1 On your PC, start “Music Transfer” (see above).
The software searches for the server.
2 On the server, press HOME and select [Settings]
– [Network Settings] – [Music Server Settings] –
[Unregistered Device List] and register the PC
using the device list (page 122).
3 Quit “Music Transfer” once and re-start the
software.
The software searches for the server on the network.
When the server is found, the server’s status will be
displayed (online/offline and the remaining HDD
capacity).
To select the server
You can search and register your server(s) either automatically
or manually.
Automatic server registration
If no server is registered and there is only one server on the
network, the software searches for servers when opened. When
only one server is detected on the network, the software registers
it as the destination. You will need to manually register the
servers in other cases.
,continued
50
z Hints
• If multiple servers are found (8 servers max), a message appears asking
you to select one as the destination.
• Even if you change the server's friendly name on the server, server
registration will be unaffected. The server's MAC address works as the
unique ID.
To register the server manually
1 On the File menu, click [Select Server].
The pop-up window appears with the list of servers.
2 Select a server as the destination and click [OK].
◆When using multiple servers
1 Select a server as the destination.
Up to the maximum of eight servers can be displayed
on the pop-up window (scroll down).
2 Click [OK].
Using “Music Transfer”
Guide to the main window
The software uses a music file database as shown in the
following main window.
Operations cover the following: 1) server registration, 2) file
registration, 3) file transfer, or 4) file management.
A Menu bar
Most of the options and commands are selectable from the menu bar.
Click the following items on the menu bar. The displayed menus are
referred to as “File” menu, “Edit” menu, “Tools” menu, etc., in this
section.
File
The “File” menu displays the following commands.
* You can also sync by clicking the [Sync Folder] button.
Edit
View
Items Details
Server Name Shows the friendly name(s).
Status Shows if the server is online or offline. If
you startup an offline server, its status
changes from “Offline” to “Starting” and
then “Online.”
Startup Server Starts up the selected server (when the
server’s [Standby Mode] is set to
[Standard]).
Erase Erases the selected server from the list.
DELETE can be used as a short-cut.
Details Shows the server's friendly name, MAC
address, IP address, Model name,
Remaining HDD capacity, etc. You can
also display the details window by double-
clicking the server listing. (If items such as
IP address are not displayed entirely on the
details window, pause on the item.)
Find Other Server Searches for an unregistered server on the
network.
Items Details
File Sync Allows you to select a file to register. See
“To search for a folder” (page 52).
Folder Sync Allows you to select a folder to register its
content. See “To search for a folder”
(page 52).
Sync Settings Sets a folder as the regular source and
synchronizes the database with the folder*.
Also, it displays file search settings such as
file formats.
Select Server Displays a list of servers for selecting the
destination.
Exit Quits the software.
Items Details
Select All Click here to select all files for transfer
(files will be check-marked).
Clear All Click here to cancel all selections.
Erase Click here to erase files selected by mouse
operations from the database.
Items Details
Show Details Displays information about the selected
track. See “Additional right-click options”
(page 51).
Change View Switches between the four tab sheets
([All], [Available], [Excluded], or
[Transferred]) when clicked.
See the on-screen messages for
explanations about the tab sheets and their
headings.
AB C
D
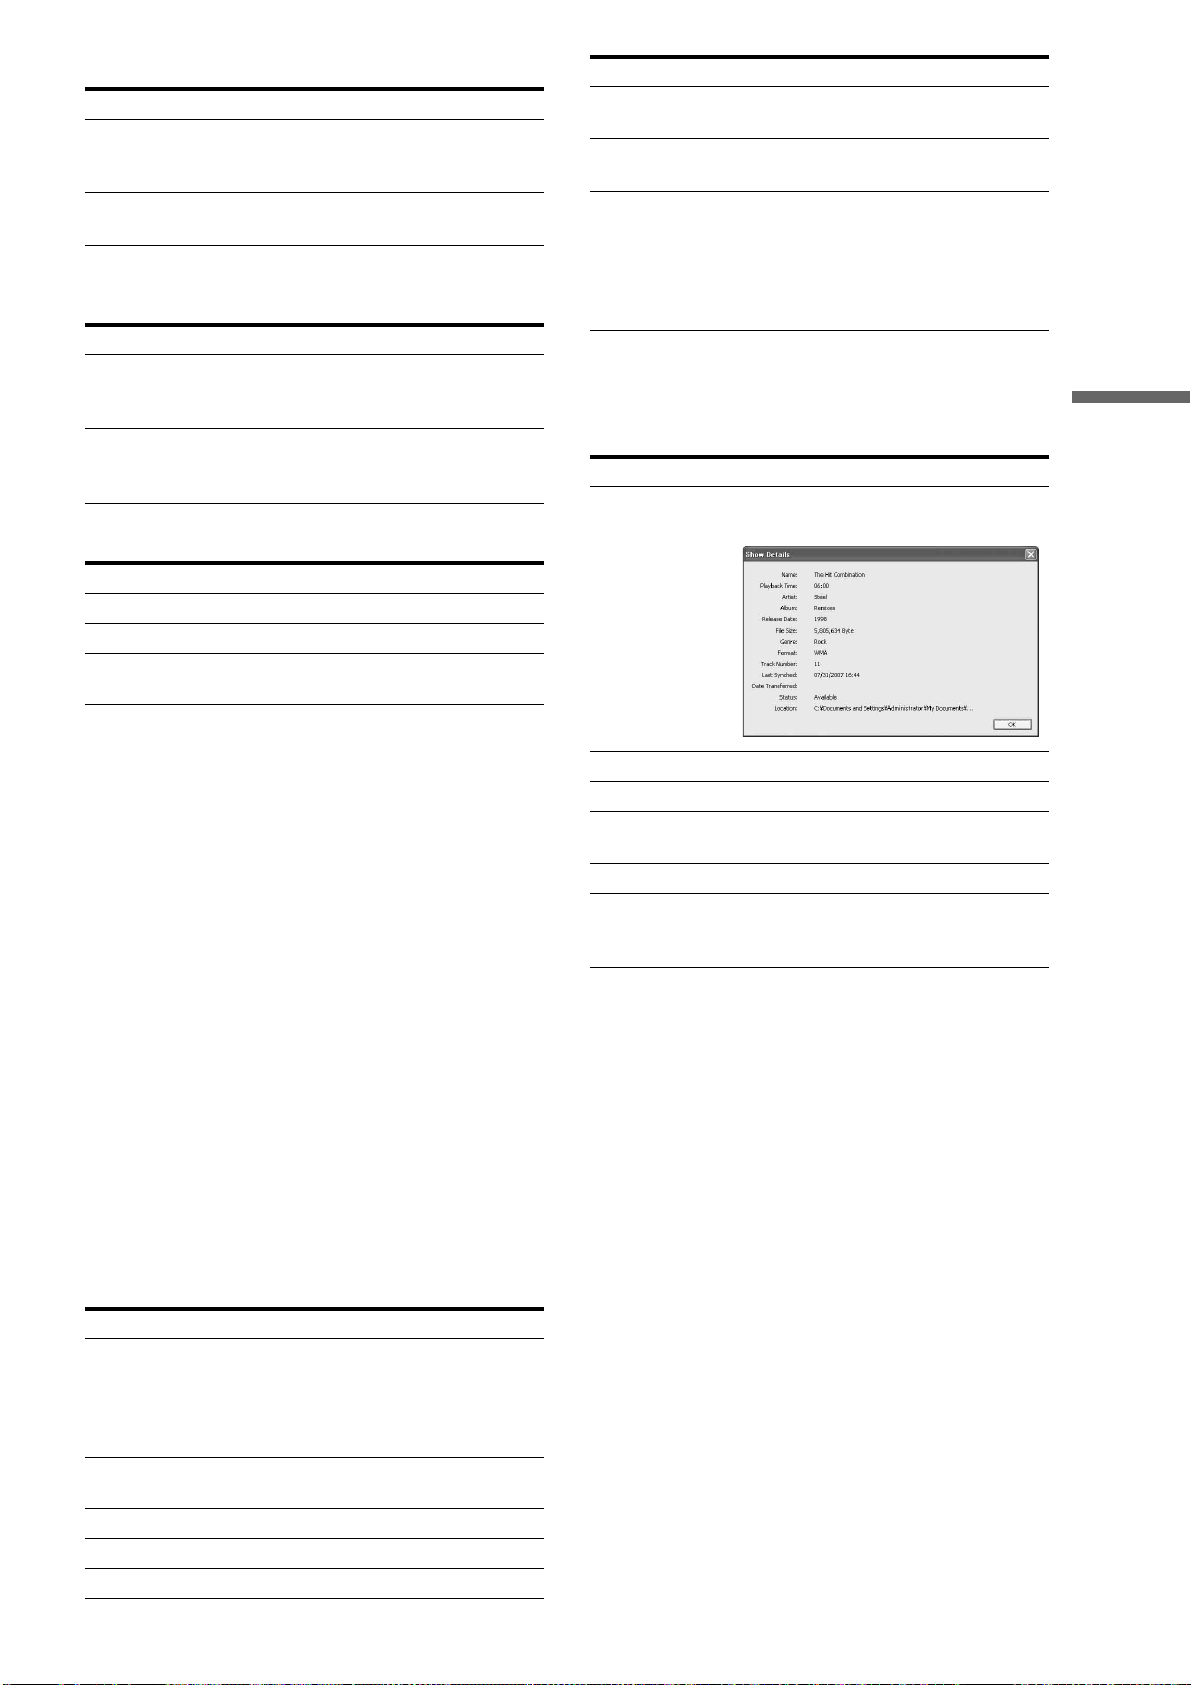
51
Importing to HDD
Operations
Tools
The “Tools” menu displays the following commands.
Help
B Sync Folder button
Click here when synchronizing the files in the database with the files in
the source folder. See “To register music files” (page 51).
C Transfer button/Server information
Click here when transferring the selected files to the destination server.
See “To register music files” (page 51).
Also displays the destination server information when available (online/
offline, and the HDD capacity).
D Music List
Use the Music List for file management. The list consists of four tab
sheets: [All], [Available], [Excluded], and [Transferred]. Click on the
tabs to check the following information.
All
Displays all files registered to the database.
Available
Displays files available for transfer (files that have not been
transferred).
Excluded
Displays files excluded from transfer. Reasons are indicated in
[Status].
Transferred
Displays transferred files.
◆About the tabs and displayed contents
Each tab sheet displays the file information under the same
header.
◆Additional right-click options
1 Select a file by clicking the check box.
2 Right-click to display additional options.
z Hints
• If an item does not fit in the line, you can display the entire content by
moving the pointer over the item.
• You can also turn on this window simply by double-clicking on the list.
• Error codes may appear in “Status.” Refer to the server's Operating
Instructions if transfer fails.
To register music files
The software uses a database for transferring music files. The
database records the paths to the actual files on the PC and can
be used for file management. Register the files to the database
first by using the following methods:
–Setting a specific folder as the regular source to sync with.
– Searching for a folder or file.
Items Details
Sync Folder Synchronizes the files in the database with
the files in the source folder (works the
same as the Sync Folder button).
Transfer Starts file transfer. You can also transfer by
clicking the [Transfer] button.
Items Details
Options Displays options for file conversion. Some
files need conversion before transfer. See
“Supported file formats” (page 52).
Initialize Database Erases all database content, including the
server and file registrations. Click [Yes] or
[No] when asked for confirmation.
Items Details
Help Displays the online help.
Product Support Displays the contact information.
About Music
Transfer
Displays information such as the software
version, license, and copyright.
Items Details
Check Boxes Click here to select files for transfer
(check-marked). Grayed out boxes
indicate a file cannot be transferred. Note
that if all boxes are grayed out, no server is
registered or set as a destination.
Name Displays track name, or file name if track
name is unavailable.
Time Displays playback time.
Artist Displays the artist name when available.
Album Displays album name when available.
Last Synched Displays the date registered to the
database.
Date Transferred Displays the date, destination, and status of
transfer.
Status Displays the file status (“Transferred,”
“Available,” “Unavailable (DRM),”
“Content Error,” “Missing Track,”
“Transfer Error,” “Incorrect Setting” ). See
also “Note about non-transferable files”
(page 53).
Items Details
Show Details Shows more details about selected tracks,
as follows.
Select Selects a track for transfer.
Clear Cancels the track selected for transfer.
Select All Selects all data for transfer. CTRL + A can
be used as a shortcut.
Clear All Cancels all the current selections.
Erase Erases the file from the database (original
data remains on the PC). You can use
DELETE as the shortcut key.
Items Details
,continued

52
Note
You may not be able to retrieve metadata from some files. And, since
WAV files do not contain metadata, their file information will not be
displayed on the server. If necessary, edit the metadata on the server
(page 87).
◆Supported file formats
The software supports WAV, MP3, AAC, WMA and ATRAC
formats. To transfer these files, the software converts them to the
formats supported by the server as follows:
– WAV files are converted according to the setting on the
software, either LPCM or MP3.
–AAC, WMA, and ATRAC files are converted only to MP3.
–MP3 files are transferred without being converted.
The server supports the following LPCM and MP3 format files:
•LPCM
–Sampling rates: 44.1 kHz
– Content audio channel modes: Stereo (2ch)
– Quantization: 16 bit
•MP3
–Sampling rates: 32 kHz, 44.1 kHz, 48 kHz
– Content audio channel modes: Stereo (2ch), Mono (1ch)
– Bit rates: 32 Kbps, 40 Kbps, 48 Kbps, 56 Kbps, 64 Kbps, 80
Kbps, 96 Kbps, 112 Kbps, 128 Kbps, 160 Kbps, 192 Kbps, 224
Kbps, 256 Kbps, 320 Kbps
– Encoding types: Constant Bit Rate (CBR), Variable Bit Rate
(VBR)
Notes
• You can convert to LPCM only from WAV files of stereo, 44.1 kHz,
and 16 bit. Other format files and WAV files that do not meet these
specifications need conversion to MP3.
• Copy-protected music files are not transferable.
To set the source folder
When the software is opened for the first time, you will be asked
to select a source folder, and whether you want to register its
files.
1 In the pop-up window, check the default folder.
• If the pop-up window does not appear (from the second
time), click [Sync Settings] on the “File” menu.
• Proceed to step 4 when using the default folder.
2 Erase the current folder setting by clicking
[Delete].
3 Click [Add] and select a folder.
Also, check if other file search settings are
appropriate.
4 Click [Start Synching Now] (checked by default).
When this is checked, all files within the folder will
be registered to the database when you click [OK] in
step 6.
5 Click [OK].
When you want to sync the database with the
source folder
Clicking the [Sync Folder] button on the main window is the
simplest way.
Follow the steps below only if you need to check or change
settings (e.g., source folder or target file format).
1 On the “File” menu, click [Sync Settings].
2 In the pop-up window, check if the other file
search settings are appropriate.
Change the folder if necessary.
3 Click [OK] on the pop-up window.
To search for a folder
1 On the “File” menu, click [Folder Sync].
The pop-up window appears.
2 Select a folder whose contents you want to
register and click [OK].
z Hints
• To register a single file, directly drag and drop the file on the main
window. Or click [File Sync] on the “File” menu, select a file and click
[Open].
• In “File Type for File Search,” you can select to search for WAV
(.wav), MP3 (.mp3), WMA (.wma), AAC (.3gp, .mp4, .m4a, .m4b,
.m4p), or ATRAC (.oma, .omg) files, and register them to the database.
Note
The music files will not be registered if the format is not selected in “File
Type for File Search”.
To erase files from the database
The original data remains on the PC. The database saves or
erases the file's path and the metadata only.
1 Click the files to erase in the main window.
To select multiple files, click files while pressing
SHIFT.
2 On the “Edit” menu, click [Erase].
z Hints
• You can select [Erase], [Select All], [Clear All] by right-clicking.
• To cancel all registrations, click [Initialize Database] on the “Tools”
menu.
To transfer music files
1 On the “All” or “Available” tab sheet, select the
files you want to transfer by clicking on the check
box.
2 Click the [Transfer] button, or click [Transfer] on
the “Operations” menu.
Tabs
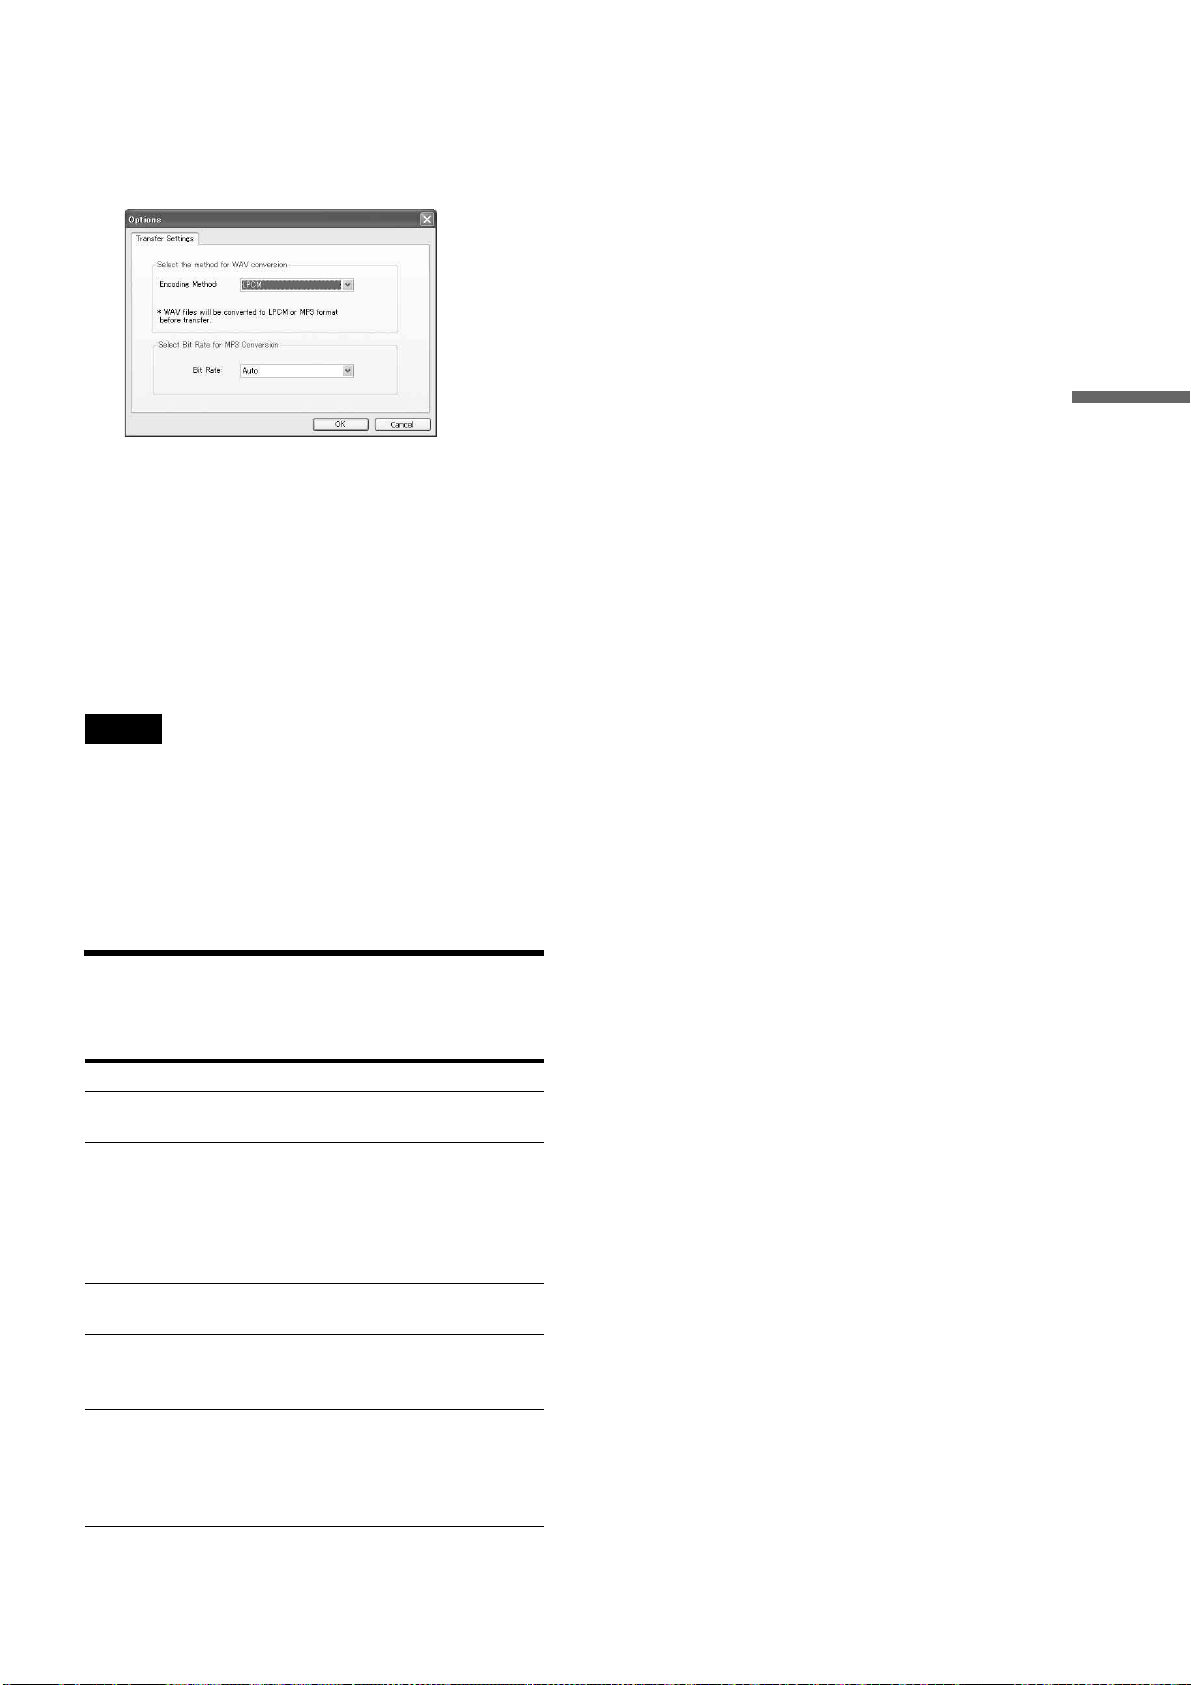
53
Importing to HDD
To change the transfer method
Before transfer, the software converts WAV, WMA, AAC, and
ATRAC files to formats playable on the server — WAV files to
LPCM or MP3; and WMA, AAC, ATRAC files to MP3. You
can select the conversion settings.
1 On the “Tools” menu, click [Options].
2 Select the format for WAV files, from LPCM or
MP3.
3 Select the bit rate for MP3 files.
When [Auto] is selected, the optimum bit rate will be
assigned to each MP3 file.
Bit rate is fixed to 128 kbps when converting WAV
to MP3 with [Bit Rate] set to [Auto].
z Hint
You can turn off the server by pressing \/1 while “Music Transfer” is
running. The operation continues even after the server is turned off.
Notes
• Music files cannot be transferred when the server is:
– importing data (photo, music, video, or “x-ScrapBook”) to the HDD.
– copying photos and videos to a disc.
– playing music recorded on the HDD.
– playing a photo.
– playing, creating, or copying “x-Pict Story” files.
–sharing music.
– changing the server settings.
• The same restrictions apply as the music file import (page 47).
Note about non-transferable files
Non-transferable files are so indicated in “Status.” The messages
include the following meanings.
Messages Meanings
Unavailable (DRM) The file is protected against copying by
Digital Rights Management (DRM).
Content Error Indicates one of the following. 1) The file
is broken, 2) not recorded in a supported
format, 3) format conversion failed, or 4)
playback time exceeded the limit (75 min
30 sec for WAV, 2hrs 30 min for other
formats), 5) the file name is too long.
Missing Music The data is no longer found on the
registered path.
Transfer Error Transfer failed due to an error that
occurred during transfer. The file itself
may be transferable if you try again.
Incorrect Setting Indicates that the WAV to LPCM
conversion has failed. The file may be
transferable if you convert the WAV file to
MP3. See “Supported file formats”
(page 52).
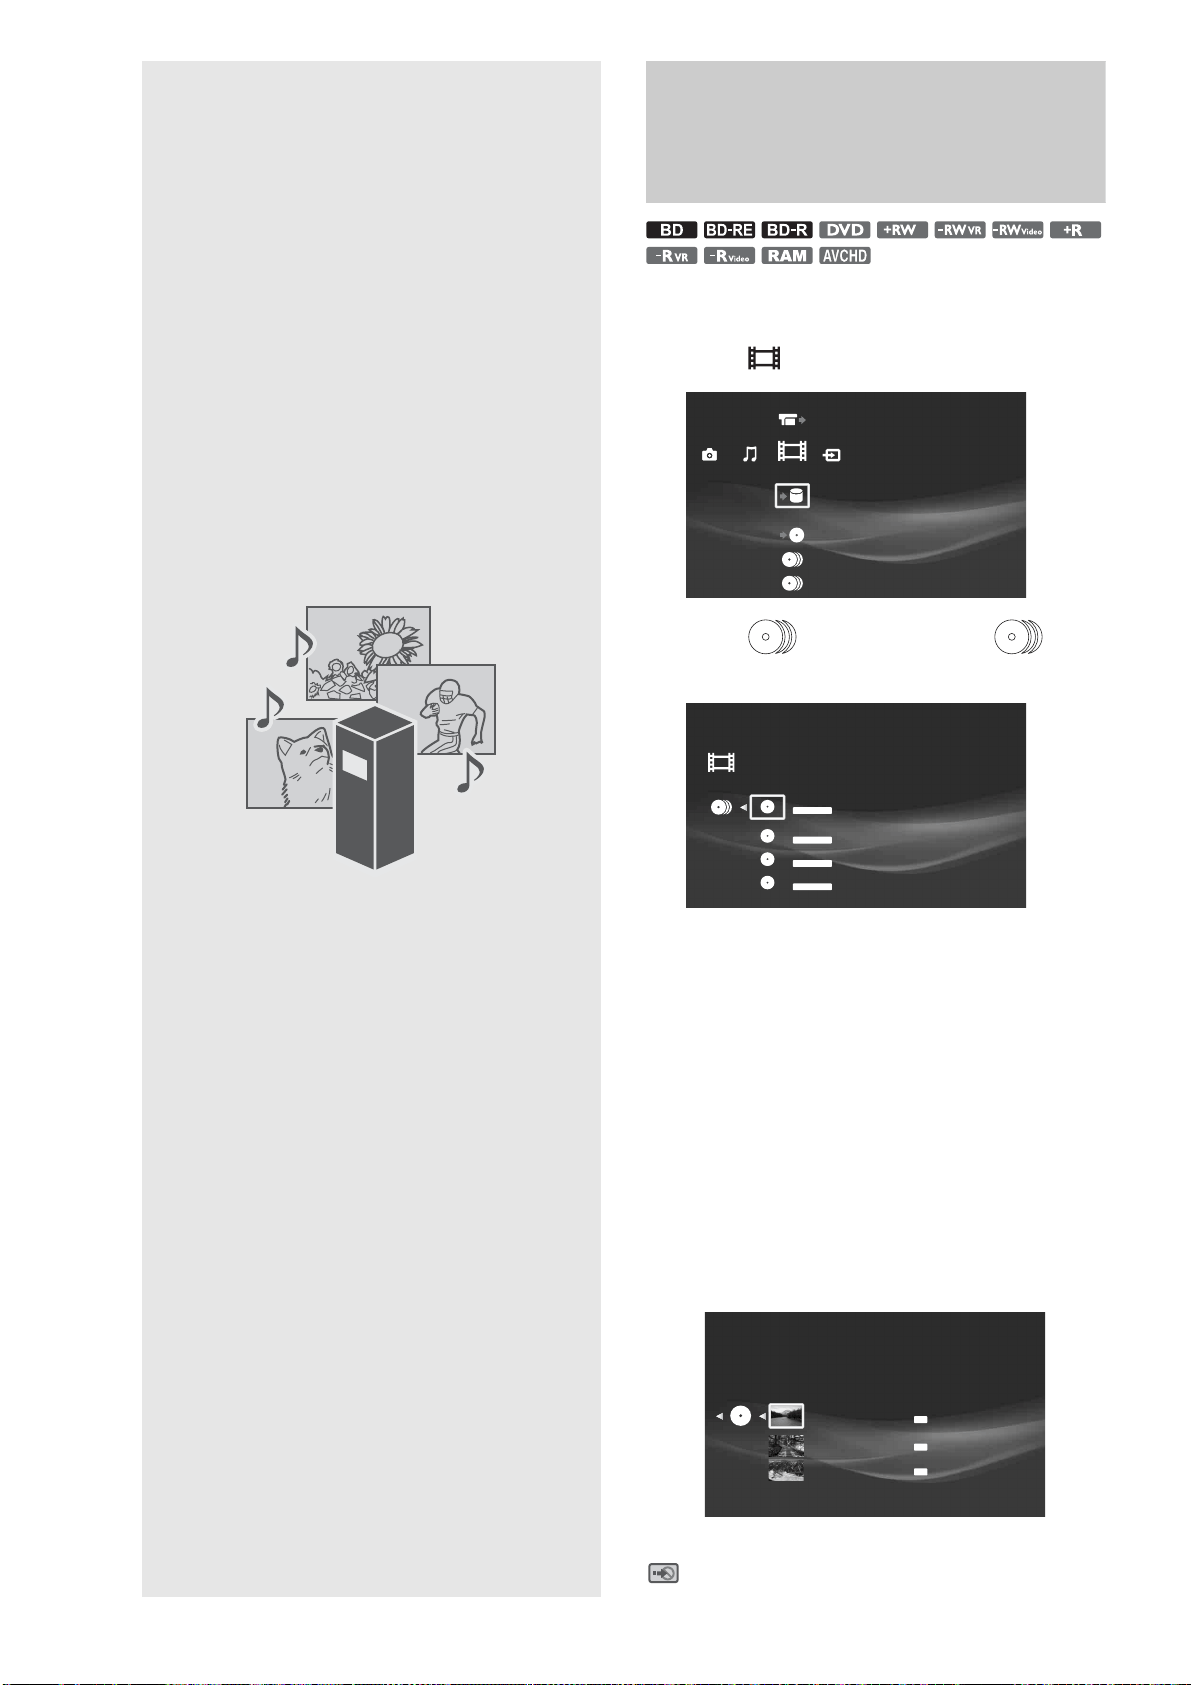
54
Enjoying Videos,
Photos,
and Music
Watching BD/DVD Videos
a Press HOME to turn on the Home Menu.
b Select to display the icons.
c Select (Personal Video) or (BD/
DVD Movies) and press ENTER.
d Select a disc and press ENTER.
e Select a title and press ENTER.
To stop playback, press x.
z Hints
• You can view the BD/DVD content by grouping them into folders by
title, genre, cast, or director, if you press OPTIONS or YELLOW
button (page 55).
• You can directly start playing the disc in the disc tray by touching N
on the top panel.
About icons on the Title List
The following icons appear next to the titles, indicating the status
of the title. Note that not all icons are displayed in this sample
display.
N: Currently playing.
: Copying is not allowed. Content is copy-protected.
Video
Import Disc to HDD
Video
DVD-R VR
Blank(Formatted) Disc 4
BD-R
7/ 6/2007 - 7/13/2007
DVD-RW VIDEO
7/13/2007
DVD-RW VIDEO
Disc 9
HDV 7/13/2007 3:34PM - 7/13/2007 3:35PM
7/13/2007 3:34PM ( 0H01M)
HDV 7/13/2007 3:34PM - 7/13/2007 3:35PM
7/13/2007 3:34PM ( 0H01M)
8/26/2007 7:20PM ( 0H32M)
SP
XP
XP
• Watching BD/DVD Videos. . . . . . . . . . . . . . . . 54
• Watching Videos on the HDD . . . . . . . . . . . . . 56
• Various Video Playback Operations . . . . . . . . 58
• Adjusting Pictures and Sound for Videos . . . . 59
• Viewing Photos Recorded on the HDD . . . . . . 60
• Viewing Photos Recorded on the Removable
Media. . . . . . . . . . . . . . . . . . . . . . . . . . . . . 62
• Various Photo Playback Operations . . . . . . . . 63
• Using “x-ScrapBook” . . . . . . . . . . . . . . . . . . . 64
• Using “x-Pict Story HD” . . . . . . . . . . . . . . . . 66
• Playing a Slideshow . . . . . . . . . . . . . . . . . . . . 69
• Playing Music CDs, DATA BDs, DATA DVDs, and
DATA CDs . . . . . . . . . . . . . . . . . . . . . . . . . 69
• Playing Music Stored on the HDD . . . . . . . . . 70
• Various Music Playback Operations . . . . . . . . 73
• Playing Music in Other Rooms . . . . . . . . . . . . 74
• Playing the Same Music on All Client Devices
(“PARTY MODE”). . . . . . . . . . . . . . . . . . . . 75

55
Enjoying Videos, Photos, and Music
: Original title.
: Playlist title.
: Protected title.
(displayed in gray): Currently in a queue waiting for
copying.
About the disc listings for BD-ROMs and DVD-
ROMs
A Title names
B Names of directors and casts
D: Director name
C: Cast name
To use the BD’s or DVD’s menu
◆About Top Menu
Some commercially available BD-ROMs and DVD VIDEOs, or
a DVD+RW, DVD-RW (Video mode), DVD+R, DVD-R
(Video mode) have their own menus. Press TOP MENU during
playback to display the Top Menu and make a selection.
◆About pop-up menus
Some BD-ROMs contain pop-up menus that appear without
interrupting playback. Press POP UP/MENU during playback
and select the items.
Navigate through the menu using the Joystick, color buttons, or
the number buttons following the on-screen instructions.
To play a locked BD-RE or BD-R
When the password input screen appears, enter the four-digit
password, select [OK] and press ENTER.
See page 34 about the lock setting.
Available OPTIONS
The Options menu appears when you press OPTIONS. The
available items differ depending on the situation.
◆Available OPTIONS when selecting BD content
◆Available OPTIONS when selecting DVD content
◆Available OPTIONS during playback
Items Details
Function/Edit Displays the following items.
• Erase Titles
Sort By Changes the title order.
• Recent First
• Oldest First
• Title
•Control ID
Group Content Displays titles by categories.
•All
•Genres
•Casts
• Director
You can also toggle them by pressing
YELLOW.
ORG
PL
Video
STARS
D: Robert Thomas C:Donald Cabana
A Space shuttle
D: Curtis Lindsey C: Steven Brown
PG-13
Slash [Blu-Ray]
D:Donald Besson C:Ian Willis, John Jovovich, Mark James
Play Resumes playback from the stop point.
Resume Play is canceled when:
– The disc tray is opened.
– The title is edited after playback is
stopped.
–Resume Play is prohibited by the disc’s
specification.
Play from Beginning Plays the title from the beginning.
Protect/Protection
Cancel
Sets or cancels protection on the title.
Information/Settings Displays the title information and the
related settings.
Items Details
Function/Edit Displays the following items.
•Erase Titles
Sort By Changes the title order.
• Recent First
•Oldest First
• Title
•Control ID
Group Content Displays titles by categories.
•All
•Genres
•Casts
• Director
You can also toggle them by pressing
YELLOW.
Play Resumes playback from the stop point.
Resume Play is canceled when:
– The disc tray is opened.
–Other title is played.
– The title is edited after playback is
stopped.
– Another recording is added (except
DVD-RW (VR mode)/DVD-R (VR
mode)).
–Resume Play is prohibited by the disc’s
specification.
Play from Beginning Plays the title from the beginning.
Protect/Protection
Cancel
Sets or cancels protection on the title.
Information/Settings Displays the title information and the
related settings.
Items Details
Disc Information Displays BD/DVD information.
A/V Settings Allows you to adjust settings for picture
and sound (page 59).
Play from
Beginning
Plays the title from beginning.
Scan/Cancel Scan Plays the title fast, with sound (BD-R and
BD-RE only).
Stop Stops playback.
Erase Erases the title.
Protect/Protection
Cancel
Sets or cancels protection on the title.
Items Details
,continued
56
Notes
• Depending on the BD-ROM, the disc may not play properly if you
have changed the BD Parental Control setting during playback. You
will need to remove the BD-ROM once and then re-insert it to re-start.
• Titles may not be sorted correctly if the title list contains long names
that exceed 60 characters.
• The original title name may not be displayed if the DVD is recorded on
other devices.
• Thumbnails may be slow to appear.
• Thumbnails may not be displayed depending on the operation status.
• For titles of mixed aspect ratio (16:9 and 4:3) recorded on a DVD-RW
(VR mode) and DVD-R (VR mode), aspect ratio of their thumbnails
may be incorrect.
• If no thumbnail appears, try playing the content once.
• BD-REs/BD-Rs do no play if bit stream data of the ATSC broadcast is
recorded in DR mode. The discs will play if recorded in SESF.
To change the group content
1 Press HOME to turn on the Home Menu.
2 Select to display the icons.
3 Select (BD/DVD Movies) and press
YELLOW repeatedly.
The view of the listings changes with each press as follows:
•All
•Genre
•Casts
•Director
Notes
• The View setting will display the [BD/DVD Movies] folder content as
follows:
All: Displays “BD/DVD Movies” folder.
Genres: Displays folders by genre.
Casts: Displays folders by cast.
Director: Displays folder by director.
• Depending on the number of recorded albums, the view may be slow
to change.
• The [Others] folder contains the following discs:
– Unknown discs (Discs that have not been registered yet)
– Blank discs (Unformatted discs)
– Unreadable discs (Error discs)
– Software update discs
Watching Videos on the
HDD
a Press HOME to turn on the Home Menu.
b Select to display the icons.
c Select and press ENTER.
d Select a title and press ENTER.
To stop playback, press x.
About icons on the Title List
The following icons appear next to the titles, indicating the status
of the title.
H: Currently playing.
: Can be copied to a DVD-RW (VR mode) with CPRM or
DVD-R (VR mode) with CPRM only.
: Copying is not allowed. Content is copy-protected.
: The title has not been played yet.
Information/
Settings
Displays the details about the title.
Search Chapter Searches for the selected chapter.
Enter the chapter number using the
number buttons.
Slow Plays the title slowly (BD-ROM only).
Eject Ejects the disc.
Items Details
Video
Import Disc to HDD
DR
NEW
SR
Video
8/ 9/2007 3:21PM( 0H00M) LINE1
ORG
HDV 7/13/2007 3:34PM - 7/13/2007 3:35PM
7/13/2007 3:34PM ( 0H01M) HDV
ORG
HDV 7/13/2007 3:34PM - 3:35PM
7/13/2007 3:34PM ( 0H01M)
PL
HDV 7/13/2007 3:34PM - 3:35PM
7/13/2007 3:34PM ( 0H01M)
PL
HDV 7/13/2007 3:34PM - 7/13/2007 3:35PM
DR
NEW
SR
Video
8/ 9/2007 3:21PM( 0H00M) LINE1
ORG
HDV 7/13/2007 3:34PM - 7/13/2007 3:35PM
7/13/2007 3:34PM ( 0H01M) HDV
ORG
HDV 7/13/2007 3:34PM - 3:35PM
7/13/2007 3:34PM ( 0H01M)
PL
HDV 7/13/2007 3:34PM - 3:35PM
7/13/2007 3:34PM ( 0H01M)
PL
HDV 7/13/2007 3:34PM - 7/13/2007 3:35PM
DR
NEW
SR
Video
8/ 9/2007 3:21PM( 0H00M) LINE1
ORG
HDV 7/13/2007 3:34PM - 7/13/2007 3:35PM
7/13/2007 3:34PM ( 0H01M) HDV
ORG
HDV 7/13/2007 3:34PM - 3:35PM
7/13/2007 3:34PM ( 0H01M)
PL
HDV 7/13/2007 3:34PM - 3:35PM
7/13/2007 3:34PM ( 0H01M)
PL
HDV 7/13/2007 3:34PM - 7/13/2007 3:35PM
NEW

57
Enjoying Videos, Photos, and Music
: Original title.
: Playlist title.
: Protected title.
: Currently importing or copying.
(displayed in gray): Currently in a queue waiting for
copying.
z (red): recording.
N: Chasing playback.
Available OPTIONS
The Options menu appears when you press OPTIONS. The
available items differ depending on the situation.
◆Available OPTIONS when selecting HDD content
◆Available OPTIONS during playback
Items Details
Function/Edit Displays the following items.
• Erase Titles
• Create Playlist
• Combine Titles
Sort By Changes the title order.
• Recent First
• Oldest First
•Unviewed First
• Title
Import Status Displays progress of the current import
operation.
Copy Status Displays progress of the current copy
operation.
Title List Displays video titles stored on the HDD.
Play Resumes playback from the stop point.
Resume Play is canceled when the title is
edited after playback is stopped.
Play from Beginning Plays the title from the beginning.
Stop Import Stops the current import operation.
Erase Erases the title.
Protect/Protection
Cancel
Sets or cancels protection on the title.
Edit Displays the following items.
•Set Chapter Marks
•Erase Chapter
• Edit Chapter
•A-B Erase
• Divide Title
Copy to Disc Copies the titles in the folder to a disc
(for Personal Videos on the HDD only).
Information/Settings Displays the title information and the
related settings.
Items Details
HDD Information Displays HDD information.
A/V Settings Allows you to adjust settings for picture
and sound (page 59).
Play from
Beginning
Plays the title from beginning.
Scan/Cancel Scan Plays the title fast, with sound.
Stop Stops playback.
Erase Erases the title.
Protect/Protection
Cancel
Sets or cancels protection on the title.
ORG
PL
Information/
Settings
Displays the details about the title.
Search Chapter Searches for the selected chapter.
Items Details
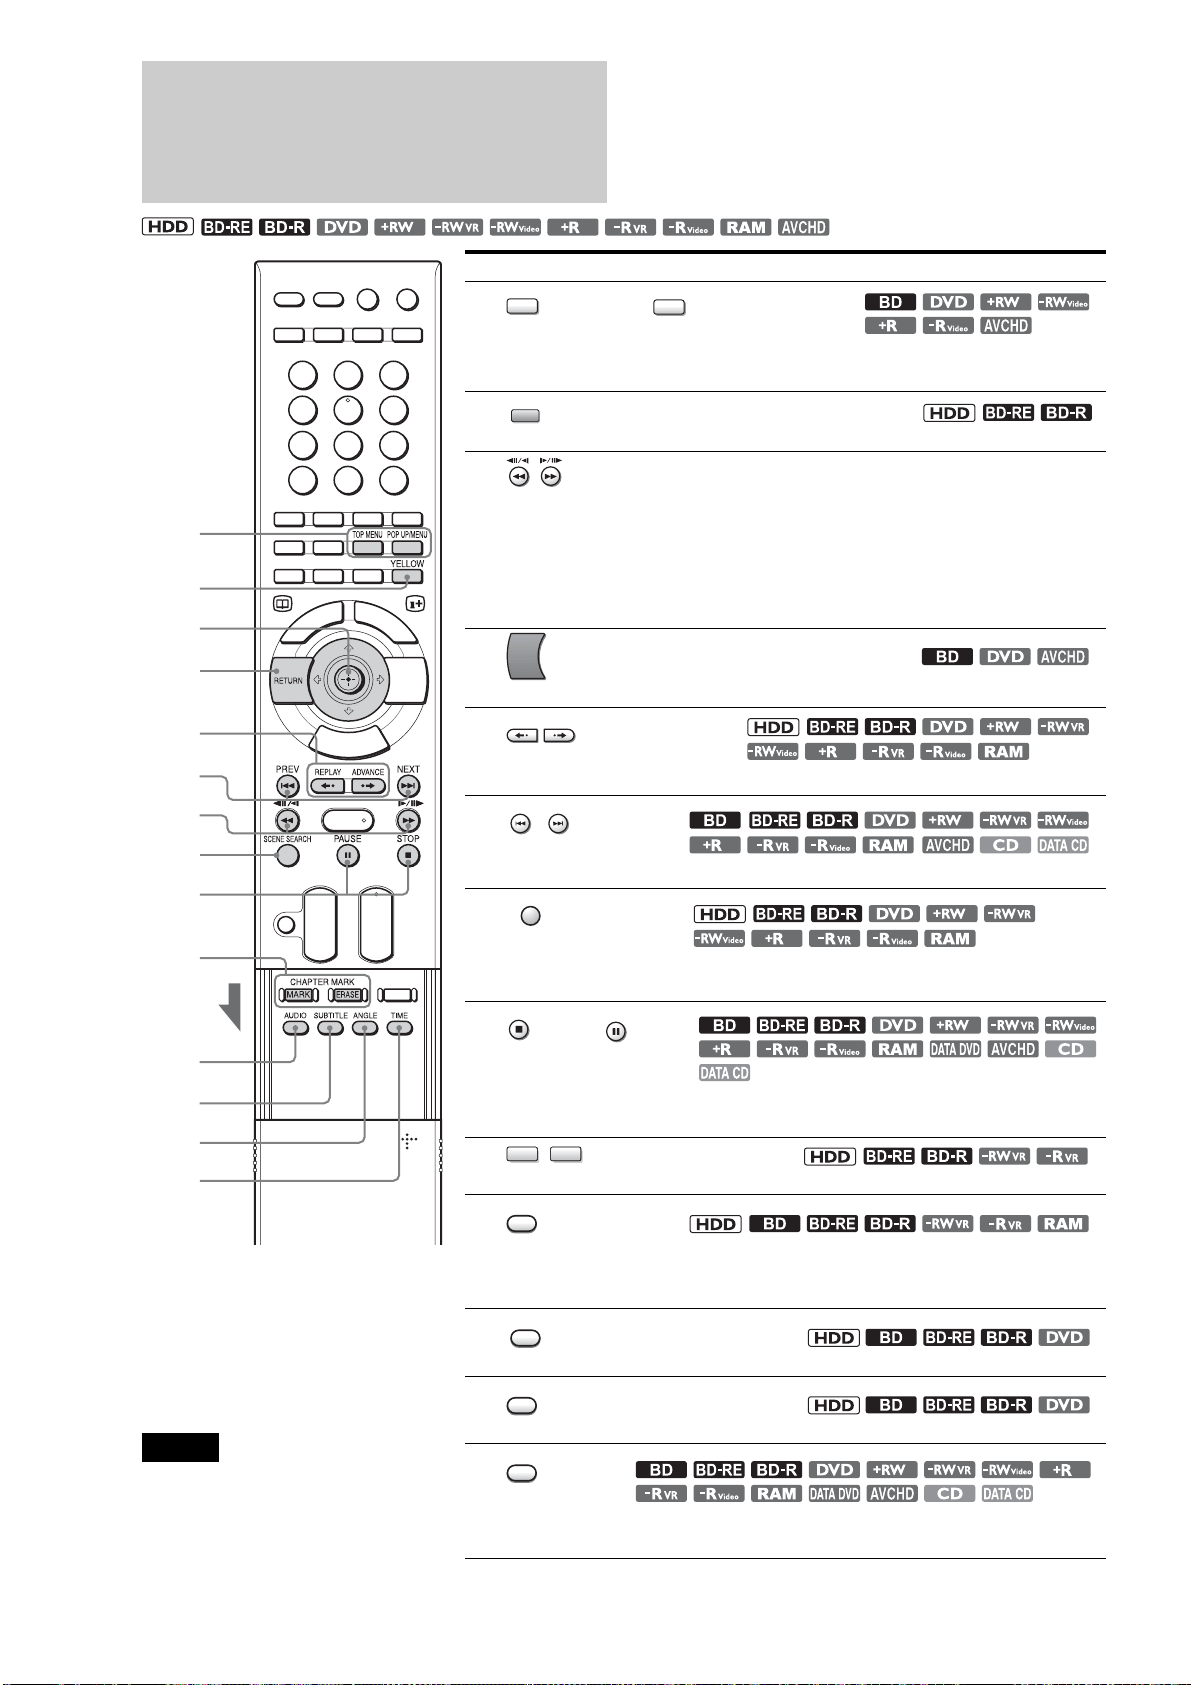
58
Various Video Playback
Operations
*1
x150 speed for BD-ROMs and AVCHD
files.
*2
For BD-ROMs and discs recorded in
AVCHD format, press OPTIONS and
select [Slow]. Reverse slow-motion is not
available.
Notes
• For some commercially available BD-ROMs and
DVD VIDEOs, the functions may not work as
described above due to disc limitation. The color
buttons may be used for BD-ROM playback.
• Scene Search can be used for tiltes longer than
100 seconds and shorter than 100 hours.
Buttons/functions/discs
A TOP MENU, POP UP/MENU
– Displays the Top Menu, or pop-up menus for BD-ROMs (page 55). To
return to the previous menu, press the button again.
B YELLOW
– Plays quickly with sound when pressed during playback.
C / (Scan/Slow/Step), or </,
– Scans backwards or forwards when being pressed during playback. Each
press changes the speed:
m
1/
M
1 (x10)
t
m
2/
M
2 (x30)
t
m
3/
M
3 (x120)*
1
. When released, normal playback resumes. (All discs)
– Plays in stop motion when pressed in pause mode. Hold the button down
for more than one second for slow-motion (except BD-ROM or AVCHD
files*
2
). To resume normal playback, press H or ENTER.
D RETURN
– Returns to the previous menu.
E REPLAY/ADVANCE
– Replays or briefly fast forwards a scene when pressed during playback.
F / PREV/NEXT
– Skips to the previous or next title/chapter.
G SCENE SEARCH
– Enters the Scene Search mode that searches for a scene quickly within the
played title.
H STOP / PAUSE
– Stops or pauses playback. You can also pause playback by pressing
ENTER during playback (except BD-ROM).
I / CHAPTER MARK/ERASE
– Divides or combines chapters (page 81).
J AUDIO
– Selects the language. (BDs, DVD VIDEOs only).
– Selects the audio track. (HDD, BD-REs, BD-Rs, DVD-RWs (VR mode),
DVD-Rs (VR mode), DVD-RAMs only).
K SUBTITLE
– Selects the subtitle language.
L ANGLE
– Switches to other viewing angles when available.
M TIME
– Switches the panel display to show elapsed playback time or remaining
time.
3
3
1
2
4
8
9
5
6
7
qa
0
qs
qd
TOP MENU
POP UP/MENU
YELLOW
RETURN
REPLAY
ADVANCE
PREV
NEXT
SCENE SEARCH
STOP
PAU SE
MARK
ERASE
AUDIO
SUBTITLE
ANGLE
TIME

59
Enjoying Videos, Photos, and Music
Adjusting Pictures and
Sound for Videos
Adjusting the picture quality
a When playing a video title or viewing an
external video input picture, press OPTIONS
to turn on the Options menu.
b Select [A/V Settings] – [Picture Settings] and
press ENTER.
The following items appear.
*1
Cannot be used for BD-ROMs or discs recorded in AVCHD format.
*2
Effective only for Standard Definition pictures.
*3
Effective for the video title currently being played.
c Select a setting and press ENTER.
You can return these settings to the defaults by
selecting [Reset].
d Select or adjust the settings and press
ENTER.
The default settings are underlined.
Repeat steps 3 and 4 to adjust any other items.
z Hint
The server is equipped with “D Matrix NR HD” and “D Matrix NR”
functions that automatically adjust the [FNR], [BNR/MNR] settings
according to the noise level in the current playback pictures.
Manual adjustment of these items changes the effectiveness of “D
Matrix NR HD” and “D Matrix NR.”
Each is effective for different title types: “D Matrix NR HD” is for High-
Definition quality videos; “D Matrix NR” is for Standard-Definition
quality videos.
Adjusting the audio quality (Audio
Filter)
Note
This function does not work for digital audio signals output from the
DIGITAL OUT (OPTICAL/COAXIAL) jacks.
a When playing a video title or viewing an
external video input picture, press OPTIONS
to turn on the Options menu.
b Select [A/V Settings] – [Audio Filter] and
press ENTER.
The following items appear.
c Select an Audio Filter setting and press
ENTER.
About audio output when playing BD-ROMs
The server outputs Dolby
*1
Digital signals when Dolby True-
HD or Dolby Digital Plus is selected, and DTS
*2
signals when
DTS-HD is selected.
*1
Manufactured under license from Dolby Laboratories. Dolby and the
double-D symbol are trademarks of Dolby Laboratories.
*2
“DTS” is a registered trademark of DTS, Inc. and “DTS 2.0 + Digital
Out” is a trademark of DTS, Inc.
Adjusting audio input signals
a When viewing external input picture, press
OPTIONS.
b Select [A/V Settings] - [Audio Input Settings]
and press ENTER.
The following items appear.
c Select [LINE 1 Level Adjust] or [LINE 2
Level Adjust] and press ENTER.
Items Details
FNR
*1
Reduces noises appearing in the picture.
BNR
*1*3
/
MNR
*1*2*3
Adjust the signals to reduce mosaic-like
block noises and minor noises around the
picture outlines (mosquito noises).
Sharpness Sharpens the picture outlines.
A/V Sync Adjusts the gap between picture and
sound, by delaying the sound output in
relation to the picture output (0 to 100 mili-
seconds).
Adjust Picture
*3
Adjusts each of the following picture
elements:
Select an item and press ENTER.
• Contrast: Changes the contrast.
• Brightness: Changes the overall
brightness.
• Chroma: Makes deep colors deeper, or
light colors lighter.
• Hue: Changes overall color balance.
Items Details
FNR (weak) Off 1 2
3 (strong)
BNR/MNR (weak) Off 1 2
3 (strong)
Sharpness (weak) –3 ~ 0
~ 3 (strong)
A/V Sync (short) 0
~ 100 msec (long)
Adjust Picture
Contrast (weak) –3 ~ 0
~ 3 (strong)
Brightness (dark) –3 ~ 0
~ 3 (bright)
Chroma (light) –3 ~ 0
~ 3 (deep)
Hue (red) –3 ~ 0
~ 3 (green)
Items Details
Sharp Provides a wide frequency range and
spatial feeling. Normally select this.
Slow Provides smooth and warm sound.
Items Details
LINE 1 Level Adjust Adjusts audio input level for LINE IN 1
jacks.
LINE 2 Level Adjust Adjusts audio input level for LINE IN 2
jacks.
,continued
60
d Adjust the audio input level and press
ENTER.
e Press RETURN.
Adjusting recording pictures for
external input
a When viewing the external input, press
OPTIONS.
b Select [A/V Settings] - [Rec Settings] and
press ENTER.
The following items appear.
c Select a setting and press ENTER.
You can return these settings to the defaults by
selecting [Reset].
d Select or adjust the settings and press
ENTER.
Viewing Photos Recorded
on the HDD
Many options are available for photo playback, including
slideshow and file search.
You can enjoy “x-applications” (“x-ScrapBook” and “x-Pict
Story HD”) if you import photos to the HDD. See page 64.
a Press HOME to turn on the Home Menu.
b Select to display the icons.
c Select an album on the HDD and press
ENTER.
d Select a photo and press ENTER.
To display the previous or next photo, press . or
>.
With digital still cameras, the displayed layer differs
depending on the model.
z Hint
When viewing a photo shot with 16:9 (HDTV size) setting on a TV,
black bands may appear on the top, bottom, left, and right of the photo.
See [Video Output Aspect Ratio] (page 112) and change the server’s
output aspect ratio setting to 16:9. For changing the viewing mode
setting, see your TV’s manual.
Items Details
Rec DNR Reduces picture noises in the recording
video signals.
Noisy scenes are detected and adjusted
automatically with the noise reduction
function.
Picture Adjustment Adjusts each of the following picture
elements:
Select an item and press ENTER.
• Contrast: Changes the contrast.
• Brightness: Changes the overall
brightness.
• Chroma: Makes deep colors deeper, or
light colors lighter.
• Hue: Changes overall color balance.
Create x-Pict Story HD
Copy x-ScrapBook
x-ScrapBook
x-Pict Story HD
Memory Stick
Photo
Sample Album
Album
Photo
CIMG @1866
7/10/2007 3:23PM
JPG
CIMG @1876
7/10/2007 3:37PM
JPG
CIMG @1884
7/10/2007 3:53PM
JPG
CIMG @1887
7/10/2007 4:11PM
JPG
CIMG @1891
Album
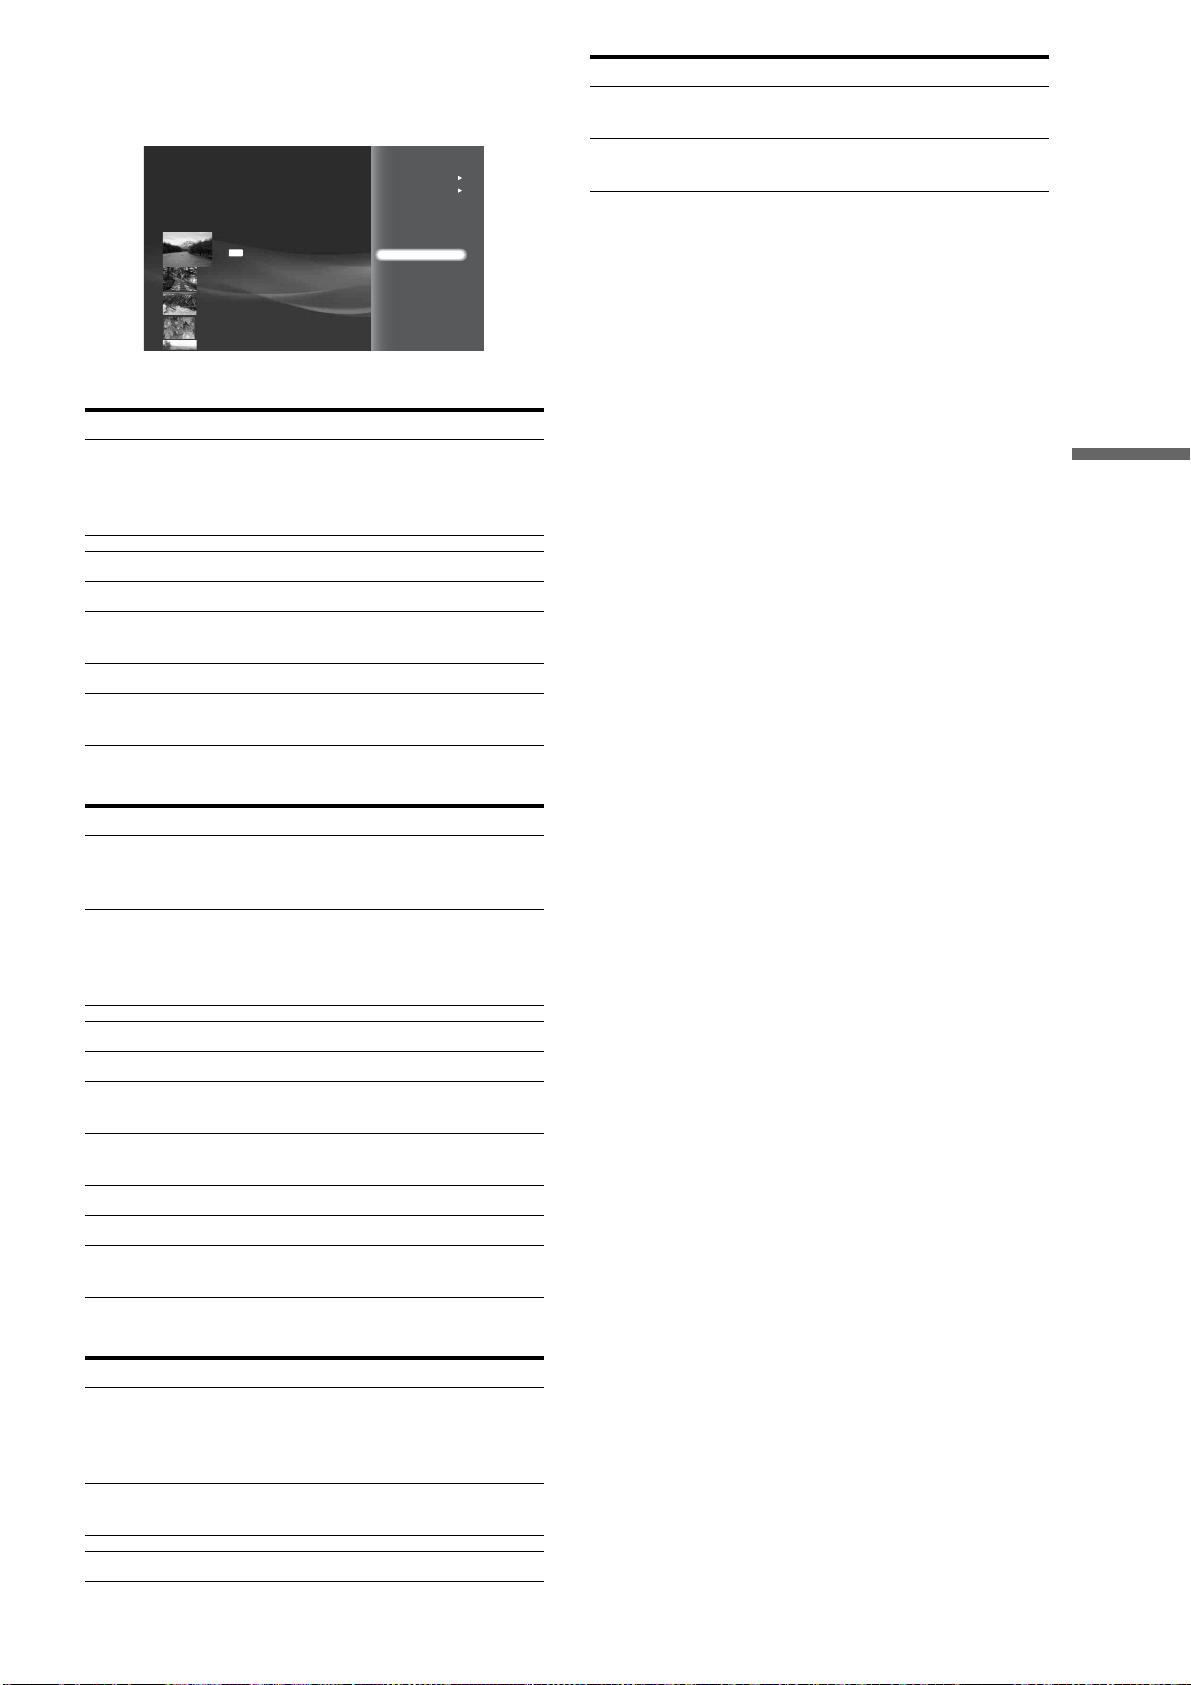
61
Enjoying Videos, Photos, and Music
Available OPTIONS
The Options menu appears when you press OPTIONS. The
available items differ depending on the situation.
◆Available OPTIONS while selecting albums
◆Available OPTIONS while selecting files
◆Available OPTIONS during playback
Items Details
Slideshow Pace Sets the pace for slideshow.
•Fast
•Normal
•Slow
Slideshow Plays a slideshow.
View x-ScrapBook Displays the “x-ScrapBook” album.
Create x-Pict Story
HD
Creates an “x-Pict Story” file from the
album.
Erase Erases the albums, photos on the HDD.
Information/Settings Displays information about the album or
photo.
Items Details
Still Pictures Displays items for file management.
• Copy Multiple
• Erase Multiple
Slideshow Pace Sets the pace for the slideshow.
•Fast
•Normal
•Slow
View Shows the photo.
Slideshow Plays a slideshow.
Rotate (left) Rotates the photo counterclockwise by
90 degrees.
Rotate (right) Rotates the photo clockwise by 90
degrees.
Copy Copies the photo to HDD.
Erase Erases the albums, photos on the HDD.
Information/Settings Displays information about the album or
photo.
Items Details
Slideshow Pace Sets the pace for slideshow.
•Fast
•Normal
•Slow
Search File Enter the file number using the number
button.
Stop Stops playing the slideshow.
Import Multiple Disks
RETURN
Finish
0.0GB 388.1GB
View
Slideshow
Rotate (left)
Rotate (right)
Copy
Erase
Information/Settings
Still pictures
Slideshow Pace
CIMG @1866
7/10/2007 3:23PM
JPG
Rotate (left) Rotates the photo counterclockwise by
90 degrees.
Rotate (right) Rotates the photo clockwise by 90
degrees.
Items Details
62
Viewing Photos Recorded
on the Removable Media
a Press HOME to turn on the Home Menu.
b Select to display the icons.
c Select one of the removable media.
When displaying folders, select a folder to view,
press ENTER.
d Select a photo and press ENTER.
To display the previous or next photo, press . or
>.
With digital still cameras, the displayed layer differs
depending on the model.
Available OPTIONS
The Options menu appears when you press OPTIONS. The
available items differ depending on the situation.
◆Available OPTIONS during playback
Note
The [Others] folder contains the following discs:
– Unknown discs (Discs that have not been registered yet)
– Blank discs (Unformatted discs)
– Unreadable discs (Error discs)
– Software update discs
Items Details
Still Pictures Displays items for file management.
• Import Multiple
Slideshow Pace Sets the pace for slideshow.
•Fast
•Normal
•Slow
View Shows the photo.
Slideshow Plays a slideshow.
Import Copies the photo to HDD (page 42).
Information/Settings Displays information about the album or
photo.
SD xDCFM.S.
Create x-Pict Story HD
Copy x-ScrapBook
x-ScrapBook
x-Pict Story HD
Memory Stick
Photo
Sample Album
Album
Items Details
Slideshow Pace Sets the pace for slideshow.
•Fast
•Normal
•Slow
Search File Searches for a file when the file number
is entered with the number buttons.
Stop Stops playing the slideshow.
Rotate (left) Rotates the photo counterclockwise by
90 degrees.
Rotate (right) Rotates the photo clockwise by 90
degrees.
Eject Ejects the disc (for disc only).
63
Enjoying Videos, Photos, and Music
Various Photo Playback
Operations
Buttons/Functions
A YELLOW
– Switches the viewing mode for “x-ScrapBook” (page 64) (HDD only).
B </,
– Turns pages or selects photos on “x-ScrapBook” (page 64) (HDD only).
C RETURN
– Returns to the previous display.
D / PREV/NEXT
– Displays the previous or next photo.
E STOP / PAUSE
– Stops or pauses playback.
SD
xD
CFM.S.
3
1
2
4
5
YELLOW
RETURN
PREV
NEXT
STOP
PAU SE
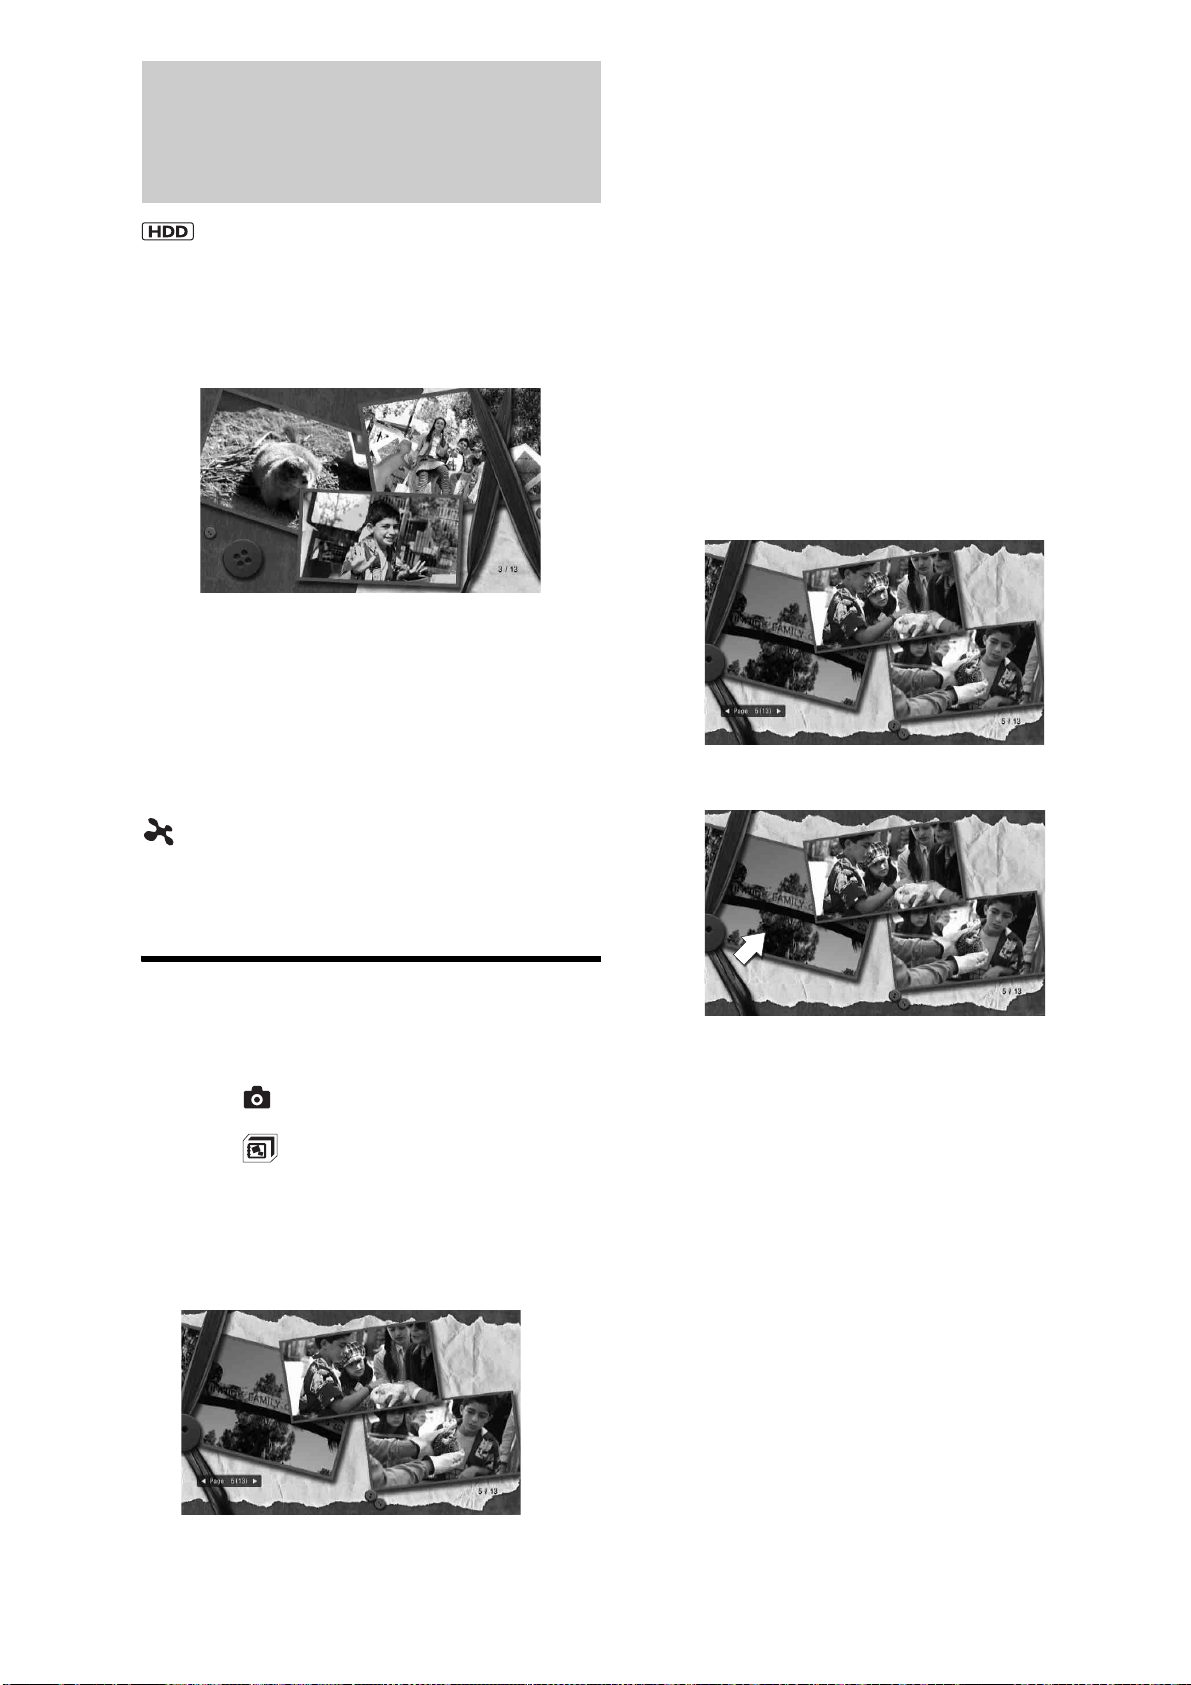
64
Using “x-ScrapBook”
“x-ScrapBook” offers compelling slide show that the server
automatically arranges to explore your memories in a
personalized digital scrapbook. Since the application allows for
adding home videos and “x-Pict Story” video titles, you can
enjoy both photos and videos in a single album.
“x-ScrapBook” has the following functions:
– “Browsing the album”
Two playback modes are available for browsing the created
content.
–“Adding video titles to the album” (page 65)
– “Changing the design theme” (page 65)
–“Copying “x-ScrapBook” albums to BD/DVD” (page 99)
About “x-Application”
(“x-Application”) is a brand name for Sony-designed and
advanced applications that mix, arrange and metamorphose
various visual and sound content.
The application suggests new emotional and easy ways for
enjoying the content.
Browsing “x-ScrapBook” album
a Press HOME to turn on the Home Menu.
b Select to display the icons.
c Select (x-ScrapBook) and press ENTER.
Thumbnails of created albums appear.
d Select an album to browse and press ENTER.
The cover page or the last viewed page appears.
◆Example:
To display the album information, press DISPLAY.
When a video title of the same shooting period
is found on the HDD
After step 4, the display asks if you want to add the video title to
the album of the same shooting period. When you select [Yes],
the album appears with the added video title. You can manually
add the video title later even if you select [No] (page 65).
Album viewing modes
For photo/video content browsing, two playback modes are
available: Page mode and Cursor mode. The Page mode is for
browsing the entire album as if you are turning pages of a photo
album. The Cursor mode allows for individual selection of
photos and video titles on a page for zooming or video playback.
You can switch the viewing modes by pressing YELLOW on the
remote.
◆Page mode
Press <, to turn pages. Or, enter the page number using the
number buttons. When you reach the desired page, press
YELLOW so you can play the individual video title or photo full
screen using the cursor in the Cursor mode below.
◆Cursor mode
A video icon is displayed by the video thumbnail image. To play
full screen, select the desired photo or video title and press
ENTER. To stop playback, press x.
To turn pages, select the left-most or the right-most photo or
video title, and press<,Mm.
z Hints
• When importing new photos of the same shooting period or deleting a
photo that is used in a “x-ScrapBook” album from HDD, album of the
same period will be added or deleted automatically
.
• The cursor does not appear on the front or back cover.
65
Enjoying Videos, Photos, and Music
◆Available OPTIONS while selecting x-ScrapBook
◆Available OPTIONS while selecting files
◆Available OPTIONS during playback
Adding video titles to the “x-
ScrapBook” album
a Press HOME to turn on the Home Menu.
b Select to display the icons.
c Select (x-ScrapBook) and press ENTER.
d Select an album to edit and press OPTIONS.
e Select [Edit] and press ENTER.
f Select [Add Video] and press ENTER.
Thumbnail images may not display in some cases.
If the video title does not contain the shooting date,
the video will be added to the end.
g Select a video title to add and press ENTER.
h When you finish selecting, select [OK] and
press ENTER.
i Select [Yes] and press ENTER.
To delete video titles from the album
1 After step 5, select [Remove Video] and press
ENTER.
2 Select video titles to delete and press ENTER.
3 When you finish selecting, select [OK] and press
ENTER.
4 Select [Yes] and press ENTER.
z Hint
If you have converted “x-Pict Story” files to video titles beforehand, you
can add the “x-Pict Story” video titles to the album (page 68).
Changing the design theme
a Press HOME to turn on the Home Menu.
b Select to display the icons.
c Select (x-ScrapBook) and press ENTER.
d Select an album to edit and press OPTIONS.
e Select [Edit] and press ENTER.
f Select [Change Theme] and press ENTER.
Items Details
Slideshow Pace Sets the pace for slideshow.
•Fast
•Normal
•Slow
Information/Settings Displays information about the album or
photo.
Items Details
Copy to Disc See “Coping Photos” for details
(page 99).
Play Display the file.
Edit Displays the following edit options for
“x-ScrapBook” albums:
• Change Theme (page 65)
• Add Video (page 65)
• Remove Video (page 65)
Information/Settings Displays information about the album or
photo.
Items Details
Cursor Mode/Page
Mode
Switches the viewing modes for the “x-
ScrapBook” album (page 64).
Stop Stops playback of the “x-ScrapBook”
album.
Edit Displays the following edit options for
“x-ScrapBook” albums:
• Change Theme (page 65)
• Add Video (page 65)
• Remove Video (page 65)
Page Search Opens the desired page of the “x-
ScrapBook” album. Use the number
buttons to enter the page number.
Remove Video Times
Select the title link(s) you want to cancel.
OK
Cancel
Select All
Clear All
RETURN
Finish
Superb view 20070713
DR
HDV 7/13/2007 3:34PM - 7/13/2007 3:35PM
7/13/2007 3:34PM ( 0H01M)
ORG
Cancel Video Selection
Select the title link(s) you want to cancel.
OK
Cancel
Select All
Clear All
RETURN
Finish
Superb view 20070713
DR
HDV 7/13/2007 3:34PM - 7/13/2007 3:35PM
7/13/2007 3:34PM ( 0H01M)
ORG
,continued
66
To enlarge, press YELLOW.
g Select the desired theme you and press
ENTER.
Notes on “x-ScrapBook”
• When you edit an album, the previous playback point will not
be retained.
• You cannot add the same video title to an album multiple
times.
• The album content may change if its video title is edited.
Changes such as video content (replacement with the edited
version or only a photo), location within the album, or deletion
from the album may result.
• Albums will be erased if the source folder or its files are deleted
from the HDD.
• Compared to the operations on the HDD, playback options for
copied discs are limited.
Using “x-Pict Story HD”
X-Pict Story HD is creating original personal movies from photo
with sophisticated face-recognition technology and syncs
transitions with music selected by CDs.
You can enjoy the created “x-Pict Story” file as it is, or convert
it to an SD (Standard Definition) video title so you can copy to a
disc and play it on other devices. The converted video title can
be edited (page 79), or added to a “x-ScrapBook” album
(page 65).
For details about SD and HD picture quality, see page 100.
Note
Use the preset music if you plan to give the BD/DVD to others after
copying. Note that the materials are copyrighted and except for personal
enjoyment, unauthorized use is against the copyright law. Sending the
copyrighted material outside the home network, or saving the material in
a place accessible by unauthorized third parties is also prohibited by the
copyright law.
a Press HOME to turn on the Home Menu.
b Select to display the icons.
c Select (Create x-Pict Story HD) and
press ENTER.
The photo album selection display appears.
d Select an album to make an “x-Pict Story”
file from, and press ENTER.
The music selection display appears.
Change Theme
Select a theme.
Cancel
RETURN
Finish
Baby
Graduation
Birthday
Beach
Wedding
Y
Zoom in/Zoom out
Kindergarten @20070710
Create x-Pict Story HD
Copy x-ScrapBook
x-ScrapBook
x-Pict Story HD
Memory Stick
Photo
Sample Album
Album
Create x-Pict Story HD - Select Album
RETURN
Finish
Select an album
Cancel
KYOTO Story
Photo
Photo
Photo
Ancient city 20070713
11/25/2005 - 11/27/2005 Number of Files:8
Capital 0713
11/25/2005 - 7/13/2007 Number of Files:4
67
Enjoying Videos, Photos, and Music
When selecting from the preset music or tracks
previously imported, go to step 9.
e Select [Import] and press ENTER.
The CD selection display appears.
• Music on the HDD is not selectable.
• Observe the copyright law when using any copy-righted
content.
f Select a source disc and press ENTER.
The track selection display appears.
g Select a track to import and press ENTER.
The music is played during import.
The music selection display re-appears with the
imported track. The display retains up to five tracks.
h Select a track for music and press ENTER.
The theme selection display appears.
When you select [Select Mode], you can set the
length of the “x-Pict Story” file.
[Auto-Adjust]: Matches the length of the audio track
and number of photos used automatically.
[Use Entire Track]: Plays the entire audio track.
[Use All Photos]: Plays all photo files.
Note that:
– Not all photos in the selected folder appear in the created “x-Pict
Story” file when you select the preset music or when you select
[Use Entire Music], as the number of photos changes according
to the music length.
– If you import an audio track that lasts more than 70 minutes, the
created “x-Pict Story” file may not play properly.
i Select a design theme and press ENTER.
The created “x-Pict Story” file plays for preview.
j Press ENTER or x.
The confirmation screen appears.
If you do not want to include the time display in the
“x-Pict Story” file, press HOME and select [Settings]
– [Photo Settings] – [x-Pict Story HD Time Display]
(page 115).
The file name is the same as the album name.
k Select if you want to make a video title from
the “x-Pict Story” file.
You can make a video title later even if you select
[No] (page 68).
[Yes]: Creates an SD video title from the “x-Pict
Story” file and saves it on the HDD. Wait until
creation finishes (the “x-Pict Story” file plays for the
whole time) or if you want to cancel the creation,
press RETURN.
When complete, the album name will be set as the
title. If you want to change the title, select [Rename],
press ENTER, and see “Entering Characters”
(page 90).
Later, the video title can be viewed from the “x-Pict
Story” icon under the Video icon on the Home menu.
[No]: Saves the created “x-Pict Story” file on the
HDD without making an SD video title. You can
play the “x-Pict Story” file by selecting [Photo] – [x-
Pict Story HD].
Voyage
New Age ( 2:14)
Memories
New Age ( 2:11)
Mystique
New Age ( 2:04)
Wind Poem
New Age ( 2:16)
Create x-Pict Story HD - Select Music
RETURN
Return
Select track
1
3
4
2
Cancel
Import
0.0GB
Create x-Pict Story HD - Select CD
The Best of Cinnamon roll
Paddy bird
Select a CD to import.
Cancel
RETURN
Return
Disc 10
--------
Trust in Me
( 3:24)
Calling You
( 4:42)
God will
( 3:12)
Create x-Pict Story HD - Import CD
RETURN
Return
Select the track you want to import.
2
3
1
Cancel
Change Disc
Create x-Pict Story HD - Select Theme
RETURN
Return
Select a theme to match the music. Mode: Auto-Adjust
Cancel
Select Mode
Cute Clouds
Spotlight
Memories
Active Frames
Sepia
Create x-Pict Story HD
RETURN
Return
x-Pict Story File will be made with the following settings.
Start
Finish
Rename
Change
Tltle: superb view @20070713
Album Name:superb view @20070713
Track Name Imported music/Sepia
Playback Time: 2:10
No
Create a video title?
Operations other than RETURN will be invaid during video title creation.
,continued

68
l Select [Start] and press ENTER.
z Hint
You can also make a “x-Pict Story” file from the OPTIONS menu. Select
an album from the Photo icon on the Home menu, press OPTIONS and
select [Create x-Pict Story HD].
Available OPTIONS
The Options menu apperas when you press OPTIONS. The
displayed items differ depending on the situation.
◆Available OPTIONS while selecting x-Pict Story HD
◆Available OPTIONS while selecting “x-Pict Story” files
To play the “x-Pict Story” file
1 Press HOME to turn on the Home Menu.
2 Select to display the icons.
3 Select the and press ENTER.
4 Select the “x-Pict Story” file you want to play and
press ENTER.
To make a video title from the“x-Pict Story” file
1 Press HOME to turn on the Home Menu.
2 Select to display the icons.
3 Select and press ENTER.
4 Select the “x-Pict Story” file that you want to
make a video title from and press OPTIONS.
5 Select [Convert to Video Title] – [Start] and press
ENTER.
Wait until creation finishes (the file plays for the
whole time). Or if you want to stop, press RETURN.
The video title created only halfway will be saved on
the HDD.
When complete, the album name will be set as the
title. If you want to change the title, select [Rename],
press ENTER, and see “Entering Characters”
(page 90). Later, the video title can be viewed from
the Video icon on the Home menu.
To erase an “x-Pict Story” file
1 Press HOME to turn on the Home Menu.
2 Select to display the icons.
3 Select and press ENTER.
4 Select the “x-Pict Story” file you want to erase,
and press OPTIONS.
5 Select [Erase] and press ENTER.
6 On the confirmation display, select [Yes] and
press ENTER.
Notes
• The “x-Pict Story” file will be erased If you delete any photo from the
source album.
• Faces may not be recognized correctly depending on the photo file.
Notes on “x-Pict Story HD”
• When an “x-Pict Story” file is converted to a video title, its HD
(High Definition) quality pictures turn into SD (Standard
Definition) quality pictures.
• “x-Pict Story” files will be erased if any photo in the source
folder is deleted.
• “x-Pict Story” files may be copied only partially depending on
the CD.
When playing the “x-Pict Story” file
• “x-Pict Story” files may not play correctly if you connect or
disconnect the following devices:
– HDV/DV devices
–HDMI devices
• Sections in the picture may look swayed depending on the
output resolution, images in the photo, or the visual effects.
When making a video title out of a “x-Pict
Story” file
• The remote does not work during conversion.
• The created “x-Pict Story” files will not be played or saved in
the following case:
– When importing data to the HDD
• Not all photos are used when [Use Entire Track] or [Auto-
Adjust] are selected, or when the folder contains many photos.
Items Details
Slideshow Pace Sets the pace for slideshow.
•Fast
•Normal
•Slow
Information/Settings Displays information about the album or
photo.
Items Details
Play Display the file.
Erase Erases the selected “x-Pict Story” file.
Convert to Video
Title
Converts the file to an SD quality video
title.
Information/Settings Displays information about the album or
photo.
a paddybird
4/12/2007
Play
Erase
Convert to Video Title
Information/Settings
69
Enjoying Videos, Photos, and Music
Playing a Slideshow
a Press HOME to turn on the Home Menu.
b Select to display the icons.
c Select an album or or Memory cards.
When displaying folders, select a folder to view,
press ENTER.
d Select a photo and press H.
• To show the previous or next photo, press . or >.
• To stop the slideshow, press x.
• To pause the slideshow press X. To resume, press X
again or press H.
z Hints
• You can start the slideshow from the Options menu. Press OPTIONS
when an album or a photo is selected.
• A slideshow also starts if H is pressed while a photo is displayed on
the TV.
Notes
• When reaching the end of an album, playback re-starts from the
beginning.
• Playback time of each photo may differ depending on the files in the
album.
• Do not remove a memory card while its card indicator is flashing. The
data may be damaged.
• When importing a folder, only the photos directly under the folder can
be imported. No photos can be imported from the sub folder.
Playing Music CDs, DATA
BDs, DATA DVDs, and DATA
CDs
You can play music CDs, data BDs, data DVDs, and data CDs.
◆Supported file format
MP3 and WAV format
Notes
• For MP3, only MPEG1 Audio Layer3 format is supported.
• The server supports WAV format files recorded in 44.1 kHz, 16 bit,
and stereo.
a Press HOME to turn on the Home Menu.
b Select to display the icons.
c Select (Music) and press ENTER.
d Select and press ENTER.
Tracks appear in the recorded order.
To play an entire album, press H instead of
ENTER.
e Select a track to play and press H.
For other playback operations, see page 73.
To stop, press x.
Note
The [Others] folder contains the following discs:
– Unknown discs (Discs that have not been registered yet)
– Blank discs (Unformatted discs)
– Unreadable discs (Error discs)
– Software update discs
Available OPTIONS
The Options menu appears when you press OPTIONS. The
available items differ depending on the situation.
SD xDM.S. CF
Create x-Pict Story HD
Copy x-ScrapBook
x-ScrapBook
x-Pict Story HD
Memory Stick
Photo
Sample Album
Album
DSC_0643
6/ 3/2007 4:00PM
JPG
DSC_0660
6/ 3/2007 4:11PM
JPG
DSC_0675
6/ 3/2007 5:49PM
JPG
DSC_0676
6/ 3/2007 5:51PM
JPG
DSC_0686
6/ 3/2007 4 00PM
JPG
Others
Number of Discs:1
Music
Music
Disc 8
CD-R DATA
Disc 5
BD-R DATA
--------
Disc 10
CDDA
Puddy bird
The Best of Cinnamon roll
CDDA
Imported
Disc 12
DVD- RW DATA
Disc 9
DVD- RW DATA
,continued
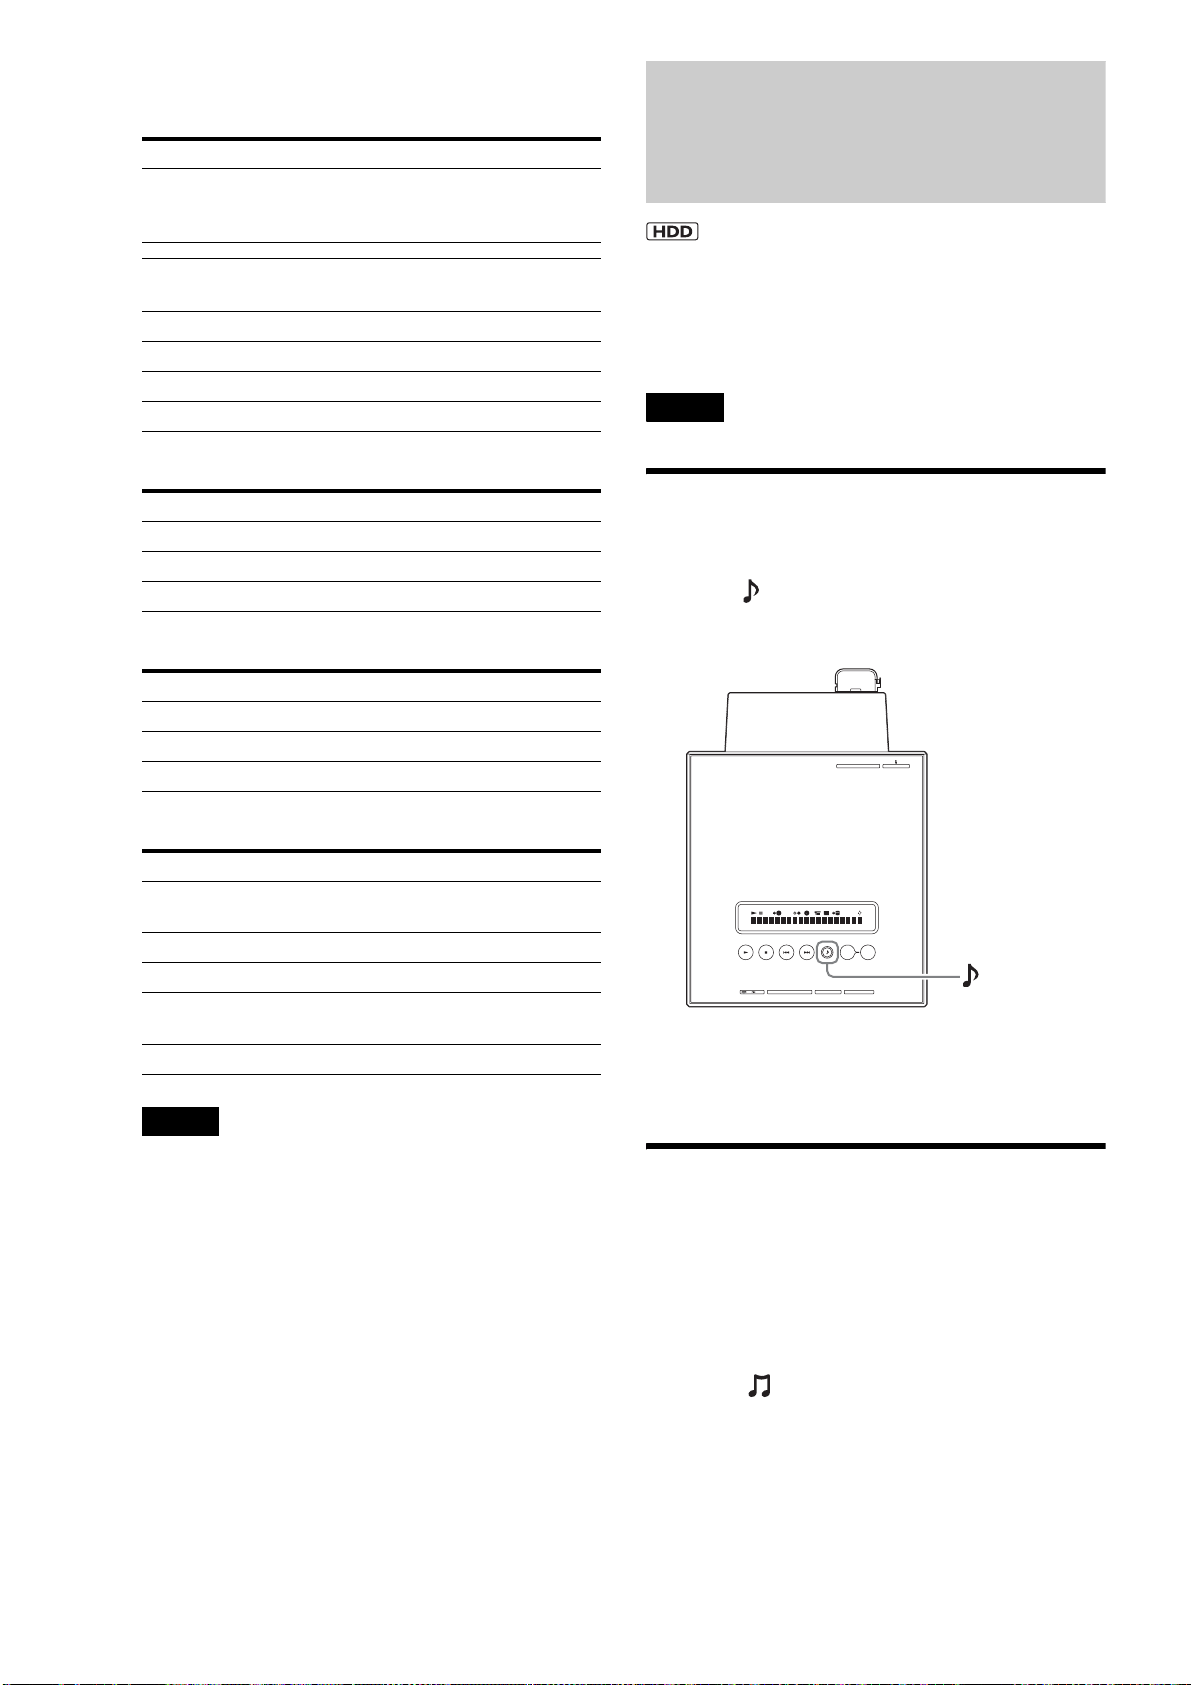
70
For playing music recorded on the discs, the availability differs
as in the following four situations.
◆Available OPTIONS while selecting discs
◆Available OPTIONS while selecting music folders
◆Available OPTIONS while selecting tracks
◆Available OPTIONS during playback
Notes
• Playback of CD-Rs created in multi-session is limited to its single
session parts.
• If “.mp3” is added to a file other than MP3, the server may play the file,
damaging the connected devices.
Notes on playing DTS soundtracks
• When playing DTS sound recorded on a CD, the analog
AUDIO L/R jacks output excessively loud noise. Noise may be
output even when the connection is digital depending on the
playback condition. To avoid damaging your system, attention
is required when connecting the server’s analog output jacks to
an AV amplifier.
• To enjoy DTS Digital Surround™ playback, you will need to
connect a 5.1ch DTS Digital Surround™ decoder to the
server’s digital output jack. If you connect the server to an AV
amplifier without a DTS decoder and play a DTS CD, noise
may be output from the connected speakers.
z Hint
You can enjoy music more with advanced playback functions such as
Shuffle Play and Repeat Play once you import the contents to the HDD
(page 73).
Playing Music Stored on
the HDD
You can play all music contents stored on the HDD.
◆Supported file format
MP3 and LPCM format
Note
For MP3, only MPEG1 Audio Layer3 format is supported.
Instant music playback using the
Music Play button
a
Press (Music Play) on the server or the
BLUE button on the remote repeatedly to
select an audio folder for playback.
The current folder flashing on the top or front panel
display toggles: All – Newly Registered – GENRE 1
– GENRE 2 – GENRE 3… – All
Playback starts after a few seconds.
Playing music on the HDD using the
Home Menu
z Hint
You can view the HDD content by grouping them into folders by album,
genre, or artist (page 71).
a Press HOME to turn on the Home Menu.
b Select to display the icons.
Items Details
Sort By Re-orders the albums.
• Album Name
• Artist Name
Import Multiple Allows for multiple disc import.
(for Music CD only)
Play Plays tracks in the album.
Disc Import Imports tracks on the selected disc.
Information/Settings Displays the disc information.
Eject Eject the disc.
Items Details
Play Plays tracks in the folder.
Folder Import Imports the selected folder.
Information/Settings Displays the folder information.
Items Details
Play Plays tracks.
Track Import Imports a single track from a disc.
Information/Settings Displays track information.
Items Details
Play from
Beginning
Plays the title from beginning.
Play Plays the selected track.
Stop Stops playing the track.
Information/
Settings
Displays the details about the title.
Eject Ejects the disc.
CF
STD/DUO
xD-Picture CardSD
IMPORT
IMPORT
SELECT
LINE IN 2
S VIDEO VIDEO R AUDIO L
(
MONO
)
HDV 1080i/DV IN
(Music Play)
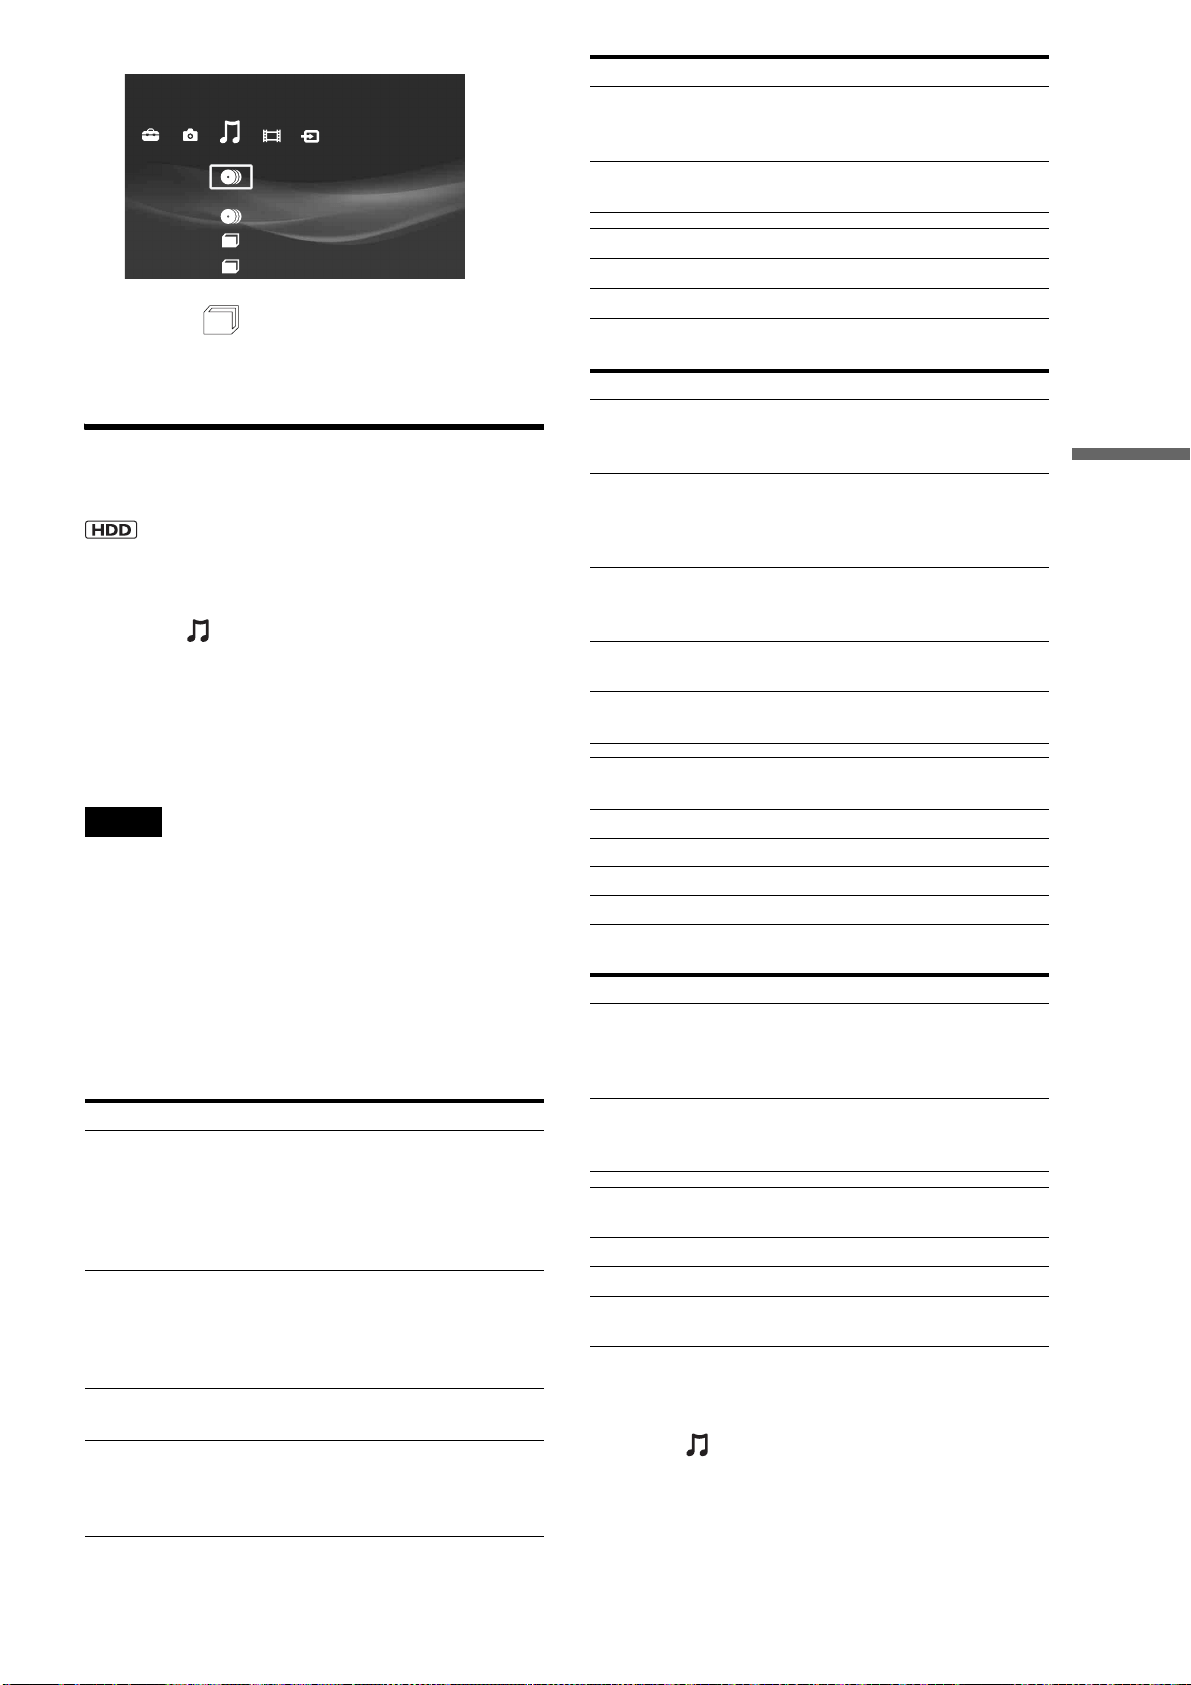
71
Enjoying Videos, Photos, and Music
c Select a and press H.
• To select a track to play, select the folder and press
ENTER.
Then, select a track and press ENTER.
Playing newly registered music stored
on the HDD
a Press HOME to turn on the Home Menu.
b Select to display the icons.
c Select the [Newly Registered] folder and
press H.
• To select a track to play, select the folder and press
ENTER.
Then, select a track and press ENTER.
Notes
• The [Newly Registered] folder will not appear if no music is imported
to the HDD.
• The [Newly Registered] folder contains tracks recently imported, for
up to 30 tracks.
Available OPTIONS
The Options menu appears when you press OPTIONS. The
available items differ depending on the situation.
For playing music recorded on the HDD, the availability differs
as in the following three situations.
◆Available OPTIONS while selecting music folders
◆Available OPTIONS while selecting tracks
◆Available OPTIONS during playback
To change the group content
1 Press HOME to turn on the Home Menu.
2 Select to display the icons.
3 Select the HDD music folder.
4 Press YELLOW repeatedly
The view of the listings changes with each press as
follows:
–Album
Items Details
Group Content Re-orders the HDD content.
• By Album
•By Genre
•By Artist
You can also toggle them by pressing
YELLOW.
Sort By Re-orders the music folders in the HDD.
• Artist (A to Z)
• Artist (Z to A)
• Album (A to Z)
• Album (Z to A)
Play All Plays all tracks in the HDD repeatedly
and randomly.
Repeat Displays options for Repeat Play.
•Track
•All
•Off
Others
Number of Discs:1
Music
Shuffle Displays options for Shuffle Play.
•On
•Off
PARTY MODE Enters “PARTY MODE” setting display
(page 75).
Play Plays tracks in the folder.
Information/Settings Displays the folder information.
Erase Erases the folder.
Items Details
Sort By Re-orders the track
• Track (A to Z)
• Track Number
Repeat Displays options for Repeat Play.
• Track
•All
•Off
Shuffle Displays options for Shuffle Play.
•On
•Off
PARTY MODE Enters “PARTY MODE” setting display
(page 75).
Erase Multiple Allows you to erase one or more tracks at
one time.
Play from
Beginning
Plays the track from beginning.
Play Plays the selected track.
Stop Stops playing the track.
Information/Settings Displays the track information.
Erase Erases a track
Items Details
Repeat Displays options for Repeat Play.
• Track
•All
•Off
Shuffle Displays options for Shuffle Play.
•On
•Off
Play from
Beginning
Plays the track from beginning.
Play Plays the selected track.
Stop Stops playing the track.
Information/
Settings
Displays the details about the track.
Items Details
,continued

72
–Genre
–Artist
Notes
• The “HDD Music” folder changes depending on the view setting.
Album: Displays folder by album.
Genre: Displays folder by genre.
Artist: Displays folder by artist.
• Depending on the number of recorded albums, the view may be slow
to change.
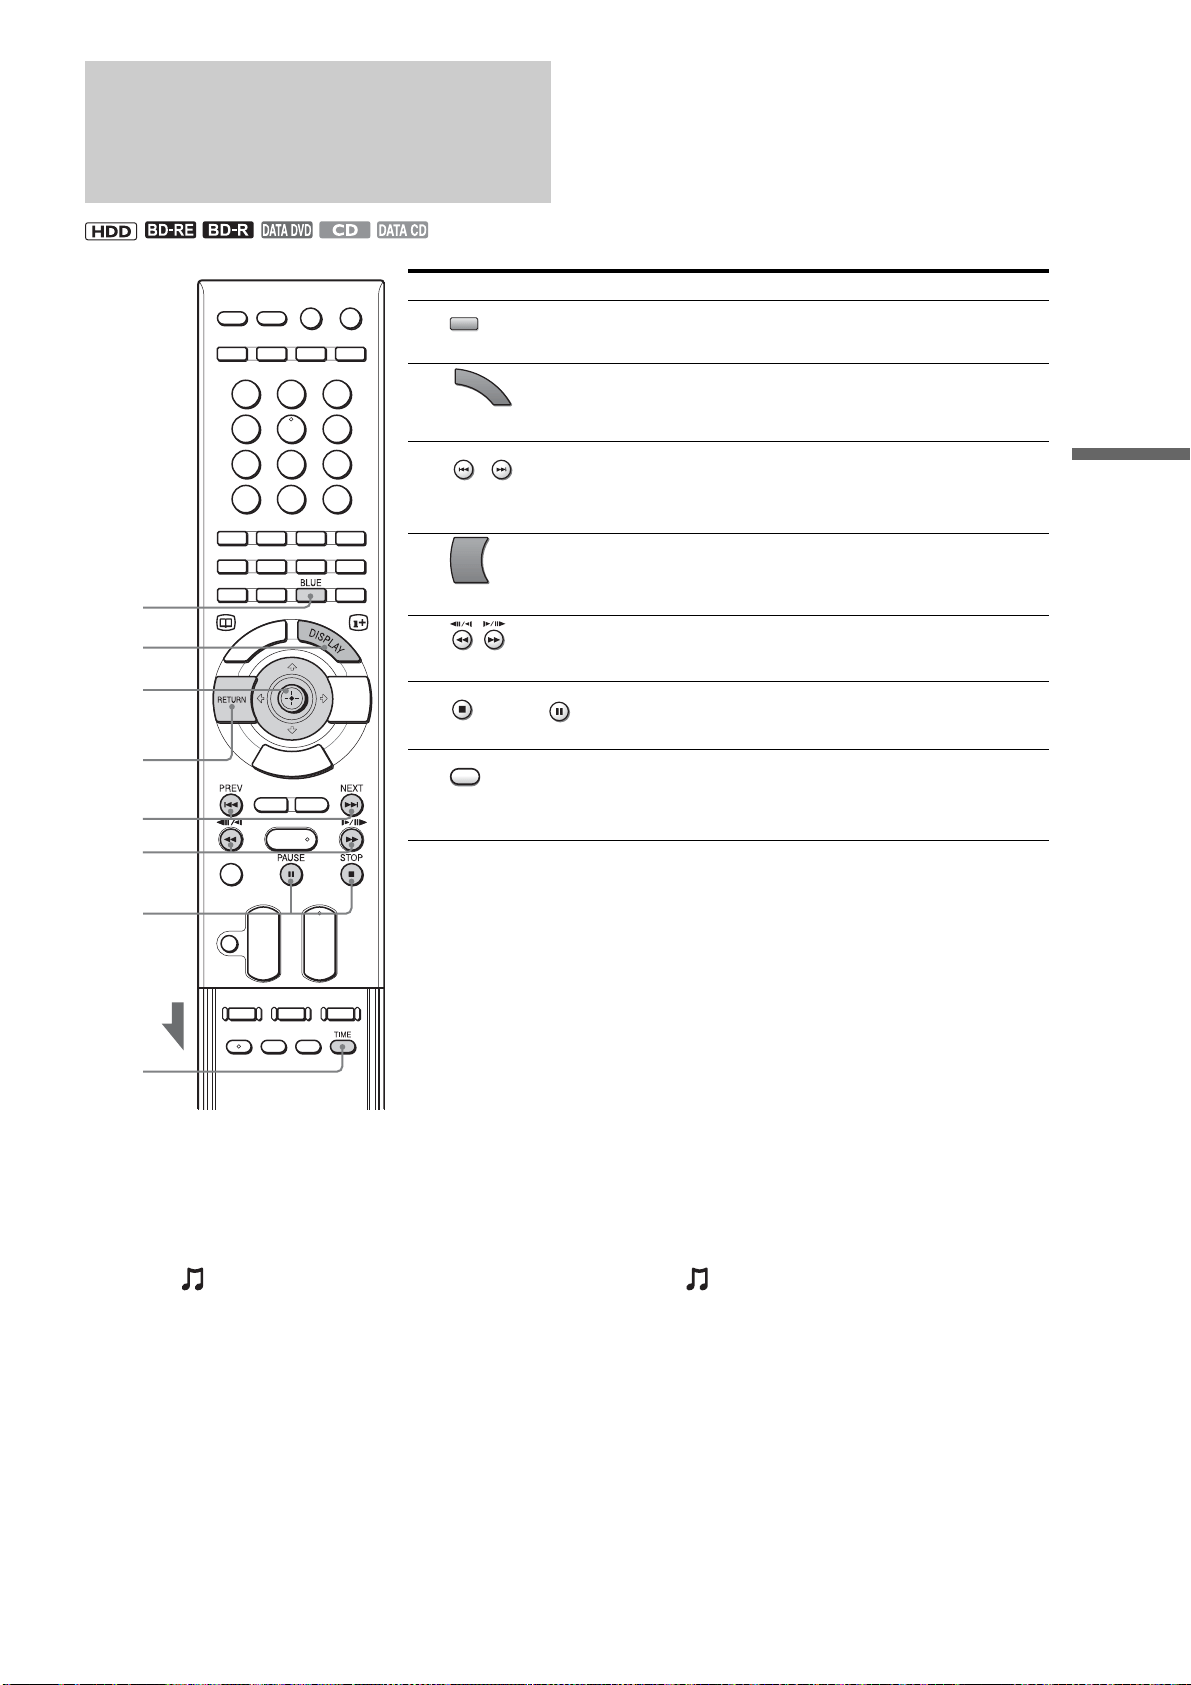
73
Enjoying Videos, Photos, and Music
Various Music Playback
Operations
To play repeatedly (Repeat Play)
Repeat Play is available for HDD content only.
1 Press HOME to turn on the Home Menu.
2 Select to display the icons.
3 Select a folder on the HDD and press OPTIONS.
The Options menu appears.
4 Select [Repeat], and then select either [Track] or
[All] and press ENTER.
The setting remains even after the server is turned
off.
To turn off, repeat the above steps and select [Off] in
step 4.
To play randomly (Shuffle Play)
Shuffle Play is available for HDD content only.
1 Press HOME to turn on the Home Menu.
2 Select to display the icons.
3 Select a folder on the HDD and press OPTIONS.
The Options menu appears.
4 Select [Shuffle] – [On], and press ENTER.
The setting remains even after the server is turned
off.
To turn off, repeat the above steps and select [Off] in
step 4.
Buttons/Functions
A BLUE
– Selects a music album for playback (page 70) (HDD only).
B DISPLAY
– Switches the panel display to show track information and playback time.
C / PREV/NEXT or </,
– Skips to the beginning of the current or next track. To go the previous
track, press . twice.
D RETURN
– Stops playback and returns to the Home Menu.
E / (Fast-reverse/fast-forward)
– Fast reverses or fast forwards (x14) when pressed during playback.
F STOP / PAUSE
– Stops or pauses playback.
G TIME
– Switches the panel display to show elapsed playback time or remaining
time.
3
5
1
2
3
4
6
7
BLUE
D
I
S
P
L
A
Y
PREV
NEXT
RETURN
STOP
PAU SE
TIME

74
Playing Music in Other
Rooms
When connected to a DLNA compatible audio device or PC via
the network, you can play music stored on the HDD on these
devices.
About the DLNA function
The function ensures connection and music sharing among
digital AV devices and PCs on the home network. When the
server and the DLNA compatible devices are connected via the
network, the device can play the server’s music content.
Because of this convenient function, you can play the server’s
music even in other rooms.
For information regarding DLNA, visit the DLNA homepage:
http://www.dlna.org/
Preparing for the music server
function
a Connect to the network.
Network connection is a prerequisite for this
function. See “Step 5: Connecting to the Network”
(page 26) for setup information.
b Configure the network settings.
Make the settings necessary for connecting the server
to the network. See “Network Settings” (page 121)
for procedures.
c Making the music server settings.
The following steps make the music on the HDD
playable on other devices.
3-1: Set [Music Server Funciton] to [On].
3-2: Set [Client Registration] to [Auto].
For details, see “Music Server Settings” (page 122).
To prepare the client devices
The client device that you are going to play the server’s music
content also needs configuration for network connection and
playback. Refer to the instructions supplied with the device for
connections and settings. Also, the music server function may
not work if firewall settings are made on other devices. See the
device’s manual and change the settings.
Playing music on the client devices
You can play the server’s music content or stop playing it by
operating the client device. Buttons on the server or the remote
cannot be used for the operation.
Refer to the instructions supplied with the device for details.
Notes on the music server function
• You cannot play on the client device when:
– Changing the server’s settings
– Editing the video titles
– Importing video titles to the HDD or copying them to a disc
(in all cases)
– Creating “x-ScrapBook” albums or copying them to a disc
– Editing audio files
– Editing music album/track information
– Copying photos to a disc
– Copying photo albums to a disc
• Depending on the client device, the server’s music content may
not be played, or the sound may not be output properly.
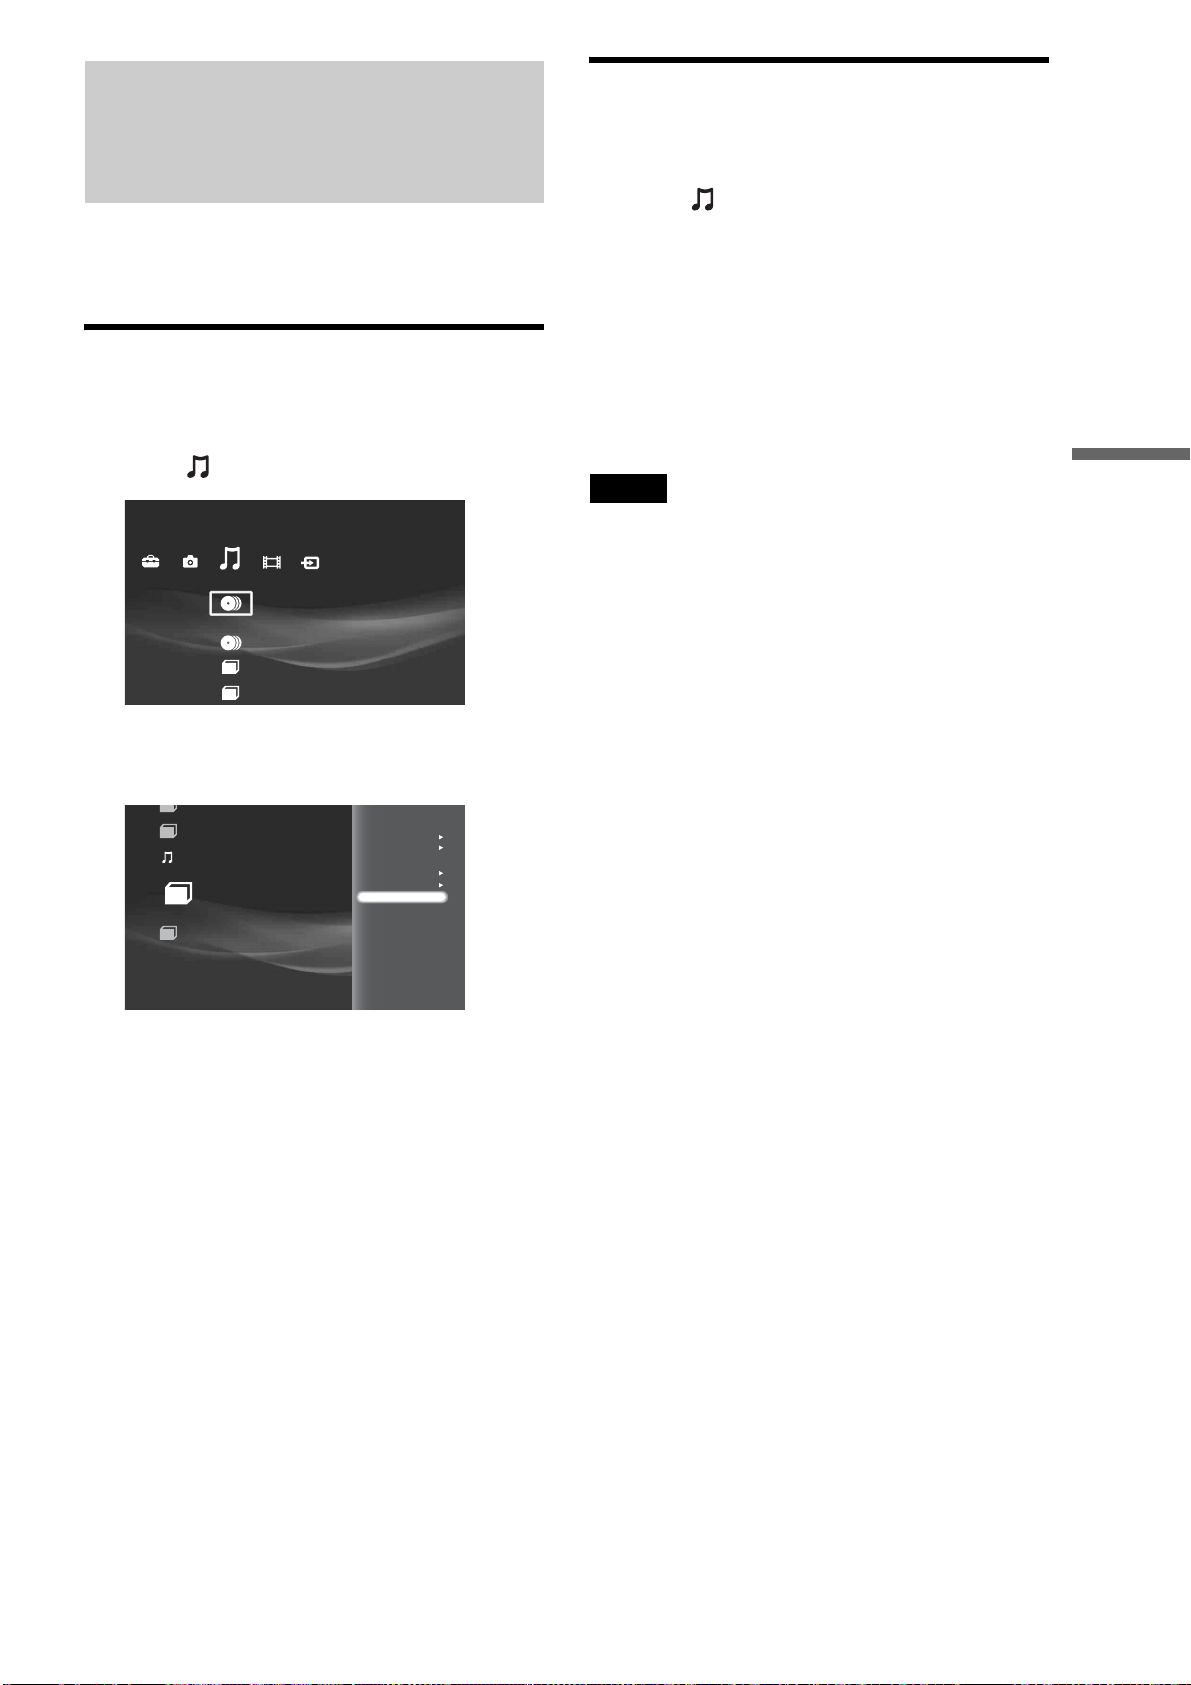
75
Enjoying Videos, Photos, and Music
Playing the Same Music on
All Client Devices (“PARTY
MODE”)
For information about client devices that support “PARTY
MODE” function, visit the following “Home Entertainment
Server” website:
http://www.sony.com/hesupport
Preparing for “PARTY MODE” Play
a Press HOME to turn on the Home Menu.
b Select to display the icons.
c Select a folder and press OPTIONS.
The Options menu appears.
d Select [PARTY MODE] and press ENTER.
The “PARTY MODE” settings display appears.
e Select [PARTY MODE] and press ENTER.
f Select [On] by pressing Mm.
g Select [Client List] and press ENTER.
The device selection display appears.
If no device is displayed, select [Scan Again] and
press ENTER.
h Select up to four devices.
A check mark appears next to the selected devices.
Devices that joined the previous “PARTY MODE”
Play are check-marked by default.
i Select [OK] and press ENTER.
Playing in “PARTY MODE”
a Press HOME to turn on the Home Menu.
b Select to display the icons.
c Select the music content to play.
d Press H.
Note that the remote’s playback operations are
limited during “PARTY MODE” Play. Only the H,
x, and ./> buttons can be used.
z Hint
Shuffle Play and Repeat Play are available during “PARTY MODE”
Play.
Note
When the server is turned off, “PARTY MODE” Play and playback on
the client devices will be canceled. To re-start the server and re-enter
“PARTY MODE,” follow the steps in “Preparing for “PARTY MODE”
Play” (page 75).
Others
Number of Discs:1
Music
Group Content
Sort By
Play All
Repeat
Shuffle
PARTY MODE
Play
Information/Settings
Erace
The Best of Cinnamon roll
Number of Albums; 1
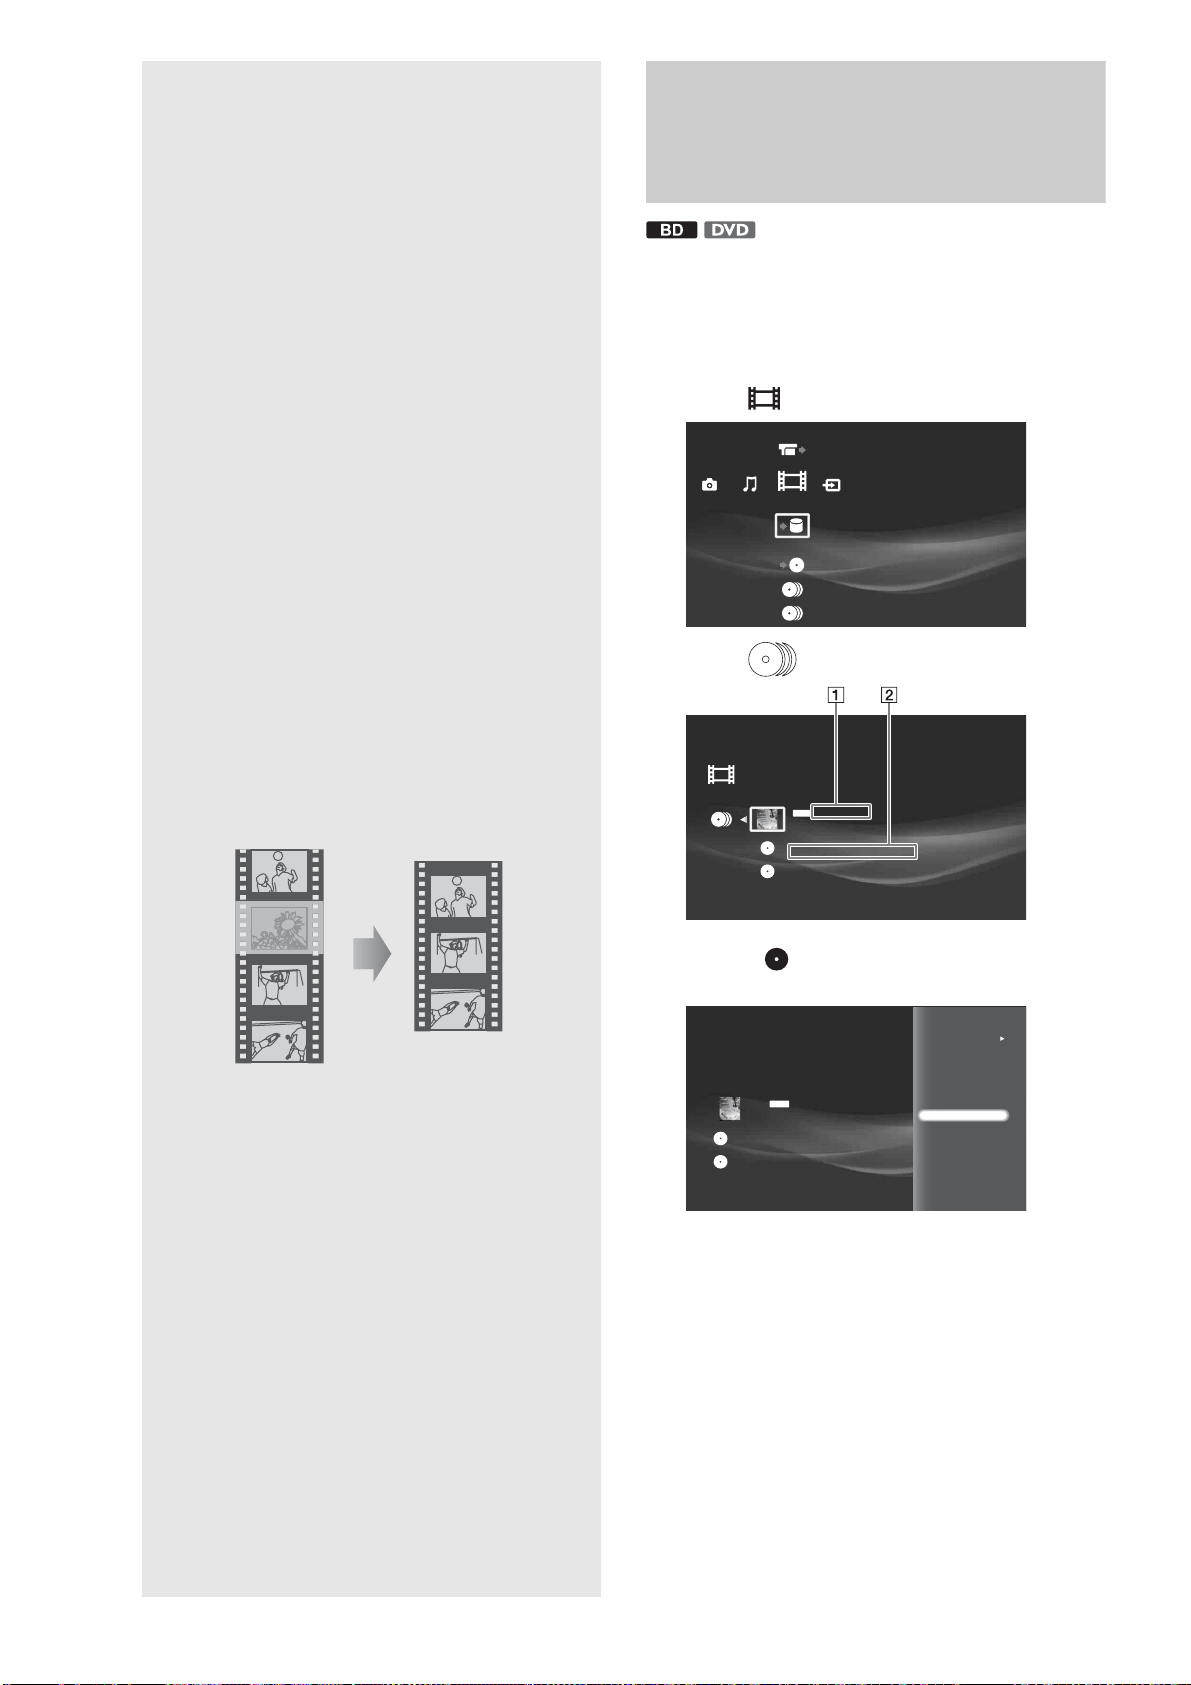
76
‘
Organizing
Content
Using the server’s various edit functions,
you can make the HDD/disc data more
accessible and easy to manage.
For managing discs in the disc changer, see
“Managing Discs” (page 35).
Editing Movie Information
for BD-ROMs and DVD-
ROMs
With registered BDs or DVD VIDEOs, you can change their
information, such as the disc and actor's name.
a Press HOME to turn on the Home Menu.
b Select to display the icons.
c Select and press ENTER.
d Select a and press OPTIONS.
The Options menu appears.
e Select [Information/Settings] and press
ENTER.
The information display appears.
f Press OPTIONS to turn on the Options
menu.
The Options menu appears with available edit
options.
Video
Import Disc to HDD
Video
STARS
D: Robert Thomas C:Donald Cabana
A Space shuttle
D: Curtis Lindsey C: Steven Brown
PG-13
Slash [Blu-Ray]
D:Donald Besson C:Ian Willis, John Jovovich, Mark James
Import Multiple Disks
0.0GB 388.1GB
RETURN
Finish
PG-13
Slash [Blu-Ray]
D:Donald Besson C:Ian Willis, John Jovovich, Mark James
Sort By
Information/Settings
Eject
• Editing Movie Information for BD-ROMs and DVD-
ROMs. . . . . . . . . . . . . . . . . . . . . . . . . . . . . 76
• Editing Video Title Information for the HDD/DATA
disc . . . . . . . . . . . . . . . . . . . . . . . . . . . . . . 77
• Searching for Disc Information. . . . . . . . . . . . 78
• Editing Video Titles. . . . . . . . . . . . . . . . . . . . . 79
• Editing Photo Album Information . . . . . . . . . . 84
• Editing Photo Files . . . . . . . . . . . . . . . . . . . . . 86
• Editing Audio Album Information . . . . . . . . . . 87
• Editing Audio Track Information. . . . . . . . . . . 88
• Editing Audio Files . . . . . . . . . . . . . . . . . . . . . 90
• Entering Characters . . . . . . . . . . . . . . . . . . . . 90
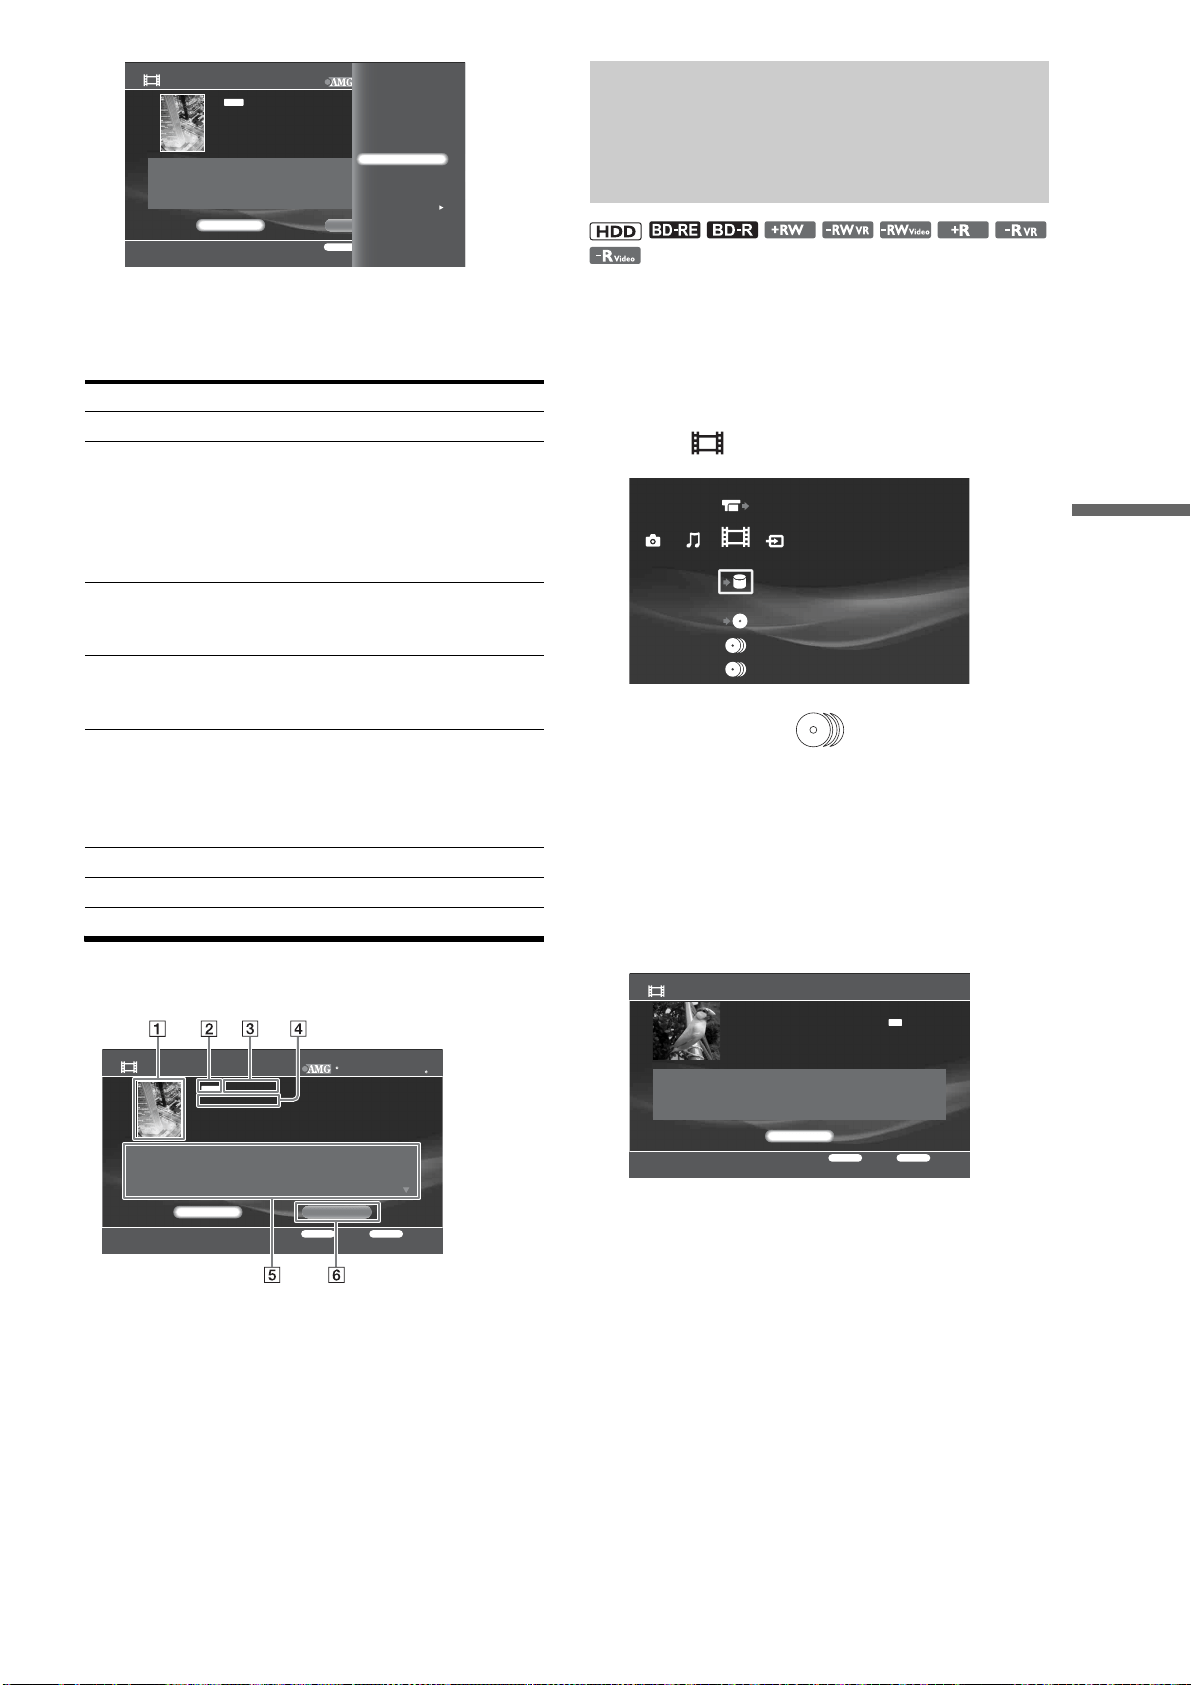
77
Organizing Content
g Select the item you want to edit and press
ENTER.
See page 90 when you need to enter characters.
About movie information display
◆Example: Display for discs (BD-ROM)
A Cover art
B Rating icon
C Title
D Release date (playback time)
E Displays director, producer, cast, and genre.
F Refers to the AMG Service for information.
See “Searching for disc information” for details
(page 78).
Editing Video Title
Information for the HDD/
DATA disc
You can make titles more recognizable and easy to manage by
renaming the title, or setting thumbnail images to them.
a Press HOME to turn on the Home Menu.
b Select to display the icons.
c Select a folder or and press ENTER.
When you select a disc type, select a disc from the
displayed disc list.
d Press OPTIONS.
e Select [Information/Settings] and press
ENTER.
The title information display appears.
f Press OPTIONS to display the Options
menu.
g Select an item to change and press ENTER.
• To change the thumbnail for the title, select [Thumbnail
Setting] (HDD only).
• To rename the title, select [Rename Title] (page 90).
Items Details
Rename Title You can change the title name.
Change Release Date Allows you to change the release date
information. Press B b to move the
highlight and enter the month, date, and
year by pressing V or v. The input is
cleared (“--”) when you press CLEAR
on the month, date, or year field.
Rename Director Enter a director name by selecting it
from the listings, or enter a new name by
selecting [New Entry].
Rename Producer Enter a producer name by selecting it
from the listings, or enter a new name by
selecting [New Entry].
Rename Cast Enter a cast name by selecting it from
the listings, or enter a new name by
selecting [New Entry].
Up to three names can be entered for a
title.
Change Genre Changes the genre information.
Clear All Clears all of the disc's information.
Title Information/Settings
RETURN
Finish
OPTIONS
Function
2007 All Media Guide, LLC
Content and technology provided by All Media Guide
Director
Paul Bullock
Produser
Rumi Reimer
Cast
Search Info.Close
PG-13
Slash [Blu-Ray]
2007 ( 2H06M)
Rename Title
Change Release Date
Rename Director
Rename Producer
Rename Cast
Change Genre
Clear All
Title Information/Settings
RETURN
Finish
OPTIONS
Function
2007 All Media Guide, LLC
Content and technology provided by All Media Guide
Director
Paul Bullock
Produser
Rumi Reimer
Cast
Search Info.Close
PG-13
Slash [Blu-Ray]
2007 ( 2H06M)
Video
Import Disc to HDD
Title Information/Settings
RETURN
Finish
OPTIONS
Function
Close
7/13/2007 3:34PM - 7/13/2007 3:34PM
HDV 7/13/2007 3:34PM - 3:35PM
7/13/2007 3:34PM ( 0H01M) HDV 0.1GB
PL
XP
,continued
78
About video title information display
A Title
B Playback time
C Date of recording
D Title type
Searching for Disc
Information
Search the AMG database for information about commercially
available CDs, DVD-ROMs and BD-ROMs while the
corresponding such discs remain in the changer.
The AMG Database contains artist names and album names for
music CDs, and movie title, director, and casts for BD/DVD
movies.
a On the Disc Information display, select
[Search Info.] and press ENTER.
After receiving the data via the network, the search
results appear.
b Select the title and press ENTER.
If the desired title is not included in the results, select
[Cancel].
Notes
• The product needs to be connected to the Internet in order to search the
database.
• Access to the AMG database will not be allowed if you did not select
[Agree] in [All Media Guide Settings] during Easy Setup. To change
the setting, see page 117.
• You cannot receive the AMG data if the network settings are not
correct. See “Internet Settings” (page 121).
• The AMG disc description is not provided for content copied on a
recordable media such as a CD-R/CD-RW and DVD-R. Note that no
data can be acquired for music content imported to the HDD.
• The number of the displayed cover arts of music CDs, DVD-ROMs
and BD-ROMs are limited. Such cover arts are displayed while the
corresponding CDs, DVD-ROMs and BD-ROMs remain in the
changer or the music files made from the corresponding CDs remain in
the HDD.
About AMG, see page 146 for details.
Title Information/Settings
RETURN
Finish
OPTIONS
Function
Close
7/13/2007 3:34PM - 7/13/2007 3:34PM
HDV 7/13/2007 3:34PM - 3:35PM
7/13/2007 3:34PM ( 0H01M) HDV 0.1GB
PL
XP
0.0GB
Select Data
Your happiness is my joy
_8/1999, ****
The following data is received. Select the data.
Cancel
RETURN
Finish
A powerful manager Odyssey
_7/10/2007, Victory and Justice
Work work and work
_7/10/2007, Victory and Justice
79
Organizing Content
Editing Video Titles
You can make the most of disc capacity by erasing and editing
video titles. Note that edits made to the original titles are final
and cannot be undone. Make a Playlist title if you want to keep
the original data.
For details about the Playlist titles and original titles, see below.
Note
You cannot edit while importing or copying data.
Before editing
You have two edit options for video titles recorded on HDD:
editing either the original recording (called the “original”), or the
playback information created from the original (“Playlist”).
Since each is different in nature and offers different merits, read
the following and select the one that better suits your needs.
◆To edit original titles
Edits made to the original titles are final. If you plan to retain an
unaltered original recording, create and edit a Playlist (see
below). However, when you want to free up disc space, erase the
original titles.
◆To create and edit Playlist titles
A Playlist is a group of Playlist titles created from the original
title for editing purposes. When you create a Playlist, only the
control information necessary for playback, such as the playback
order, is stored on the disc. Since the original titles are left
unaltered, Playlist titles can be re-edited and still take up very
little disc space. Note however, when you want to free up disc
space, erasing Playlist titles has little effect.
Example: You have recorded the final few matches of a soccer
tournament. You want to create a digest with the goal scenes and
other highlights, but you also want to keep the original
recording.
In this case, you can compile highlight scenes as a Playlist title
(page 83), retaining the original video title.
The following edit functions are available for both original and
Playlist titles:
– Setting protection against erasure (page 80).
–Renaming a title (page 77).
– Erasing titles (page 80).
–Erasing chapters (page 81).
– Erasing a section of a title (A-B Erase) (page 81).
–Dividing a title (page 82).
– Combining titles (page 83).
–Combining/dividing/erasing chapters (page 81).
Notes
• If you plan to move or to copy the title to other media after editing,
check that the titles are not shown with the COPY NEVER icon or the
COPY ONCE icon (changes to COPY NEVER after editing).
• After making a Playlist title, you will be unable to erase the original
titles that the Playlist title refers to.
• If a message appears and indicates that the disc’s control information
is full, erase unnecessary titles.
,continued
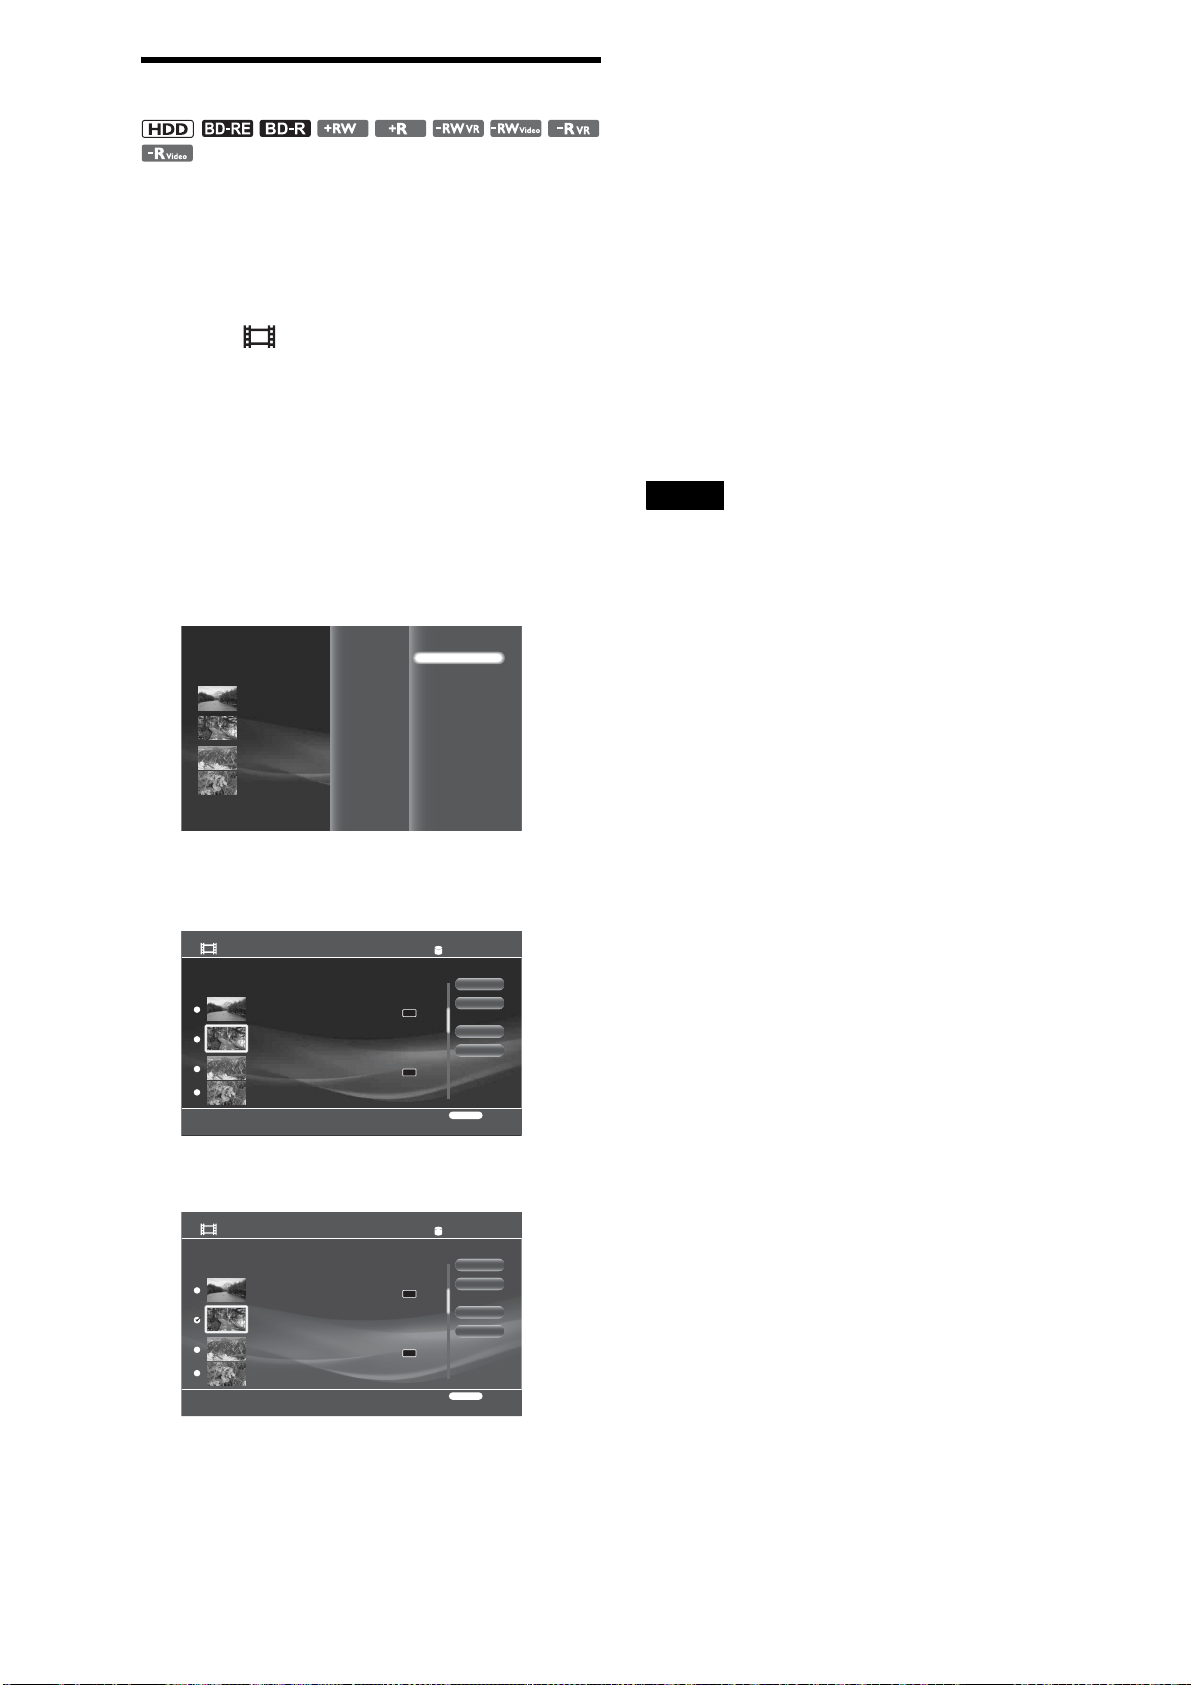
80
Erasing titles
Erasing multiple video titles is usually the quickest way to free
up HDD/disc space. Make sure you have a backup if you are
erasing original home video titles.
a Press HOME to turn on the Home Menu.
b Select to display the icons thumbnails of
video titles.
When editing disc content, select the DISC icon and
press ENTER.
c Select a folder and press ENTER.
d Select a title and press OPTIONS.
The Options menu appears.
e Select [Function/Edit] and press ENTER.
f Select [Erase Titles] and press ENTER.
The display for selecting the titles appears.
g Select titles to erase and press ENTER.
A checkmark appears next to the selected title. To
remove the checkmark, press ENTER again.
Titles that are referred to by a Playlist or are currently
being copied to a disc are not selectable.
You can select all other titles or cancel all selections
by selecting [Select All] or [Clear All].
◆ If the title is protected
The display asks for confirmation. Select
[Protection Cancel] and press ENTER.
◆ If the title is referred to by a Playlist
You cannot erase the original title until you select
the referring Playlist title and erase it.
h Repeat step 7 to select all titles you want to
erase.
i Select [OK] and press ENTER.
j On the confirmation screen, select [Yes] and
press ENTER.
z Hint
You can erase a single title if you select [Erase] in step 5.
Notes
• Erasing titles on a BD-R, DVD+R, and DVD-R does not free up disc
space.
• Erasing Playlist titles does not free up disc space.
• You cannot erase titles if the disc is finalized.
To protect titles against erasure
After selecting a title in step 4, press OPTIONS to turn on the
Options menu, select [Protect], and press ENTER. A protect icon
appears next to the protected title.
To cancel protection, follow the same procedure, select
[Protection Cancel] from the Options menu, and press ENTER.
Import Multiple Disks
0.0GB 388.1GB
RETURN
Finish
Sort By
Import Multiple
Erase Titles
Create Playlist
Combine Titles
Function/Edit
Erase Titles
[
Personal Video
]
Select the title you want to erase.
OK
Finish
Select All
Clear All
RETURN
Finish
Remaining:386.7GBTotal Size:0.0GB
DR
DR
HDV 7/ 6/2007 12:57PM - 7/ 6/2007 12:58PM
7/ 6/2007 12:57PM ( 0H02M) HDV
ORG
HDV 7/13/2007 3:34PM - 3:35PM
7/13/2007 3:34PM ( 0H01M)
PL
HDV 7/13/2007 3:34PM - 7/13/2007 3:35PM
7/13/2007 3:34PM ( 0H01M) HDV
ORG
HDV 7/ 6/2007 12:57PM - 12:58PM
7/ 6/2007 12:57PM ( 0H02M)
PL
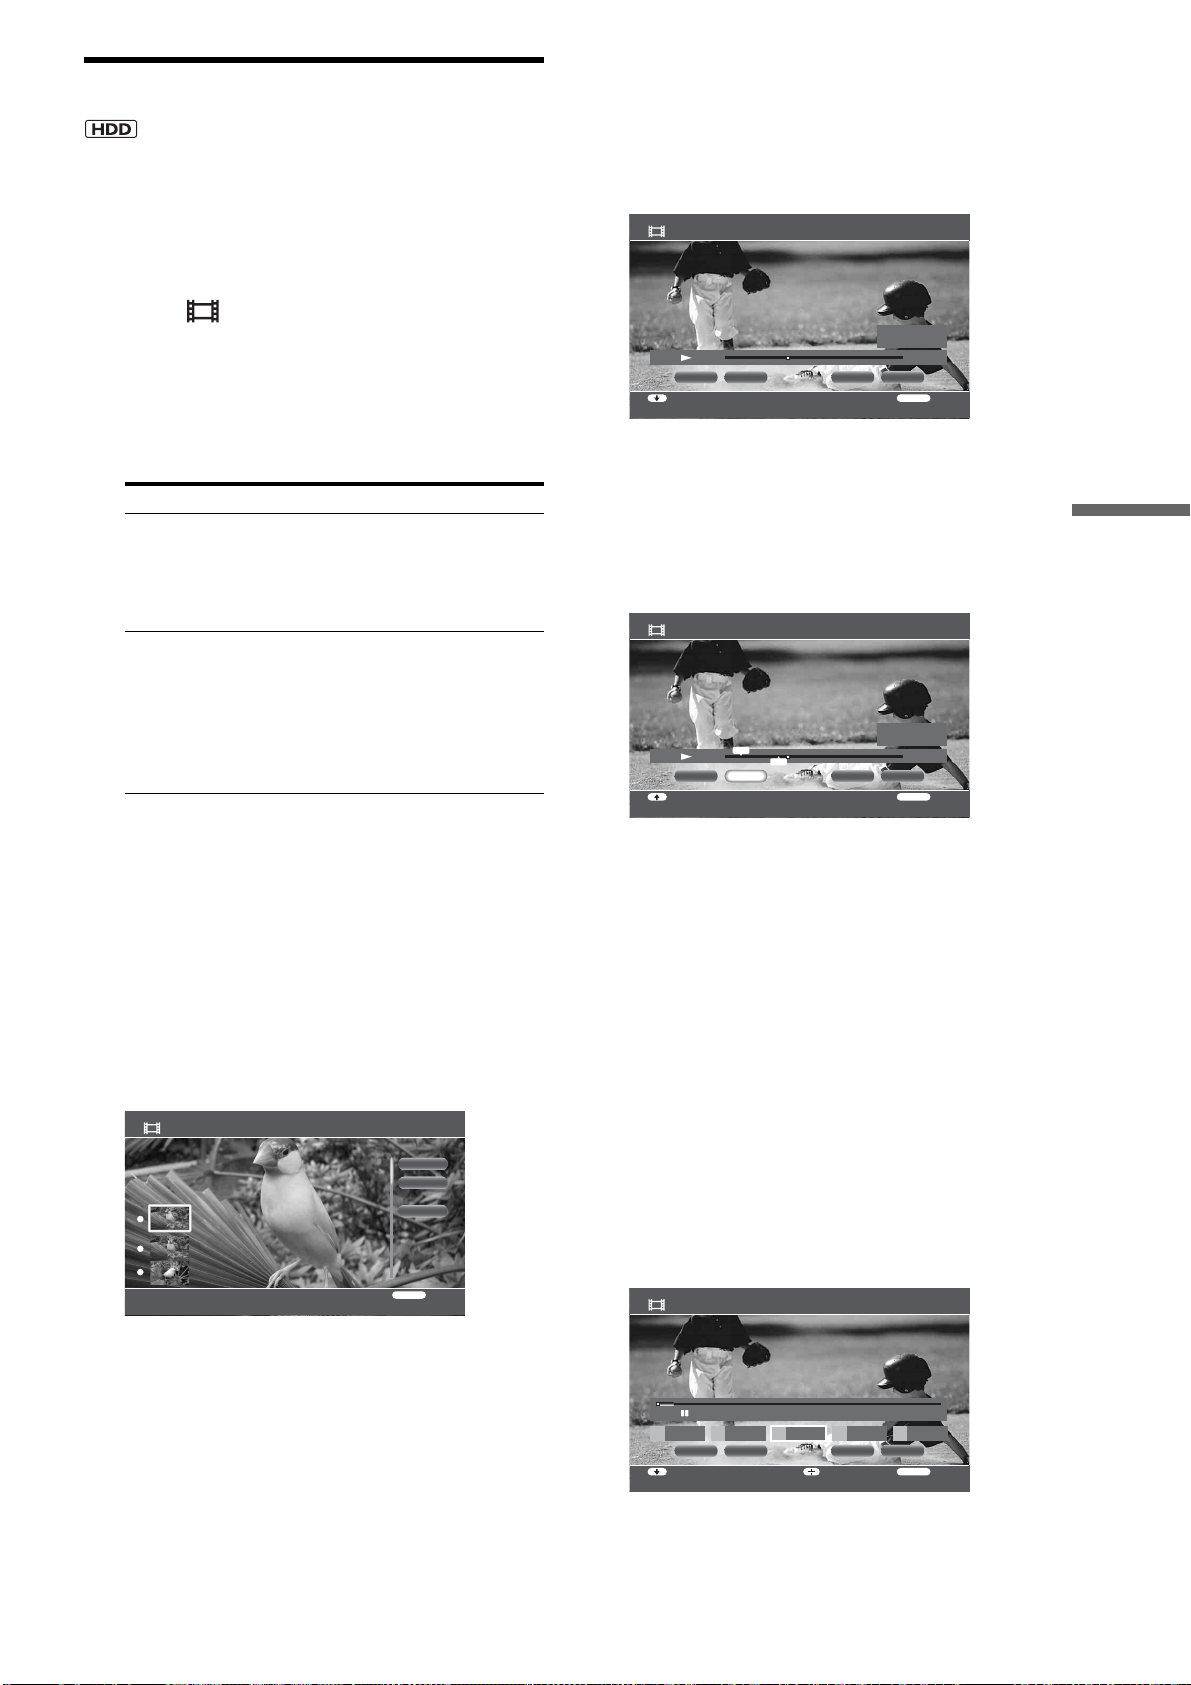
81
Organizing Content
Erasing/editing sections of a title
Playback will be more fun after erasing unwanted scenes.
a Press HOME to turn on the Home Menu.
b Select to display the icons.
c Select a folder and press ENTER.
d Select a title and press OPTIONS.
The Options menu appears.
e Select the desired edit option and follow the
steps below. If you have selected [Erase
Titles], see page 80 for procedures.
To erase by chapter
1 Select [Edit] in step 4 and press ENTER.
2 Select [Erase Chapter] and press ENTER.
The display for selecting chapters appears.
To check chapter content, select a chapter thumbnail
to display the picture in the background.
3 Select a chapter to erase and press ENTER.
A checkmark appears next to the selected chapter. To
remove the checkmark, press ENTER again.
You can select all chapters or cancel all selections by
selecting or [Clear All].
4 Select [OK] and press ENTER.
On the confirmation screen, select [Yes] and press
ENTER.
To erase by manual selection (A-B Erase)
1 Select [Edit] in step 4 and press ENTER.
2 Select [A-B Erase] and press ENTER.
The manual selection display appears. The title plays
in the background.
3 At the start of the section you want to erase, select
[Set Point A] and press ENTER.
Press m or M to move forward or backwards.
4 At the end of the section, select [Set Point B] and
press ENTER.
5 Select [OK] and press ENTER.
6 On the confirmation screen, select [Yes] and press
ENTER.
To erase more sections within the same title, repeat
steps 3 to 6.
7 Select [Finish] and press ENTER.
z Hint
Chapter marks are inserted at the erased places and the sections before
and after become separate chapters.
To edit chapters (combine, divide, or multi-
erase)
1 Select [Edit] in step 4 and press ENTER.
2 Select [Edit Chapter] and press ENTER.
The display for selecting chapters appears.
3 Select a chapter to edit and press ENTER.
4 Select from the following edits and press ENTER.
Items Details
Function/Edit You can apply the following edits to
multiple titles:
–Erase Titles
–Create Playlist
–Combine Titles
Edit You can apply the following edits only
to the selected title:
–Set Chapter Marks
–Erase Chapter
–Edit Chapter
–A-B Erase
–Divide Title
Erase Chapter
Select the chapter you want to erase.
OK
Cancel
Clear All
RETURN
Finish
1 0:00:00 (Time 0:00:04)
2 0:00:04 (Time 0:00:04)
3 0:00:08 (Time 0:00:01)
A-B Erase HDV 7/13/2007 3:34PM - 3:35PM
RETURN
FinishSelect function
OK FinishSet Point A Set Point B
HDD
0:00:20:03
-:--:-- :--
-:--:-- :--
A
B
A-B Erase HDV 7/13/2007 3:34PM - 3:35PM
RETURN
FinishMove Point
OK FinishSet Point A
HDD
0:00:20:23
0:00:00:26
0:00:18:18
A
B
A
B
Set Point B
OK
5 0:00:004 0:00:00
Edit Chapter HDV 7/13/2007 3:34PM - 3:35PM
RETURN
FinishSelect chapter/EraseSelect function
FinishDivide EraseCombine
5
HDD
0:00:08:02
0:00:044 0:00:043 0:00:042 0:00:041 0:00:04
,continued
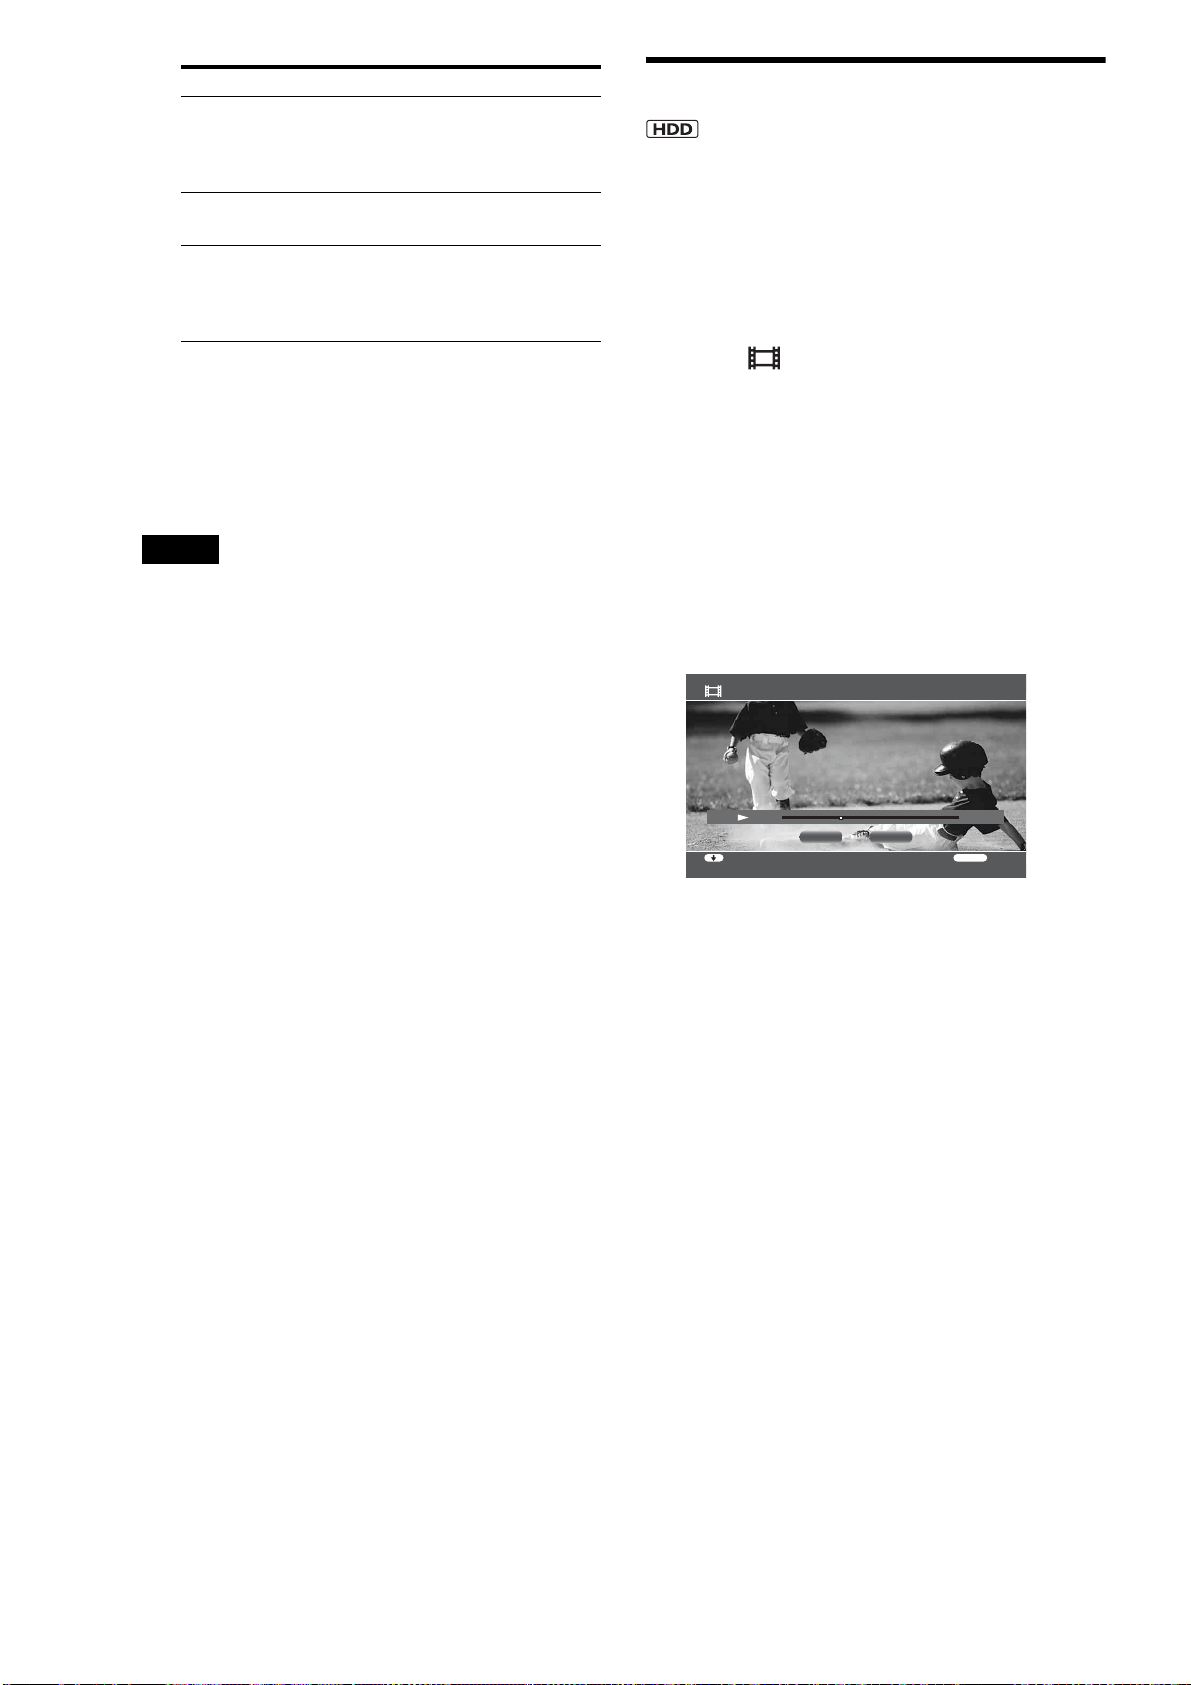
82
5 Select [Finish] and press ENTER.
z Hints
• You can divide or combine chapters by pressing the CHAPTER
MARK button or CHAPTER MARK ERASE button during playback.
• If you want to divide chapters during import, press HOME, select
[Settings] – [Import Settings] and set [Auto Chapter Mark] to [Off].
• Up to 98 chapter marks can be added to a title.
Notes
• Chapter erase may not work if the chapter is too short.
• Chapter marks cannot be added or deleted during Chase Play.
To divide a title into chapters at fixed intervals
You can insert chapter marks either at 6- or 15-minute intervals.
1 Select [Edit] in step 4 and press ENTER.
2 Select [Set Chapter Marks] and press ENTER.
3 Select the interval from [6min Interval] or [15min
Interval] and press ENTER.
To clear existing chapter marks, select [Erase All].
z Hint
Scene detection algorithm developed by Sony detects any change in
picture and sound (movements, music, dialog, etc.,) and inserts chapter
marks to make more meaningful scenes. To use this function, see “Auto-
Chapter Marks” (page 111).
Dividing a title
Divide the title when you want to copy a lengthy title without
lowering the picture quality.
You can divide the original titles and playlist titles recorded on
HDD.
a Press HOME to turn on the Home Menu.
b Select to display the icons.
c Select a folder and press ENTER.
d Select a title and press OPTIONS.
The Options menu appears.
e Select [Edit] and press ENTER.
f Select [Divide Title] and press ENTER.
The divide point display appears. To go forward or
backwards, press m or M.
g When you reach the divide point, select [OK]
and press ENTER.
h On the confirmation screen, select [Yes] and
press ENTER.
i Select if you want to rename the divided
titles.
To rename, select [Yes]. The title will be divided
after you enter a new name. To use the same name for
both the divided titles, select [No].
Items Details
Divide Divides the chapter by setting a chapter mark.
Select the chapter thumbnail to play the picture
in the background. Press m/M to reach the
desired point and press ENTER.
Combine Erases the chapter mark and combine the
chapter with the previous chapter.
Erase Erases multiple chapters selected in step 3.
Select [OK] on the confirmation screen.
Note that the chapters, not the chapter marks,
will be erased.
Divide Title HDV 7/13/2007 3:34PM - 3:35PM
RETURN
FinishSelect function
OK Cancel
HDD
0:00:20:22
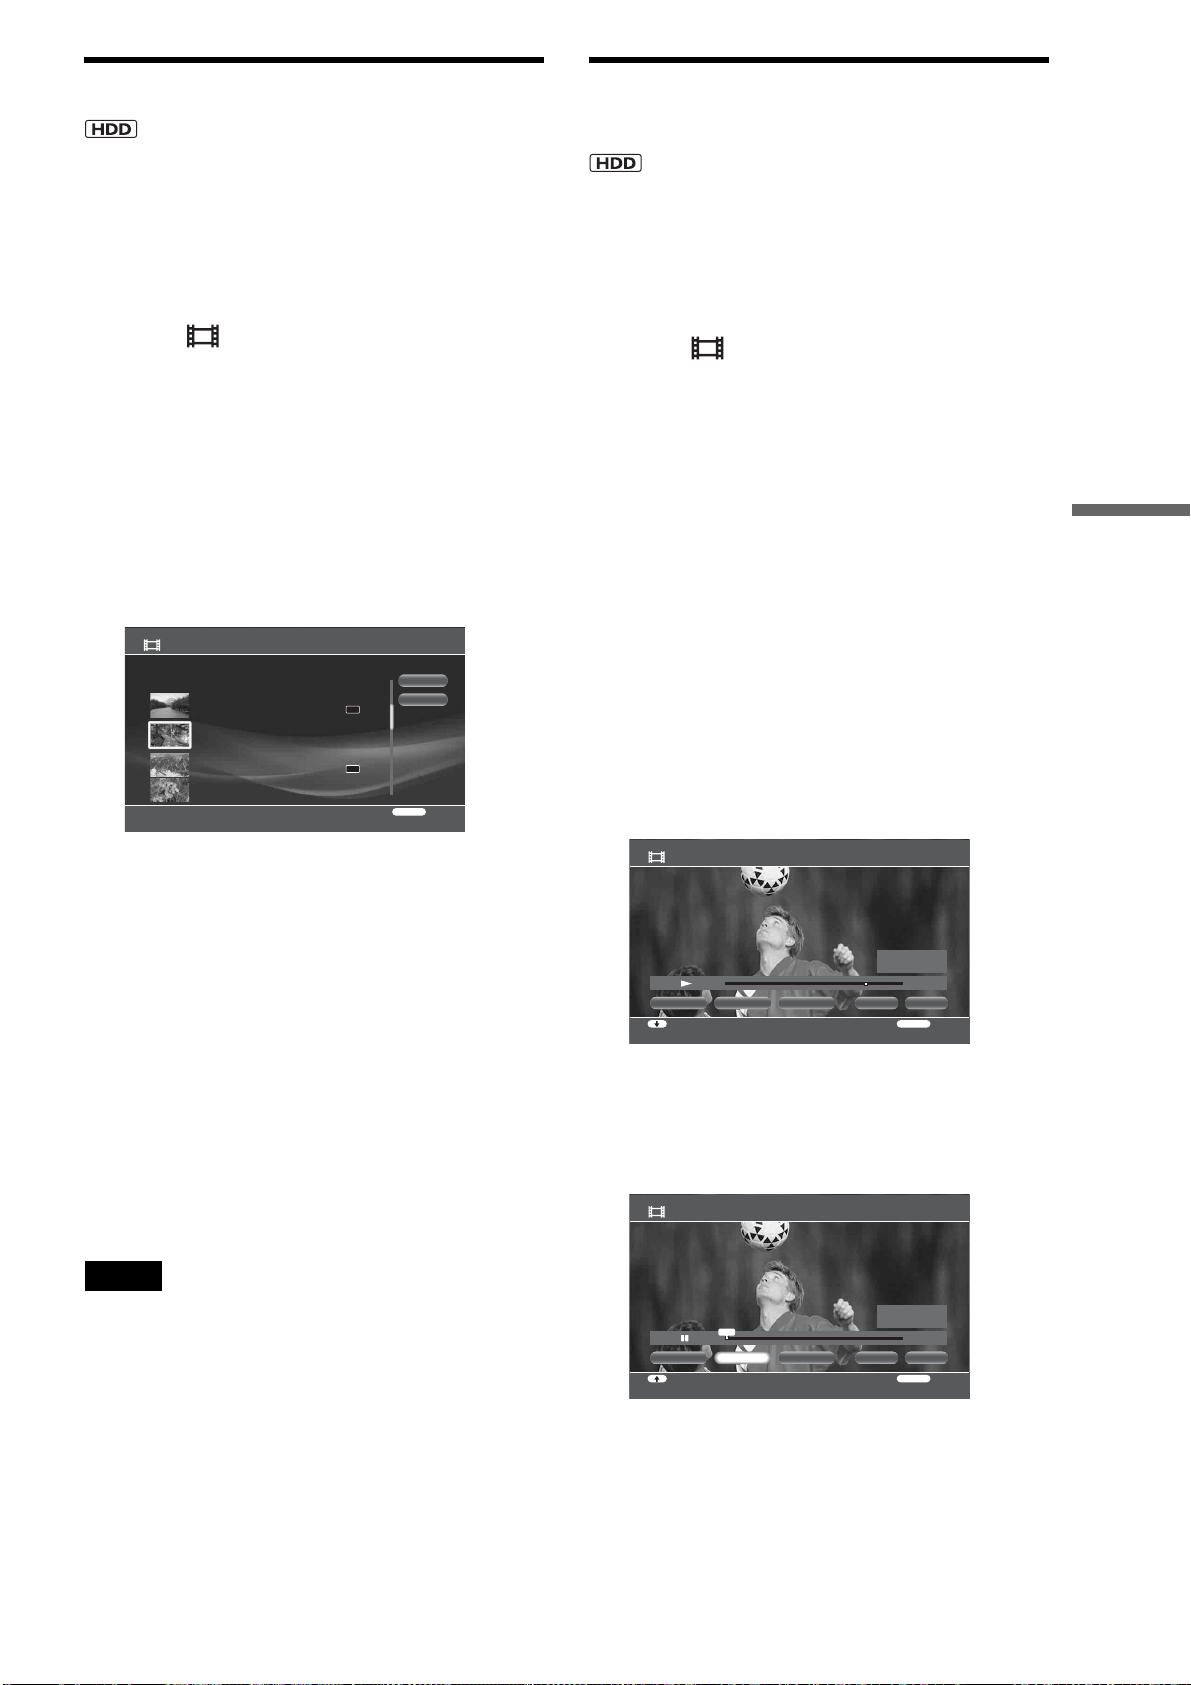
83
Organizing Content
Combining titles
Among the titles recorded on the HDD, you can combine titles
of the same type (i.e. playlist titles to playlist title, or original
titles to original titles).
a Press HOME to turn on the Home Menu.
b Select to display the icons.
c Select a folder and press ENTER.
d Select a title and press OPTIONS.
The Options menu appears.
e Select [Function/Edit] and press ENTER.
f Select [Combine Titles] and press ENTER.
The title selection display appears.
g Select a title to combine and press ENTER.
h Repeat step 7 to select all titles you want to
combine in the desired order.
Titles are numbered in the selected order. To cancel,
press ENTER again.
i Select [OK] and press ENTER.
The title name selection display appears.
j Select a title name and press ENTER.
To enter a new name, select [Input].
To combine other titles, select [Change Title].
k Select [Finish] and press ENTER.
Note
If the number of chapters is going to exceed the limit after title combine,
chapters in the later part become one chapter.
Compiling favorite scenes into a single
Playlist title
You can select up to 50 scenes either from Playlist or original
titles. See page 79 for details about Playlist and original titles.
a Press HOME to turn on the Home Menu.
b Select to display the icons.
c Select a folder or a disc type and press
ENTER.
d Select a title and press OPTIONS.
The Options menu appears.
e Select [Function/Edit] and press ENTER.
f Select [Create Playlist] and press ENTER.
The title selection display appears.
If a scene list is previously saved on the HDD, the
confirmation screen appears.
g Select a title to add to the Playlist title and
press ENTER.
The scene selection display appears. The title plays
in the background.
h At the start of the section you want to add,
select [Set IN] and press ENTER.
Press m or M to move forward or backwards. To
add the entire title as a scene, select [Capture All].
i At the end of the section, select [Set OUT]
and press ENTER.
Combine Titles
[
Personal Video
]
Select titles in the binding order.
OK
Finish
RETURN
Finish
DR
DR
HDV 7/ 6/2007 12:57PM - 7/ 6/2007 12:58PM
7/ 6/2007 12:57PM ( 0H02M) HDV
ORG
HDV 7/13/2007 3:34PM - 3:35PM
7/13/2007 3:34PM ( 0H01M)
PL
HDV 7/13/2007 3:34PM - 7/13/2007 3:35PM
7/13/2007 3:34PM ( 0H01M) HDV
ORG
HDV 7/ 6/2007 12:57PM - 12:58PM
7/ 6/2007 12:57PM ( 0H02M)
PL
Create Playlist - Scene Capture HDV 7/13/2007 3:34PM - 3:35PM
RETURN
ReturnSelect function
OKCapture All Set IN Set OUT Finish
HDD
0:00:48:15
-:--:-- :--
-:--:-- :--
IN
OUT
Create Playlist - Scene Capture HDV 7/13/2007 3:34PM - 3:35PM
RETURN
ReturnMove Point
OKCapture All Set OUT Finish
HDD
0:00:00:00
0:00:00:00
-:--:-- :--
IN
OUT
Set IN
IN
,continued
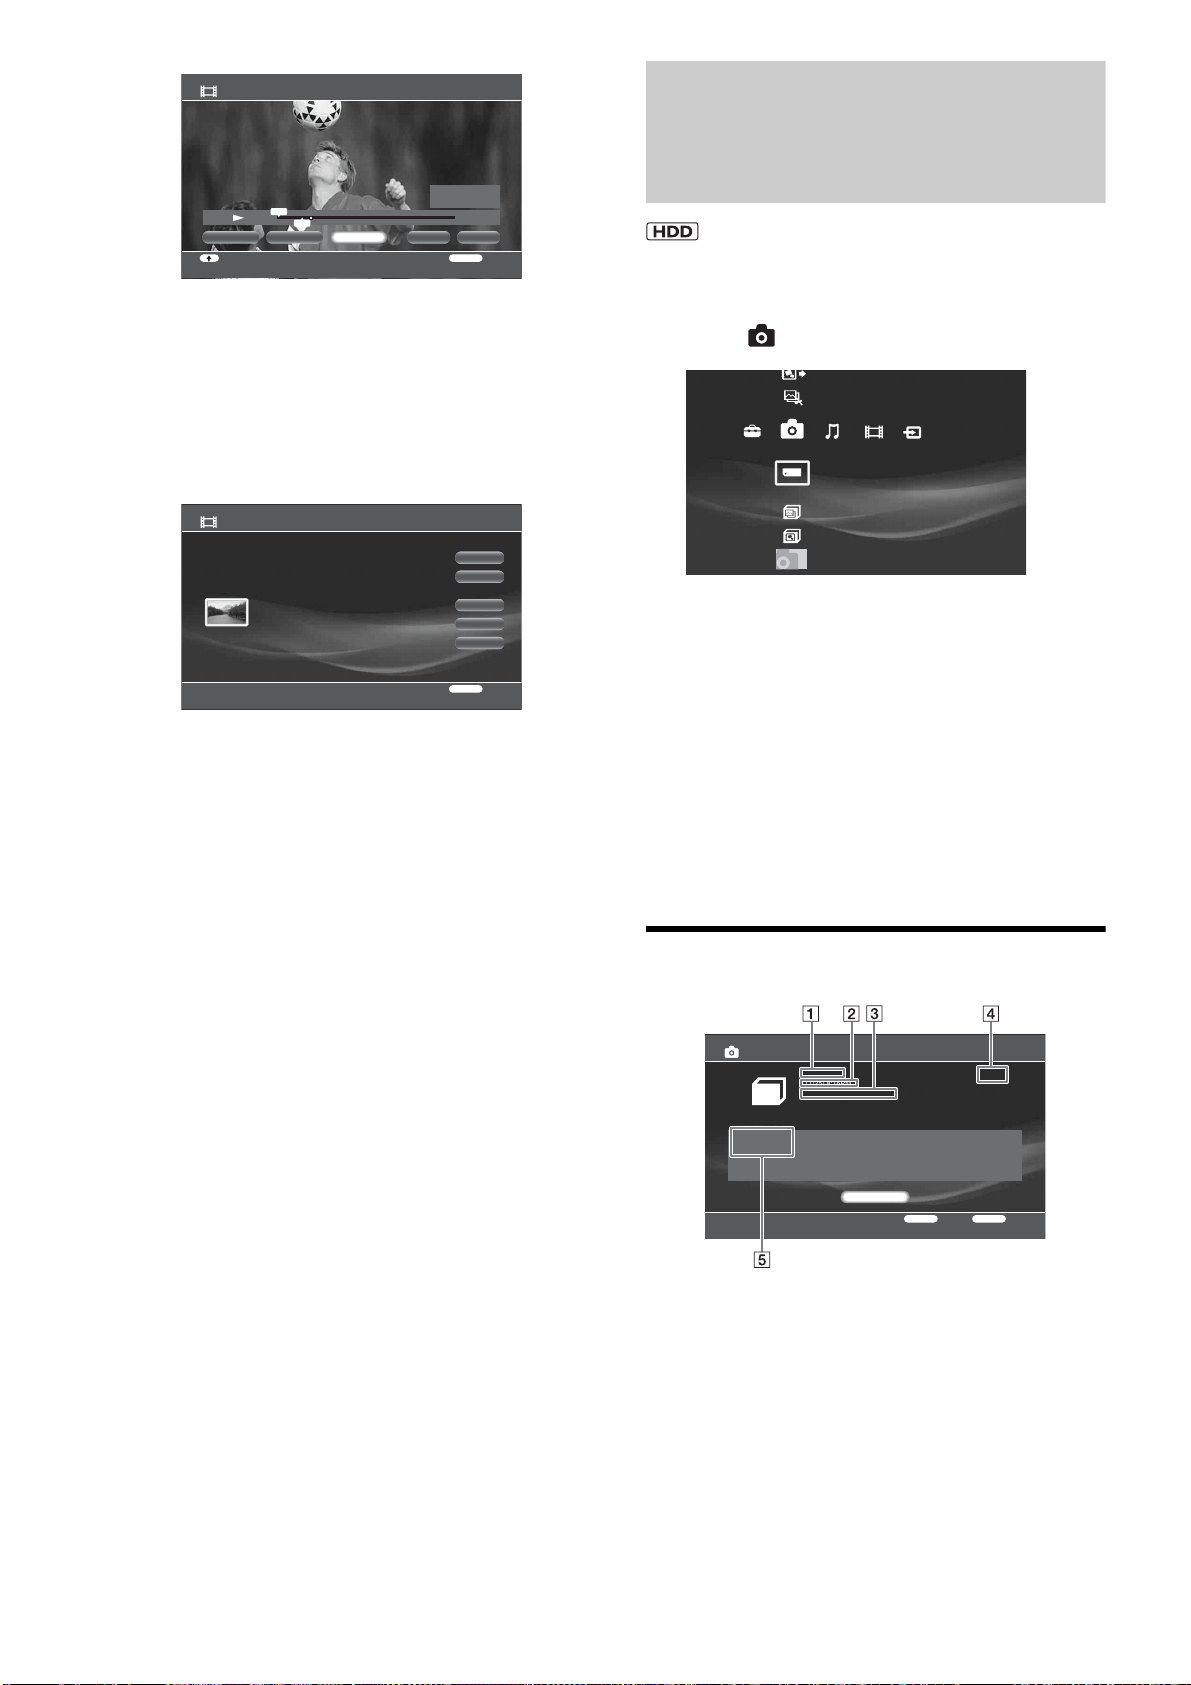
84
j Select [OK] and press ENTER.
To select more sections within the same title, repeat
from step 7.
k When you finish selecting scenes from the
same title, select [Finish] and press ENTER.
The scene list display appears.
• To add other scenes, select [Add Scene].
• To change the scene order, select [Move Scene].
• To cancel all scene selections, select [Erase All].
l Select [OK] and press ENTER.
m Select [OK] and press ENTER.
• To enter a new name for the Playlist title, select [Input].
n Select [Finish] and press ENTER.
You can save the scene list. Select [Yes] on the
confirmation display.
z Hint
Created Playlist titles may have many chapters as each scene becomes a
chapter. When editing on HDD or BD, chapters in the captured scenes
will also be added.
Editing Photo Album
Information
a Press HOME to turn on the Home Menu.
b Select to display the icons.
c Select a folder and press OPTIONS.
The Options menu appears.
d Select [Information/Settings] and press
ENTER.
The album information display appears.
e Press OPTIONS to display the Options
menu.
f Select [Rename Title] and press ENTER.
About the photo album information
A Folder name
B Folder creation date
C “x-Pict Story” file creation status
D Folder size
E Number of Files
Create Playlist - Scene Capture HDV 7/13/2007 3:34PM - 3:35PM
RETURN
ReturnMove Point
OKCapture All Finish
HDD
0:00:10:17
0:00:00:00
0:00:08:19
IN
OUT
Set IN
IN
OUT
Set OUT
Create Playlist - Scene List
Total Time 0:00:08 Number of Scenes 1
OK
Finish
RETURN
Return
0:00:00 - 0:00:08 Time 0:00:08
Add Scene
Move Scene
Erase All
HDV 7/13/2007 3:34PM - 3:35PM
Create x-Pict Story HD
Copy x-ScrapBook
x-ScrapBook
x-Pict Story HD
Memory Stick
Photo
Sample Album
Album
Folder Information
RETURN
Finish
OPTIONS
Function
Number of Files
5 Files
Close
CIMG 1884
11/25/ 8:16PM
x-PictStory HD : Not Create
4.3MB
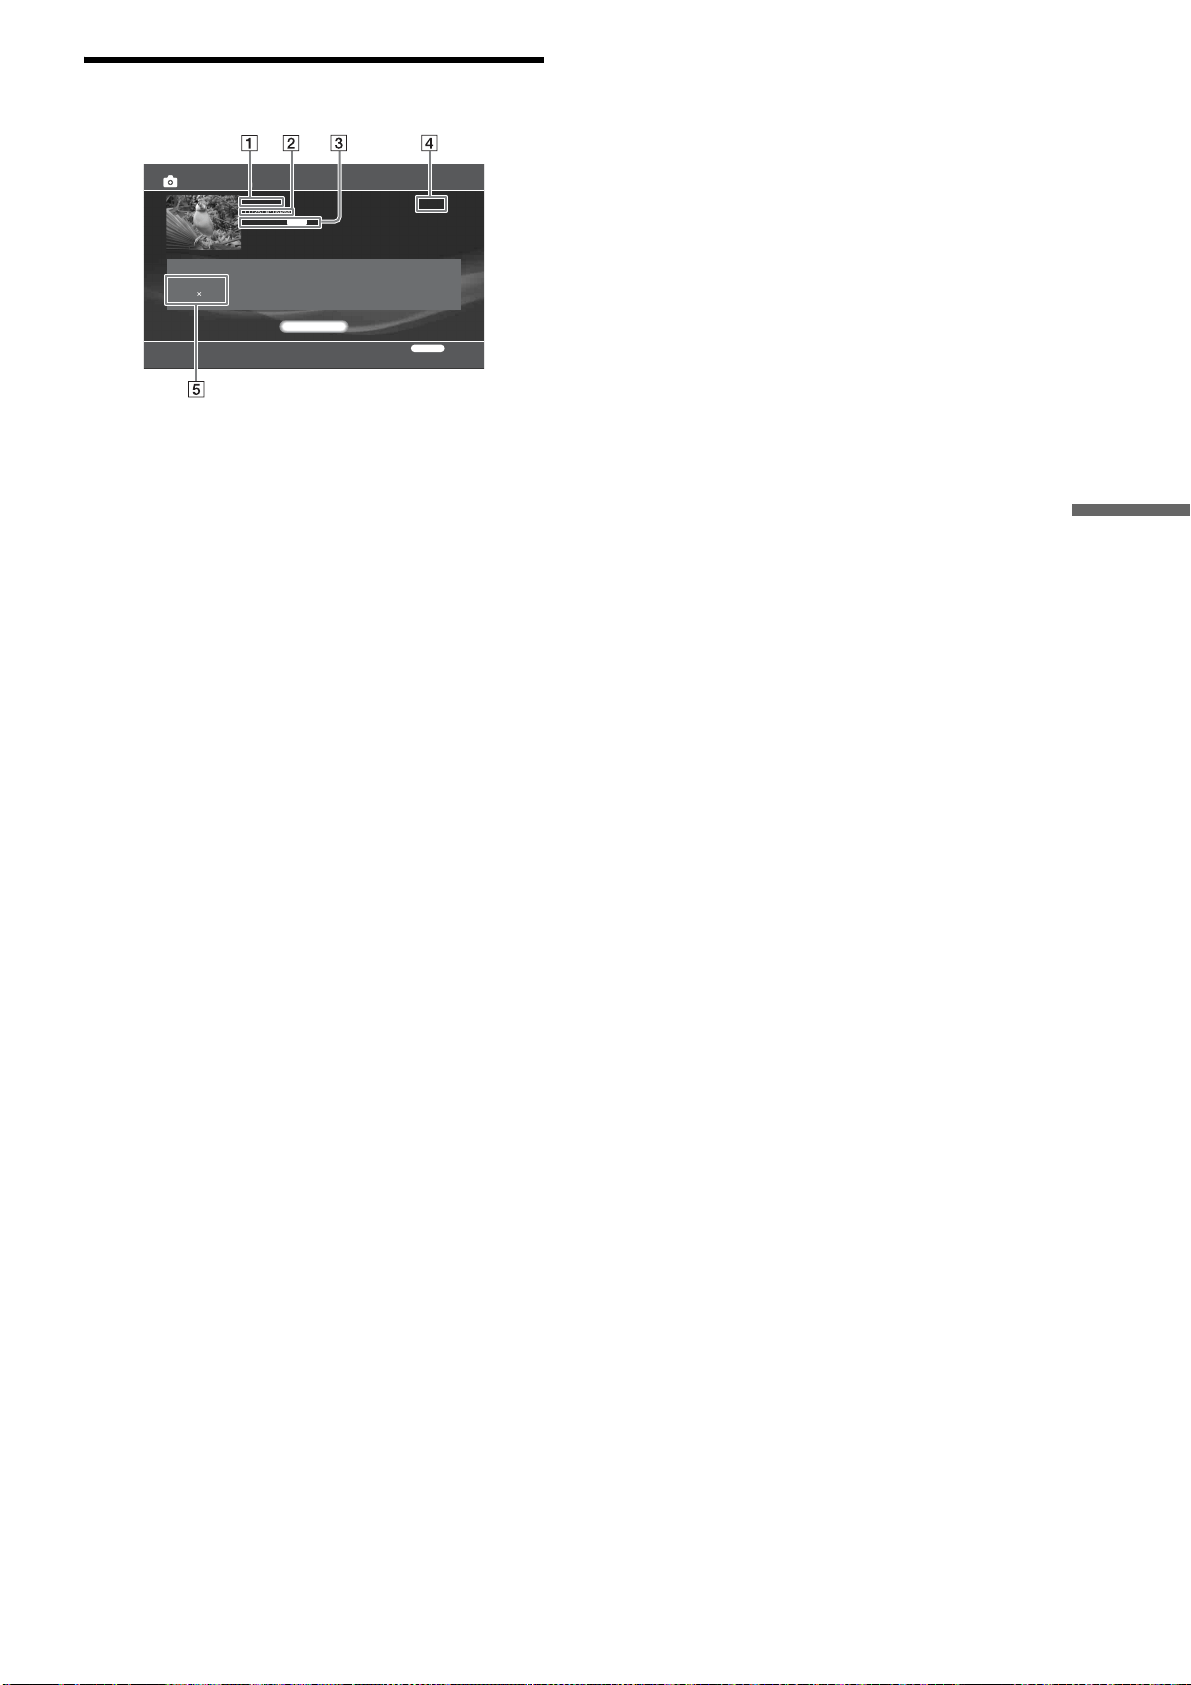
85
Organizing Content
About the photo file information
A Title
B Date of shooting
C File format
D Data size
E Resolution
Information/Settings
RETURN
Finish
11/25/2005 8:16PM
Resolution
2304 1728
Close
JPG
CIMG 1876
11/25/ 8:16PM
File Format:
1.3MB

86
Editing Photo Files
Erasing photos, albums and “x-Pict
Story” files
a Press HOME to turn on the Home Menu.
b Select to display the icons.
c Select an album, photo or “x-Pict Story” file
to erase and press OPTIONS.
The Options menu appears.
• To erase multiple photo files, select [Still Pictures] –
[Erase Multiple].
d Select [Erase] and press ENTER.
e On the confirmation screen, select [Yes] and
press ENTER.
Capturing photos from personal video
You can capture photos from a personal video title shot with
digital video cameras. This function can be used for the
following video titles.
• Titles recorded via the LINE 2 input jack with no copy
protection signal.
• Titles recorded via the HDV/DV jack.
• Titles created from “x-Pict Story” files.
a Press HOME to turn on the Home Menu.
b Select to display the icons.
c Select and press ENTER.
The title selection display appears.
d Select a title to capture from and press
ENTER.
The destination selection display appears.
• To save in a new album, select [New Album]. See
page 90 for entering the album name.
e Select the destination album and press
ENTER.
The photo capture display appears, and the selected
title plays in the background.
• To go forward or backwards, press m or M.
f At the capture point, press X.
g Select [Capture] and press ENTER.
The picture is captured.
• To capture more photos from the same title, press
PLAY and repeat from step 6.
h Select [Finish] and press ENTER.
Copying a photo to another album on
HDD
a Press HOME to turn on the Home Menu.
b Select to display the icons.
c Select an album and press ENTER.
d Select the photo to copy and press OPTIONS.
The Options menu appears.
• To copy multiple photos at one time, select [Still
Pictures] – [Copy Multiple].
e Select [Copy] and press ENTER.
SDCF
xD
M.S.
Photo Capture
Select the video title you want to capture a still picture from.
RETURN
Finish
DR
DR
Cancel
HDV 7/ 6/2007 12:57PM - 7/ 6/2007 12:58PM
7/ 6/2007 12:57PM ( 0H02M) HDV
ORG
HDV 7/13/2007 3:34PM - 3:35PM
7/13/2007 3:34PM ( 0H01M)
PL
HDV 7/13/2007 3:34PM - 7/13/2007 3:35PM
7/13/2007 3:34PM ( 0H01M) HDV
ORG
Photo Capture
Select the album you want to save the still picture to.
RETURN
Return
Capital 0713
11/29/2005 - 11/30/2005 Number of Files:2
New Album
Cancel
Album
Album
Ancient city 20070713
11/25/2005 - 11/27/2005 Number of Files:8
Photo Capture
RETURN
ReturnSelect function
Capture Finish
HDD
0:00:22
Baseball 0808
Number of Files:2
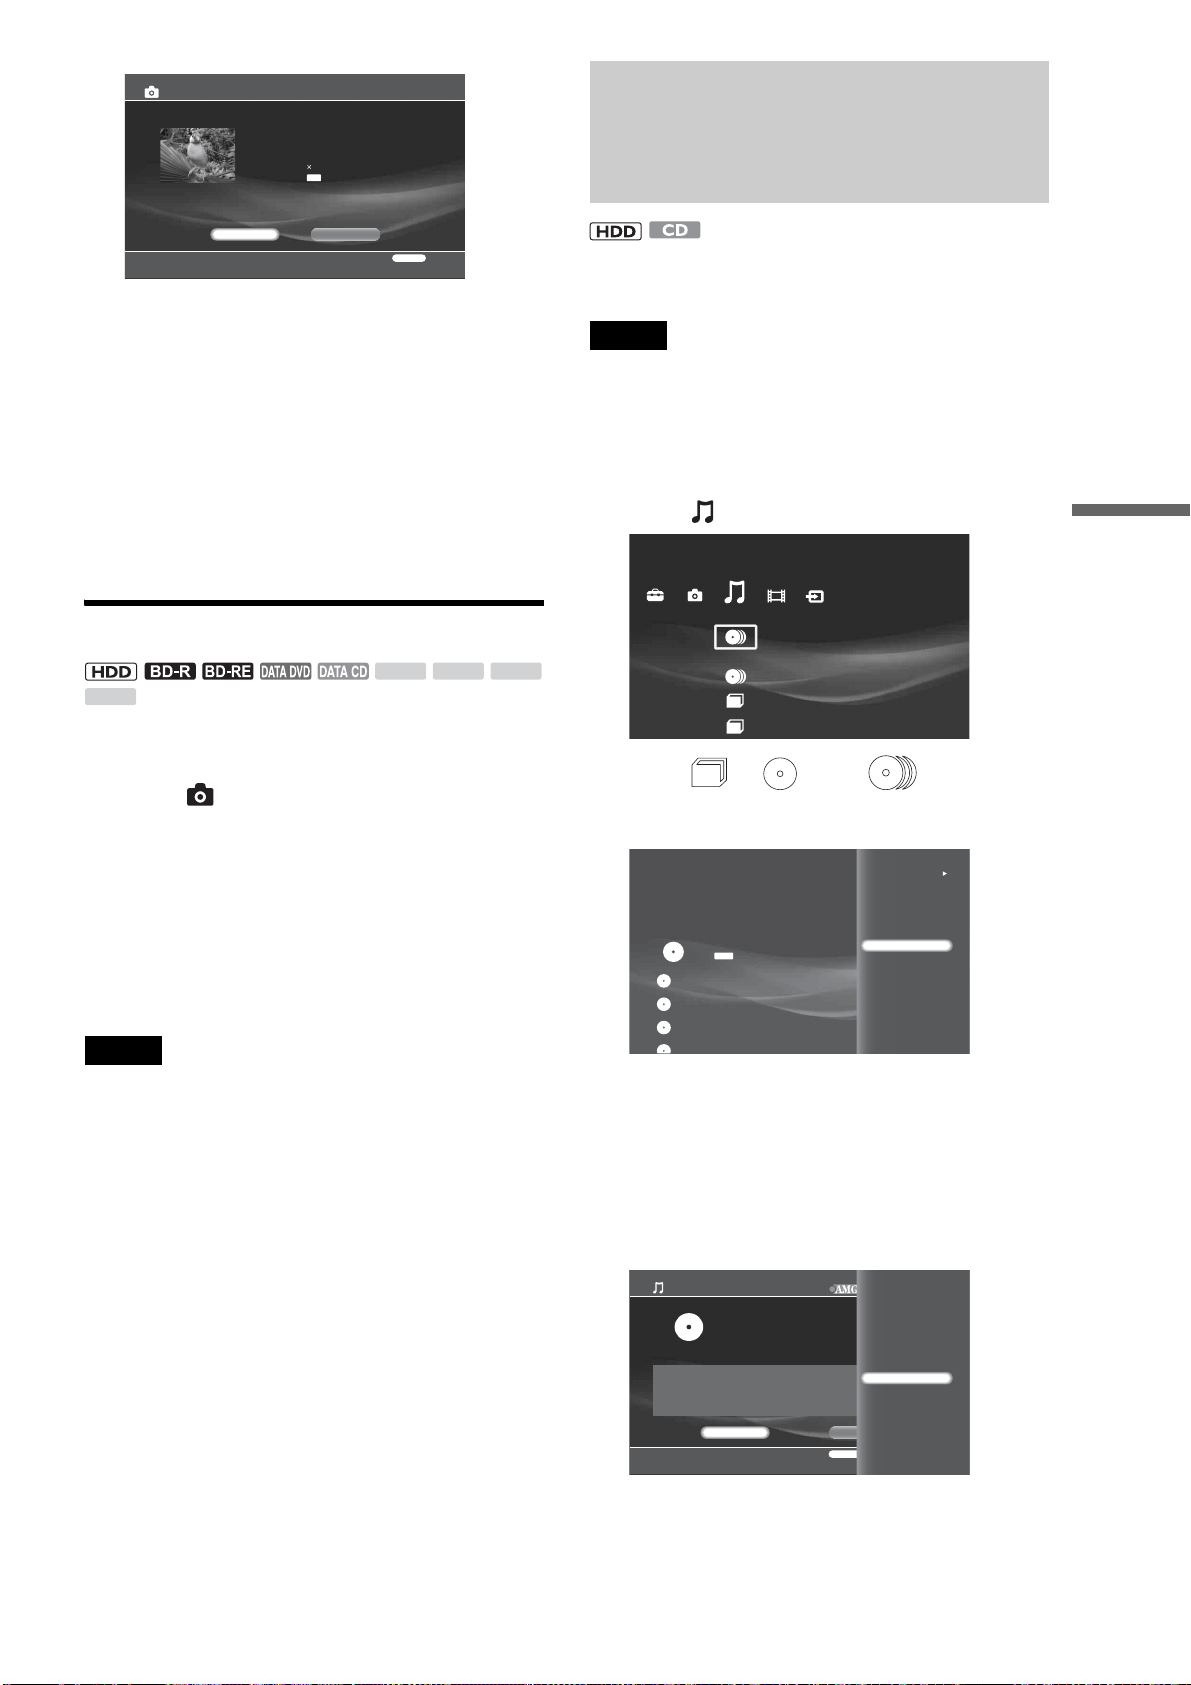
87
Organizing Content
f On the confirmation screen, select [OK] and
press ENTER.
The album selection display appears.
• To save in a new album, select [New Album]. See
page 90 for entering the album name.
g Select the destination album and press
ENTER.
z Hint
Photos will not be grouped by date when copying on the HDD.
Rotating a photo
a Press HOME to turn on the Home Menu.
b Select to display the icons.
c Select an album and press ENTER.
d Select a photo from an album on the HDD
and press OPTIONS.
e Select [Rotate (left)] or [Rotate (right)] and
press ENTER.
Note
Photos on the disc or memory card can be rotated only when they are
displayed.
Editing Audio Album
Information
With registered music CDs and albums on the HDD, you can
change album information such as the album name.
Note
You cannot edit the album information of the HDD or the discs while
playing music content on them. Stop playing music by pressing
RETURN, and then edit the information.
a Press HOME to turn on the Home Menu.
b Select to display the icons.
c Select or under and press
OPTIONS.
The Options menu appears.
d Select [Information/Settings] and press
ENTER.
The information display appears.
To change the folder view, see page 71.
e Press OPTIONS to turn on the Options
menu.
f Select the item you want to edit and press
ENTER.
See page 90 to enter characters.
Copy File
This image will be copied
File Name:CIMG 1884
File Size: 1.3MB
Shot Date: 11/26/2005 12:44AM
Resolution:2304 1728
File Format:
RETURN
Finish
OK Cancel
JPG
SDCF
xD
M.S.
Others
Number of Discs:1
Music
Sort By
Import Multiple
Play
Disc Import
Information/Settings
Eject
Decision of the King
Victory and Justice
CDDA
0.0GB
Search Info.Close
Artist
Victory and Justice
Genre
No Genre
RETURN
Finish
OPTIONS
Function
Album Information/Settings
385.5GB
Rename Album
Change Release Date
Rename Artist
Change Genre
Clear All
A powerful manager Odyssey
29/ 2/2000
Total Number of Tracks: 12 ( 1:00:41)
,continued
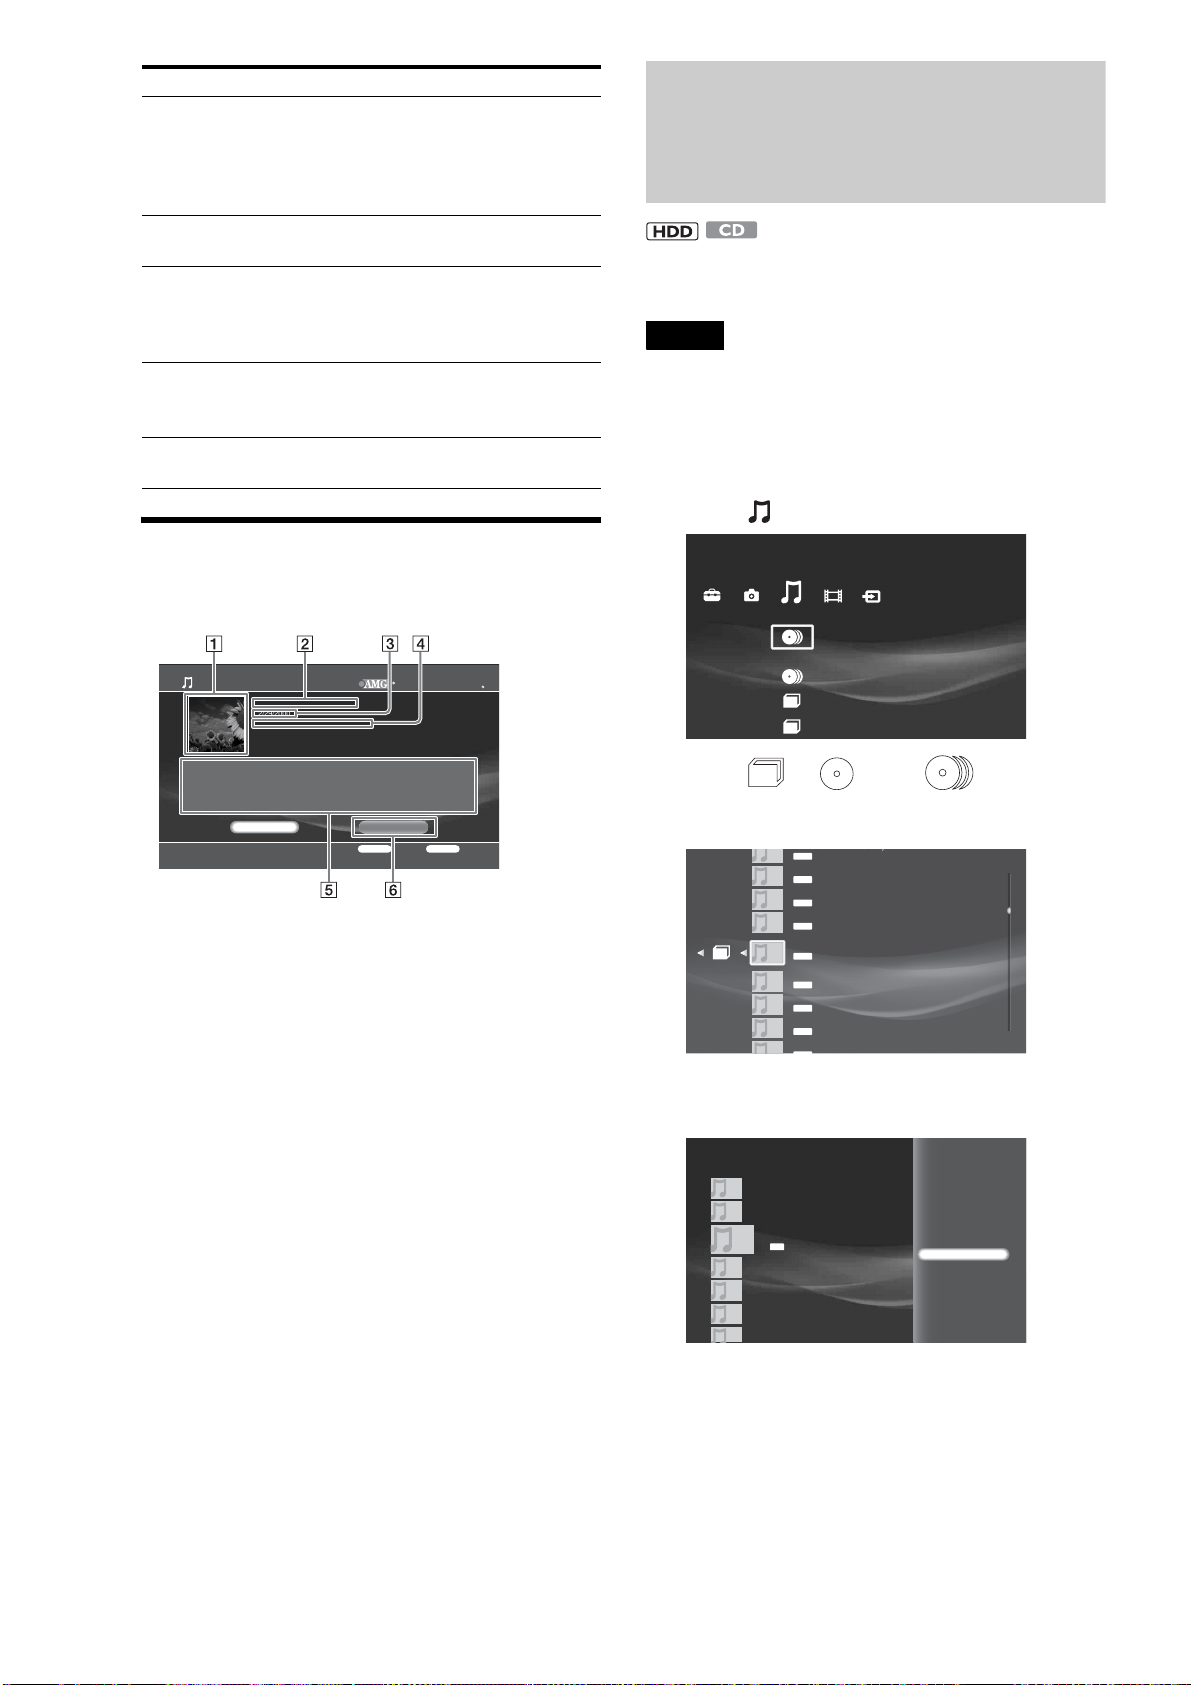
88
About the music album information
display
◆Example: Display for discs (Music CD)
A Cover art
B Album name
C Release date
D Total number of tracks (playback time total)
E Displays artist and genre.
F Refers to the AMG Service for information.
See “Searching for disc information” for details
(page 78).
Editing Audio Track
Information
With registered tracks either on CDs or the HDD, you can
change the track information such as the track name.
Note
You cannot edit the album information of the HDD or the discs while
playing music content on them. Stop playing music by pressing
RETURN, and then edit the information.
a Press HOME to turn on the Home Menu.
b Select to display the icons.
c Select or under and press
ENTER.
The list of tracks in the album appears.
d Select a track and press OPTIONS.
The Options menu appears.
e Select [Information/Settings] and press
ENTER.
The track information display appears.
Items Details
Rename Album You can change the album name.
Select from the listings (HDD only), or
select [Input] and enter a new name.
If you enter an existing album name, the
two albums are combined.
Change Release Date Allows you to change the release date
information.
Rename Artist You can change the artist's name for the
album.
Select from the listings or select [Input]
and enter a new name.
Change Genre Changes the genre information for the
album.
Select a genre on the genre list.
Clear All Clears all of the album and track
information (Music CD only).
Album Information/Settings
RETURN
Finish
OPTIONS
Function
2007 All Media Guide, LLC
Content and technology provided by All Media Guide
Artist
Victory and Justice
Genre
Rock
Search Info.Close
A powerful manager Odyssey
2/29/2000
Total Number of Tracks:11 ( 51:52)
Others
Number of Discs:1
Music
Music
Music
Music
Music
Music
Music
Music
Music
M
us
i
c
I have a pain in it with you even if objected
2/28/1996 11:12PM
A mystery of the space
3/15/2001 0:15AM
For tomorrow
3/15/2001 0 15AM
My daughter who shines
8/31/2007 9:12AM
The employee is a treasure
8/15/2003 11:06PM
MP3
MP3
MP3
MP3
MP3
Decision of the King
6/17/2005 12:06AM
The corner of the ancient city
6/17/2004 1:17AM
The feelings of the gourmet
7/10/2006 2:42 PM
The
corner
of
the
ancient
city
6/17/2005 1:04AM
MP3
MP3
MP3
MP3
Play
Track Import
Information/Settings
SL SOUND 32K
10/13/2006 8:57PM
Music
Music
Music
Music
Music
Music
Music
MP3
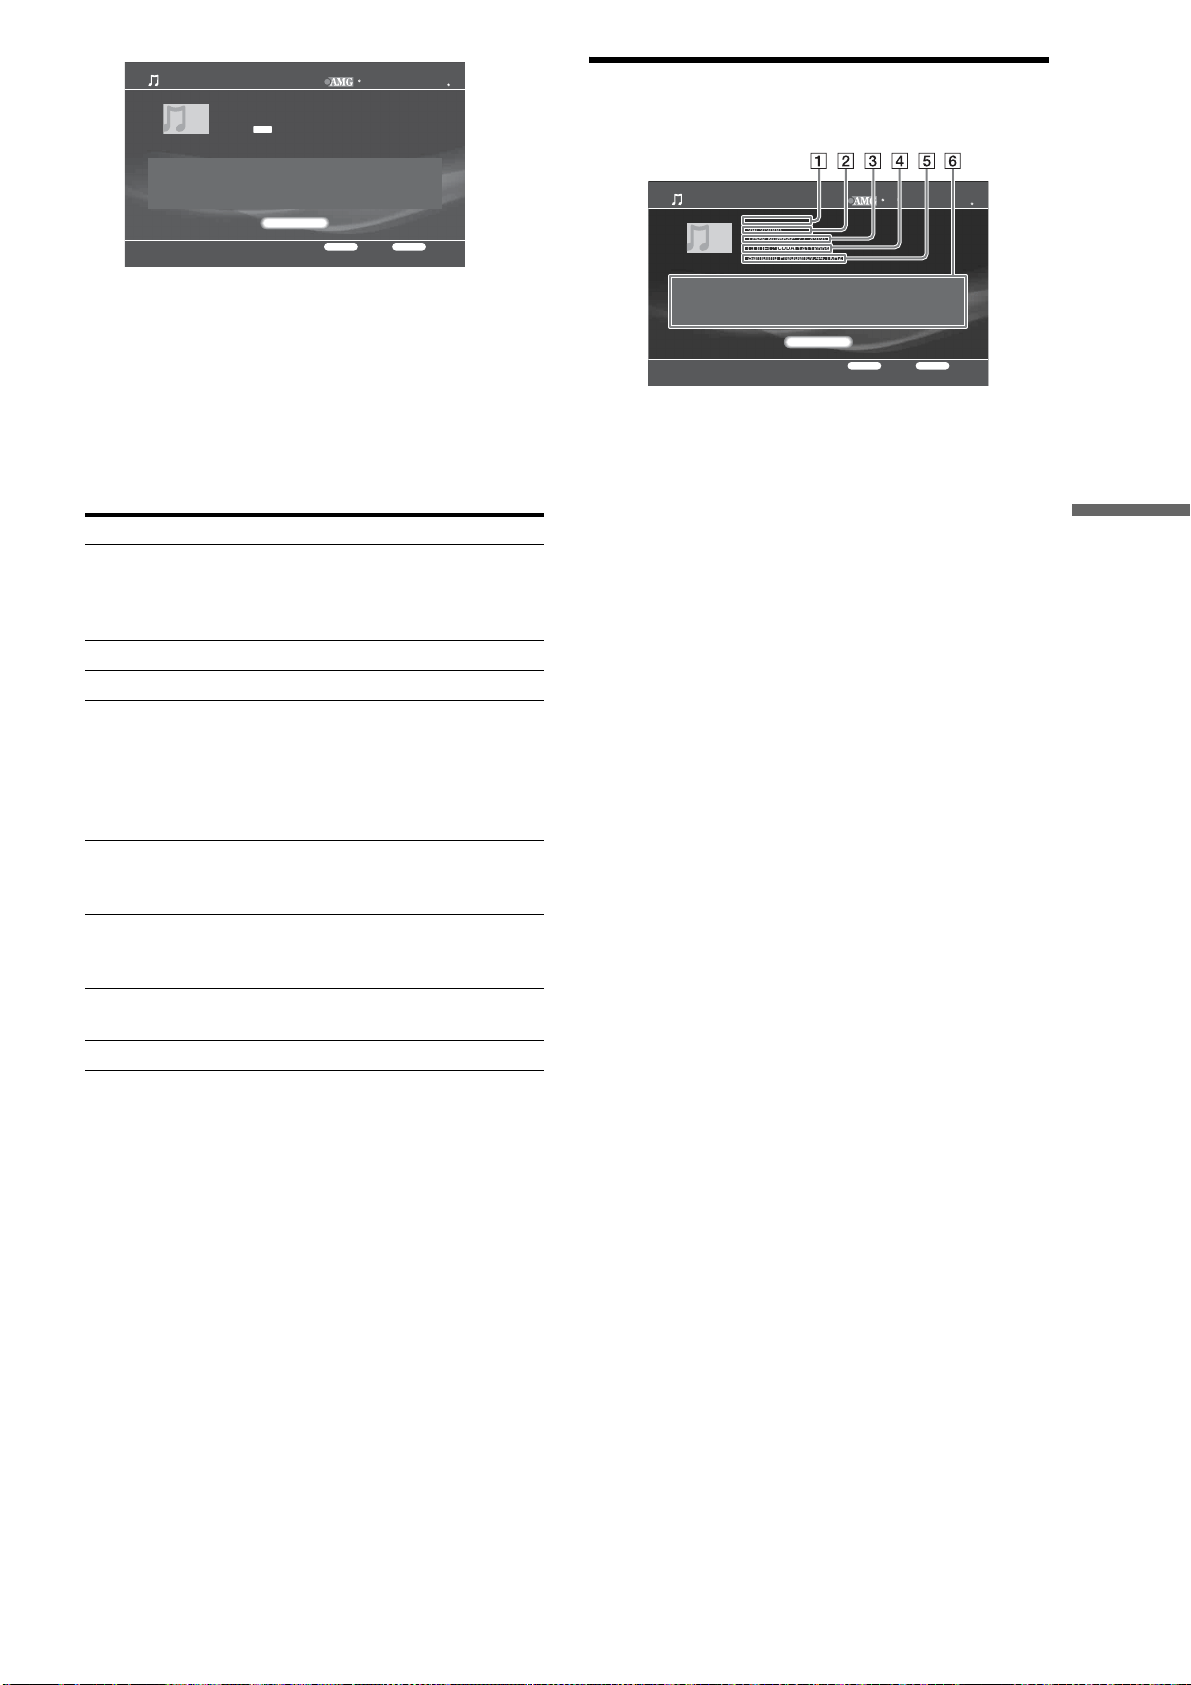
89
Organizing Content
f Press OPTIONS to turn on the Options
Menu.
The Options menu appears with available edit
options.
g Select the item you want to edit and press
ENTER.
See page 90 when you need to enter characters.
About the audio track information
display
A Track name
B Release date
C Track number (playback time of the track)
D Format information/bit rate
E Sampling Frequency
F Displays album name, artist, composer, conductor, and
genre.
Items Details
Rename Album You can change the album name for the
track.
Select from the listing, or select [New
Entry] and enter a new name (HDD only).
Rename Track Allows you to change the track name.
Change Track No Changes the track number (HDD only).
Rename Artist You can change the artist name for the
track.
Select from the listings, or select [New
Entry] and enter a new name.
Up to three artists can be entered for a
track.
Rename Composer You can change the name of the composer.
Select from the listings, or select [New
Entry] and enter a new name.
Rename Conductor You can change the name of the conductor.
Select from the listings, or select [New
Entry] and enter a new name.
Change Genre Changes the genre for the track.
Select a genre from the genre list.
Clear All Clears the track information (CD only).
Album Name
A powerful manager Odyssey
Artist
Victory and Justice
RETURN
Finish
OPTIONS
Function
Track Information Settings
Close
Music
Decision of the King
29/ 2/2000
Track Number: 7 ( 4:02)
CODEC: 1411kbps
Sampling Frequency:44.1kHz
CDDA
2007 All Media Guide, LLC
Content and technology provided by All Media Guide
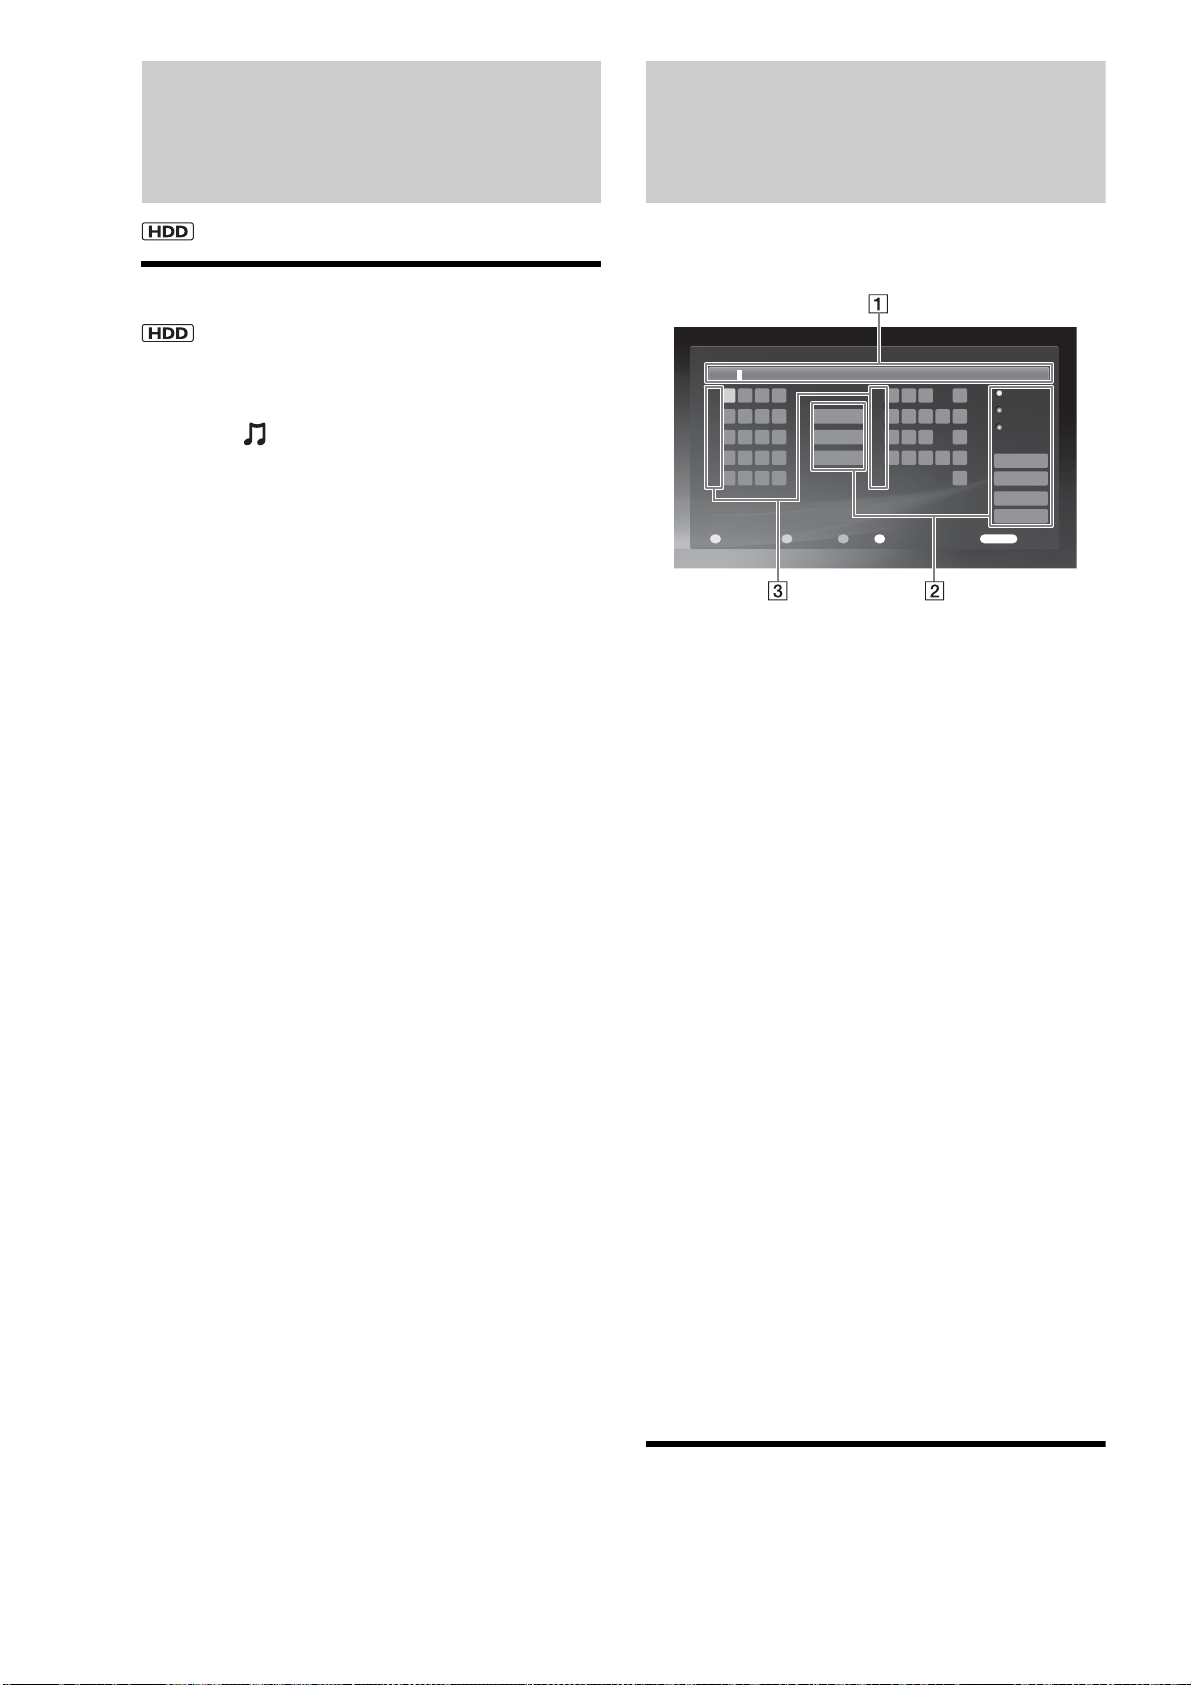
90
Editing Audio Files
Erasing albums and tracks
a Press HOME to turn on the Home Menu.
b Select to display the icons.
c Select an album or track to erase and press
OPTIONS.
The Options menu appears.
• To erase multiple tracks, select [Erase Multiple].
d Select [Erase] and press ENTER.
e On the confirmation screen, select [Yes] and
press ENTER.
Entering Characters
The following on-screen keyboard appears when entering a
name for a disc, title, etc.
◆Example: Display for upper case letters
A Input field
Maximum word length is indicated in the field.
Select a character using the Joystick and press
ENTER.
B Input functions
Select the following items using the Joystick, or
alternatively use the other buttons enclosed in
parentheses.
[Upper Case]: Displays the keyboard for upper case
letters. (INPUT)
[Lower Case]: Displays the keyboard for lower case
letters. (INPUT)
[Symbol]: Displays the keyboard for symbols.
(INPUT)
[Register Word]: Registers the input to the word
list. (RED)
[Word List]: Displays the registered word list so
you can select from previous inputs without
entering the same word again. The list will not
appear if nothing is registered. (GREEN)
[Cancel]: Returns to the previous display, canceling
the input.
[Finish]: Returns to the previous display. The input
is entered.
[Back]: Erases the character to the left of the cursor.
(BLUE)
[All Clear]: Clears all characters in the input field.
(CLEAR)
[Space]: Inserts a space. (YELLOW)
C Number button indicators
Indicates that the characters on the same row can be
entered with the number buttons. For example, to
select [A], press 2 once.
To enter characters
Example: To enter “Sea” with the Joystick
1 Select [Upper Case] and press ENTER.
Input Title Name
ABC
,-1
ABC2
Back
Cancel
5
4
3
2
0
9
8
7
6
1
Finish
All Clear
Space
DEF3
GH I 4
JKL5
MNO 6
PQ
U
RS7
TV8
WX Y Z 9
0
RETURN
Return
Register Word Word List SpaceBack
RGBY
.
Register Word
Word List
Upper Case
Lower Case
Symbol

91
Organizing Content
2 Select [S] and press ENTER.
3 Select [Lower Case] and press ENTER.
4 Select [e] and press ENTER.
5 Select [a] and press ENTER.
To register the word to the word list, select
[Register Word].
6 Select [Finish] and press ENTER.
Example: To enter “Sea” with the other buttons
1 Press INPUT to turn on the upper case
keyboard.
2 Press “7” four times to select [S].
3 Press INPUT to switch to the lower case
keyboard.
4 Press “3” twice to select [e].
5 Press “2” once to select [a].
To register the word to the word list, select
[Register Word].
6 With the Joystick, select [Finish] and press
ENTER.
Example: To enter “Sea” from the registered
word list
1 Select [Word List] and press ENTER.
2 Select a word and press ENTER to return to the
keyboard display.
3 Select [Finish] and press ENTER.
z Hint
The registered word list retains up to 20 words. If you want to add a new
word beyond this, delete unnecessary listings by selecting [Word List] -
[Delete Word]. After pressing ENTER, a message asks for confirmation.
Select [Yes] and press ENTER.

92
Copying
to BD/DVD
Checking Disc Information
Some restrictions may apply depending on the media and
content. Check the source content on the HDD and the
destination disc status beforehand. See “Managing Server
Content With the Disc Information Display” (page 33).
z Hint
When a disc’s content is mixed with video, photo, and music, the disc
will be registered to each of the , , and category icons on
the Home Menu, possibly under different names. Be careful when
copying content to a disc as you may accidentally overwrite a seemingly
different disc.
You can make discs more recognizable if you label the disc (page 34).
• Checking Disc Information . . . . . . . . . . . . . . . 92
• Copying Videos. . . . . . . . . . . . . . . . . . . . . . . . 93
• About Recording Modes. . . . . . . . . . . . . . . . . 96
• Notes and Restrictions on Importing/Copying
. . . . . . . . . . . . . . . . . . . . . . . . . . . . . . . . . . 98
• Copying Photos . . . . . . . . . . . . . . . . . . . . . . . 99
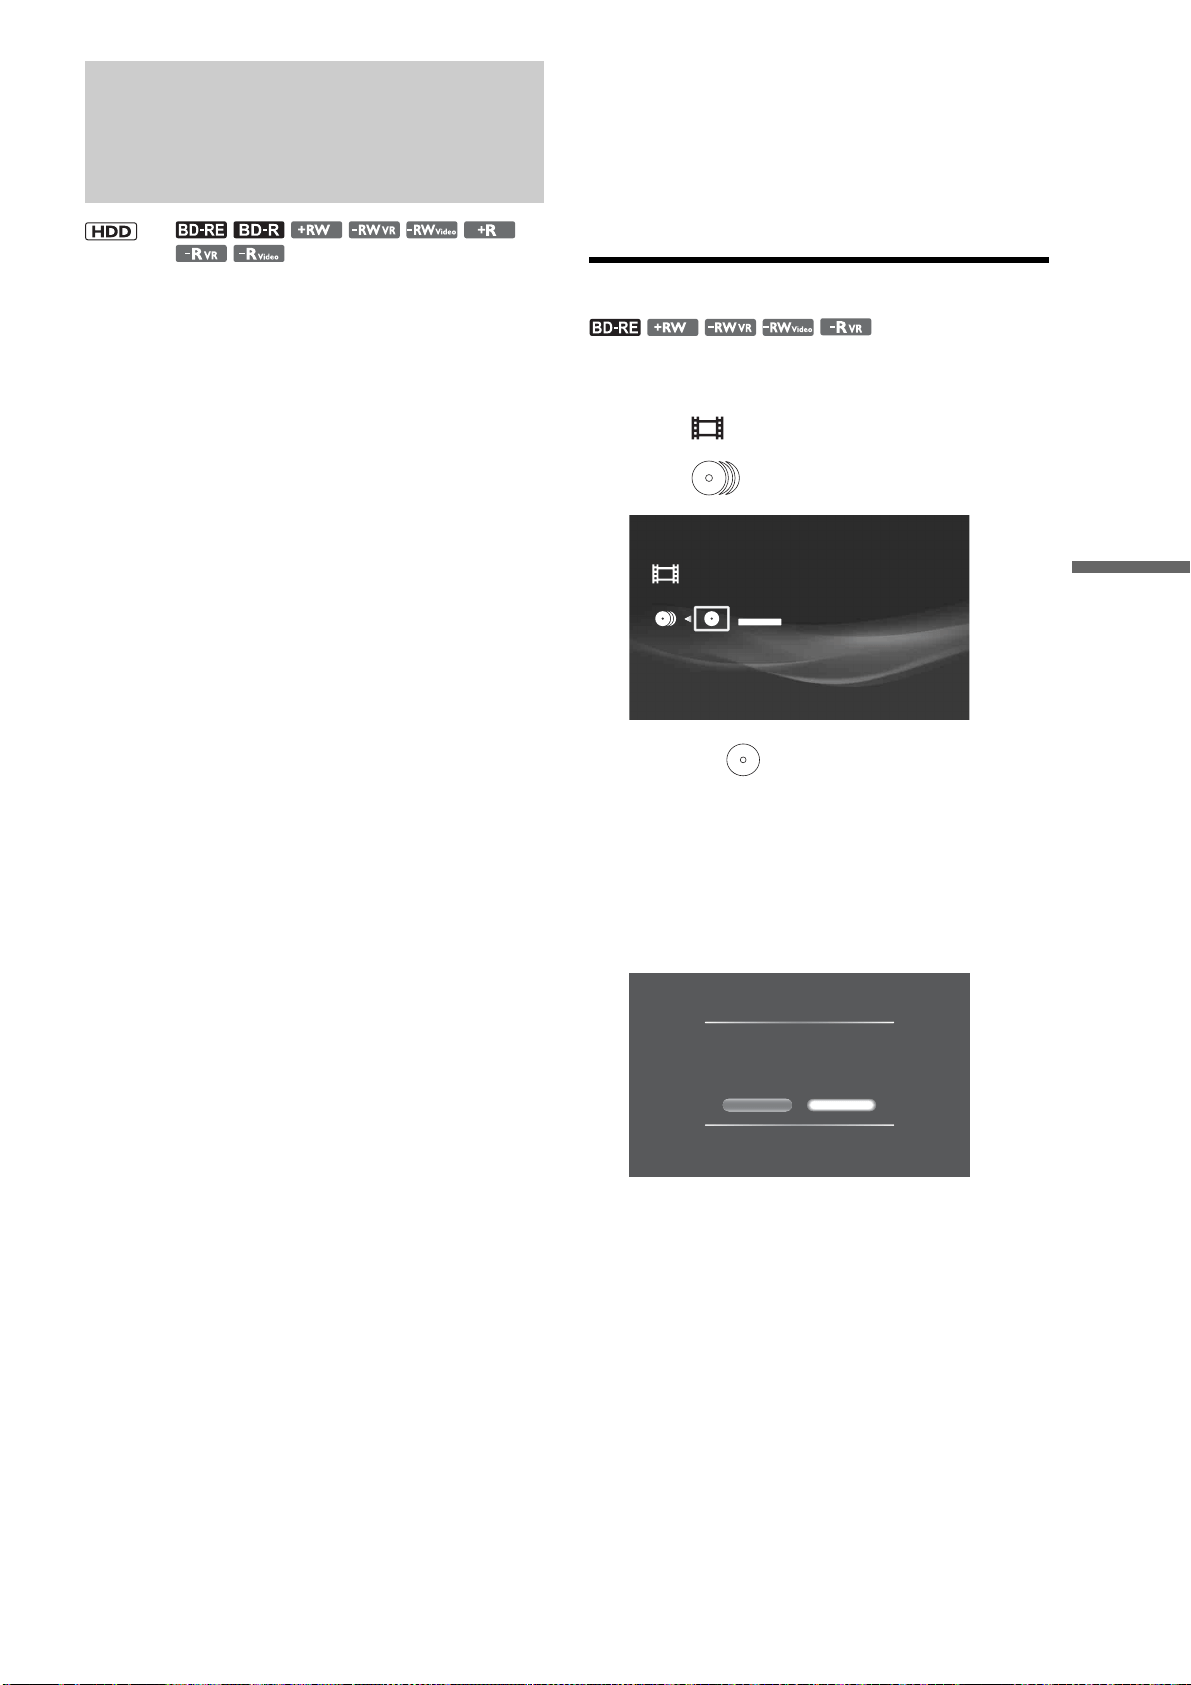
93
Copying to BD/DVD
Copying Videos
This section covers video copy from HDD to BD/DVD in
procedural order:
•“Before copying” (page 93)
•“Formatting a BD/DVD” (page 93)
•“Copying videos to BD/DVD” (page 94)
•“Closing a BD” (page 95)
•“Finalizing a DVD” (page 95)
Refer directly to the related sections when necessary (i.e., if your
disc is ready, refer directly to “Copying videos to BD/DVD”
(page 94).
Before copying
• Select the disc type according to your needs (page 148).
• The server does not support the BDMV format (one of the Blu-
ray Disc specifications). You cannot import BDMV format
content edited on PCs, or copy such content from the HDD to
a disc.
• If you copy a ‘Copy Once’ title from the HDD to a BD or DVD,
you cannot copy the title back to the HDD.
• When copying the video on the HDD that contains “Copy
Once” signal to a DVD, use a CPRM-compatible DVD-RW/
DVD-R (page 148). After copying (moving), the video will be
erased from the HDD. Note that you cannot use a BD-RE/BD-
R in this case.
• You cannot ‘Copy Once’ titles on the HDD to a BD-RE/BD-R.
• Operations are restricted while copied.
• Video titles copied to any disc except DVD+R DL will have
the same chapter marks as the original title on HDD. When
copying to DVD+R DL, the chapter marks are inserted
according to the [Auto Chapter Mark] setting (page 111).
• With videos containing mixed aspect ratios (16:9, 4:3), the
aspect ratio may change depending on the disc type and the
server setting:
– When recording on a DVD-RW (Video mode)/DVD-R (Video
mode) in XR mode or SR mode, the aspect ratio will change
according to the [Video Output Aspect Ratio] setting
(page 112). However, the aspect ratio will be fixed to 4:3 if
[Video Output Aspect Ratio] is set to [Original].
– When recording on a DVD-RW (Video mode)/DVD-R (Video
mode) in LR or ER mode, or when recording on a DVD+RW/
DVD+R, the aspect ratio is fixed to 4:3.
• With a BD-RE or BD-R, copying does not start if the total title
length exceeds 12 hours.
• Maximum number of recordable titles is as follows:
– BD-R/BD-RE: 300
– DVD+R, DVD+RW: 49
– DVD-R, DVD-RW: 99
Note that the discs become full before reaching these limits
depending on usage conditions.
• A title longer than eight hours (approx) cannot be copied to a
BD.
• A title longer than six hours (approx) cannot be copied to a
DVD.
• Thumbnail images in the source title will not be recorded when
copying to a DVD+RW, DVD-RW (Video mode), DVD+R,
DVD-R (Video mode).
z Hints
• You can use Playlist titles on the HDD for copying in the same way as
original titles.
• The copy will continue even when the server is turned off.
• The VBR (Variable Bit Rate) function analyzes the picture complexity
and optimizes the bit rate accordingly, resulting in a higher picture
quality.
• You can format the HDD using the [HDD Initialization] setting
(page 117).
Formatting a BD/DVD
a Press HOME to turn on the Home Menu.
b Select to display the icons.
c Select and press ENTER.
d Select the and press OPTIONS.
The Options menu appears.
e Select [Information/Settings] and press
ENTER.
f Select [Format] and press ENTER.
The following display appears.
g On the confirmation screen, select [Yes] and
press ENTER.
When formatting a DVD-RW or DVD-R, select the
format from [VR] or [Video].
z Hints
• You can re-format a finalized DVD-RW changing the video format
(VR mode/Video mode).
• To format the HDD, select the Settings icon on the HOME menu and
select [HDD Initialization] (page 117).
,
Video
Blank Disc 9
DVD- RW
Format
Formatting will erase all the titles including the
protected ones.
Are you sure you want to format?
NoYe s
,continued
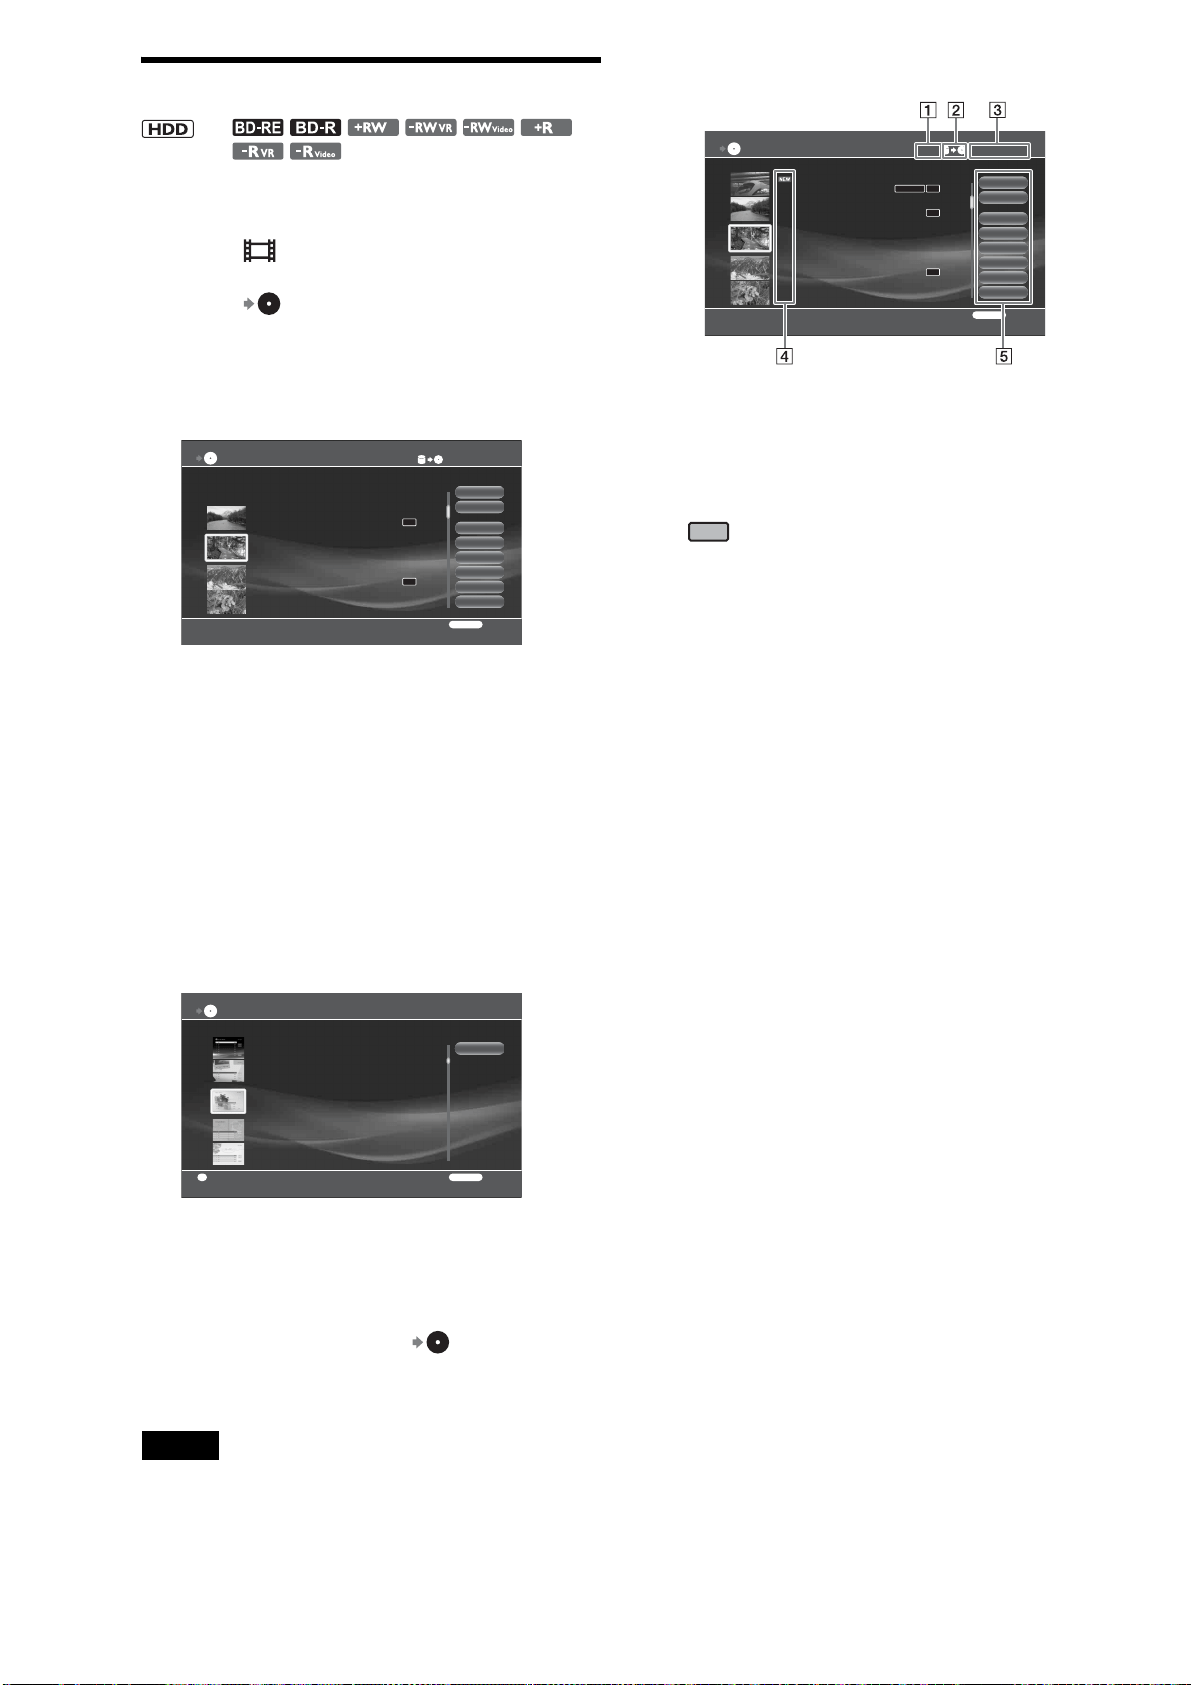
94
Copying videos to BD/DVD
a Press HOME to turn on the Home Menu.
b Select to display the icons.
c Select (Copy HDD to Disc) and press
ENTER.
d Select a destination disc and press ENTER.
The title selection display appears.
e Select video titles to copy and press ENTER
(30 titles maximum).
The video copy display appears (see below).
When copying to DVD+RW/DVD+R/DVD-RW
(Video mode)/DVD-R (Video mode), you can create
a DVD Menu. Go to step 6.
When using other discs, go to step 8.
f On the confirmation screen, select [Yes] for
finalizing and press ENTER.
The wall paper selection display appears.
To zoom the wall paper, press YELLOW.
g Select a wallpaper and press ENTER.
h Select [Start] and press ENTER.
z Hints
• To check progress, press HOME, select and press ENTER.
• Copying will continue if the server is turned off.
• High-speed copy is possible only when the destination is a BD-RE or
BD-R.
Note
You can enter up to 80 characters for an HDD video title, but only the
first 64 characters will be retained after the title is copied to a DVD.
About the video copy display
A Total data size of videos
B Direction of copy
C Remaining capacity of destination media
D Title type
: Indicates the video has not been played.
: Original title.
: Playlist title.
HDV: Titles recorded on HDV devices.
DV: Titles recorded on DV devices.
E Available operations
[Start]: Starts copying.
[Finish]: Turns off the video copy display.
[Settings]: Allows for detailed settings for each
video.
[Clear All]: Cancels all video selections for copy.
[DVD Menu]: Allows you to select a wallpaper for
the DVD Menu (for DVD+RW/DVD+R/DVD-R
(Video mode)/DVD-R(Video mode) only).
[Finalize]: Sets whether to finalize the disc after
copying.
[Disc Name]: Displays an on-screen keyboard for
disc name input.
[Change Disc]: Select this when changing the
destination disc.
z Hint
You can turn off the the server by pressing \/1 while copying from the
HDD to a disc. The operation continues even when the server is turned
off.
,
Copy Title
Select the title.
Start
Finish
Settings
Clear All
DVD Menu
Finalize
Disc Name
Change Disc
RETURN
Finish
Remaining:4.6GB0.0GB
DR
DR
HDV 7/ 6/2007 12:57PM - 7/ 6/2007 12:58PM
7/ 6/2007 12:57PM ( 0H02M) HDV
ORG
HDV 7/13/2007 3:34PM - 3:35PM
7/13/2007 3:34PM ( 0H01M)
PL
HDV 7/13/2007 3:34PM - 7/13/2007 3:35PM
7/13/2007 3:34PM ( 0H01M) HDV
ORG
HDV 7/ 6/2007 12:57PM - 12:58PM
7/ 6/2007 12:57PM ( 0H02M)
PL
3. Picture
4. Gift
5. Pastel
6. Memory
Copy Title - DVD Menu Selection
RETURN
Return
Y
Zoom in/Zoom out
Select the DVD Menu used for finalizing
2. RED
Cancel
Copy Title
Select the title.
Start
Finish
Settings
Clear All
DVD Menu
Finalize
Disc Name
Change Disc
RETURN
Finish
Remaining:4.6GB0.0GB
DR
DR
DR
DV 7/ 6/2007 12:57PM - 7/ 6/2007 12:58PM
7/ 6/2007 12:57PM ( 0H02M) HDV
ORG
Album-X
8/ 9/2007 9:32AM ( 0H00M)
ORG
HDV 7/13/2007 3:34PM - 3:35PM
7/13/2007 3:34PM ( 0H01M)
ORG
HDV 7/13/2007 3:34PM - 7/13/2007 3:35PM
7/13/2007 3:34PM ( 0H01M) HDV
ORG
DV 7/ 6/2007 12:57PM - 12:58PM
7/ 6/2007 12:57PM ( 0H02M)
PL
x-Pict Story
NEW
ORG
PL

95
Copying to BD/DVD
Closing a BD
By closing, you can retain disc recordings without alteration or
erasure. Note that unlike DVD finalizing, closing a BD cannot be
undone.
a Press HOME to turn on the Home Menu.
b Select to display the icons.
c Select and press ENTER.
d Select a BD disc and press OPTIONS.
The Options menu appears.
e Select [Information/Settings] and press
ENTER.
The disc information display appears.
f Select [BD Close] and press ENTER.
g On the confirmation screen, select [OK] and
press ENTER.
Finalizing a DVD
Finalizing rearranges the disc’s recorded data in a format
generally playable on other DVD devices. Since a DVD Menu is
automatically created when you finalize DVD+RW/DVD-RW
(Video mode)/DVD+R/DVD-R (Video mode), you can display
the menu on other DVD devices.
z Hints
• You do not need to finalize BD-RE and BD-R to make them playable
on other BD devices.
• You can turn off the the server by pressing \/1 while copying from the
HDD to a disc. The operation continues even when the server is turned
off.
Note
You cannot finalize on this server if the DVD was recorded on other
DVD devices.
Before finalizing, check the difference between DVD disc types.
◆ Manual finalizing is unnecessary
The server automatically finalizes DVD+RW and creates a DVD
Menu before ejecting.
You can record or edit after finalizing.
◆ Finalizing is necessary
However, the disc is playable without finalizing if the DVD
device is compatible with DVD-RW (VR mode)*.
You can record or edit after finalizing, and further re-finalizing
is unnecessary.
* If the recording is short, finalizing may become necessary to enhance
compatibility.
◆ Finalizing is necessary
You can play the disc after finalizing if the DVD device is
compatible with DVD-R (VR mode).
You cannot record or edit after finalizing.
◆ Finalizing is necessary
A DVD Menu will be created while finalizing.
You can record or edit after finalizing if you unfinalize the disc,
although you will need to re-finalize later.
◆ Finalizing is necessary
A DVD Menu will be created while finalizing.
You cannot record or edit after finalizing.
a Press HOME to turn on the Home Menu.
b Select to display the media icons.
c Select and press ENTER.
d Select and press OPTIONS.
The Options menu appears.
e Select [Information/Settings] and press
ENTER.
The disc information display appears.
If the disc type does not allow for DVD Menu, go to
step 8.
,continued
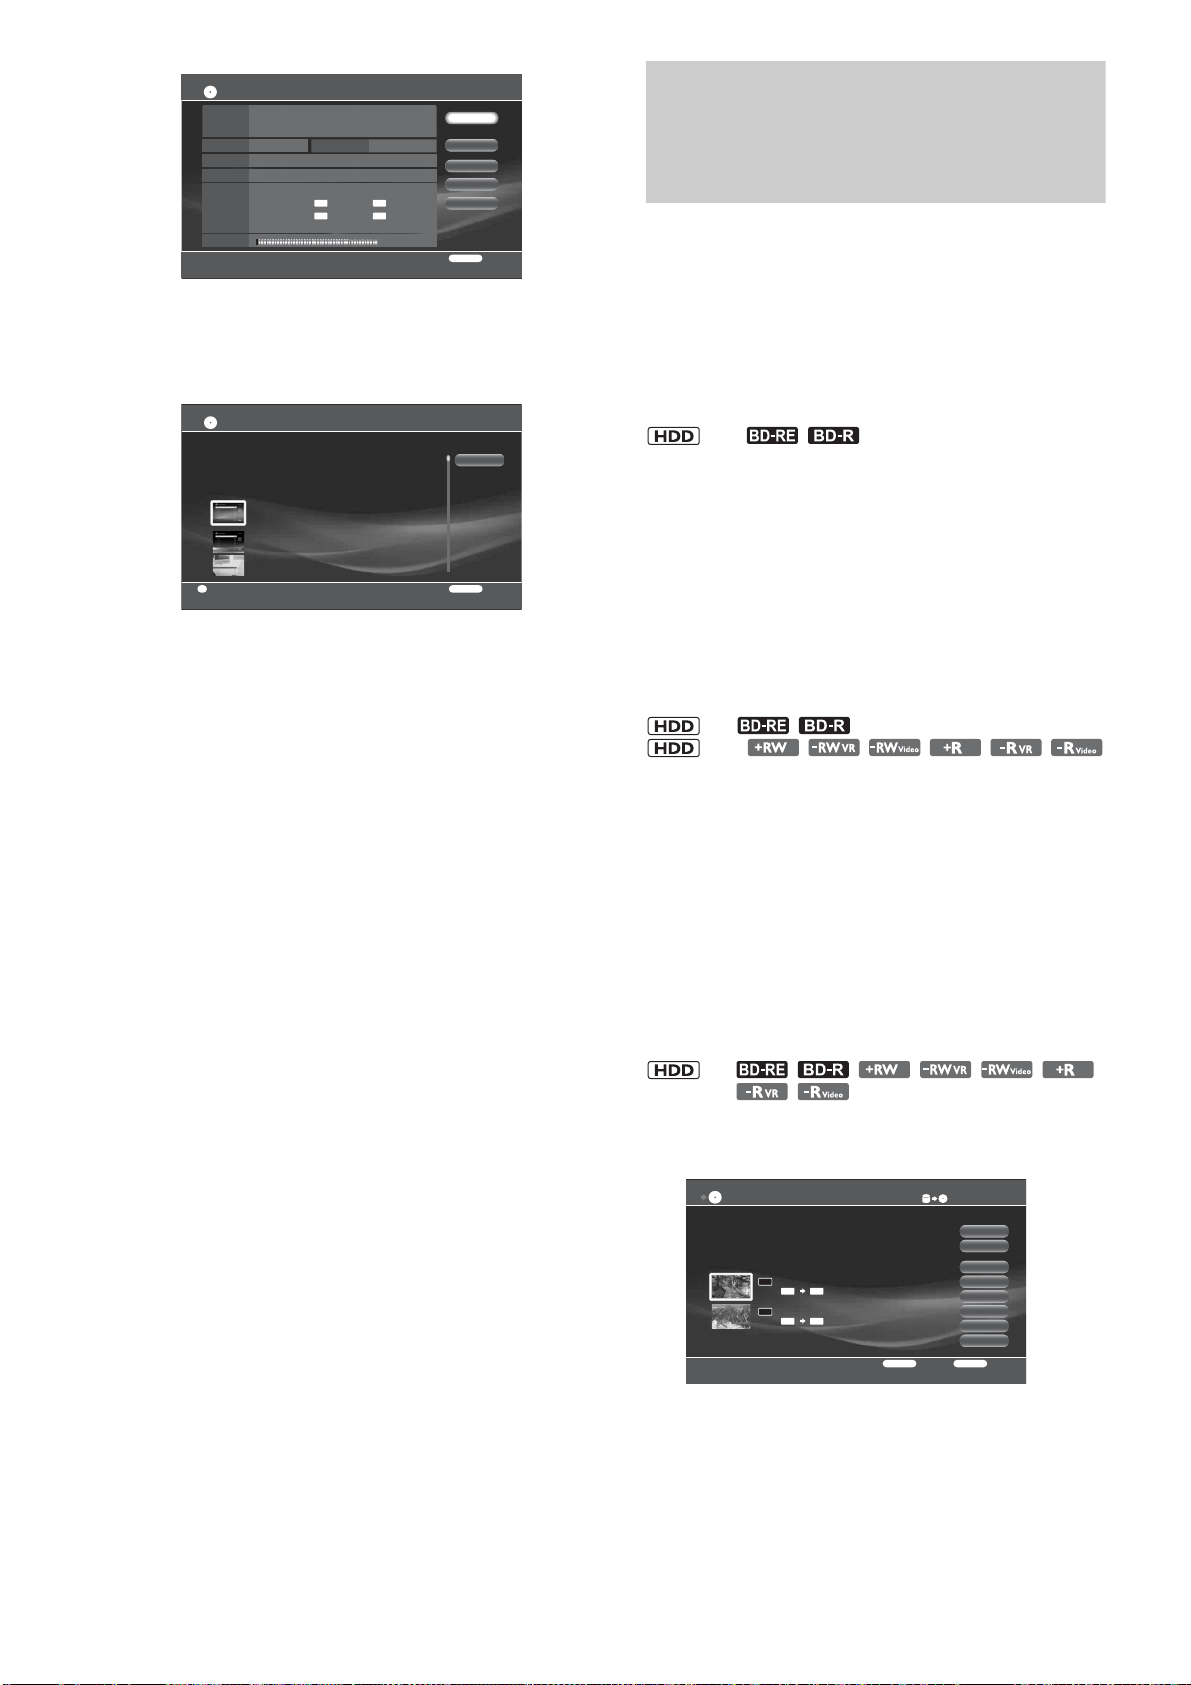
96
f Select [Finalize] or [DVD Menu] and press
ENTER.
The DVD Menu creation display appears.
To zoom the wallpaper, press the YELLOW button.
If [Finalize] is not selectable, the disc has previously
been finalized.
g Select the DVD Menu and press ENTER.
h On the confirmation screen, check the time
required for finalizing, select [Yes] and press
ENTER.
z Hint
You can use the disc information display to check if the disc is finalized.
When [Finalized] is selectable, the disc is not finalized.
To unfinalize the disc (DVD-RW VR mode, DVD-
RW (Video mode) only)
◆For DVD-RW (Video mode)
Unfinalizing makes the disc recordable and editable again.
Note that you cannot unfinalize if the disc was finalized on
another device.
1 Insert a finalized DVD-RW (Video mode) by
pressing Z.
2 Repeat steps 1 to 3 to turn on the disc information
display.
3 Select [Unfinalize] and press ENTER.
Unfinalizing may take several minutes.
◆For DVD-RW (VR mode)
When a DVD-RW (VR mode) finalized on another DVD device
does not accept recording or editing, a message appears
indicating that it is a finalized disc and that you need to
unfinalize. In such case, select [Unfinalize] on the disc
information display as above.
However, you may not be able to unfinalize the disc, depending
on the device used for finalizing.
About Recording Modes
For importing/copying, two methods are available: High-speed
Importing/Copying (without changing the recording mode), and
Rec Mode Conversion Importing/Copying (reducing the data
size converting to the different recording mode from the original
recordings). Read the following and select according to the
required time, disc space, and picture quality.
Importing/copying at high-speed (High-speed
Importing/Copying)
n
Allows you to copy titles from HDD to a BD or import to HDD
from a BD, without changing the mode.
Select [High-Speed] in [Recording Mode] when importing/
copying (page 97). See page 150 for required time for
importing/copying.
z Hints
• When importing/copying the edited titles at high-speed, the “seams”
that are left over from editing may remain on the disc.
• Importing/copying between HDD and DVD automatically set to Rec
Mode Conversion Importing/Copying.
Rec Mode Conversion Importing/Copying
,
n
Allows you to import/copy a title from the HDD to a DVD or
vice versa, or import from HDD to a BD, in a recording mode
that differs from the original recordings. For example, when you
import/copy a title recorded in XR mode (high quality, but large
data size) to SP mode, you can reduce the data size, saving more
titles using less space.
If you copy a title of HDD recorded in DR or XR mode to a BD
in SR, LR, or ER mode, or to a DVD in SP or LP recording
mode, the unit automatically set the optimum picture quality,
which makes the deterioration in the image quality minimum.
To automatically adjust the recording mode
according to the available space
,
1 Select [Settings] from the video copy display and
press ENTER.
2 Select [Auto Adjust] and press ENTER.
DR
: 35H11M
4.4/4.7GB
LP
XP
EP
SP
Disc Information
Disc Name
Media
Title Total
Rec Date
Remaining
DVD-RW Format Video
2
7/13/2007
Recordable
Time
: 0H59M : 1H59M
: 4H01M : 5H56M
Name Input
Finalize
DVD Me n u
Format
RETURN
Finish
Close
1. Blue
2. RED
3. Picture
Finalize - DVD Menu Selection
RETURN
Return
Select the DVD Menu used for finalizing
Cancel
Y
Zoom in/Zoom out
Copy Title - Settings
Set the copy mode.
Start
Finish
Change Title
Auto Adjust
DVD Menu
Finalize
Disc Name
Change Disc
RETURN
Finish
OPTIONS
Function
Remaining:4.6GB5.3GB
NEW
NEW
XR
SR
XP
SP
ORG
ORG
2
1
1.2GB
4.0GB
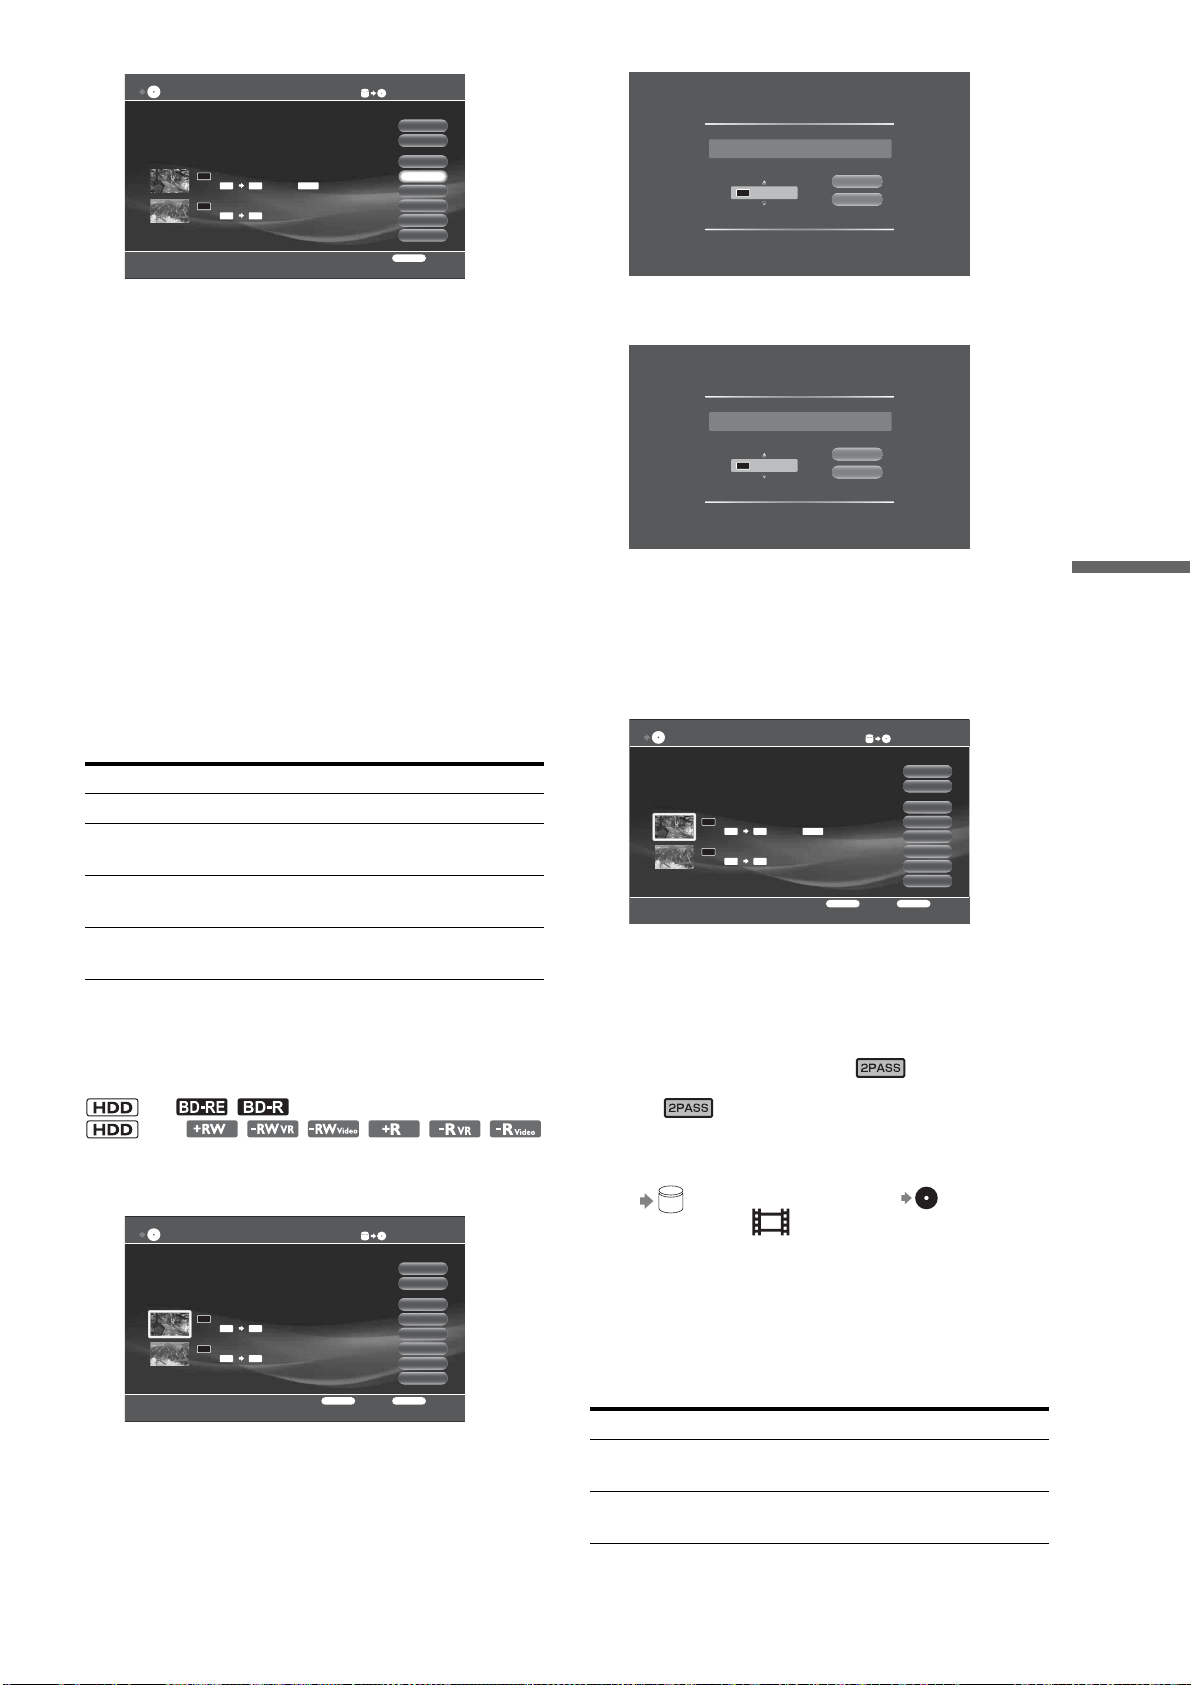
97
Copying to BD/DVD
The unit automatically selects the recording mode
according to the available space.
z Hints
• If there is not enough available space or management information on
the target disc, the message “Cannot import/copy because of the less
space.” appears in the display during importing/copying.
• If importing/copying can be performed by adjusting the importing/
copying mode, the message “Importing/copying title(s) adjusting
importing/copying mode?” will be displayed. When you select “Yes,”
importing/copying starts changing the recording mode automatically,
according to the available space of the target disc. If you select [Auto
Adjust] in Detail Settings display of Title Importing/Copying and press
ENTER, you can also adjust the importing/copying mode
automatically.
• Rec Mode Conversion Importing/Copying in the recording mode of
the source title smoothes out the “seams” that are left over from
editing.
◆Available settings in Detail Settings display of Title
Importing/Copying
You can set the following settings. Select an item and press
ENTER.
*
1
DVD only (except DVD-RW in VR mode, DVD-R in VR mode).
*
2
DVD only (except DVD+RW).
To change the recording mode per title
,
n
1 Select [Settings] from Title Importing/Copying
display and press ENTER.
2 Select the title and press ENTER.
3 Select the recording mode.
Select the recording mode from High-Speed
*
/XR/
SR/LR/ER. When copying from HDD to a DVD,
select from XP/SP/LP/EP.
* Displayed when copying from HDD to a BD.
4 Select [Set] and press ENTER.
5 Select [Start] and press ENTER.
z Hints
• You can also set the recording mode by pressing OPTIONS to select
[Rec Mode Setting] in Detail Settings display in Title Importing/
Copying.
• When you import/copy a title displayed (2 PASS), the picture
quality will be higher by performing Dynamic VBR Dubbing PRO
function. (2 PASS) may not be correctly displayed according
to the title (combined title or playlist, etc.).
To stop the importing/copying partway
Select (HDD t DISC copying) or (DISC t
HDD importing) from in Home Menu, and select ENTER.
Select [Stop] in Importing/Copying Progress display, and press
ENTER. Select [OK] and press ENTER. It may take several tens
of seconds to stop importing/copying. It may take time longer
according to the condition of importing/copying.
Available OPTIONS in Detailed Settings display
Available options differ depending on the situation.
Items
Details
Reselect Selects a title again.
DVD Menu
*1
Sets the background picture of the DVD
menu.
Finalize
*2
Enables finalizing after completing
importing/copying.
Disc Name Allows you to input a disc name in the
displayed keyboard.
Copy Title - Settings
Set the copy mode.
Start
Finish
Change Title
Auto Adjust
DVD Menu
Finalize
Disc Name
Change Disc
RETURN
Return
Remaining:4.6GB3.3GB
NEW
NEW
XR
SR
SP 2PASS
SP
ORG
ORG
2
1
1.2GB
2.0GB
Copy Title - Settings
Set the copy mode.
Start
Finish
Change Title
Auto Adjust
DVD Menu
Finalize
Disc Name
Change Disc
RETURN
Finish
OPTIONS
Function
Remaining:4.6GB5.3GB
NEW
NEW
XR
SR
XP
SP
ORG
ORG
2
1
1.2GB
4.0GB
Items
Details
Copy Mode Settings/
Import Mode Settings
Set the importing/copying mode.
Cancel Cancels the selection, and erases them
from the importing/copying select list.
Copy Mode Settings
Set the copy mode.
8/27/2007
Copy Mode
4.0GB
Cancel
Set
XP
Copy Mode Settings
Set the copy mode.
8/27/2007
Copy Mode
1.0GB
Cancel
Set
LP
Copy Title - Detailed Settings
Set the copy mode.
RETURN
Return
Remaining:4.6GB2.3GB
NEW
NEW
XR
SR
LP 2PASS
SP
ORG
ORG
2
1
1.2GB
1.0GB
OPTIONS
Function
Start
Finish
Change Title
Auto Adjust
DVD Menu
Finalize
Disc Name
Change Disc
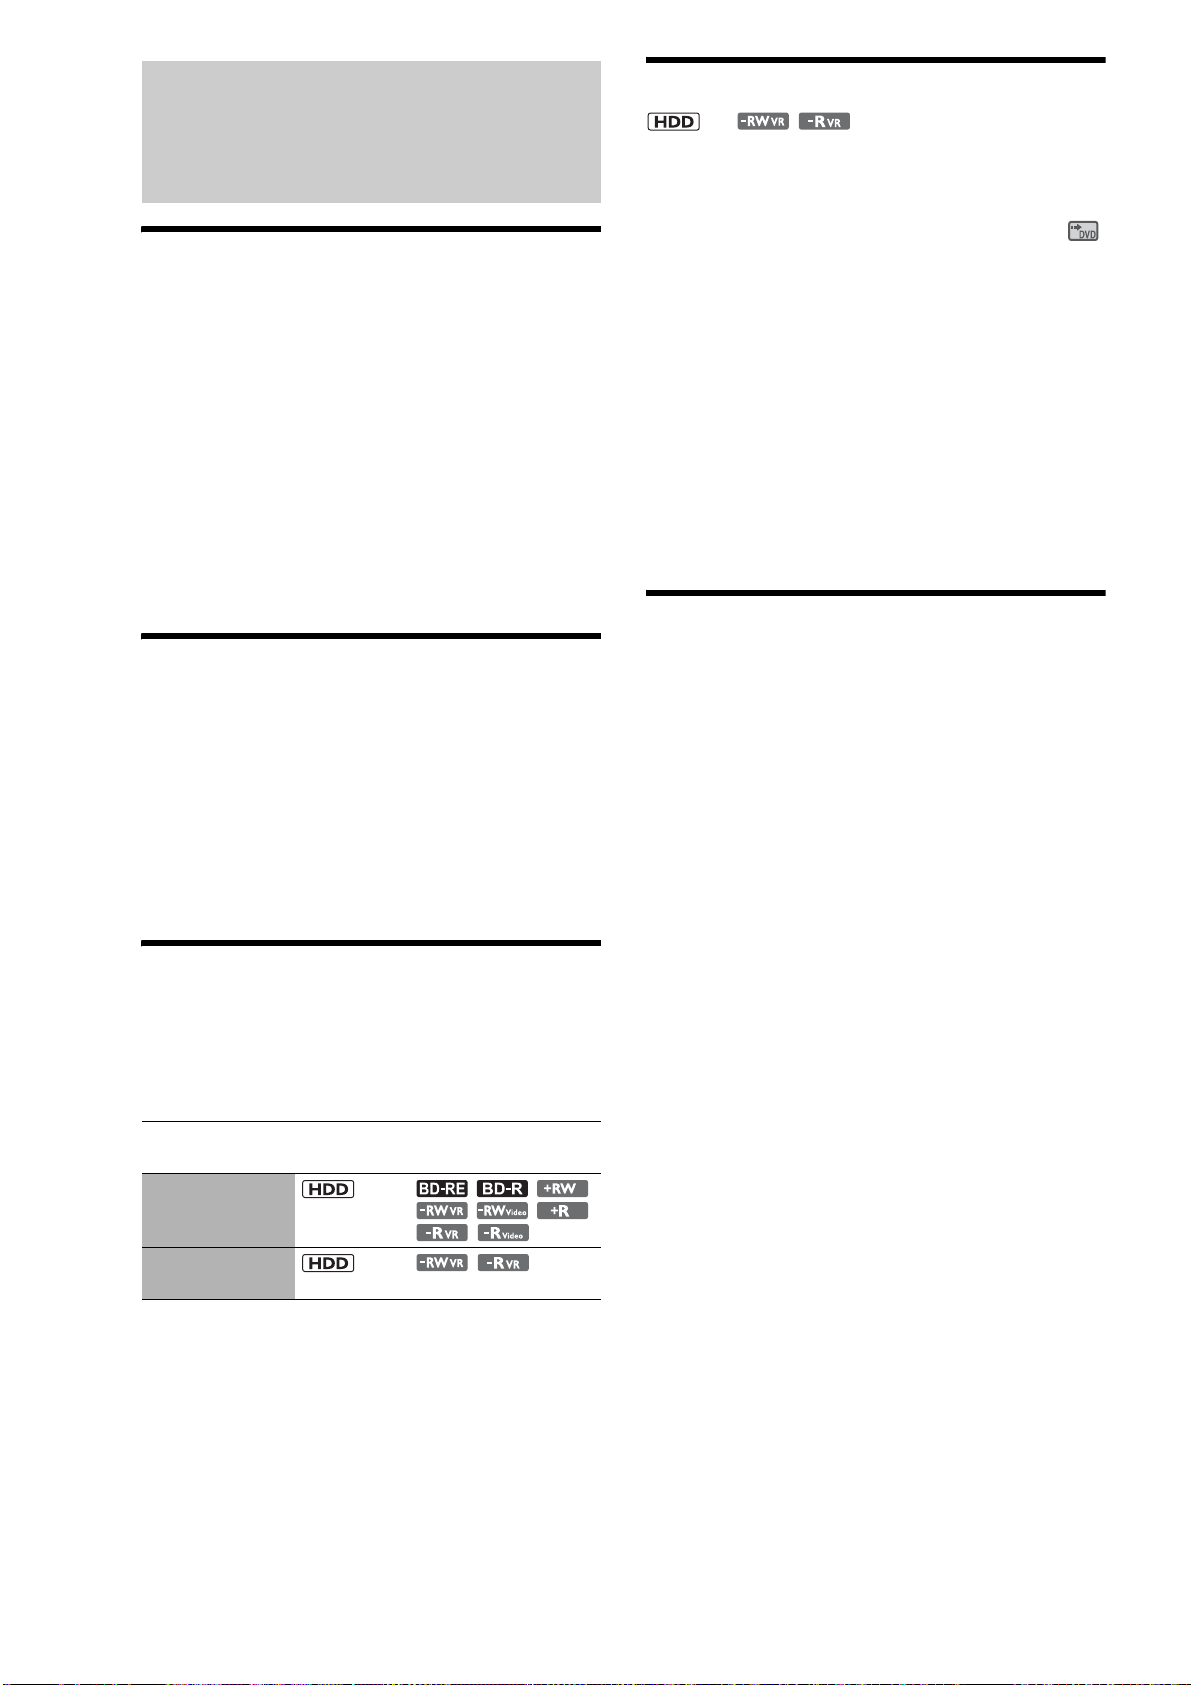
98
Notes and Restrictions on
Importing/Copying
Notes on general importing/copying
• Operations may differ depending on the HDD/BD/DVD status.
Follow the on-screen messages.
• If a message appears indicating that the control information is
full, erase the titles on the disc. Importing or copying of heavily
edited titles may not be possible. In that case, dividing them
may solve the problem.
• You cannot import from commercially available BD-ROMs
and DVDs to the HDD.
• Titles longer than eight hours cannot be imported or copied.
• Titles may not be imported or copied if they are too short.
• In some cases, titles recorded on the server may not be
imported or copied.
• When importing to a BD-RE/BD-R/DVD+RW/DVD-RW
(Video mode)/DVD+R/DVD-R (Video mode), thumbnails of
the source title will not be retained.
Notes on recording modes
Note on High-Speed Import/High-Speed Copy
If canceled halfway, the title remains on the HDD, not on the
BD. However, the available capacity decreases if a BD-R is
used.
Notes on Rec Mode Conversion
• Picture quality does not improve even if converted to a
recording mode of better picture quality.
• Short titles may not be imported or copied properly.
Restrictions on importing/copying
The server can perform the following importing/copying, in
addition to “Moving” the content.
Commercially available software such as movies cannot be
imported to the HDD. Also, importing will pause if the DVD
contains copy protection signals.
Notes on ‘Move’
,
Video titles that contain ‘Copy Once’ signals can only be
‘moved’ from the HDD to a DVD-RW (VR mode) or DVD-RW
(VR mode)*. After being moved, the original title in the HDD is
erased.
You can move titles in the same way as copying. Check for
to see if the title can be moved to DVD-RW (VR mode)/DVD-R
(VR mode).
• The following titles recorded on the HDD cannot be moved:
– Protected titles
– Playlist titles
– Original titles referred to by Playlist titles
• You cannot move back titles that have been moved to a BD/
DVD.
• If move is canceled, the source title remains in the HDD, and
no data will be recorded on the BD/DVD. However, the disc
capacity decreases if the disc is a BD-R or a DVD-R (VR
mode).
* CPRM-compatible DVD-RW (VR mode)/DVD-R (VR mode) only.
CPRM (Content Protection for Recordable Media) is a coding
technology for protecting copyright of moving images.
Notes on disc formatting and finalizing
• You cannot re-format a DVD-R in Video mode if it has once
been formatted in VR mode.
• Depending on the DVD device, discs may not play even if
finalized correctly.
• You cannot finalize a DVD that has been recorded on other
devices.
To unfinalize a disc
• Some DVD-RWs (VR mode) cannot be unfinalized.
• You cannot unfinalize if the disc has been finalized on other
devices.
Copy protection
signal
Importing/Copying, and Moving
‘Copy Free’
(copies content)
n
‘Copy Once’
(moves content)
,
(both CPRM compatible)
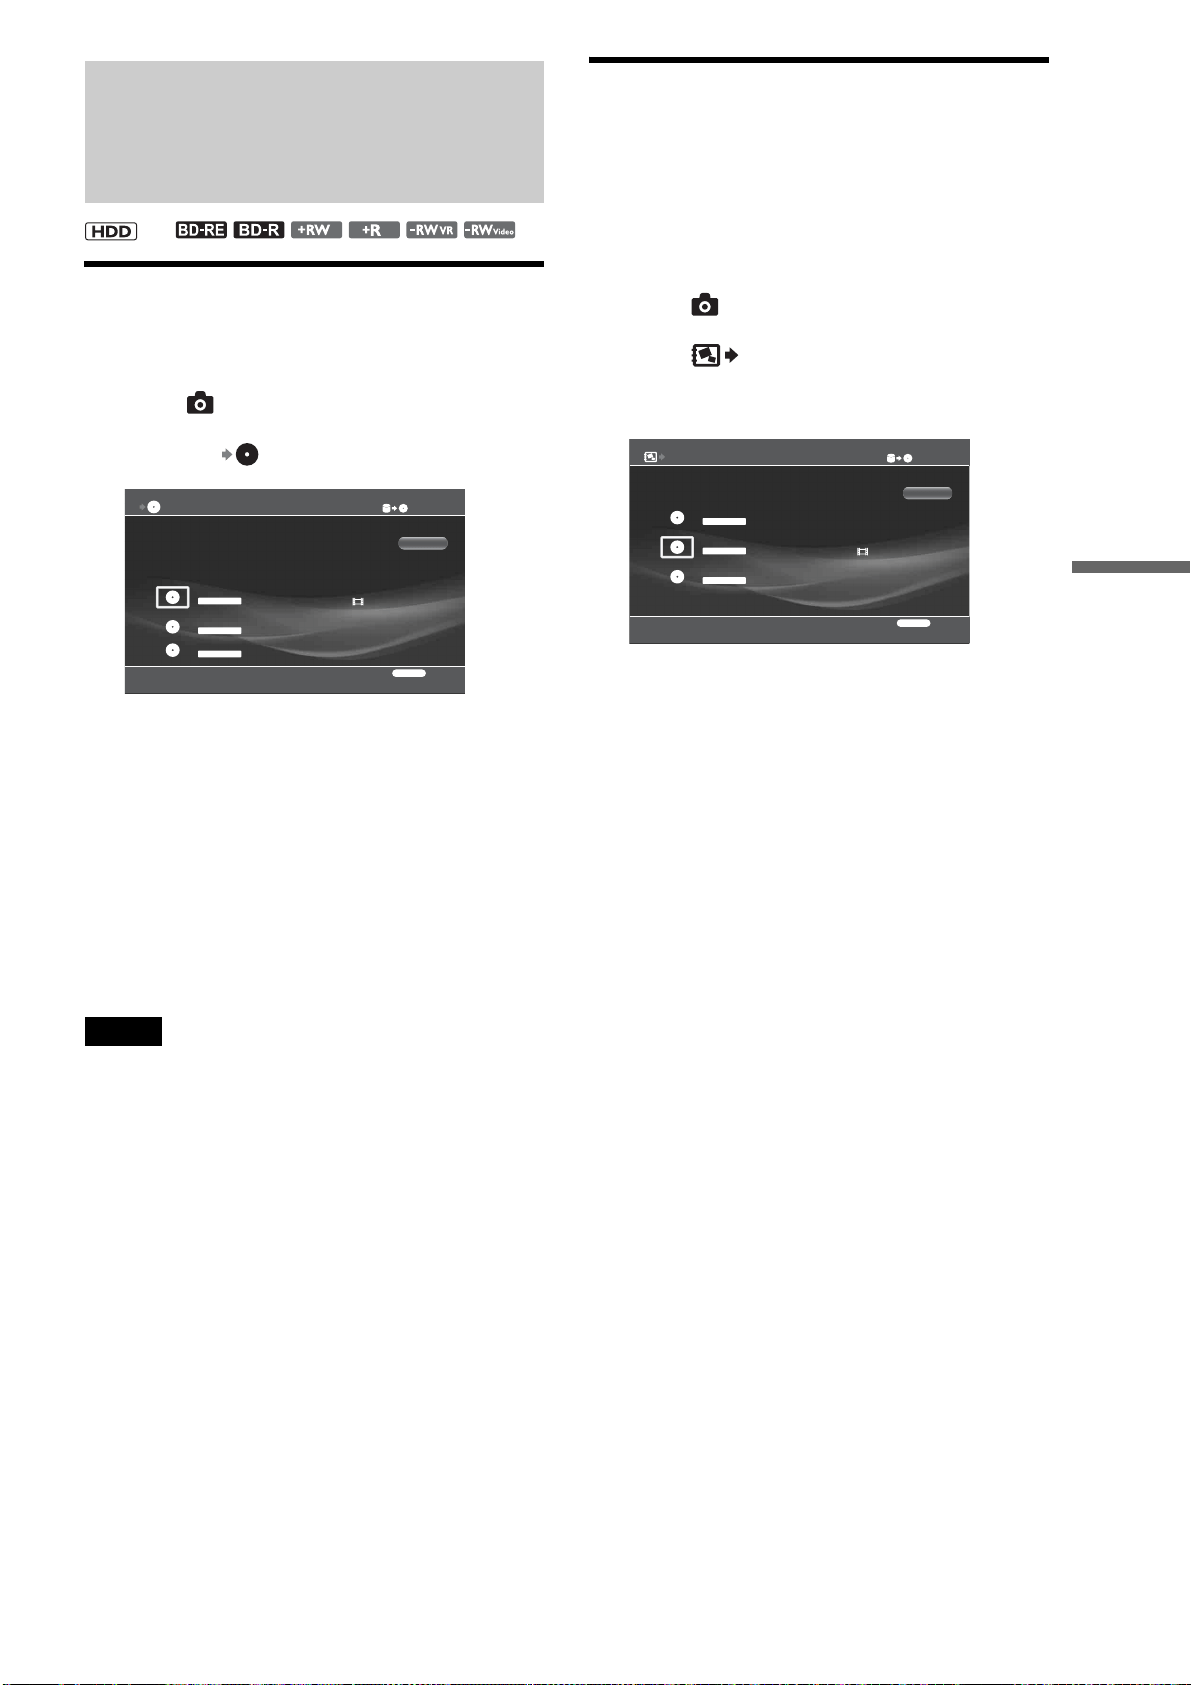
99
Copying to BD/DVD
Copying Photos
Copying photos to BD/DVD
a Press HOME to turn on the Home Menu.
b Select to display the icons.
c Select the icon and press ENTER.
d Select a disc.
e Select an album to copy and press ENTER.
f Repeat step 5 to select all the albums you
want to copy.
g Select [Start] and press ENTER.
z Hint
If you create an “x-Pict Story” file and make a video title from it, you can
copy the video title to a DVD (page 68).
Notes
• Photos and “x-ScrapBook” albums cannot be copied to DVD-Rs and
DVD+Rs if they are formatted.
• After photos or “x-ScrapBook” albums are copied to a DVD, no further
recording can be added to the disc.
• Up to a combined total of 2,000 files and folders can be copied to a BD.
• Up to 4,000 photo files can be copied to a DVD.
Copying “x-ScrapBook” albums to BD/
DVD
You can copy all the photos and videos used in “x-ScrapBook”
albums, in addition to album-like “x-ScrapBook” images (each
page is saved as a JPEG image).
a Press HOME to turn on the Home menu.
b Select to display the icons.
c Select and press ENTER.
The “x-ScrapBook” destination selection display
appears.
d Select destination disc and press ENTER.
e Select “x-ScrapBook” albums to copy and
press ENTER.
Select in the order you want to record on the disc.
The selected “x-ScrapBook” albums will be
numbered on the screen.
f Select [Start] and press ENTER.
Copying starts.
g Select [Finish] and press ENTER.
To copy more “x-ScrapBook” albums, select
[Continue], change discs if necessary, and repeat
from step 4.
z Hint
To view photos and videos on the DVD, press HOME and select the
Video or Photo icon.
When copying photos from the HDD to BD/DVD
• The photos are copied to DVD-RWs/DVD+RWs only after the
discs are initialized in DATA format. All previous recordings
will be lost.
• Since DVDs are automatically finalized after photos are
copied, no more photos can be added to these discs. You can
make additional photo copying if you use a BD-RE or BD-R.
• Up to 4,000 photos can be copied to a single DVD.
• If you import a file or folder whose name contains more than
54 characters, its files and subfolders will not be displayed
correctly.
• Files that indirectly refer to other photo data (files edited on
PCs) cannot be played.
• Discs created on PCs may not play.
,
0.0GB
Copy Album - Select Disc
23.8GB
Select the destination disc.
Cancel
RETURN
Finish
BD-RE DATA
Blank(Formatted) Disc 4
DVD-R VR
7/13/2007
DVD-RW VIDEO
Disc 5
0.0GB
Copy x-ScrapBook - Select Disc
1.0GB
Disc 6
Select the destination disc.
Cancel
RETURN
Finish
DVD- RW DATA
Blank(Formatted) Disc 4
DVD-R VR
23.8GB
Disc 5
BD-RE DATA

100
Various
Connections
Connecting a TV
(or monitor)
Refer to the following sections for details about connection to a
TV (or monitor).
About video signals
Videos and photos can be displayed either in the High Definition
(HD) or Standard Definition (SD) quality.
This server handles the following video signals. Select the
format acceptable to your TV.
◆For HD quality pictures
• Progressive signals
720p and 1080p — for HDMI OUT jack only
• Interlace signals
1080i
◆For SD quality pictures
• Progressive signals
480p
• Interlace signals
480i — for output jacks other than the HDMI OUT jack
See pages 143 and 144 for difference between Progressive and
Interlace signals.
• Connecting a TV (or monitor). . . . . . . . . . . . 100
• Connecting an AV Amplifier . . . . . . . . . . . . . 105
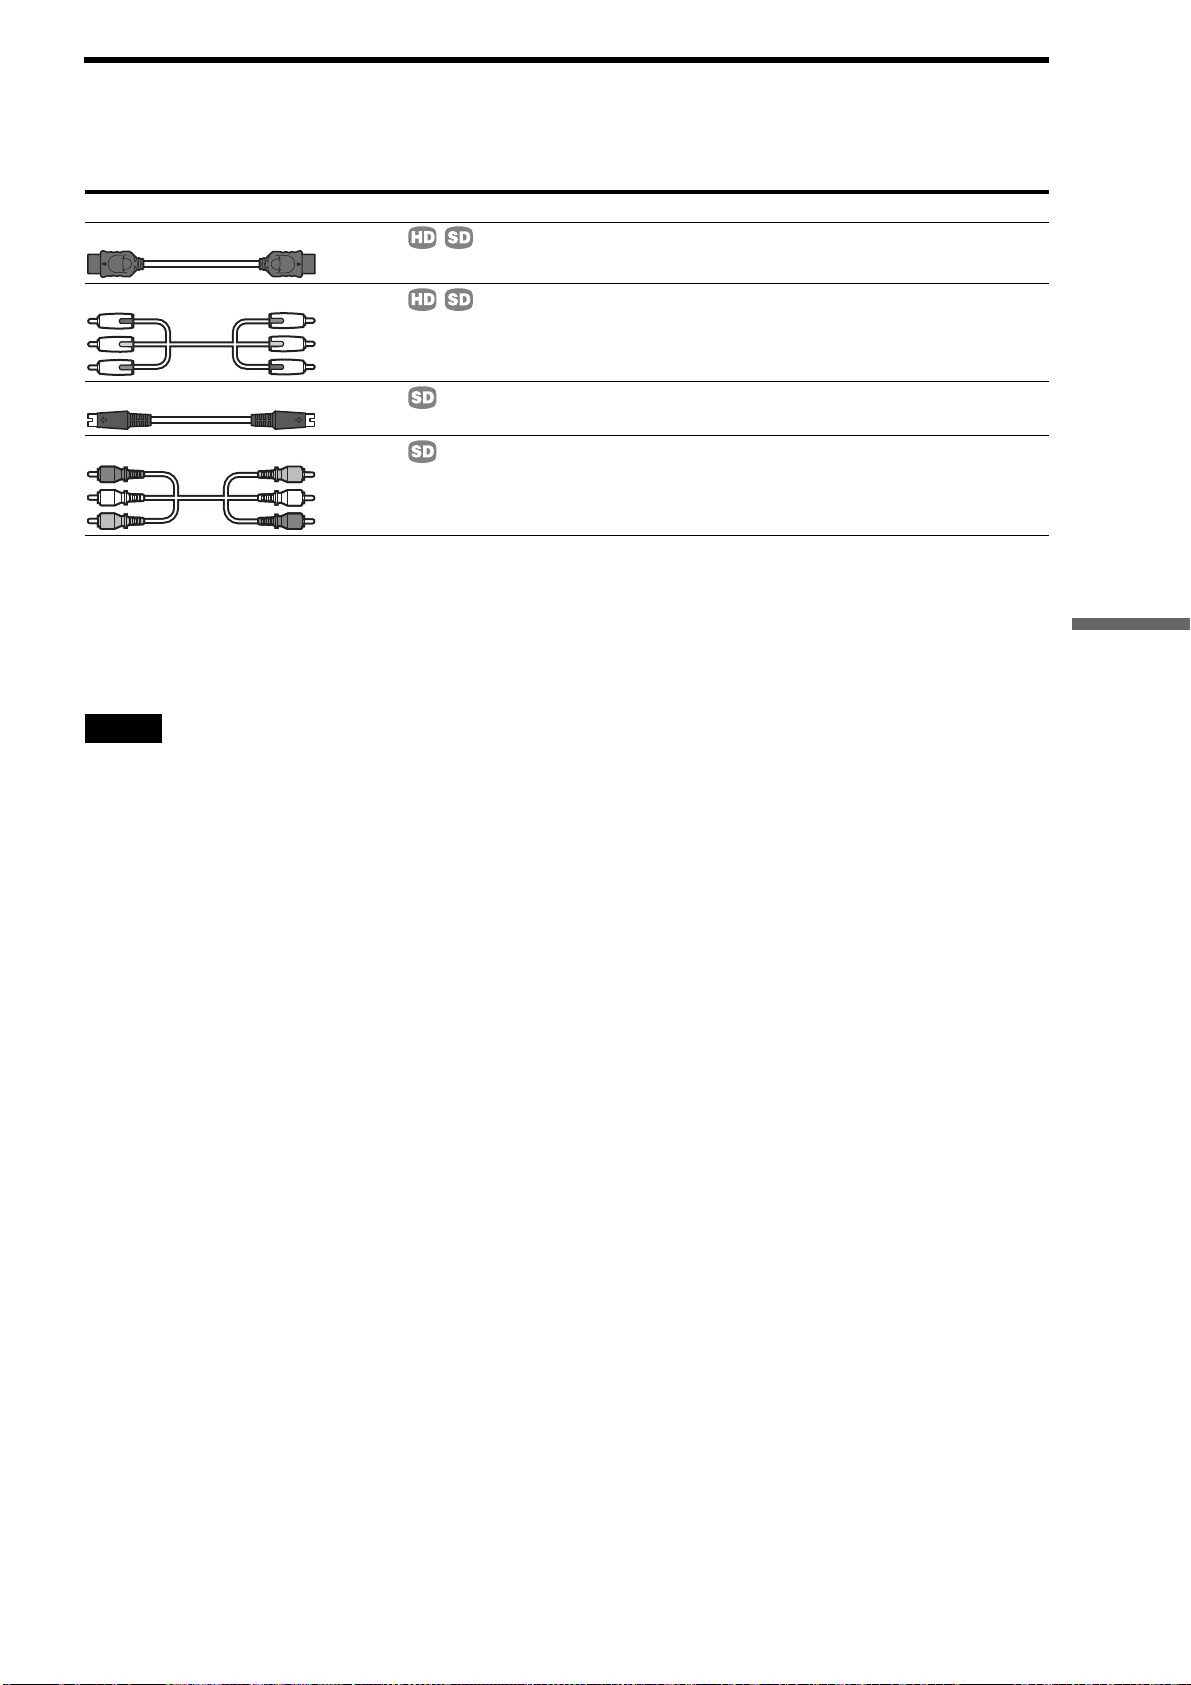
101
Various Connections
Selecting a video cable
Since the server has several connecting jacks, you can select according to the jacks on your TV.
If you have a high-definition TV, connect using the HDMI OUT jack or the COMPONENT VIDEO OUT jacks.
About video signal settings
The server supports several video display formats listed on the
previous page. To find the optimal format of your preference
using your TV, please select among available formats supported
(page 103).
Notes
• If you have any problems outputting progressive signals to your TV, it
is recommended that you view the pictures in Interlace format. See
page 103 for details.
• Use a Sony audio/video cable.
Types of video cable Picture quality Reference page
HDMI cable page 102
Component video cable (red, green, blue) page 103
S Video cable page 104
Video cables (red, white, yellow) page 104
,continued
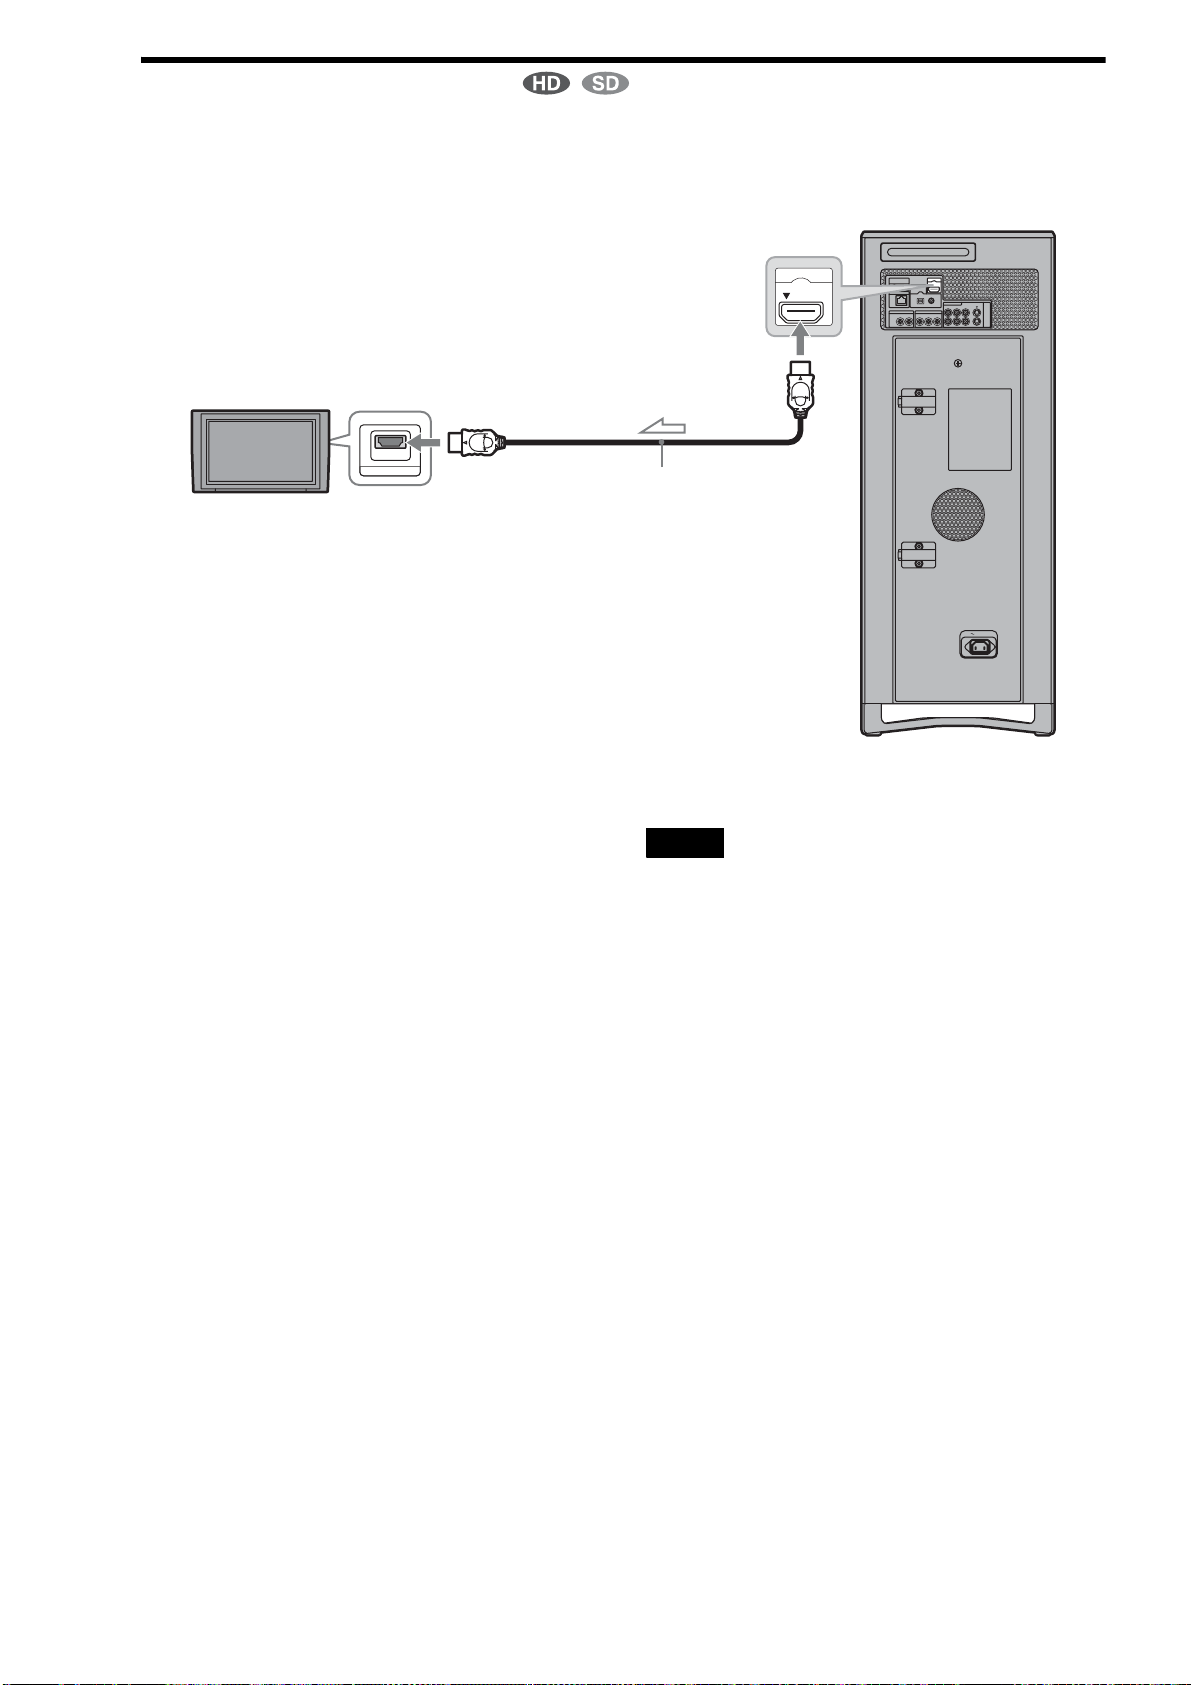
102
Connecting with an HDMI cable
Superior video and audio quality can be obtained when the
HDMI cable is used to connect the server to a TV. This
connection type outputs both the audio and video signals so only
one cable is required.
To switch the output resolution for the HDMI
OUT jack
Select [Settings] – [Video Settings] – [Output Resolution
Priority] – [HDMI] (page 112).
◆Notes about the HDMI OUT jack
• When you connect the server to an AV amplifier (receiver)
using an HDMI cable, you will need to do one of the following:
– Connect the AV amplifier(receiver) to a TV with the HDMI
cable.
– Connect the server to the TV with a video cable other than the
HDMI cable (component video cable, S VIDEO cable, or video
cable).
• When connecting to the HDMI OUT jack, carefully align the
HDMI connector with the jack. Do not bend or apply pressure
to the HDMI cable.
z Hint
Connection to DVI devices is not guaranteed.
Notes
• Pictures and sound may be interrupted before the devices recognize the
connection.
• If you connect a component that does not conform to the selected audio
signal, a loud noise (or no sound) will come out from the speakers,
which could damage your ears or speakers.
PUSH/OPEN
AC IN
CONTROL S IN/
IR IN
HDMI OUT
COMPONENT VIDEO OUT
AUDIO OUT
R
R-AUDIO-L VIDEO
LINE
IN 1
OUT
S VIDEO
YP
B PR
LAN
(
10/100
)
COAXIAL
DIGITAL OUT
PCM/DTS/
DOLBY DIGITAL
L
OPTICAL
HDMI OUT
HDMI IN
TV
Server
To HDMI OUT
HDMI cable (supplied)
To HDMI input jack
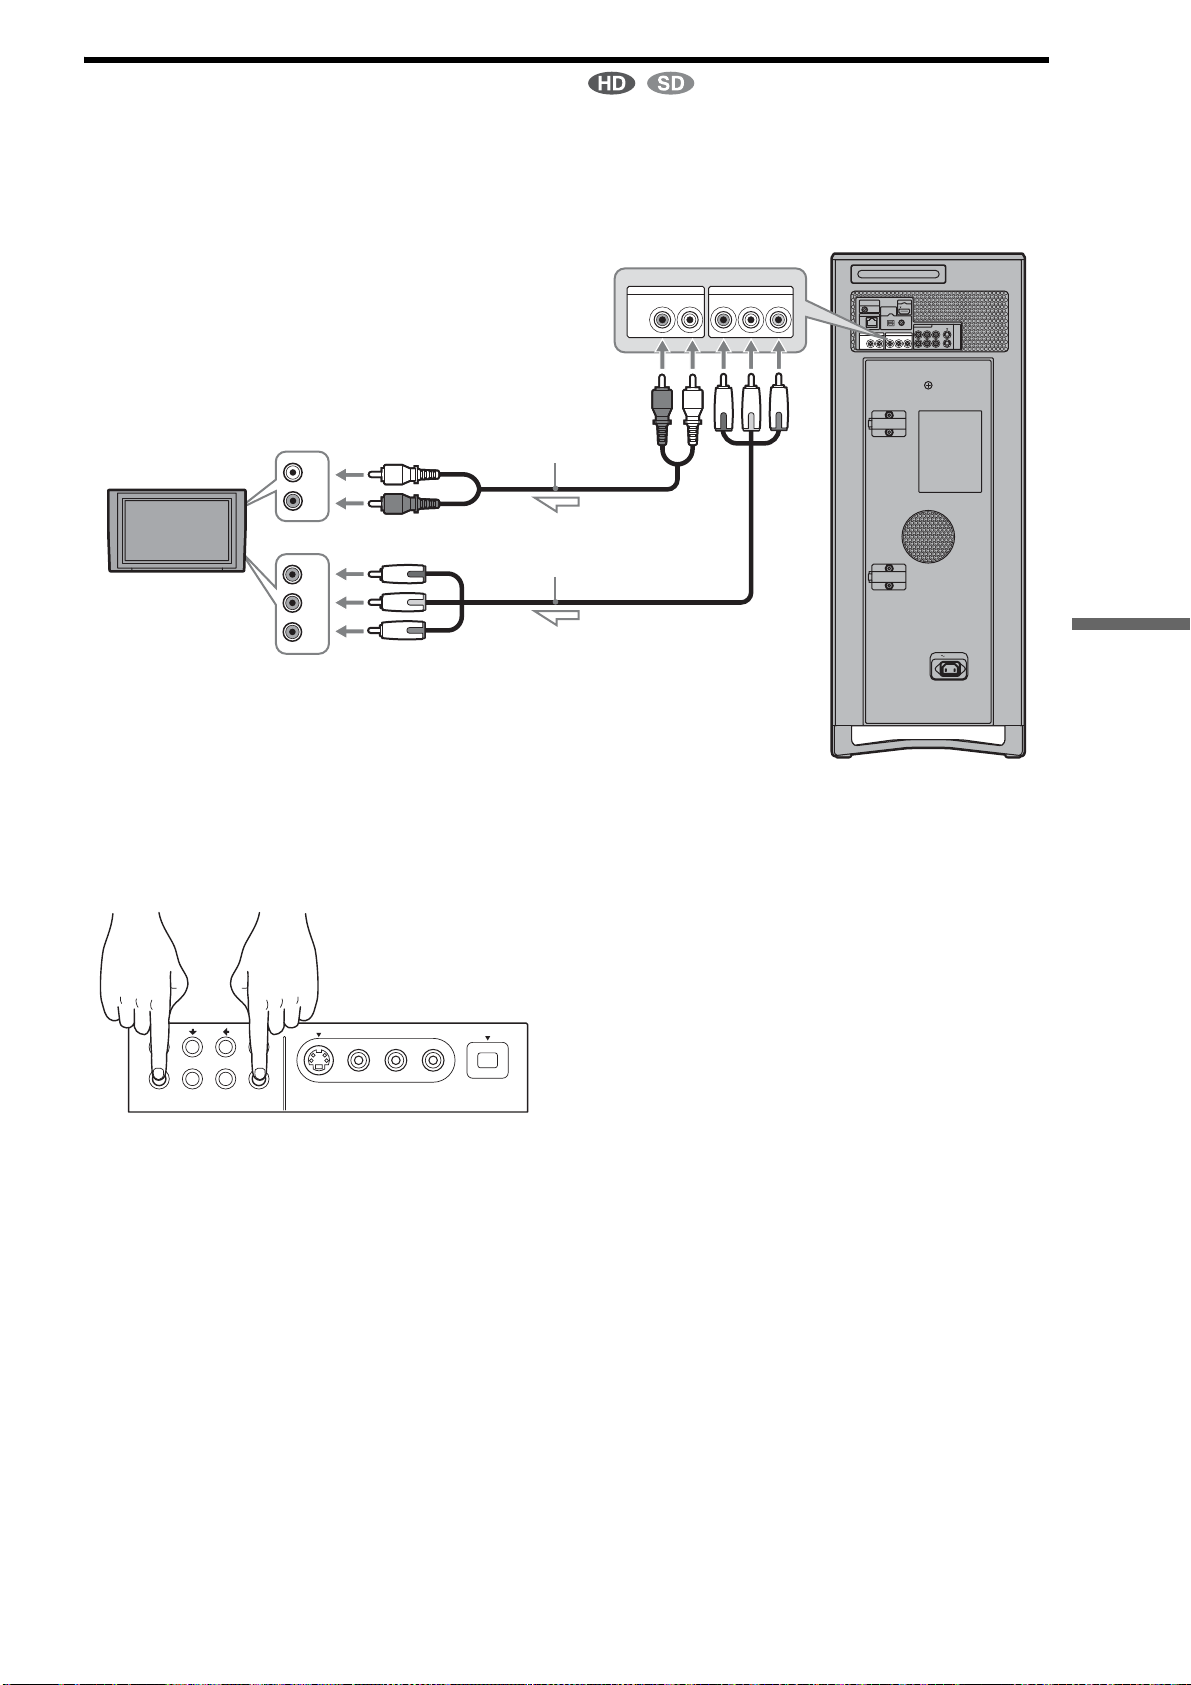
103
Various Connections
Connecting with a component video cable
The COMPONENT VIDEO OUT jacks output brightness (Y)
and chroma (P
B, PR) independently to reproduce the original
color.
You can also enjoy higher quality pictures from 480p/720p
progressive signals or 1080i interlace signals, if your TV,
projector or AV amplifier (receiver) is compatible.
Be sure to also connect an audio cable as the COMPONENT
VIDEO jacks do not output audio signals.
To switch the output resolution for the
COMPONENT VIDEO OUT jacks
Press ENTER while holding down RETURN on the unit. The
resolution toggles:
480i t 480p t 1080i t 720p
Select 480i if no picture appears on the screen.
For other video settings, see also “Video Settings” (page 112).
PUSH/OPEN
AC IN
CONTROL S IN/
IR IN
HDMI OUT
COMPONENT VIDEO OUT
R-AUDIO-L VIDEO
LINE
IN 1
OUT
S VIDEO
YP
B PR
LAN
(
10/100
)
OPTICAL COAXIAL
DIGITAL OUT
PCM/DTS/
DOLBY DIGITAL
AUDIO OUT
R L
(R)
AUDIO
(L)
Pb
Pr
Y
COMPONENT VIDEO OUT
AUDIO OUT
RYP
B PRL
TV
Server
To COMPONENT
VIDEO OUT
Audio cable (not supplied)
To component input jacks
To AUDIO OUT
(L/R)
To audio input
jacks
Use a component cable or three video
cords of the same length (neither are
supplied).
RETURN OPTION HOME ENTER
,continued
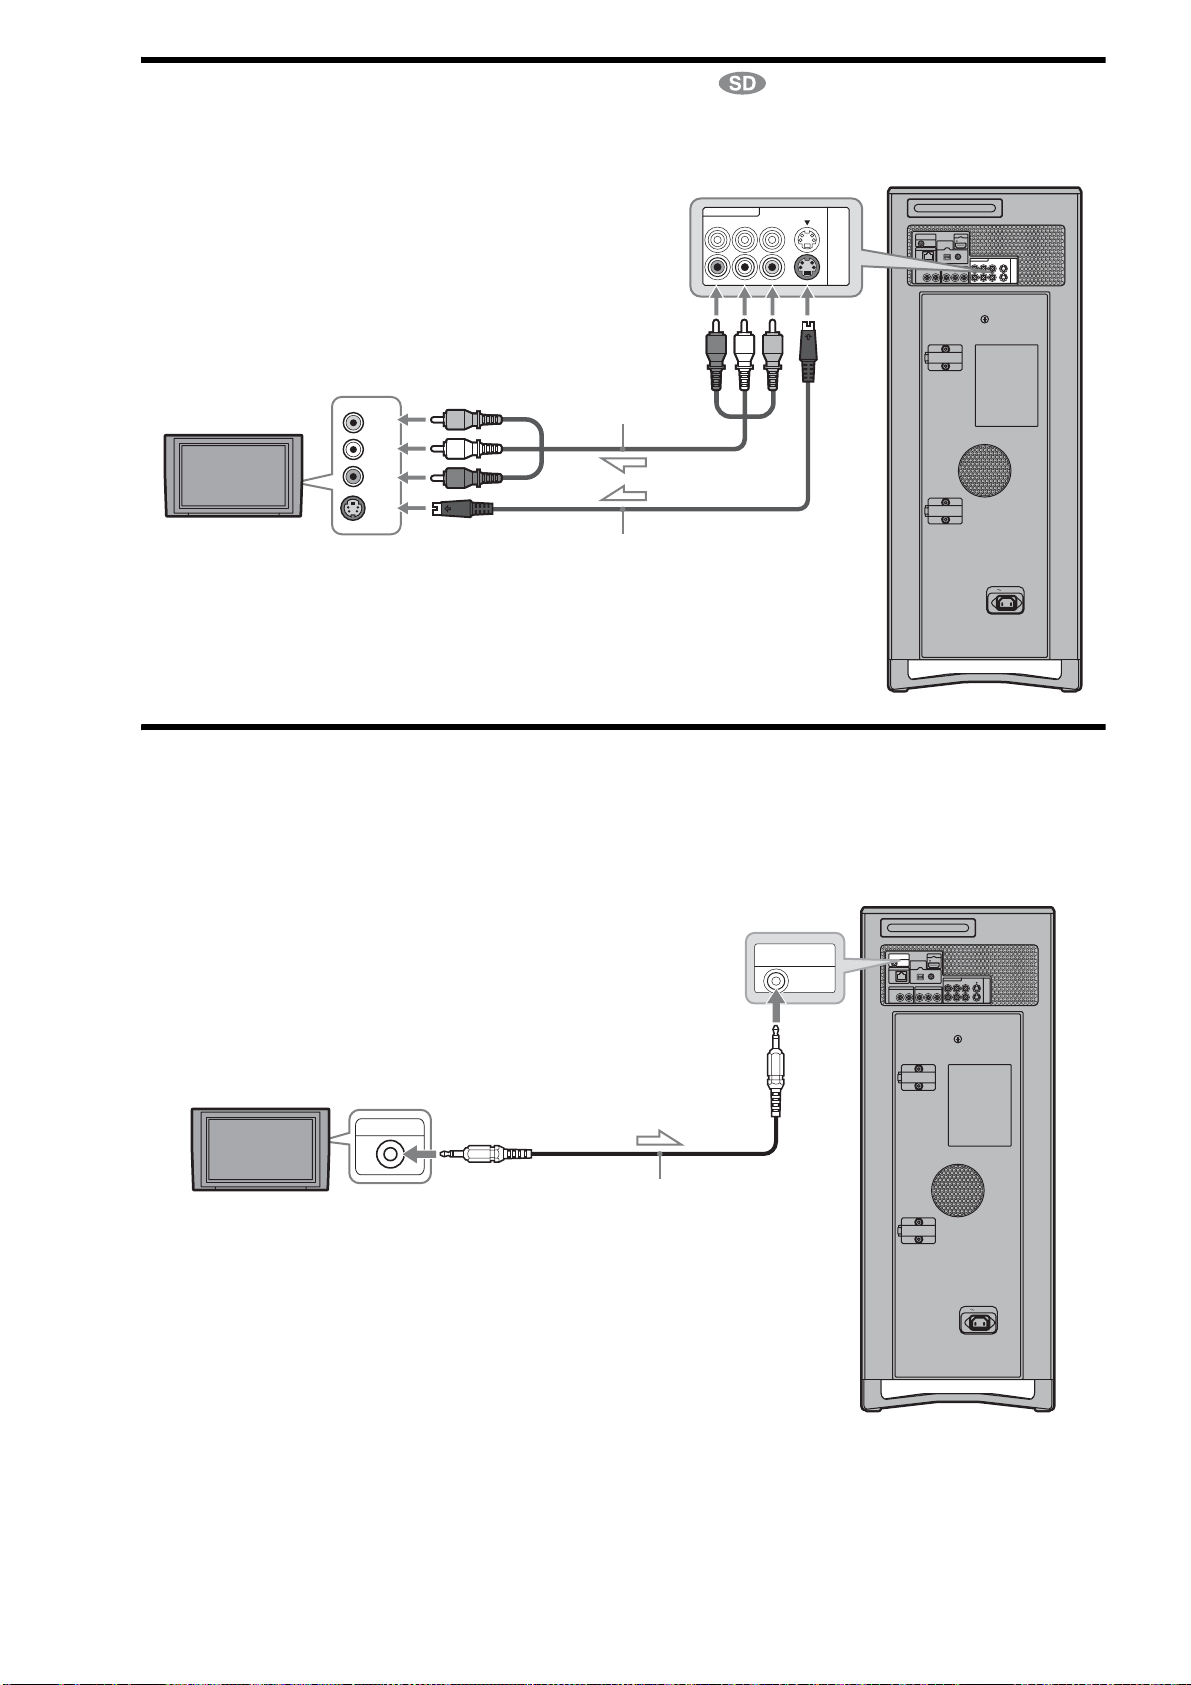
104
Connecting with an S Video cable or video cable
If you have an AV amplifier (receiver) and would like to enjoy
high quality sound, use the supplied HDMI cable.
[Optional]: If your TV has a CONTROL S jack
You can control the server by operating the remote, pointing it
toward the TV (convenient when the server and TV are placed
away from each other).
After connecting the server to your TV, connect also the
CONTROL S IN/IR IN jack to your TV’s CONTROL S (OUT)
jack using a control S cable (not supplied). Refer to the
instructions supplied with the TV.
PUSH/OPEN
AC IN
CONTROL S IN/
IR IN
HDMI OUT
COMPONENT VIDEO OUT
AUDIO OUT
R
R-AUDIO-L VIDEO
LINE
IN 1
OUT
S VIDEO
YPB PR
LAN
(
10/100
)
OPTICAL COAXIAL
DIGITAL OUT
PCM/DTS/
DOLBY DIGITAL
L
S VIDEO
(R)
AUDIO
(L)
VIDEO
R-AUDIO-L VIDEO
LINE
IN 1
OUT
S VIDEO
Server
To LINE OUT AUDIO (L/R)
and S VIDEO
Audio/video cable
(supplied)
S Video cable (not supplied)
To video input jack
To audio input jacks
To S Video input jack
TV
PUSH/OPEN
AC IN
CONTROL S IN/
IR IN
HDMI OUT
COMPONENT VIDEO OUT
AUDIO OUT
R
R-AUDIO-L VIDEO
LINE
IN 1
OUT
S VIDEO
YP
B PR
LAN
(
10/100
)
COAXIAL
DIGITAL OUT
PCM/DTS/
DOLBY DIGITAL
L
OPTICAL
CONTROL S
CONTROL S IN/
IR IN
Control S cable (not supplied)
To CONTROL S IN/IR IN
Server
To CONTROL S (OUT) jackTV
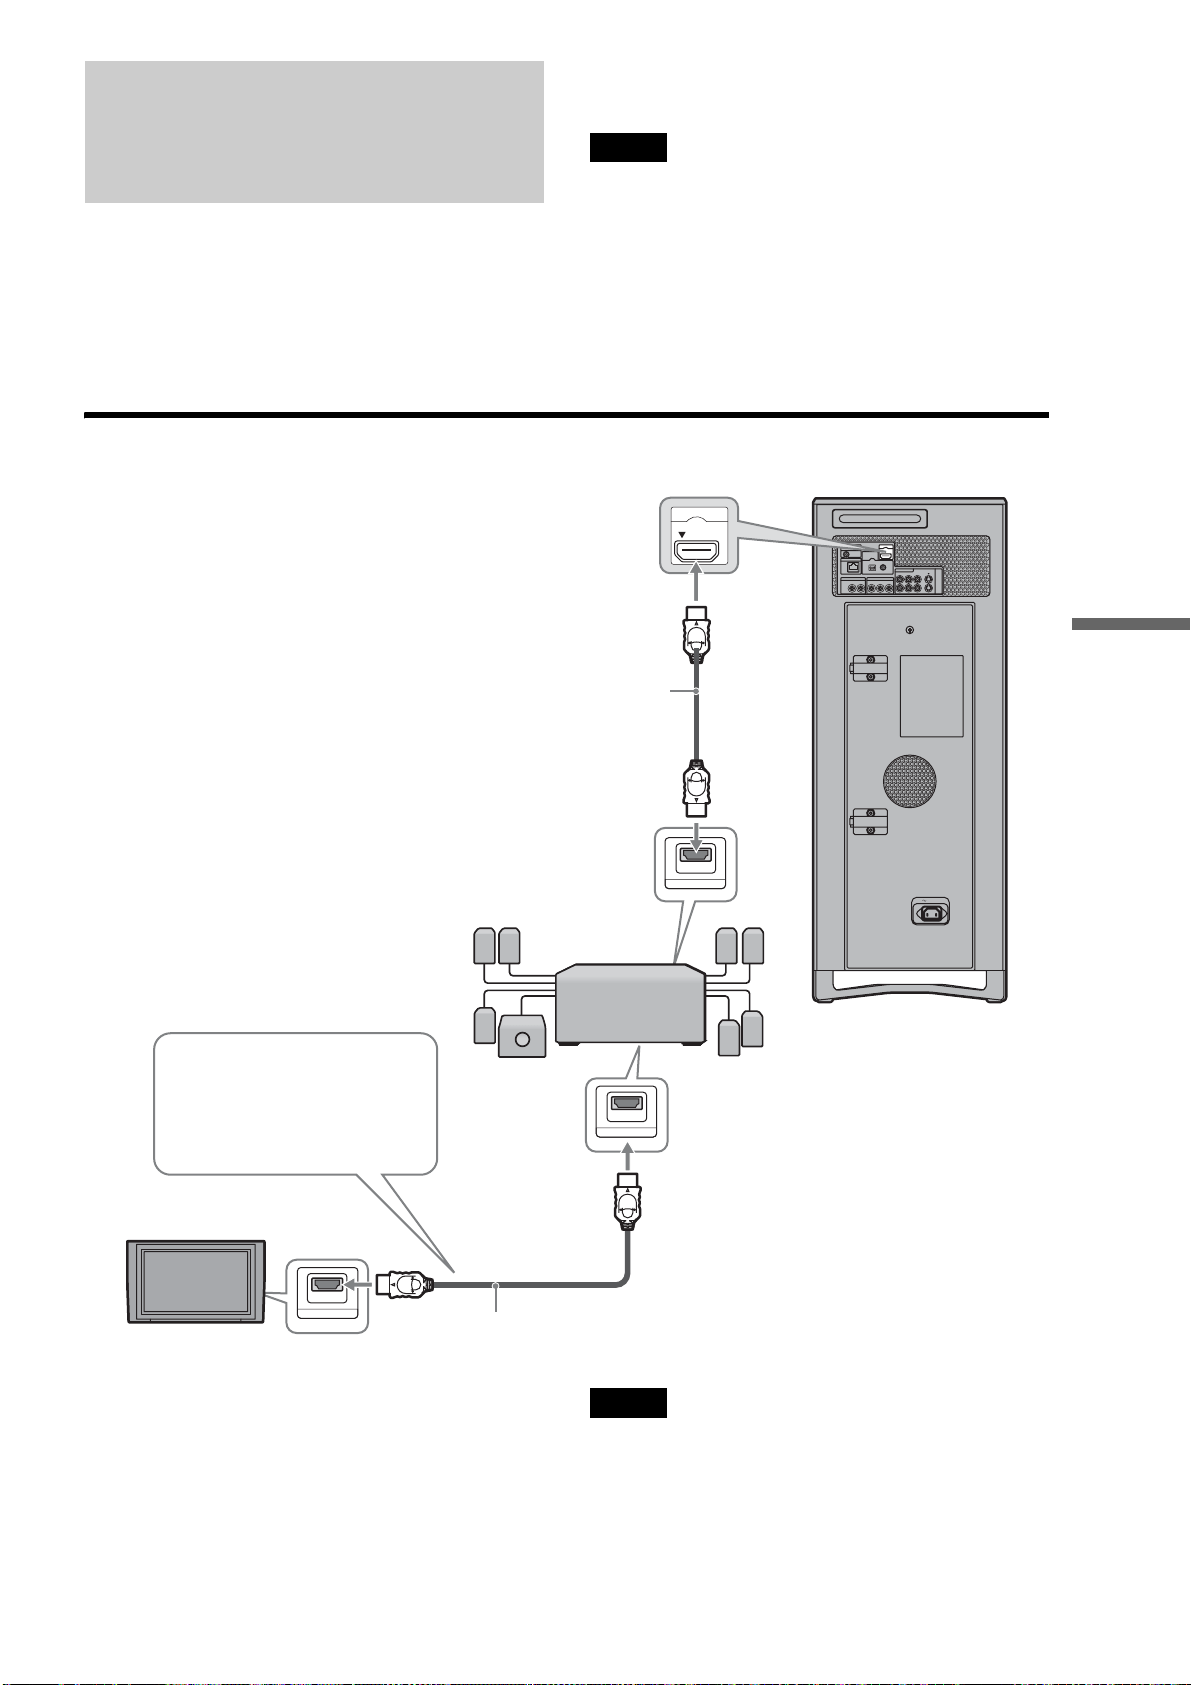
105
Various Connections
Connecting an AV Amplifier
If you have an AV amplifier (receiver) and would like to enjoy
high quality sound, use the supplied HDMI cable. If your HDMI
device does not support digital audio signals or has no HDMI
input jack, connect using an optical or coaxial digital cable (not
supplied). If the amplifier has 2ch audio input jacks (L/R),
connect using an audio cable.
If the amplifier has a Dolby Digital decoder, set [Digital Audio
Output] in [Audio Settings] accordingly (page 114).
z Hint
For correct speaker location, see the operating instructions of the
connected components.
Note
When you connect an HDMI OUT jack or a DIGITAL OUT jack and
play a video or music, the beginning may be skipped depending on the
external device.
Connecting with an HDMI cable
Note
Not all HDMI-compatible AV amplifiers (receivers) accept 8ch
Linear PCM signals.
See also the operating instructions supplied with the connected
AV amplifier (receiver).
PUSH/OPEN
AC IN
CONTROL S IN/
IR IN
HDMI OUT
COMPONENT VIDEO OUT
AUDIO OUT
R
R-AUDIO-L VIDEO
LINE
IN 1
OUT
S VIDEO
YP
B PR
LAN
(
10/100
)
COAXIAL
DIGITAL OUT
PCM/DTS/
DOLBY DIGITAL
L
OPTICAL
HDMI IN
HDMI OUT
HDMI IN
HDMI OUT
Server
To HDMI OUT
HDMI cable (supplied)
To HDMI input jack
To HDMI output jack AV amplifier with Dolby
Digital or DTS decoder
In this case, connect the amplifier to
the TV using another HDMI cable
(not supplied). If the TV has no HDMI
input jack, connect the TV and the
server using another video cable.
HDMI cable (not supplied)
To HDMI input jack
TV
,continued
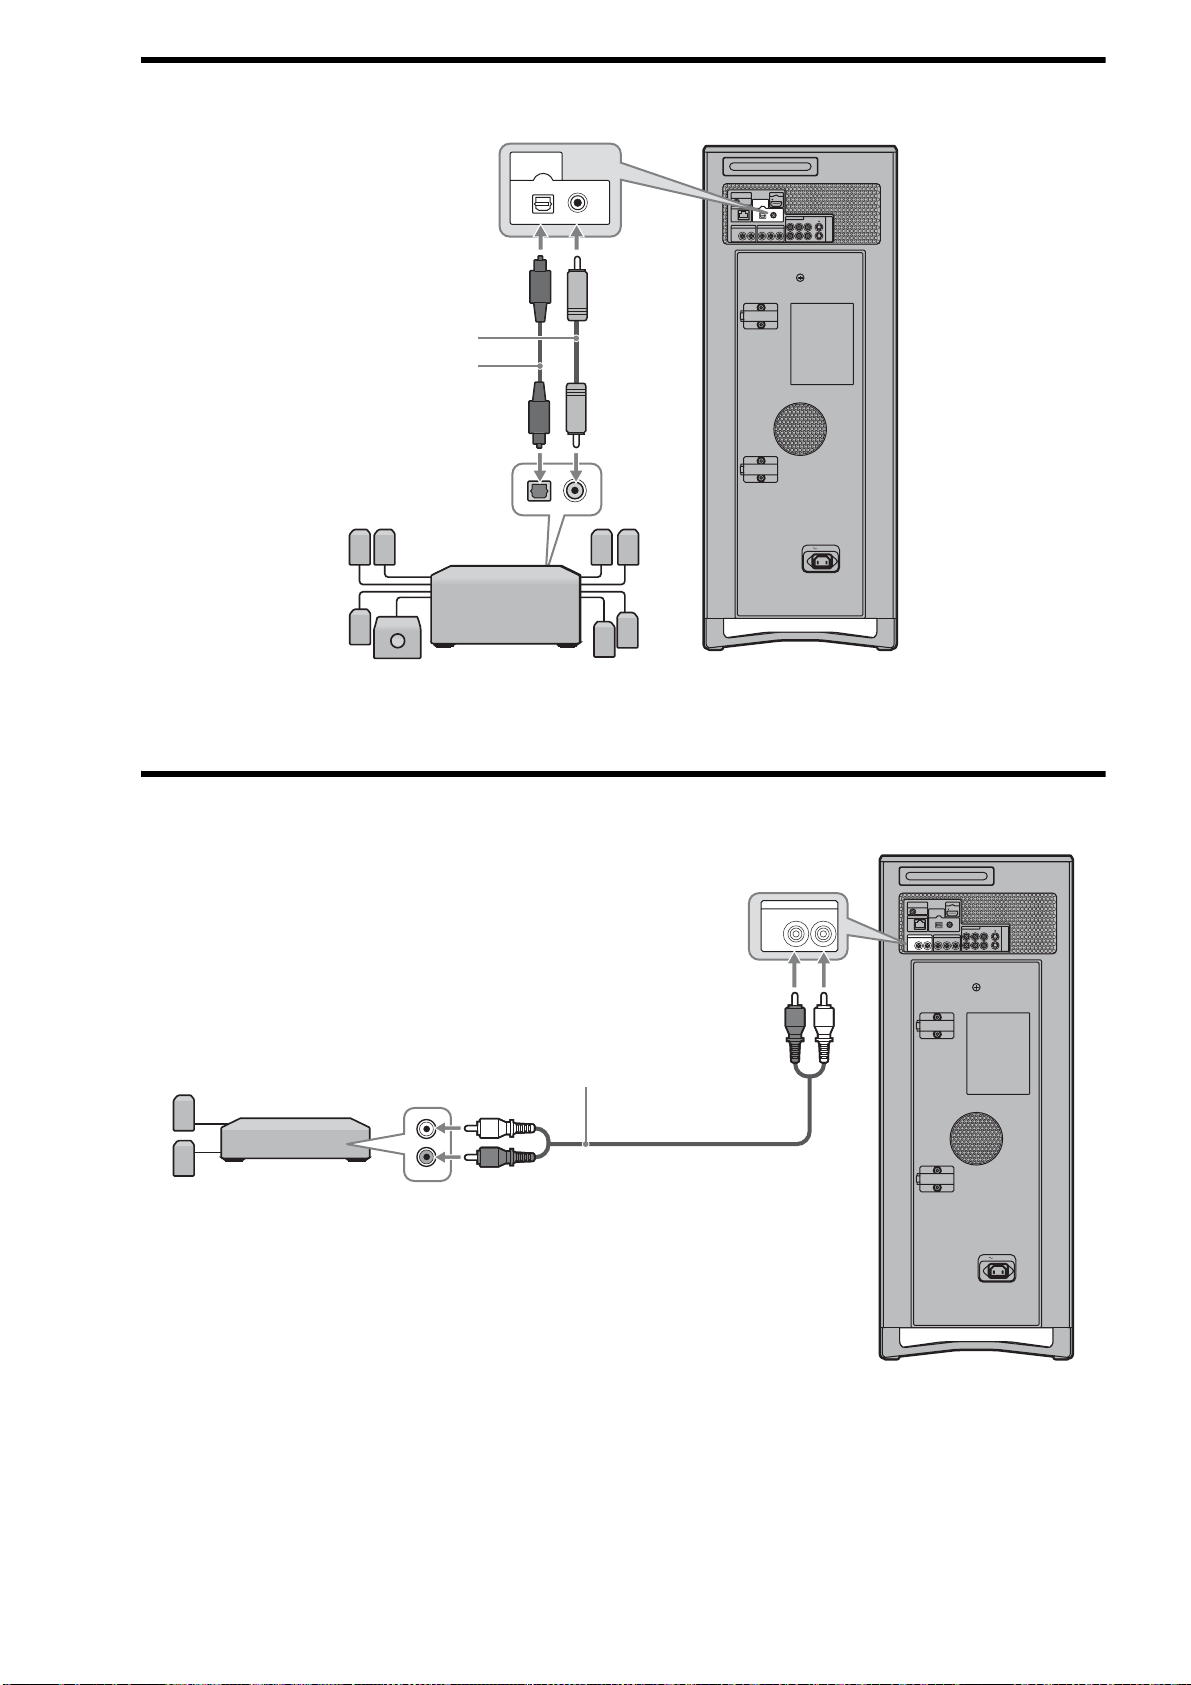
106
Connecting with a digital cable
Connecting with an audio cable
PUSH/OPEN
AC IN
CONTROL S IN/
IR IN
HDMI OUT
COMPONENT VIDEO OUT
AUDIO OUT
R
R-AUDIO-L VIDEO
LINE
IN 1
OUT
S VIDEO
YP
B PR
LAN
(
10/100
)
COAXIAL
DIGITAL OUT
PCM/DTS/
DOLBY DIGITAL
L
OPTICAL
OPTICAL COAXIAL
DIGITAL OUT
PCM/DTS/
DOLBY DIGITAL
Server
To DIGITAL OUT
(OPTICAL/COAXIAL)
Coaxial digital cable (not supplied)
or
Optical digital cable (not supplied)
To digital input jacks
AV amplifier with Dolby
Digital or DTS decoder
PUSH/OPEN
AC IN
CONTROL S IN/
IR IN
HDMI OUT
COMPONENT VIDEO OUT
AUDIO OUT
R
R-AUDIO-L VIDEO
LINE
IN 1
OUT
S VIDEO
YP
B PR
LAN
(
10/100
)
OPTICAL COAXIAL
DIGITAL OUT
PCM/DTS/
DOLBY DIGITAL
L
AUDIO OUT
R
L
Server
To AUDIO OUT (L/R)
Audio cable (not supplied)
To audio input jacks
Stereo amplifier

107
Various Connections
108
Changing the
Server Settings
Select (Settings) on the Home Menu
when you need to change the settings of the
server.
Displaying the Server
Settings icon
By selecting you can make various adjustments for picture
and sound and system settings.
a Press HOME to turn on the Home Menu.
b Select .
c Select the desired setup category icon, and
press ENTER.
Example: When [Video Settings] is selected.
For details about each of the category icons, see the
pages in “List of settings category icons” (page 109).
◆ When a list appears
Select the desired setting and press ENTER.
◆ When a message appears full screen
Follow the dialog.
To return to the previous display
Press RETURN.
Call Guide
Settings
Video Output Aspect Ratio 16:9
VideoVideo Input 1
Auto
Component
Auto
Cinema Conversion Mode
Output Resolution Priority
HDMI Resolution
Settings
• Displaying the Server Settings icon . . . . . . . 108
• Call Guide . . . . . . . . . . . . . . . . . . . . . . . . . . . 110
• Messages . . . . . . . . . . . . . . . . . . . . . . . . . . . 110
• Disc Manager . . . . . . . . . . . . . . . . . . . . . . . 110
• Import Settings. . . . . . . . . . . . . . . . . . . . . . . 111
• Video Settings . . . . . . . . . . . . . . . . . . . . . . . 112
• Audio Settings . . . . . . . . . . . . . . . . . . . . . . . 114
• Photo Settings . . . . . . . . . . . . . . . . . . . . . . . 115
• System Settings . . . . . . . . . . . . . . . . . . . . . . 116
• BD/DVD Viewing Settings. . . . . . . . . . . . . . . 118
• Date and Time Settings. . . . . . . . . . . . . . . . . 120
• Network Settings . . . . . . . . . . . . . . . . . . . . . 121
• Easy Setup . . . . . . . . . . . . . . . . . . . . . . . . . . 123
• Resetting . . . . . . . . . . . . . . . . . . . . . . . . . . . 124

109
Changing the Server Settings
List of settings category icons
Icon Explanation
Call Guide (page 110)
Displays contact information for Sony customer
support.
Messages (page 110)
Messages from the server containing operation hints
and notes are stored.
Disc Manager (page 110)
Select this when you want to operate [Disc Manager].
Applies setting to individual discs loaded in the
changer.
Import Settings (page 111)
Displays options available for import to the HDD.
Video Settings (page 112)
Allows for various picture adjustments to suit your
preference.
Audio Settings (page 114)
Allows you to select audio settings.
Photo Settings (page 115)
Displays photo-related settings.
System Settings (page 116)
Use this to change important server configuration.
BD/DVD Viewing Settings (page 118)
Provides detailed options for BD/DVD playback.
Date and Time Settings (page 120)
Select this when adjusting the internal clock.
Network Settings (page 121)
Provides internet and music server settings.
Easy Setup (page 123)
Starts the initial setup wizard to help you make the
basic settings.
Resetting (page 124)
Resets the server settings to the factory defaults.
110
Call Guide
Select this when you need to contact “Home Entertainment Server” Customer
Call Center for product support. The contact information will be displayed.
For product support, call “Home Entertainment Server” Customer Call Center at
1-877-531-SONY (7669),
or visit our web site at
http://www.sony.com/hesupport
Messages
Server alerts and important messages are stored here to inform you of the sever
status.
Disc Manager
Disc Manager sorts the discs in the changer into four groups.
See page 35 for details about these operations.
Call Guide
Settings
Messages
Settings
Disc Manager
Settings
111
Changing the Server Settings
Import Settings
The default settings are underlined.
HDV/DV Import Settings File Format
– Select [DV] or [HDV
] and press ENTER according to the camcorder you plan to
connect. If a DV camcorder is connected when [HDV] is selected, the setting will be
switched to [DV] to receive the DV signals.
Recording Mode
– Select the recording mode from [XR], [SR
], [LR], [ER]. This setting will be fixed to
[DR] when importing from HDV devices.
Audio Input
–Select [Stereo 1
] for normal audio recorded at the time of shooting; [Stereo 2] for
voice-over audio; [Mix] for recording both.
Auto Playlist Creation
– Select from [Create Playlist
] or [Do Not Create] according to whether you want to
create Playlist titles of the shooting date.
– Create a group of settings for HDV/DV video
imports. These settings are effective when
importing from HDV/DV camcorders using
the One-Touch button.
Auto-Group to Albums On
Off
–This is the default setting.
– Effective for One-Touch Photo Import.
Select whether you want to auto-group your
photos.
Music Import Settings Importing Format
–Select the format in which you want to import, from [MP3
] or [LPCM].
MP3 Conversion Rate
– This setting is effective when [MP3] is selected in the above [Importing Format]
(default). Select the conversion rate from the following settings:
[96 kbps]/[128 kbps]/[160 kbps]/[192 kbps]/[256 kbps].
– Select music format and MP3 Conversion
Rate.
External Input Rec mode Select the desired recording quality (See page 150).
XR
SR
LR
ER
– Effective for recording from LINE IN 1 and
LINE IN 2 jacks, and also for One-Touch
recording.
Auto Chapter Mark On
–When importing from the LINE IN 1 or LINE IN 2 jacks, the title is divided,
automatically detecting changes in the picture and sounds.
When importing from the HDV/DV IN jack, each shooting on the tape becomes a
chapter.
Off
– Chapter marks are created only at the beginning of a recording.
– Select whether to make chapter markings
automatically during import.
HDV/DV Import Settings
OffAuto-Group to Albums
SR
On
Music Import Settings
External Input Rec mode
Auto Chapter Mark
Settings
112
Video Settings
The default settings are underlined.
Video Output Aspect Ratio 16:9
– Select this when connecting a wide-screen TV.
Original
– Select this when connecting to a TV with a wide-mode function.
A wide-screen TV also displays 4:3 screen pictures in 16:9.
4:3
– Select this when connecting a 4:3 TV without a wide-mode function.
For picture configuration, see “TV Display Viewing Options” (page 147).
z Hint
See also your TV manual for details about the wide mode function of a 4:3 TV.
–For your best viewing pleasure, select the
aspect ratio that best matches your needs. For
BD-ROMs or discs with AVCHD files, the
[16:9] aspect ratio is chosen automatically by
the application.
Video Input 1 Video
– Select this when connecting to the VIDEO jack.
S Video
–Select this when connecting to the S VIDEO jack.
–Select the signal type for the LINE IN 1
jacks.
Cinema Conversion Mode Auto
–Normally select this. The server automatically detects whether the material is video-
based or film-based, and switches to the appropriate conversion method.
Video
– The conversion method suited for video-based material will always be selected
regardless of the material.
–Sets the video conversion method for 480p,
720p, or 1080i signals from the HDMI OUT
jack or the COMPONENT VIDEO OUT
jacks.
Output Resolution Priority HDMI
– Outputs signals according to the [HDMI Resolution] setting below.
Component
– The type of output signal is affected by certain factors. See page 113. When this is
selected, [HDMI Resolution] will be set to [Auto].
–Allows you to select output priority from the
HDMI or component jacks.
HDMI Resolution Auto
–Normally select this, or automatically fixed if the above [Output Resolution Priority]
is set to [Component].
The server outputs signals starting from the highest resolution acceptable to the TV;
1080p > 1080i > 720p > 480p
If the resulting image format is undesirable, try another setting that suits the TV.
480p
– Outputs 480p video signals.
1080i
–Outputs 1080i video signals.
720p
– Outputs 720p video signals.
1080p
– Outputs 1080p video signals.
– Select the signal type for the HDMI OUT
jack.
Note that you can make this setting only
when the connected TV is turned on, and that
some options may not be displayed if they are
unacceptable for the TV.
YCbCr/RGB(HDMI) Auto
–Automatically detects the type of external device, and switches to the matching color
setting.
RGB
– Outputs RGB video signals.
YCbCr 4:4:4
– Outputs YCbCr 4:4:4 video signals.
YCbCr 4:2:2
– Outputs YCbCr 4:2:2 video signals.
–Sets the color setting for video signals output
from the HDMI OUT jack. Select the setting
that matches the type of TV, monitor, or
projector to be connected.
Video Output Aspect Ratio 16:9
VideoVideo Input 1
Auto
Component
Auto
Cinema Conversion Mode
Output Resolution Priority
HDMI Resolution
Settings
113
Changing the Server Settings
To set the output resolution
Note that the resolution differs depending on the display device, connecting jack, and the source material as below.
When the COMPONENT setting is prioritized
z Hint
To change [Component Resolution], press ENTER while holding down RETURN (both are in the retractable input and control panel).
The output changes with each press: 480i t 480p t 1080i t 720p
When the HDMI setting is prioritized
z Hints
• For HDMI Resolution, the resolution that the connected TV can display appears.
• You can change the priority from HDMI to Component by pressing ENTER while holding down RETURN.
Black Level (VIDEO OUT) On
–Sets the black level of the output signal to the standard level. Normally select this.
Off
– Lowers the standard black level. Use this if the picture becomes too white.
– Sets the black level setting for video signals
output from the VIDEO OUT jacks.
Black Level (COMPONENT OUT) On
– Raises the standard black level. Use this setting if the picture appears too dark.
Off
–Sets the black level of the output signal to the standard level. Normally select this.
– Sets the black level setting for video signals
output from the COMPONENT VIDEO
OUT jacks.
Pause Mode Auto
– Normally select this. Dynamic moving pictures appear without blur.
Frame
– Displays static pictures at high resolution.
– Sets the picture mode for DVD playback
pause status. For BD-ROMs or discs
containing AVCHD files, [Auto] will be
automatically selected.
Output Resolution
Priority
Component
Resolution
COMPONENT VIDEO OUT HDMI OUT
Component
480i 480i Not displayed
480p 480p
The same resolution as for
COMPONENT VIDEO OUT
1080i 1080i (When playing a DVD Video: 480p)
720p 720p (When playing a DVD Video: 480p)
Output Resolution
Priority
HDMI Resolution HDMI OUT COMPONENT VIDEO OUT
HDMI
Auto
Automatically selects the highest resolution
acceptable for your TV.
The same resolution as for HDMI
OUT (however, outputs in 1080i
when set to 1080p)
(When playing a DVD Video: Not
displayed if other than 480p is
selected)
480p 480p 480p
1080i 1080i
1080i (When playing a DVD Video:
Not displayed)
720p 720p
720p (When playing a DVD Video:
Not displayed)
1080p 1080p
1080i (When playing a DVD Video:
Not displayed)
114
Audio Settings
The default settings are underlined.
HDMI Audio Output Auto
– Normally, select this. Outputs audio signals according to the status of the connected
HDMI device.
PCM
–Downmixes to 2-channel Linear PCM signals before outputting from the HDMI OUT
jack.
Note
Select [PCM] when connecting a TV or an AV amplifier that does not support Dolby Digital or
DTS, otherwise noise or no sound may result.
– Select the signal type for the HDMI OUT
jack.
Audio Output ATT On
– Enables Audio Attenuation.
Off
–Disables Audio Attenuation.
Note
This setting does not affect output from the HDMI OUT jack and the DIGITAL OUT (OPTICAL/
COAXIAL) jacks.
–Lowers the audio output level to prevent
sound distortion.
Digital Audio Output On
–Normally select this. You will need to make additional settings described below for
the digital output.
Off
–Does not output audio signal from these digital output jacks.
Note
If the external device does not support the audio output formats selected below, loud sound, noise,
or no sound may result that could damage your ears or the speaker system.
–Select whether to output audio signals from
the DIGITAL OUT (OPTICAL/COAXIAL)
jacks.
Dolby Digital Downmix PCM
–Select this when connecting an audio device without a built-in Dolby Digital decoder.
Dolby Digital
–Select this when connecting an audio device with a built-in Dolby Digital decoder.
– Select the audio signals output for playback
of discs with audio recorded in Dolby Digital
format.
DTS DTS
– Select this when connecting an audio device with a built-in DTS decoder.
PCM (BD-ROM)
–Select this when connecting an audio device without a built-in DTS decoder.
z Hint
The server outputs Linear PCM signals if you play a BD-ROM that contains DTS source with the
[PCM (BD-ROM)] setting selected.
– Select the audio signals output for playback
of discs with audio recorded in DTS format.
48kHz/96kHz PCM 48kHz/16bit
– Outputs audio signals of 48 kHz frequency as 48 kHz/16 bit.
96kHz/24bit
– Outputs audio signals of 96 kHz frequency as 96 kHz/24 bit. However, the signals
will be output as 48 kHz/16bit if the source is copy-protected.
Notes
• If you select [96kHz/24bit] when an AV amplifier that does not support 96 kHz is connected,
no sound or a loud sound may result.
• This setting is not effective when the audio signals are output from the AUDIO OUT (L/R)
jacks. The signals will be output as analog retaining the original sampling frequency.
• Regardless of the above settings, the HDMI OUT jack outputs 48 kHz signals if the external
device does not support 96 kHz signals, and will output 96 kHz signals even if you select
[48kHz/16bit] if 96 kHz signals are supported by the device.
– You can select the maximum sampling
frequency for the PCM signals output from
the DIGITAL OUT (OPTICAL/COAXIAL)
jacks.
HDMI Audio Output Auto
OffAudio Output ATT
On
Downmix PCM
PCM (BD-ROM)
Digital Audio Output
Dolby Digital
DTS
Settings

115
Changing the Server Settings
Photo Settings
The default settings are underlined.
Slideshow Effect On
–Enables slideshow transitions.
Off
– Disable slideshow transitions.
– Selects effects for the slideshow.
x-Pict Story HD Time Display On
– Shows the shooting date as part of the visual effect.
Off
–Does not show the shooting date.
Sample Display On
– Displays the “Photo” category sample albums (albums/“x-Pict Story HD”/“x-
ScrapBook”).
Off
– Does not display the sample albums.
Slideshow Effect Off
Onx-Pict Story HD Time Display
OnSample Display
Settings
116
System Settings
The default settings are underlined.
Brightness of Front Panel Bright
– Indicators and the top and front panel displays light up brightly.
Dark
– The indicators and the top and front panel displays light up dimly.
Dim
– The top and front panel displays turn off when the power is off, and light up dimly
when the power is on, although they turn off during playback of video, photo, and
music.
Note
Setting to [Dim] does not turn off the indicators.
HDMI Control On
–Activates the function.
Off
–Turns off the function.
– Select whether to activate the HDMI Control
function of the server (page 24).
Standby Mode Standard
– This mode uses (slightly) more electricity because the server is in a standby status
even when turned off. For example, music and videos will start playing sooner when
you press \/1, etc.
This is automatically selected if you set Music [Music Server Settings] to [On] in
[Network Settings] (page 122).
Eco
– This mode uses less electricity because the power saving mode is enabled during
standby mode.
For example, the ventilation fan does not rotate.
Notes
• [Standard] consumes more standby power as the internal controller carries current and rotates
the ventilation fan.
• If [Eco] is selected, the server's music sharing function, and the music file transfer function from
PCs cannot be used.
• When [Standard] is selected, the server can distribute or receive audio data even in standby
mode. To use these functions while in standby mode, you will need to make additional settings
on the client device or “Music transfer” on the PC.
For “Music Transfer”: On the “File” menu, click [Select Server], and after selecting the server,
click [Startup Server] (page 50)
For client devices: Settings differ depending on the device. See instructions supplied with the
device.
– There are two modes of operation that
determine how fast the server becomes
operable after you turn on the power.
Auto Display On
–Displays the information at the time of change.
Off
– Does not display the information automatically.
– When changing the viewing titles, picture
modes, audio signals, etc., you can check the
information about the change on screen
(name of the title, the picture mode or the
signal).
Software Update Disc Update
– Updates the server's software using a software update disc. See “Updating the
software using an update disc” (page 140) for details.
Network Update
–You can update by downloading the update data from the Internet. See “Updating the
server’s software using the network” for details (page 141).
– Updates the server software using a software
update disc or connecting to the network.
Brightness of Front Panel Bright
OffHDMI Control
Standard
On
Standby Mode
Audio Display
Software Update
Settings

117
Changing the Server Settings
Set Password 1 Enter the password you want to set.
2 Select [OK] and press ENTER.
To change the password
Before step 1, enter the current password and then a new password.
– Set or change the password for the "parental
control" function. A password allows you to
set a restriction on BD-ROM/DVD VIDEO
playback. If necessary, you can differentiate
the restriction levels for BD-ROM and DVD
VIDEO.
All Media Guide Settings Agree
– Accesses the AMG database. The disc information will be stored on the server for
later browsing on the [Disc Manager] display.
Decline
– Does not access the AMG database. When changed from [Agree] to [Decline], all the
data that has previously been accumulated will no longer be accessible for viewing.
– Select whether to access the All Media Guide
(AMG) database via the Internet to search for
disc information each time you register a BD-
ROM, DVD VIDEO, or CD to the server.
Device Information – Displays the server software version information and the MAC address.
HDD Initialization – Initializes the HDD. All of the HDD contents including video titles, photos, music,
“x-Pict Story” files and “x-ScrapBook” albums are completely cleared and cannot be
recovered.
z Hint
To initialize the entire system, execute all three of [Reset to Factory Default] (page 124),
[Initialize Personal Settings] (page 124), and [HDD Initialization] above.
118
BD/DVD Viewing Settings
The default settings are underlined.
Note
Playback settings described in this section may not work if a playback setting was recorded
or preset on the disc by disc manufacturer. The disc’s playback settings take priority over the server’s playback settings.
BD/DVD Menu Language –When you select [Language Code], the language code entry display appears. Enter
the code for your language by referring to “Language Code List” (page 153).
The default setting is [English].
– Select the default menu language for BD-
ROMs/DVD VIDEOs.
Audio Language – When you select [Language Code], the language code entry display appears. Enter
the code for your language by referring to “Language Code List” (page 153).
The default setting is [Original
].
Note
When you select [Original], the disc’s priority language will be selected.
–Select the default track language for BD-
ROMs/DVD VIDEOs.
Subtitle Language – When you select [Language Code], the language code entry display appears. Enter
the code for your language by referring to “Language Code List” (page 153).
The default setting is [Audio Language].
Note
When you select [Audio Language], the subtitle language switches in accordance with the [Audio
Language] setting.
–Select the default subtitle language for BD-
ROMs/DVD VIDEOs.
DVD Parental Control 1 Enter the password, select [OK], and press ENTER.
If no password has been set, the [DVD Parental Control] display appears instead.
2 Select a level and press ENTER.
The default setting is [No Restriction
].
z Hint
When you want to change the password, see “Set Password” (page 117).
Notes
• If you forget the password, clear the current password and set a new one. Press HOME and select
[Settings] – [Resetting] – [Reset to Factory Default] – [System Settings] (page 124). When you
select [Start], the previous password will be erased. Then, set a new password from “Set
Password” (page 117).
• You cannot limit playback if the disc does not have the Parental Control function.
• You may be asked to change the parental control level while playing the disc. In this case, enter
your password, then change the level.
– This function limits playback of DVD
VIDEOs.
BD Parental Control 1 Enter the password, select [OK], and press ENTER.
If no password has been set, the [BD Parental Control] display appears instead.
2 Select the age restriction and press ENTER.
Younger age sets a stricter restriction. The default setting is [No Restriction
].
When you select [Age Restriction], you can enter the age from “0” to “255” using
the cursor and the number buttons.
z Hint
When you want to change the password, see “Set Password” (page 117).
Notes
• If you forget the password, clear the current password and set a new one. Press HOME and select
[Settings] – [Resetting] – [Reset to Factory Default] – [System Settings] (page 124). When you
select [Start], the previous setting will be erased. Then, set a new password from “Set Password”
(page 117).
• You cannot limit playback if the disc does not have the Parental Control function.
• You may be asked to change the parental control level while playing the disc. In this case, enter
your password, then change the level.
– This function limits playback of BD-ROMs.
BD/DVD Menu Language English
OriginalAudio Language
Audio Language
No Restriction
No Restriction
Subtitle Language
DVD Parental Control
BD Parental Control
Settings

119
Changing the Server Settings
DVD Wide Mode Letter Box
– Displays a wide picture with black bands at the top and bottom.
Pan & Scan
– Displays the full-height picture on the entire screen, with trimmed sides.
Note
The aspect ratio is fixed on some discs. For example, a letter box picture may appear even when
[Pan & Scan] is selected.
– Select the display configuration for a 16:9
DVD picture on a 4:3 screen TV(selectable
when [Video Output Aspect Ratio] in [Video
Settings] is set to [4:3] (page 112)).
Audio DRC Standard
–Normally select this.
TV
–Clarifies the low sound. This is especially effective when outputting the sound from
the TV’s speakers.
Wide Range
–Makes the sound dynamic. You can attain a better effect with a hi-fi speaker set.
Note
[Audio DRC] is effective only when the disc is a Dolby Digital Blu-ray Disc or DVD and:
– [Dolby Digital] in [Audio Settings] is set to [Downmix PCM] below, and the audio signals are
output from the DIGITAL OUT (OPTICAL or COAXIAL) jack or the HDMI OUT jack.
– [HDMI Audio Output] in [Audio Settings] is set to [PCM] (page 114) and the audio signals are
output from the HDMI OUT jack.
– the audio signals are output from the LINE OUT AUDIO (L/R) jacks.
– Using the Audio Dynamic Range Control
(DRC) function of the BD/DVD, you can
make low sounds such as dialogs more
audible even at low volume.
Downmix for DVD Dolby Surround
–Outputs the Dolby Surround (Pro Logic) signals in 2 channels. Select this when
connecting an audio device that supports Dolby Surround (Pro Logic).
Normal
– Outputs audio signals without Dolby Surround (Pro Logic) effect. Select this when
connecting an audio device that does not support Dolby Surround (Pro Logic).
Notes
• This setting is effective for analog audio output when [Dolby Digital] in [Audio Settings] is set
to [Downmix PCM] (page 114).
• 5.1 channel PCM signals recorded at 192 kHz will be downmixed to 2 channels.
– Sets the downmix method for Dolby Digital
DVDs that have rear speaker multi channels.
BD Digital Audio Output Direct
– Outputs the original audio bit stream.
Mix
–Outputs Dolby Digital or DTS signals mixed with interactive audio.
Notes
• This setting is ineffective for analog output and PCM digital output (interactive audio will
always be mixed).
• If the Dolby Digital or DTS signals on the disc contain less than two channels, the server outputs
PCM signals even when [Mix] is selected.
– Select whether to mix or not to mix
interactive audio (audio for menu operations)
when playing a Dolby Digital or DTS BD
that contains such audio.

120
Date and Time Settings
Date and Time Set – Set the month, date, year, hour, and minute (in this order) using the cursor buttons.
Date and Time Set
Settings

121
Changing the Server Settings
Network Settings
Internet Settings Quickest way to get started
Connect the server to the Internet. See page 26 for connection details. For use of
routers and gaming adapters, refer to the device's operating instructions.
1 Check that [IP Address Acquisition] is set to [Use DHCP].
2 Select [Network Diagnostic] and press ENTER.
3 Select [Start] and press ENTER.
4 Check that a message, [Connection to the network is correct] appears.
The setup is finished when this message appears. If it does not appear, follow the on-
screen messages and check the following settings. And also see page 134 for possible
causes.
IP Address Acquisition
• Use DHCP
Select this when DHCP (Dynamic Host Configuration Protocol) server settings are
available from your Internet service provider. The network settings necessary for the
server will be assigned automatically. Contact the service provider for information.
• Use static IP address
Set the IP address manually according to your network environment.
Additionally, you will need to configure the following items:
–Subnet Mask
– Default Gateway
– [DNS Server (Primary)]/[DNS Server (Secondary)] *
1
You will need to contact your Internet service provider (ISP) or the network
administrator for this information.
*
1
[DNS Server Auto Aquisition] is available only when you select [Use DHCP].
You can set the [DNS Server (Primary)] and [DNS Server (Secondary)] addresses manually if
you set [DNS Server Auto Acquisition] to [Off]. In this case, be sure to enter the [DNS Server
(Primary)] address, otherwise the [Network Settings] will not be set correctly.
If your ISP has a specific proxy server setting, select [Proxy Settings] and enter the
setting.
For more information regarding network configuration, contact “Home Entertainment
Server” Customer Call Center:
1-877-531-SONY (7669).
– These items are necessary when you connect
to the Internet via an Ethernet cable to use the
AMG service. Refer to the Internet service
provider’s instructions and select the settings
appropriate for your network environment.
Internet Settings
Music Server Settings
Settings
,continued

122
Music Server Settings Quickest way to get started
1 Set [Music Server Function] to [On].
2 Set [Client Registration] to [Auto].
Music Server Function
Turns on or off the server function.
1 Select [Music Server Function] and press ENTER.
2 Select [On] and press ENTER.
[Off] stops the server function entirely.
Server Name
Sets the name of the server. The name appears on the client devices when they access
the server.
1 Select [Server Name] and press ENTER.
2 Enter a name using the on-screen keyboard.
Client Registration
‘Client device’ refers to devices that support the music server function. You have the
following registration methods.
1 Select [Client Registration] and press ENTER.
2 Select an item and press ENTER.
• Auto
Automatically registers up to 10 devices when accessed. This allows access to the
server for all accessible devices on the network.
• Manual
Allows for manual registration.
You can register a new device using the [Unregistered Device List], and cancel an
existing registration using [Registered Device List].
Registered Device List
Displays the list of registered client devices. You can check the device information, or
cancel the registration from this list.
1 Select [Registered Device List] and press ENTER.
– If your device does not appear on the list, see [Unregistered Device List].
– To cancel all the displayed registrations, select [Clear]. And then select [Start] and
press ENTER.
2 Select the device you want to check and press ENTER.
The device information appears.
To cancel the device’s registration, select [Delete Device] and press ENTER. Then
select [Yes] when asked and press ENTER. The device name will be deleted from
the list.
Unregistered Device List
Displays the list of accessible devices on the network that have not been registered yet.
You can check the device information, or register a device from this list.
1 Select [Unregistered Device List] and press ENTER.
2 Select the device you want to check.
The device information appears.
To register the device as the server’s client, select [Register Device] and press
ENTER. The device becomes ready for playback.
z Hints
• If you do not want to manually register each client from the [Unregistered Device List], you can
clear the list by selecting [Auto] in [Client Registration].
•See page 74, and refer to your client device manuals for more information on playback.
– This setting is a prerequisite for the use of
“Music Transfer,” “PARTY MODE,” and
music sharing in the house. See page 26 for
the network settings, and also the device
manuals for their playback procedures.

123
Changing the Server Settings
Easy Setup
Re-runs Easy Setup, which includes the following settings. See page 28 for
details.
◆Date and Time Settings
◆All Media Guide Settings
◆Music Server Settings
Note
If you have re-run Easy Setup accidentally, check that the previous settings are retained.
Easy Setup
Makes the Initial settings necessary for using the
server.
Start Cancel

124
Resetting
Reset to Factory Default 1 Select the settings you want to reset to default and press ENTER.
You can reset the following settings:
–Import Settings
–Video Settings
–Audio Settings
–Photo Settings
–System Settings
– BD/DVD Viewing Settings
–Network Settings
–All Settings
2 On the confirmation screen, select [Start] and press ENTER.
z Hint
To initialize the entire system, execute all three of [Reset to Factory Default], [Initialize Personal
Settings], and [HDD Initialization] (page 117).
– You can reset the server settings to the
factory default by selecting the group of
settings. Note that all the settings within the
group will be reset.
Initialize Personal Settings – Messages
Messages are cleared.
– Password and parental controls
Parental Control is cleared.
Password for parental control is also cleared.
z Hint
To initialize the entire system, execute all three of [Reset to Factory Default], [Initialize Personal
Settings], and [HDD Initialization] (page 117).
Notes
• You cannot erase the personal settings one by one. All the settings will be lost once erased.
• HDD content that you have imported will not be lost.
• This setting will not clear the password for BD locking.
– Erasing the data within the server before
disposing or transferring is strongly
recommended.
Reset to Factory Default
Settings
Initialize Personal Settings

125
Changing the Server Settings

126
Other Remote
Uses
Operating Other Devices
By pressing the device selection button on the remote (TV, VCR,
etc.), you can switch the remote’s device mode and operate other
devices that are placed in the same room.
AV
AV \/1
RM SET UP
Number buttons
Device selection
buttons
Color buttons
• Operating Other Devices. . . . . . . . . . . . . . . . 126
• The Remote Learning Operations . . . . . . . . . 129
• Saving Frequent Procedures. . . . . . . . . . . . . 130

127
Other Remote Uses
Programming AV components to the
device selection buttons
You can use the remote with Sony and other branded AV
components. To use with other AV components, set the
component’s manufacturer code to the corresponding device
button on the remote (TV, VCR, CUSTOM buttons, etc.).
Codes that can be entered vary depending on the device selection
button (page 127).
a While holding down RM SETUP, press AV
\/1.
The RM SETUP button flashes.
b Press the desired device selection button
before the RM SET UP button stops flashing.
Both the RM SETUP button and the device selection
button flash.
c Enter the three-digit manufacturer code
using the number buttons (page 127).
For example, to enter 901, enter “9,” “0,” “1.”
d Press ENTER.
The RM SETUP button flashes twice and turns off.
z Hints
• To exit the above procedures, press RM SETUP.
• When more than one code is listed, try until you find the one that
works.
• If you cannot finish entering the code, repeat from step 1.
Operating registered devices
a Press the device selection button (TV, AMP,
SAT/CABLE, VCR, or CUSTOM) to change
the remote’s mode.
The button lights up and remains lit for about 30
seconds.
You can operate the device until the device selection
button turns off and the remote returns to the server
mode.
Manufacturer code lists
◆Default Settings
The following codes are set to the device selection buttons by
default.
*1
Only the AV \/1, MUTING, VOL +/– buttons will work.
*2
TV codes (5xx) and AV amplifier codes (9xx) can be assigned to this
button.
*3
The following button functions are added to the AMP button. Refer
also to the instructions supplied with the amplifier.
z Hint
To use the “ON SCREEN” function on a Sony AV amplifier, press
AMP, then press POP UP/MENU.
◆For AV amplifiers
◆For tuners
◆For CD players
◆For tape/DAT decks
◆For tape decks
SERVER 501 (Sony TV)
*1*2
TV 501 (Sony TV)
AMP 905 (Sony amplifier)
*3
SAT/CABLE 801 (Sony satellite tuner)
VCR 703 (Sony VCR)
CUSTOM –
Button Function Name
RED 2CH
GREEN A.F.D.
BLUE MOVIE
YELLOW MUSIC
POP UP/MENU ON SCREEN
Manufacturer Code
Sony 905 906 907 908 909
Pioneer 910 913 920 930 932 934 935
Denon 911 916 917 918 923 924
Yamaha 912 919 927 938
JVC 914 915 928 929 931 936
Harman/Kardon 922
Onkyo 921 925 926 933
Manufacturer Code
Sony 002 005
Manufacturer Code
Sony 101 102 103
Denon 123 104
JVC 105 106 107
Kenwood 108 109 110
Magnavox 111 116
Marantz 116
Onkyo 112 113 114
Panasonic 115
Philips 116
Pioneer 117
Technics 115 118 119
Yamaha 120 121 122
Manufacturer Code
Sony 203
Pioneer 219
Manufacturer Code
Sony 201 202
Denon 204 205
Kenwood 206 207 208 209
Nakamichi 210
Panasonic 216
Philips 211 212
Pioneer 213 214
Technics 215 216
Yamaha 217 218
,continued

128
◆For MD decks
◆For BD players and recorders
◆For TVs ◆For DVD players
◆For DVD/VIDEO combo decks
◆For LD players
◆For Video CD players
◆For VCRs
Manufacturer Code
Sony 301
Denon 302
JVC 303
Kenwood 304
Manufacturer Code
Sony 310 311 312
Manufacturer Code
Sony 501
Aiwa 536 539 501
Akai 503
AOC 503
Centurion 566
Coronado 517
Curtis-Mathes 503 551 566 567
Daytron 517 566
Daewoo 504 505 506 507 515 544
Fisher 508 545
Funai 548
Fujitsu 528
GoldStar/LG 503 512 515 517 534 544 556 568
Grundig 511 533 534
Hitachi 513 514 515 544 557 503 519 517 571
ITT/Nokia 521 522
J.C.Penny 503 510 566
JVC 516 552
KMC 517
Magnavox 503 518 544 515 517 566
Marantz 527
Mitsubishi/MGA 503 519 527 544 566 568
NEC 503 520 544 554 517 540 566
NordMende 530 558
Nokia 521 522 573 575
Panasonic 509 524 553 559 572
Philips 515 518 557 570 571
Philco 503 504 514 517 518
Pioneer 509 525 526 540 551 555
Portland 503
Quasar 509 535
Radio Shack 503 510 527 565 567
RCA/ProScan 510 523 529 544 503
Samsung 503 515 517 531 532 534 544 556 557
562 563 566 569
Sampo 566
Saba 547 537 549 558 530
Sanyo 508 545 546 560 567
Scott 503 566
Sears 517 510 508 503 518 551
Sharp 535 550 517 561 565
Sylvania 503 518 566
Thomson 530 537 547 549
Toshiba 535 539 540 541 551
Telefunken 537 538 547 549 558 530
Teknika 517 518 567
Wards 503 517 566
York 566
Zenith 542 543 567
GE 509 510 503 544
Loewe 515 534 556
Manufacturer Code
Sony 401 402 403
Broksonic 424
Denon 405
Hitachi 416
JVC 415 423
Mitsubishi 419
Oritron 417
Panasonic 406 408 425
Philips 407
Pioneer 409 410
RCA 414
Samsung 416 422
Toshiba 404 421
Zenith 418 420
Manufacturer Code
Sony 411
Manufacturer Code
Sony 601 602 603
Pioneer 606
Manufacturer Code
Sony 605
Manufacturer Code
Sony 701 702 703 704 705 706
Aiwa 710 750 757 758
Akai 707 708 709 759
Blaupunkt 740
Emerson 711 712 713 714 715 716 750
Fisher 717 718 719 720
General Electric
(GE)
721 722 730
GoldStar/LG 723 753
Grundig 724
Hitachi 722 725 729 741
ITT/Nokia 717
Manufacturer Code
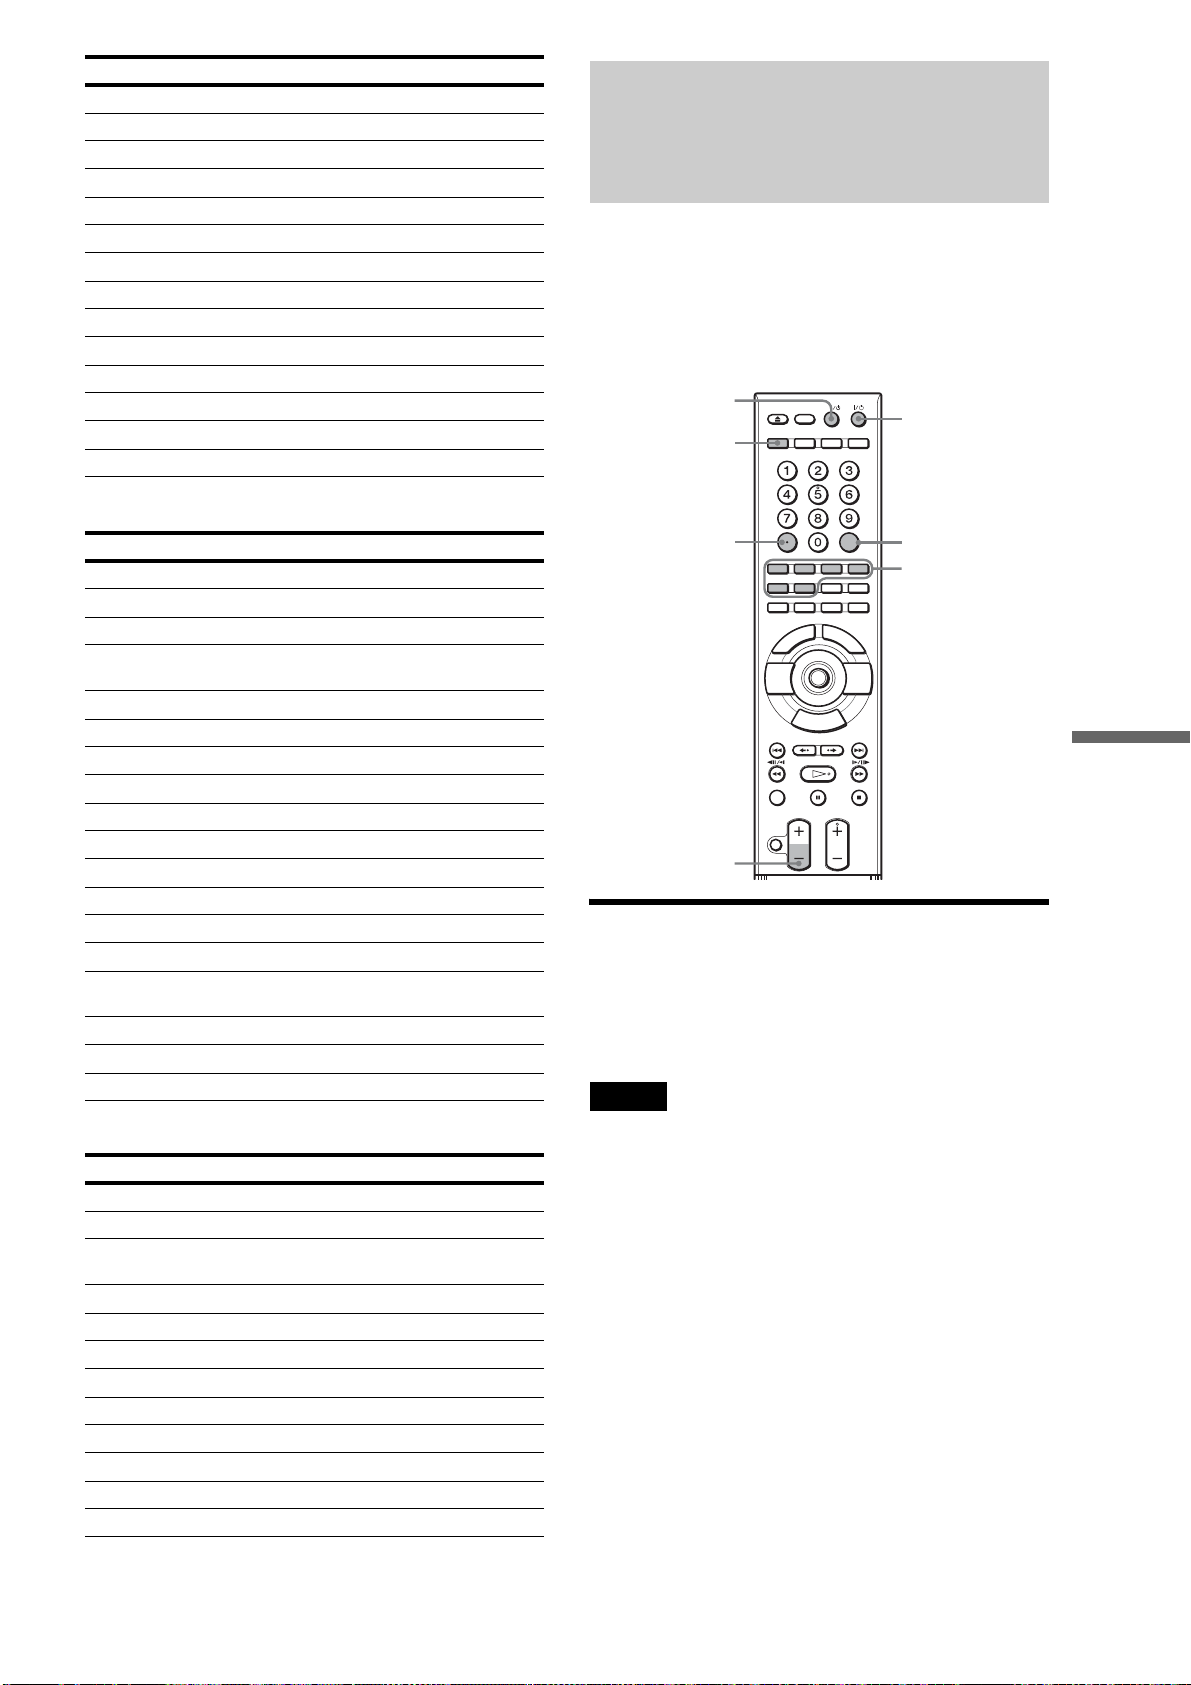
129
Other Remote Uses
◆For satellite tuners
◆For cable box tuners
The Remote Learning
Operations
The supplied remote is a “learning” remote that memorizes:
1) Additional device functions when the existing device
selection button (e.g., TV, VCR, etc.) is already in use
(page 129).
2) Frequently used sequential procedures, such as turning on
your TV, AV amplifier, subwoofer, or volume adjustment
(page 130).
Adding a new device selection button
Example: You want to control a new AV amplifier with the
remote but the AMP button has been assigned to the other AV
amplifier. So you decide to assign a number button to the new
amplifier by registering the AMP device selection function to
“1.”
Note
Change the batteries if the RM SET UP button flashes five times and
does not enter the Learning mode in step 1.
a While pressing down RM SET UP, press SET
to enter the Learning mode.
RM SET UP lights up.
b Press the device selection button to select the
function (AMP in this example).
AMP flashes and RM SET UP remains lit.
c Press the button that you are going to use as
the new AMP button (“1” in this case).
The device selection button you pressed in step 2
(AMP) lights up. RM SET UP flashes five times if
you select a button that has already been used for
other function.
JVC 726 727 728 736
Magnavox 730 731 738
Mitsubishi/MGA 732 733 734 735
NEC 736
Panasonic 729 730 737 738 739 740
Philips 729 730 731
Pioneer 729
RCA/ProScan 722 729 730 731 741 747
Samsung 742 743 744 745
Sanyo 717 720 746
Sharp 748 749
Telefunken 751 752
Toshiba 747 756
Zenith 754
Manufacturer Code
Sony 801 802 803 804 824 825 865
Amstrad 845 846
BskyB 862
General Electric
(GE)
866
Grunding 859 860
HUMAX 846 847
Thomson 857 861 864
Pace 848 849 850 852 862 863 864
Panasonic 818 855
Philips 856 857 858 859 860 864 874
Nokia 851 853 854 864
RCA/ProScan 866 871
BITA/ Hitachi 868
Hughes 867
JVC/Echostar/
Dish Network
873
Mitsubishi 872
Sumsung 875
Toshiba 869 870
Manufacturer Code
Sony 821 822 823
Hamlin/Regal 836 837 838 839 840
Jerrold/G.I. /
Motorola
806 807 808 809 810 811 812 813 814
Jerrold 830 831
Oak 841 842 843
Panasonic 816 826 832 833 834 835
Philips 830 831
Pioneer 828 829
RCA 805
Scientific Atlanta 815 816 817
Tocom/Philips 830 831
Zenith 826 827
Manufacturer Code
SET
AV
HOME
AV \/1
RM SET UP
CLEAR
\/1
VOL –
SET
Device selection
buttons
,continued
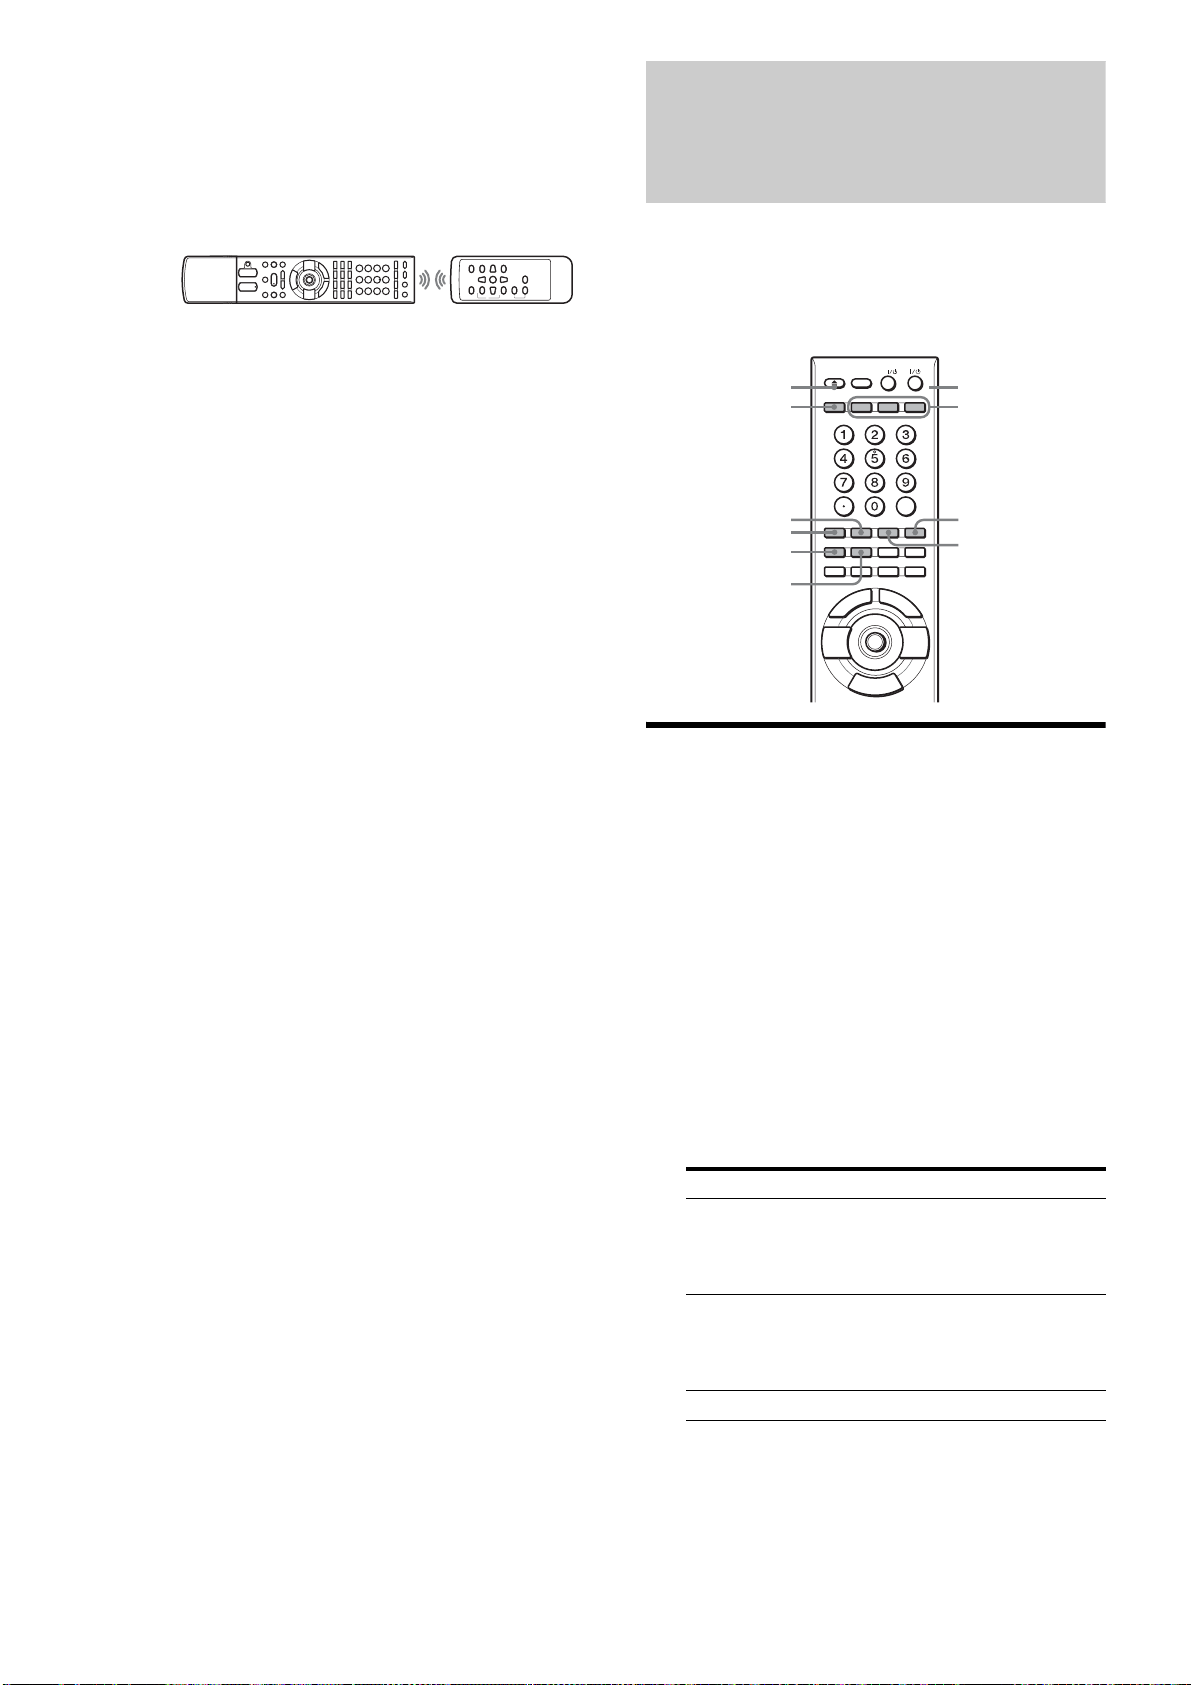
130
d At close range (2–4 inches, about 5–10 cm)
and facing the sensors on the server’s remote
and the AV amplifier’s remote, send the
remote code from the AV amplifier’s remote.
The device's button light pressed in step 2 (AMP)
turns off. Keep sending for more than one second
until the button flashes again.
e Check that AMP flashes again.
Learning has failed if AMP flashes five times. If it
flashes 10 times, the remote’s memory is full. Clear
the remote’s memory (page 130) and repeat from
step 1.
f Press RM SET UP again to exit the Learning
mode.
To exit the Learning mode
Press RM SET UP. Or, leave the remote for more than 60
seconds without operating.
To erase a learned function
Example: Erasing the function assigned to “1” above.
1 While holding down RM SET UP, press CLEAR.
RM SET UP flashes twice.
2 Press the device function button (AMP) to select
the function to erase.
AMP lights up and RM SET UP keeps flashing.
3 Press the device selection button you want to clear
(“1”).
AMP flashes twice and the device selection function
of “1” is cleared.
If it fails, RM SET UP flashes five times.
z Hint
See below when you want to clear the remote’s memory entirely.
To erase all learned functions
1 While holding down VOL –, press \/1 and AV
\/1 at the same time.
RM SET UP flashes three times.
2 Release VOL –.
Saving Frequent
Procedures
The MACRO function lets you register a sequential procedure
that consists of up to 30 presses of the remote’s buttons.
This function is convenient, for example, when you have many
devices in your home theater and need to press many buttons for
many devices before you start viewing.
Registering a MACRO
Note that the other devices need to be registered to the device
selection buttons (TV, VCR, etc.,) beforehand (page 129).
a While pressing down RM SET UP, press
MACRO 1/2/3 for more than one second.
The RM SET UP flashes twice, and the pressed
MACRO button lights up.
b Press the device selection button to switch the
remote’s mode for the device (i.e., press TV to
operate a TV).
The device selection button flashes.
c Set the button operations by pressing the
following function buttons.
d Repeat steps 2 to 3 to set the entire sequence.
RM SET UP flashes twice and lights up again each
time you press other buttons.
e Press RM SET UP to finish.
Buttons Functions
TV, VCR, AMP,
SAT/CABLE,
CUSTOM,
SERVER
Switches the remote’s mode for the
device.
MACRO1–3 Sets intervals before sending a signal
when pressed for more than one second.
(MACRO 1: 1 sec., MACRO 2: 5 sec.,
MACRO 3: 10 sec.)
Other buttons Sets the functions to perform.
SET
AV
HOME
RM SET UP
TV
AMP
VCR
CUSTOM
MACRO 1/2/3
SAT/CABLE
SERVER

131
Other Remote Uses
To exit the procedure
Press RM SET UP. Or, leave the remote for more than 60
seconds without operating.
Using a registered MACRO
a Press MACRO 1/2/3 to execute MACRO.
The MACRO operation starts, executing each
command in the set order. The pressed MACRO
button lights up during execution, and turns off when
finished.
To erase a registered MACRO
1 While holding down RM SET UP, press MACRO
1/2/3 for more than one second.
RM SET UP and the pressed MACRO button lights
up.
2 Press RM SET UP.
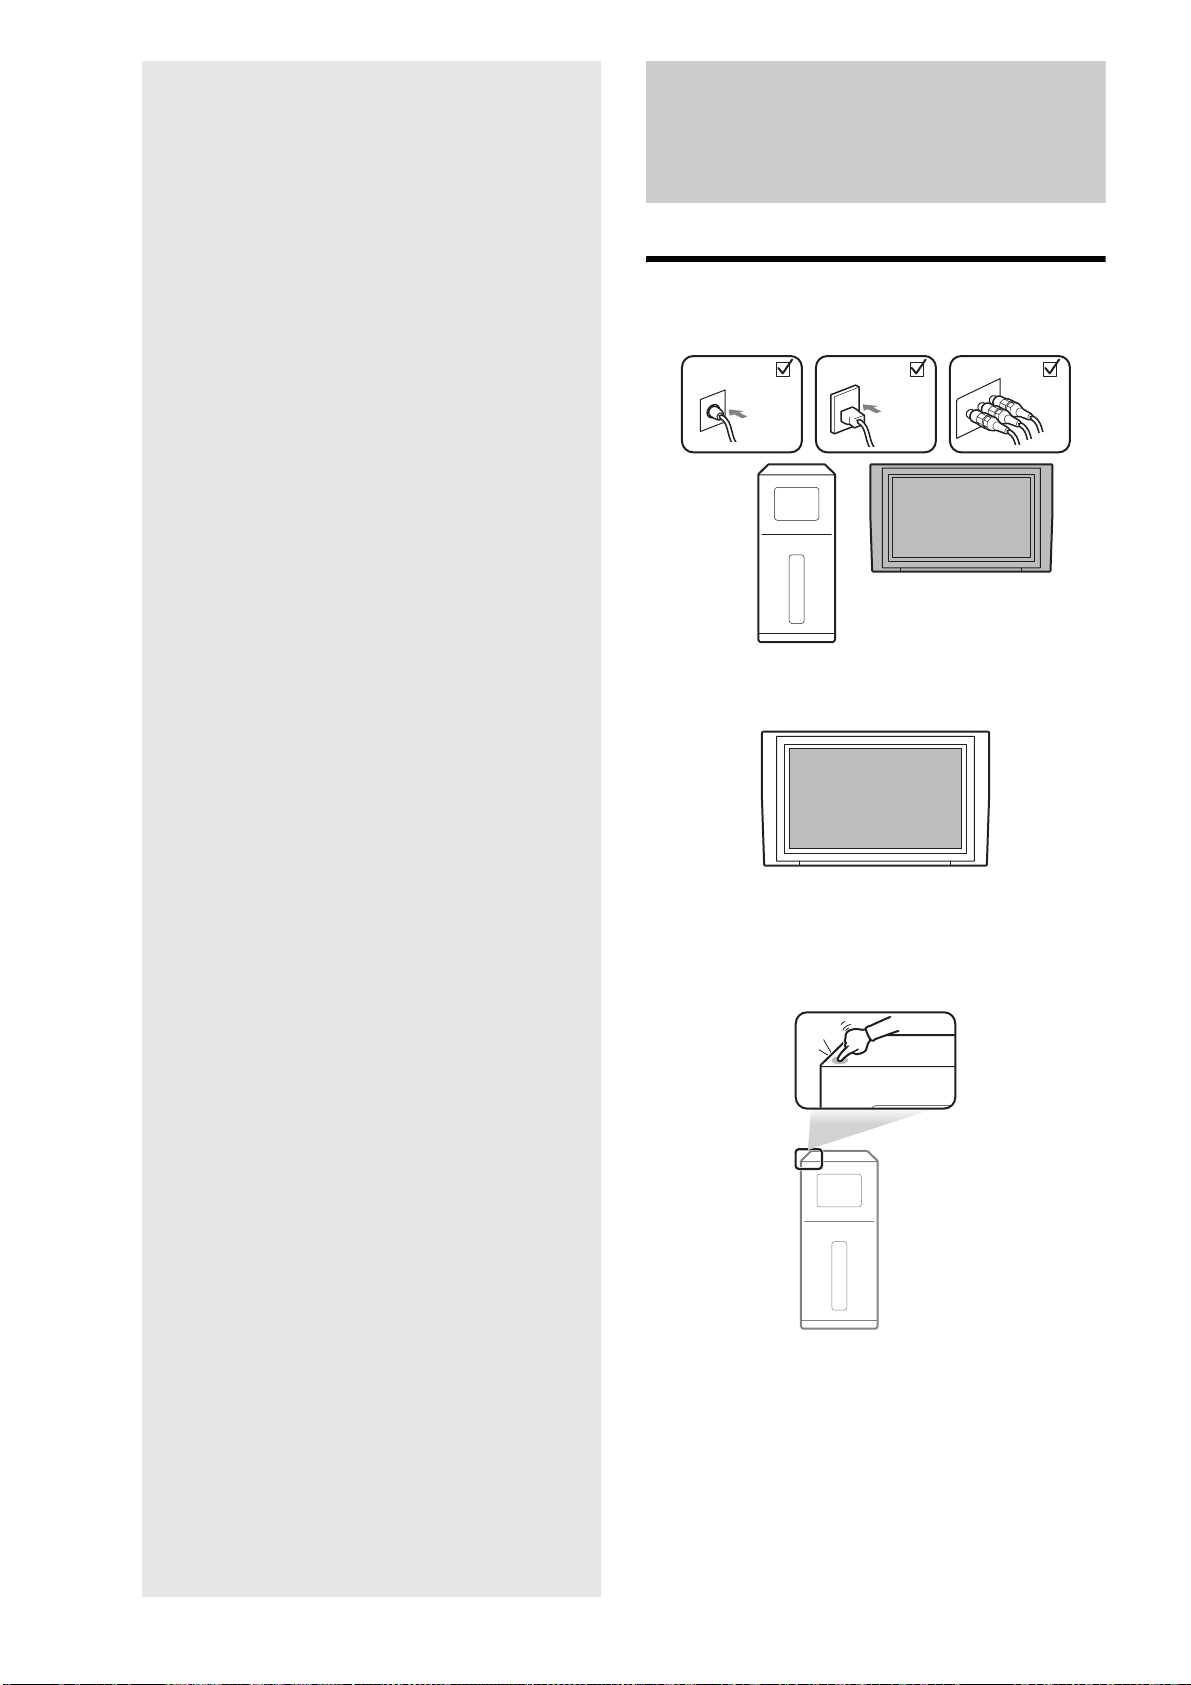
132
Additional
Information
Basic Troubleshooting
Check the following conditions
Cable connection
TV's input switch
Server's power
Is the server
turned on?
Are they
connected
securely?
Is the TV’s input switched to the server?
If the server’s power is on,
\/1 on the server lights up in green.
• Basic Troubleshooting . . . . . . . . . . . . . . . . . 132
• Troubleshooting . . . . . . . . . . . . . . . . . . . . . . 134
• Self-Diagnostic Function. . . . . . . . . . . . . . . . 139
• About Software Updates. . . . . . . . . . . . . . . . 140
• Glossary . . . . . . . . . . . . . . . . . . . . . . . . . . . . 142
• Specifications . . . . . . . . . . . . . . . . . . . . . . . . 144
• About Trademarks and Copyrights . . . . . . . . 145
• About i.LINK. . . . . . . . . . . . . . . . . . . . . . . . . 145
• About All Media Guide . . . . . . . . . . . . . . . . . 146
• TV Display Viewing Options . . . . . . . . . . . . . 147
• About Removable Media and Recording Modes
. . . . . . . . . . . . . . . . . . . . . . . . . . . . . . . . . 148
• Language Code List . . . . . . . . . . . . . . . . . . . 153
• Index . . . . . . . . . . . . . . . . . . . . . . . . . . . . . . 154
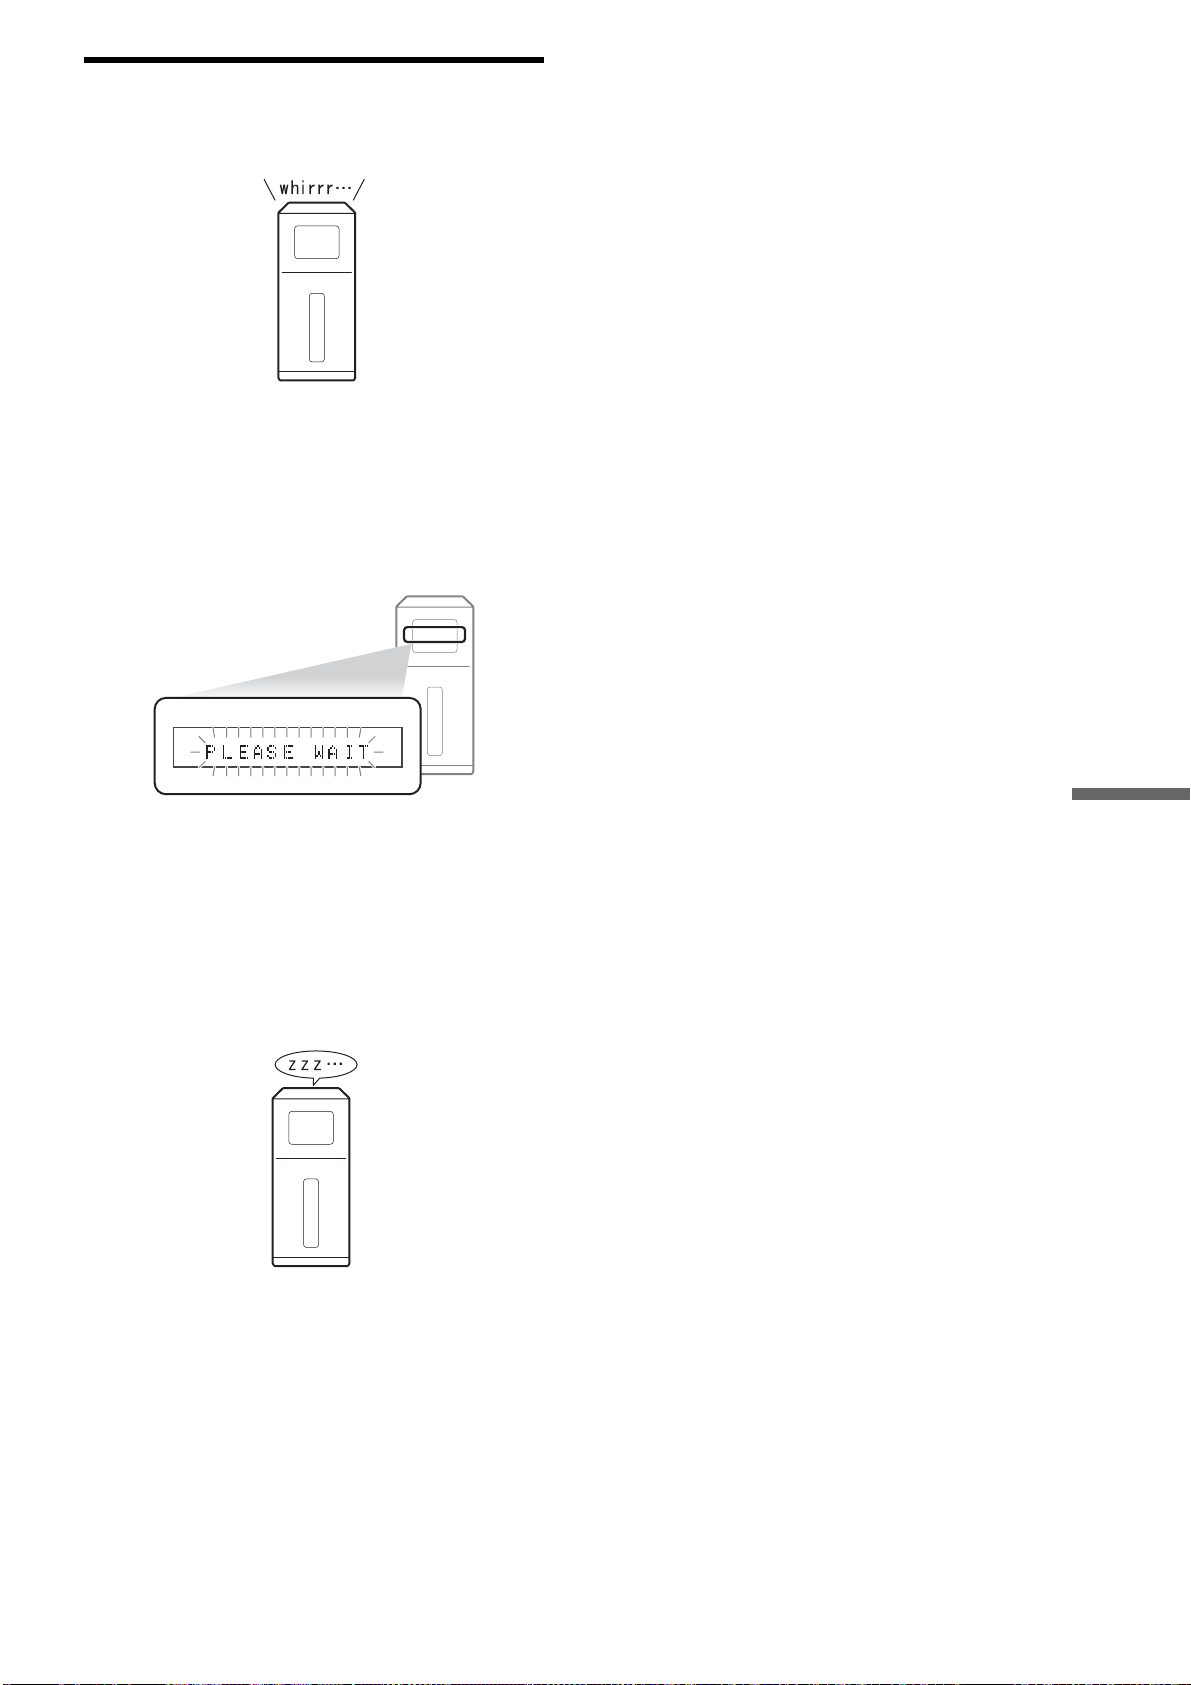
133
Additional Information
These are not real problems
,If none of the above applies, find the
symptom in “Troubleshooting” (page 134).
DATA
D1 D2 D3 D4
CD
VR
DVD RW
The power is off but fan noise is heard.
[PLEASE WAIT] flashes, but it is slow to start
up.
No response
The fan rotates if [Standard] is selected.
The front panel display flashes while starting up.
Wait until the server starts up, which will take about one minute.
The startup is shorter if you use the [Standard] setting
(page 116).
If the server is unresponsive, press \/1 for more than ten seconds
to re-start the server.

134
Troubleshooting
If you experience any of the following difficulties while using
the server, use this troubleshooting guide to help remedy the
problem before requesting repairs. If you have any questions
about this product, call “Home Entertainment Server” Customer
Call Center at 1-877-531-SONY (7669), or visit our web site at
http://www.sony.com/hesupport.
Power
The power does not turn on.
, Check that the power cord is connected securely.
, It takes a short while before the server turns on.
“PLEASE WAIT” flashes on the front panel
display but the server is slow to turn on.
, The message keeps flashing during startup, which may take
several moments. Wait without operating the server. Or, if
necessary, you can shorten the time by using the [Standard]
setting (page 116).
Picture
There is no picture/picture noise appears.
, Re-connect the cables securely.
, The connecting cables are damaged.
, Check the connection to your TV (page 23) and switch the
input selector on your TV so that the signal from the server
appears on the TV screen.
, The disc is dirty or flawed.
, If the picture output from your server goes through your
VCR to get to your TV or if you are connected to a
combination TV/VIDEO player, the copy-protection signal
applied to some BD/DVD programs could affect picture
quality. If you still experience problems even when you
connect your server directly to your TV, try connecting your
server to your TV’s S VIDEO input (page 104).
, Check the setting in [Settings] – [Video Settings] – [Video
Input 1] (page 112). To display signals from the server’s
LINE IN 1 jacks on your TV, select [Video] for input from
the VIDEO jack; [S Video] for S VIDEO jack.
, The server is connected to an input device that is not HDCP-
compliant.
, If the HDMI OUT jack or the COMPONENT VIDEO OUT
jacks are used for video output, changing the output
resolution may solve the problem (page 112).
, When playing a double-layer DVD, the video and audio may
be momentarily interrupted at the point where the layers
switch.
, Pictures may be blurred if you have recorded from a game
console.
, See the manual supplied with the display device.
There is no picture or picture noise appears
when connected to the HDMI OUT jack.
, Try the following: 1Turn the server off and on again.
2Turn the connected equipment off and on again.
3Disconnect and then connect the HDMI cable again.
, If the HDMI OUT jack is used for video output, changing the
output resolution may solve the problem (page 103).
, Picture quality may be lowered if you connect the server to
a progressive TV or an HD TV with an HDMI cable, and
play a disc that contains 480i video signals.
In this case, disconnect the HDMI cable, re-connect the
server and the TV with an A/V cable or a component video
cable, and view the pictures in 480i. See page 103 for
details.
, See page 112 if the [YCbCr/RGB(HDMI)] setting is
appropriate for the display device.
There is no picture when connected the digital
camcorder to the HDV 1080i/DV IN jack.
, Trying the following:
1Disconnect and then connect the i.LINK cable again.
2Turn the connected digital camcorder off and on again.
3Turn the server off and on again.
The picture does not fill the screen, even
though the aspect ratio is set in [Video Output
Aspect Ratio] under [Video Settings].
, The aspect ratio of the disc is fixed on your BD/DVD. See
page 112.
The dark area of the picture is too dark/the
bright area is too bright or unnatural.
, Set [Black Level (VIDEO OUT)] and [Black Level
(COMPONENT OUT)] in [Video Settings] to [On] (default)
(page 113).
The imported video titles were not recorded on
the HDD.
, When importing using the Options item on the Home Menu,
check that the connected HDV device is in playback status.
, Import may not be possible if blanks and recorded sections
are mixed throughout the HDV tape.
Sound
There is no sound.
, The disc is dirty or flawed.
, Re-connect the connecting cable securely.
, The connecting cable is damaged.
, The server is connected to the wrong input jack on the
amplifier (receiver) (page 105).
, The amplifier (receiver) input is not correctly set.
, The server is in pause mode or in Slow-motion Play mode.
, The server is in scan mode.
, If the audio signal does not come through the DIGITAL
OUT (OPTICAL or COAXIAL)/HDMI OUT jack, check
the audio settings (page 114).
, The equipment connected to the HDMI OUT jack does not
conform to the audio signal format, in this case set [HDMI
Audio Output] in [Audio Settings] to [PCM] (page 114).

135
Additional Information
, DTS audio signals on CDs and DVDs are output from the
DIGITAL OUT (OPTICAL/COAXIAL) jack. And set
[DTS] is set to [DTS] of [Audio Settings] in [Settings].
The sound is not output correctly.
, When the AV amplifier connected to the DIGITAL OUT
(OPTICAL or COAXIAL) jack or the HDMI OUT jack does
not support Dolby Digital signals, set [Dolby Digital] in
[Audio Settings] to [Downmix PCM] (page 114).
, When the AV amplifier connected to the DIGITAL OUT
(OPTICAL or COAXIAL) jack or the HDMI OUT jack does
not support DTS signals, set [DTS] in [Audio Settings] to
[PCM(BD-ROM)] (page 114).
, When the AV amplifier connected to the DIGITAL OUT
(OPTICAL or COAXIAL) jack does not support signals
recorded in 96 kHz frequency by its audio clock, set [48kHz/
96kHz PCM] in [Audio Settings] to [48kHz/16bit]
(page 114).
The sound output from the AUDIO OUT (L/R) or
LINE OUT AUDIO (L/R) jacks is distorted.
, Set [Audio Output ATT] in [Audio Setting] to [On]
(page 114).
No sound is output from the HDMI OUT jack
, The sound volume is low on some BDs/DVDs. The sound
volume may improve if you adjust the [Audio DRC]
setting in “BD/DVD Viewing Settings” (page 119).
, The HDMI OUT jack is connected to a DVI device (DVI
jacks do not accept audio signals).
The sound volume is low.
, On the Home Menu, select [Settings] – [Audio Settings], and
set [Audio Output ATT] to [Off] (page 114).
Operation
The server does not become operable after the
power is turned on. “E81XX” appears on the
front panel display.
, Check that two lock screws and a lock stick are removed
from the server's bottom (page 19).
Discs cannot be inserted.
, Check that two lock screws and a lock stick are removed
from the server's bottom (page 19).
, Dual discs are not supported.
, Do not place multiple discs on the disc tray at the same time.
Discs do not eject after Z is pressed.
, Additional operations are required. See page 33 for
procedures.
The remote does not function.
, The batteries in the remote are weak (page 27).
, There are obstacles between the remote and the server.
, The distance between the remote and the server is too far.
, The remote is not pointed at the remote sensor on the server.
The disc does not play.
, The disc is turned over. Insert the disc with the playback side
facing down.
, The disc is skewed.
, The server cannot play certain discs (page 148).
, The remote’s device selection is set for a device other than
SERVER.
, The region code on the BD/DVD does not match the server.
, Moisture has condensed inside the server (page 3).
, The server cannot play a recorded disc that is not correctly
finalized (page 149).
, See “About Removable Media and Recording Modes”
(page 148).
, Video CDs and Super Video CDs do not play on this server.
, The server is inclined (page 3).
The file name or contents information are not
correctly displayed.
, Mixed mode CDs do not play on the server. (If audio of a
music CD format multi-session CD is recorded in the first
session, only the first session will be played.)
, See “About Removable Media and Recording Modes” on
page 148.
The MP3 audio track file cannot be played
, The DATA DVD is not recorded in the MP3 format that
conforms to UDF (Universal Disk Format).
, The audio track file does not have the extension “.MP3.”
, The data is not formatted properly even though it has the
extension “.MP3.”
, The data is not MPEG-1 Audio Layer III data.
, The server cannot play audio tracks in mp3PRO format.
, BD-REs/BD-Rs is recorded in a format other than UDF 2.5.
, The CD is a mixed mode CD.
The LPCM audio track file cannot be played
, The DATA DVD is not recorded in the LPCM format that
conforms to UDF (Universal Disk Format).
, The audio track file does not have the extension “.WAV.”
, The data is not formatted properly even though it has the
extension “.WAV.”
, Characters other than numbers and English alphabet are
contained in the file name.
, Only audio track files of 44.1 kHz, 16 bit, and stereo, are
playable.
The file name or the content information are not
correctly displayed.
, The server can only display numbers and English alphabet.
Other characters may be displayed differently.
, Depending on the writing software used, the input characters
may be displayed differently.
Playback stops automatically.
, While playing discs with an auto pause signal, the server
stops playback at the auto pause signal.
Thumbnails do not appear.
, Thumbnails may not be created depending on the operation
status or the recorded content.
, Play the title once, stop playback, and try again.
(
page
69)
.
,continued

136
Some functions such as Stop, Search, Slow-
motion Play, Repeat Play, or Shuffle Play
cannot be performed.
, Depending on the disc, you may not be able to do some of
the operations above. Refer to the operating manual that
comes with the disc.
The language for the audio cannot be changed.
, Try using the BD’s or DVD’s menu instead of the direct
selection button on the remote (page 55).
, Multi-lingual tracks are not recorded on the BD/DVD being
played.
, The BD/DVD prohibits the changing of the language for the
sound track.
The angles cannot be changed.
, Try using the BD’s or DVD’s menu instead of the direct
selection button on the remote (page 55).
, Multi-angles are not recorded on the BD/DVD being played.
, The BD/DVD prohibits changing of the angles.
, You are trying to change the angles when "ANGLE" does
not appear in the front panel display.
The photo file cannot be played.
, Photo files larger than 10 MB cannot be played.
, The disc is dirty or flawed.
, On the DATA DVD, the JPEG file is not recorded in a
format that complies with UDF (Universal Disk Format).
, On the BD-RE/BD-R, the JPEG file is not recorded in a
format that complies with UDF 2.5.
, The file has an extension other than “.JPEG” or “.JPG.”
, The image is larger than 4,097 (width) × 6,145 (hight).
(Some progressive JPEG files cannot be displayed even if
the file size is within this specified capacity.)
, The image does not fit the screen (the image is reduced).
, Characters other than numbers and English alphabet are
contained in the file name.
, Files exceeding 10 MB will not play on the server.
, Photos may not play on the server if edited on a PC.
, Progressive JPEG files are not supported.
, The server does not support voice memos.
Importing to the HDD
The selected content was not imported to the
HDD.
, Check if there is enough disk space.
, Copy-protected content cannot be imported.
, Other function may have been working. Import may not be
possible when share or upload of music files (the network
communication indicator on the front or top panel display
lights up — see page 14) or recording is in progress.
, Power failure occurred while importing.
, The following restriction apply to video import:
– No more than 300 titles, including original and Playlist
titles can be recorded on the HDD.
, The following restrictions apply to photo import:
– Photo files larger than 10 MB cannot be imported.
– Photo files other than JPEG format cannot be imported.
– When importing from a disc, photo files may not be
imported depending on the number of files and method of
recording on the disc.
– Up to 500 albums can be imported to the HDD, and a photo
album can contain up to 200 photos.
, The following restrictions apply to music import:
– Music files equal to or longer than 75 minutes and 30
seconds (WAV), or 2 hours and 30 minutes (MP3) cannot
be imported.
– Up to 40,000 files can be imported to the HDD.
– Artist information cannot be imported to the HDD if the
number of artist exceeds 2,000.
– No more than 2,000 music albums can be imported to the
HDD.
– When importing from a disc, music files may not be
imported depending on the number of files and method of
recording on the disc.
The disc cannot be selected.
, The disc may not be inserted.
, Discs will not be displayed on the list if they are not
supported.
One-Touch Import does not work/The IMPORT
SELECT button on the top panel does not work.
, The buttons on the top panel may be disabled. Press
CONTROL ON/OFF on the right bottom corner of the top
panel to make them operable.
, One-Touch Import does not work while the unit is changing
its settings. (“SETUP” appears on the top panel display).
Copying from HDD to a disc
The selected content was not copied to a disc.
, Check if the disc capacity is enough.
, Check if it is a recordable disc.
, The following restrictions apply when copying videos from
the HDD to a disc. Copying cannot be made if the number of
titles exceed these limit:
– For BD-REs/BD-Rs: 200 titles (including both original
and Playlist titles)
– For DVD-RWs (VR mode)/DVD-Rs (VR mode): 99
original titles/97 Playlist titles
– For DVD+RWs/DVD+Rs: 97 original titles
– For DVD-RWs (Video mode)/DVD-Rs (Video mode): 99
original titles
, Photo Copy from the HDD to a disc cannot be made beyond
the following limits:
– For DVDs: 4,000 files/folders (combined total of files and
folders)
– For BDs: 2,000 files/folders (combined total of files and
folders)
, Other function may have been working. Copying is not be
possible when share or upload of music files (the network
communication indicator on the front or top panel display
lights up — see page 14) or recording is in progress.
The disc cannot be selected.
, Check if the disc is inserted.
, Discs will not be displayed in the list if they are not
supported.
, Copying to 8 cm discs is not allowed.
, Power failure occurred while importing.

137
Additional Information
Others
The upper end or bottom end of the Options
menu does not fit the screen.
, Change the TV’s Zoom setting. Refer to the Instructions
supplied with the TV.
The HDMI Control function does not work.
, Check the HDMI connection (page 102).
, Set [HDMI Control] to [On] (page 116).
, Make sure that the connected component is compatible with
the HDMI Control function. Refer to the operating
instructions of the component for details.
, Check that the power cord of the connected component is
connected securely.
, Check the connected component’s setting for the HDMI
Control function. Refer to the operating instructions of the
component.
, If you change the HDMI connection, while watching the
server's output picture on the TV via the HDMI jack, set
[HDMI Control] to [Off], then set [HDMI Control] to [On].
For details on the HDMI Control function, see “About the
‘BRAVIA’ Theatre Sync
™
features (for HDMI connections
only)” (page 24).
, If four or more DVD/BD player or other devices are
connected via the HDMI OUT jack, the ‘BRAVIA’ Theatre
Sync function may not work.
The color is unnatural/noise appears on the
screen when output from the HDMI OUT jack.
, Press HOME, select [Settings] – [Video Settings] – [YCbCr/
RGB(HDMI)], and try the [RGB], [YCbCr 4:4:4], or
[YCbCr 4:2:2] settings to find the one that works.
The server does not operate properly.
, When static electricity, etc., causes the server to operate
abnormally, unplug the server.
The disc tray does not open and “LOCKED”
appears on the front panel display.
, The front panel may be locked (Child Lock. See page 33 to
unlock.
The disc tray does not open and you cannot
remove the disc even after you press Z.
, Turn on the server.
As soon as “POWER ON” appears on the front panel
display, press x on the server (not the Remote) repeatedly
until the tray opens. Repeat the above procedure several
times if the tray does not open on the first try.
, If “EXXXX” is displayed, remove the rock screws and the
screw stick from the unit bottom.
[Cannot play] appears when playing a DATA
DVD.
, See also “The photo file cannot be played.” or “The MP3
audio track file cannot be played” (page 135).
, The MP3 audio track/JPEG image file you want to play/view
is damaged.
, The data is not MPEG-1 Audio Layer III data.
, The JPEG image file format does not conform to DCF*
(page 43).
, The JPEG image file has the extension “.JPG” or “.JPEG,”
but is not in JPEG format.
* “Design rule for Camera File system”: Image standards for digital
cameras regulated by JEITA (Japan Electronics and Information
Technology Industries Association).
The server does not accept any button or, the
buttons on the top panel is flashing.
, Check if any object (disc, etc) is placed on the top panel.
, Are the buttons on the top panel in operable status? Press
CONTROL ON/OFF on the top panel.
, Hold down \/1 on the server for more than 10 seconds until
the indicators on the front panel display turn off.
The server does not function properly.
, Press down \/1 on the server for more than 10 seconds to re-
start the server.
, If the static electricity is affecting the server, turn it off by
pressing \/1, and after the time is displayed on the front
panel display, disconnect the power cord. After waiting for a
while, re-connect the power cord and turn it on.
The server shuts down and starts up
automatically.
, The server is designed to re-start when an internal problem
occurs.
An alphanumeric five digit code appears on the
front panel display.
, The self-diagnostic function is working. See page 139 for
error codes.
A message such as “SYSTEM ERROR” or “FAN
ERROR” appears on the front panel display.
, The self-diagnostic function is working. See page 139 for
error messages.
The front panel does not open even after OPEN/
CLOSE (either for the disc tray or the card slots)
on the server is touched.
, The front panel may be locked (Child Lock). To unlock, see
page 33.
, When the server was turned on with the OPEN/CLOSE
buttons, the front panel will not open until the server is
started.
Fan noise is heard when the power is off.
, The fan rotates when the power is off if [Standby Mode] is
set to [Standard].
, When the server’s music server function is being used, the
fan keeps rotating even when the power is off.
Metadata cannot be received after the disc is
inserted.
, Check if the server is connected to the network.
, “AMG Terms of Use” has to be agreed before use.
Press HOME and select [Settings] – [System Settings] – [All
Media Guide Settings] (page 117).
,continued

138
, Nothing will be displayed for content copied on a recordable
media such as a CD-R/CD-RW and DVD-R. Note that no
data can be acquired for music content imported to the HDD.
, When the AMG Database does not contain pertinent data,
nothing will be displayed or received.
Metadata received from AMG Database is not
correct.
, Metadata received through automatic acquisition may be
wrong.
Select the correct data from the search results that appear
when you select [Search Info.] on the Disc Information
display.
, When the AMG Database does not contain pertinent data,
nothing will be displayed or received. Enter the data
manually using the edit functions.
Artist name and other information are
displayed, with no cover art.
, The number of the displayed cover arts of music CDs, DVD-
ROMs and BD-ROMs are limited.
About AMG, see page 146 for details.
Network-related problems
No sound is output from the client device.
, The server may be busy processing other operations. Music
sharing may not be allowed when other operations are in
progress.
, Even when the server is in “PARTY MODE,” there will be
no sharing if recording is underway.
Music files were not uploaded from the PC.
, The server may be busy processing other operations. Music
upload is not possible when other operations are in progress.
Sound is sometimes interrupted when sharing
music on a wireless network.
, On a wireless network, communication speed lowers
depending on the environment. Check the surroundings for
problems (distance between the devices, obstruction such as
walls or a microwave oven that is currently in use).
, LPCM files require a network bandwidth about 3 Mbps. If
the sound is interrupted, import the file in MP3 format (a
narrower bandwidth would suffice) and try again.
The server is not found by “Music Transfer”.
, Check that, the PC’s network setting is correct.
, When using a Windows XP or Vista PC, check that the
firewall settings are appropriate. To communicate with the
server, “Music Transfer.” needs to be registered as an
exception to the firewall setting, which is normally done at
the time of installation automatically if your PC’s firewall
function is the Windows standard package. With other
vendor’s firewall products, you will need to manually
configure the firewall exception setting by referring to the
product’s manual.
, The server is turned on.
, The server’s network settings are appropriate by referring to
related sections. If Music [Music Server Settings] is [Off],
change it to [On].
The server is always offline on “Music
Transfer.”
, If the server is detected but only found as offline, check that
the PC’s device name or MAC address is included in
[Registered Device List]. If not listed, register the PC to the
list by referring to page 122.
Music file transfer with “Music Transfer” has
failed.
, If “Server is busy” is displayed, operations on the server are
the cause. Cancel the server’s operation and re-start the
transfer.
, If “The server’s HDD capacity is insufficient” is displayed,
the server’s HDD capacity is not enough.
, If “The control area is full” is displayed, it is beyond the limit
that the server can manage (page 47).
The client device does not play the server’s
music content/The client device cannot find the
server.
, Check that the server is connected to the network.
, The client device may not be registered. Check the
Unregistered Device List and register the device.
, If the client device does not play the music content properly,
refer to the instructions supplied with the device.
, To play the server’s music content while the server is turned
off, [System Settings] – [Standby Mode] must be set to
[Standard] (page 116).
, Operations on the server may have interfered with playback
on the client device.

139
Additional Information
Self-Diagnostic Function
To prevent the server from malfunctioning, the server may
perform self-diagnostic test. In case an error message is
displayed on the top or front panel display, call “Home
Entertainment Server” Customer Call Center.
Error code Cause and/or corrective
action
E×××× An error occurred.
tRe-start the server. If it does not
work, call “Home Entertainment
Server” Customer Call Center
(page 2), and give the 4-digit error
code.
Error message Cause and/or corrective
action
SYSTEM ERROR An error occurred.
tCall “Home Entertainment
Server” Customer Call Center
(page 2).
FAN X ERROR An error occurred.
tWait until the error message
disappears, and turn on the server. If
the error message is still displayed,
call “Home Entertainment Server”
Customer Call Center (page 2), and
give the 1-digit number.
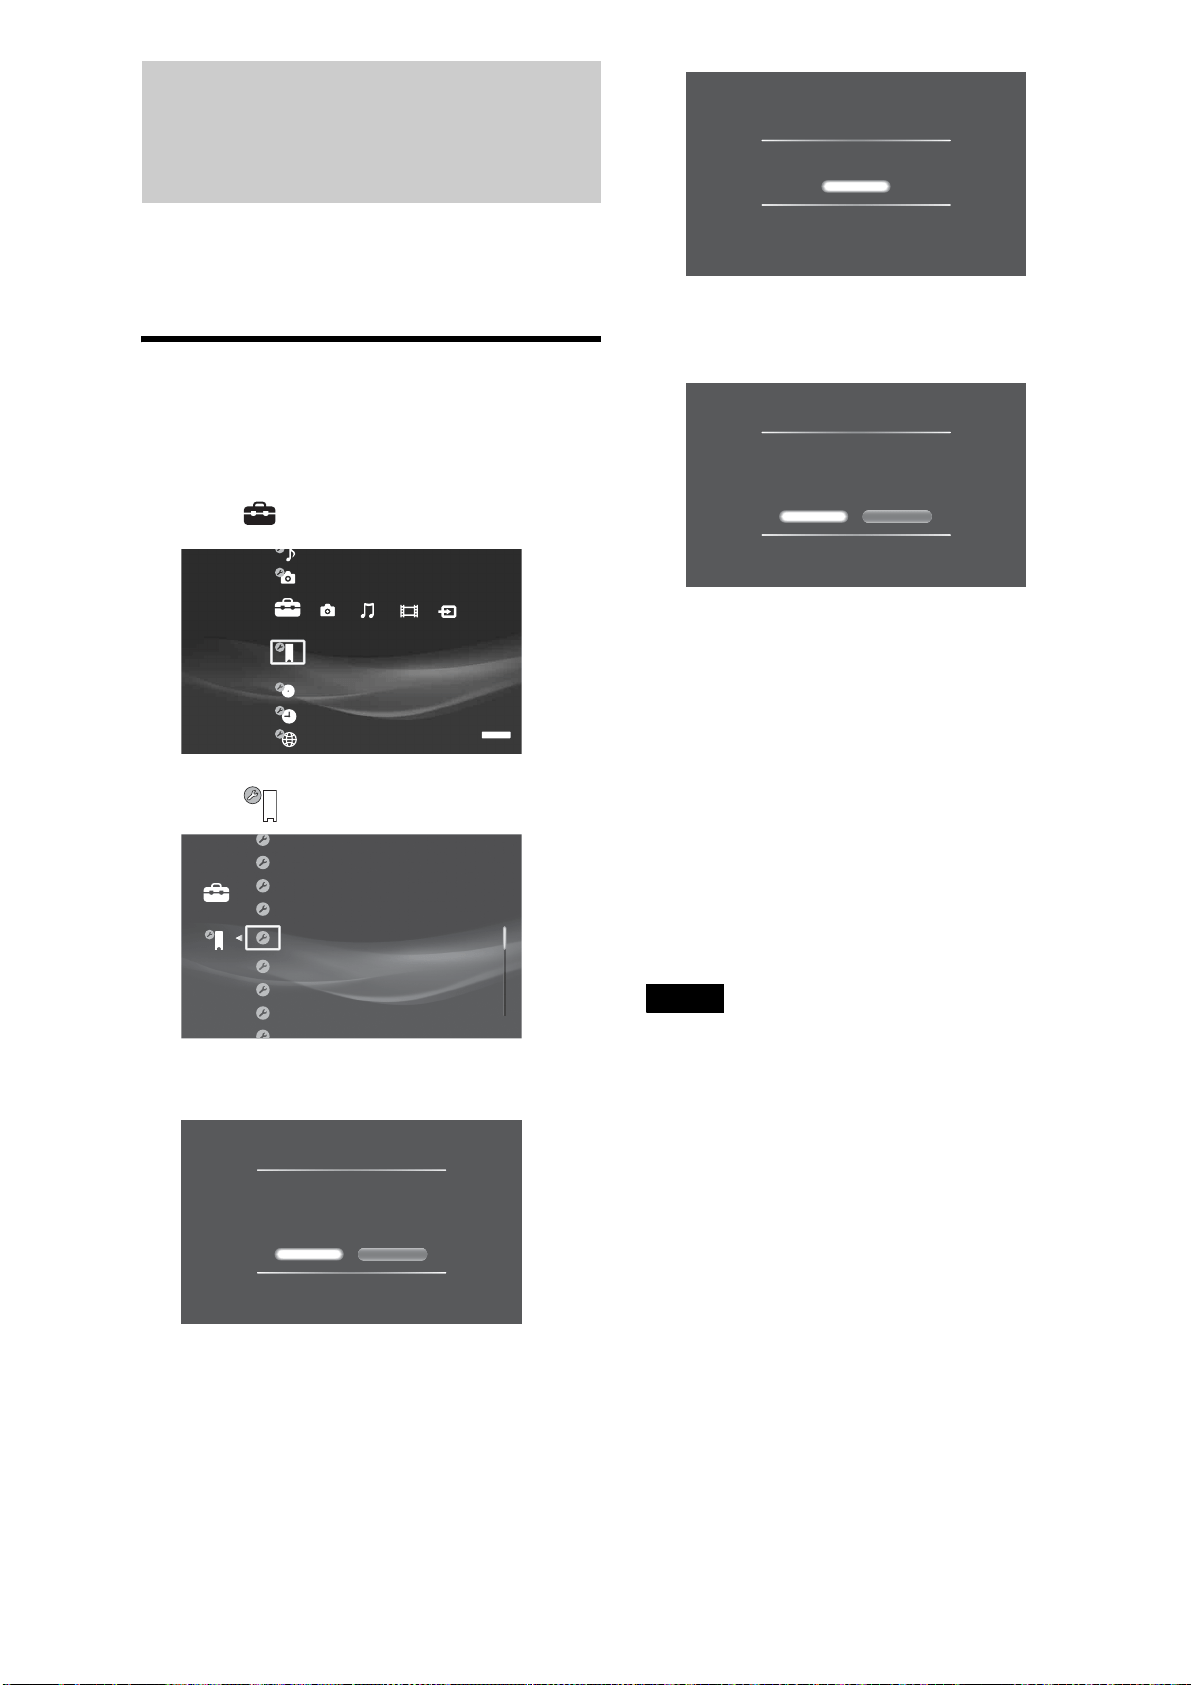
140
About Software Updates
z Hints
• You can check the current software version. Press HOME, and select
[Settings] - [System Settings] - [Device Information].
• A new mail will be stored in [Massages] notifying that the update was
successful.
Updating the software using an update
disc
a Press HOME to turn on the Home Menu.
b Select to display the icons.
c Select and press ENTER.
d Select [Software Update] and press ENTER.
e Select [Disc Update] and press ENTER.
A message appears asking you to insert a software
update disc.
f Insert the update disc by pressing Z.
The display asks for confirmation.
g Select [Yes] and press ENTER.
Software update starts.
On the top or front panel display, “VERSION UP”
appears, and then messages such as “VERSION UP
XX%” appear indicating the progress.
When successful, “VERSION UP FINISH” is
displayed, and the disc will be ejected.
• Repeat the above steps if the update fails as follows:
– “VERSION UP FAIL” appears and the disc is
ejected.
h Remove the disc.
The server will start up with the updated software
from the next time.
Notes
• Call “Home Entertainment Server” Customer Call Center (1-877-531-
SONY (7669)) if an error message appears during software update.
• The server may automatically re-start a few times depending on the
updated content.
• Software update service may be discontinued without a prior notice.
System Settings
Settings
SERVER
Software Update
Set Password
All Media Guide Settings
Device Information
Settings
BrightBrightness of Front Panel
Off
Standard
On
HDMI Control
Standby Mode
Audio Display
Update Methods
Select a software update method.
When selecting [Network Update], you will need to
configure the network settings.
Disc Update Network Update
Confirm Software Update Disc
Cancel
System update will be performed.
Insert the designated update disc.
Confirm Version
Version update disc is inserted.
Do you want to update?
Current Version: 0.00.001
New Version: 0.10.030
Do not turn off System during an update.
Ye s No
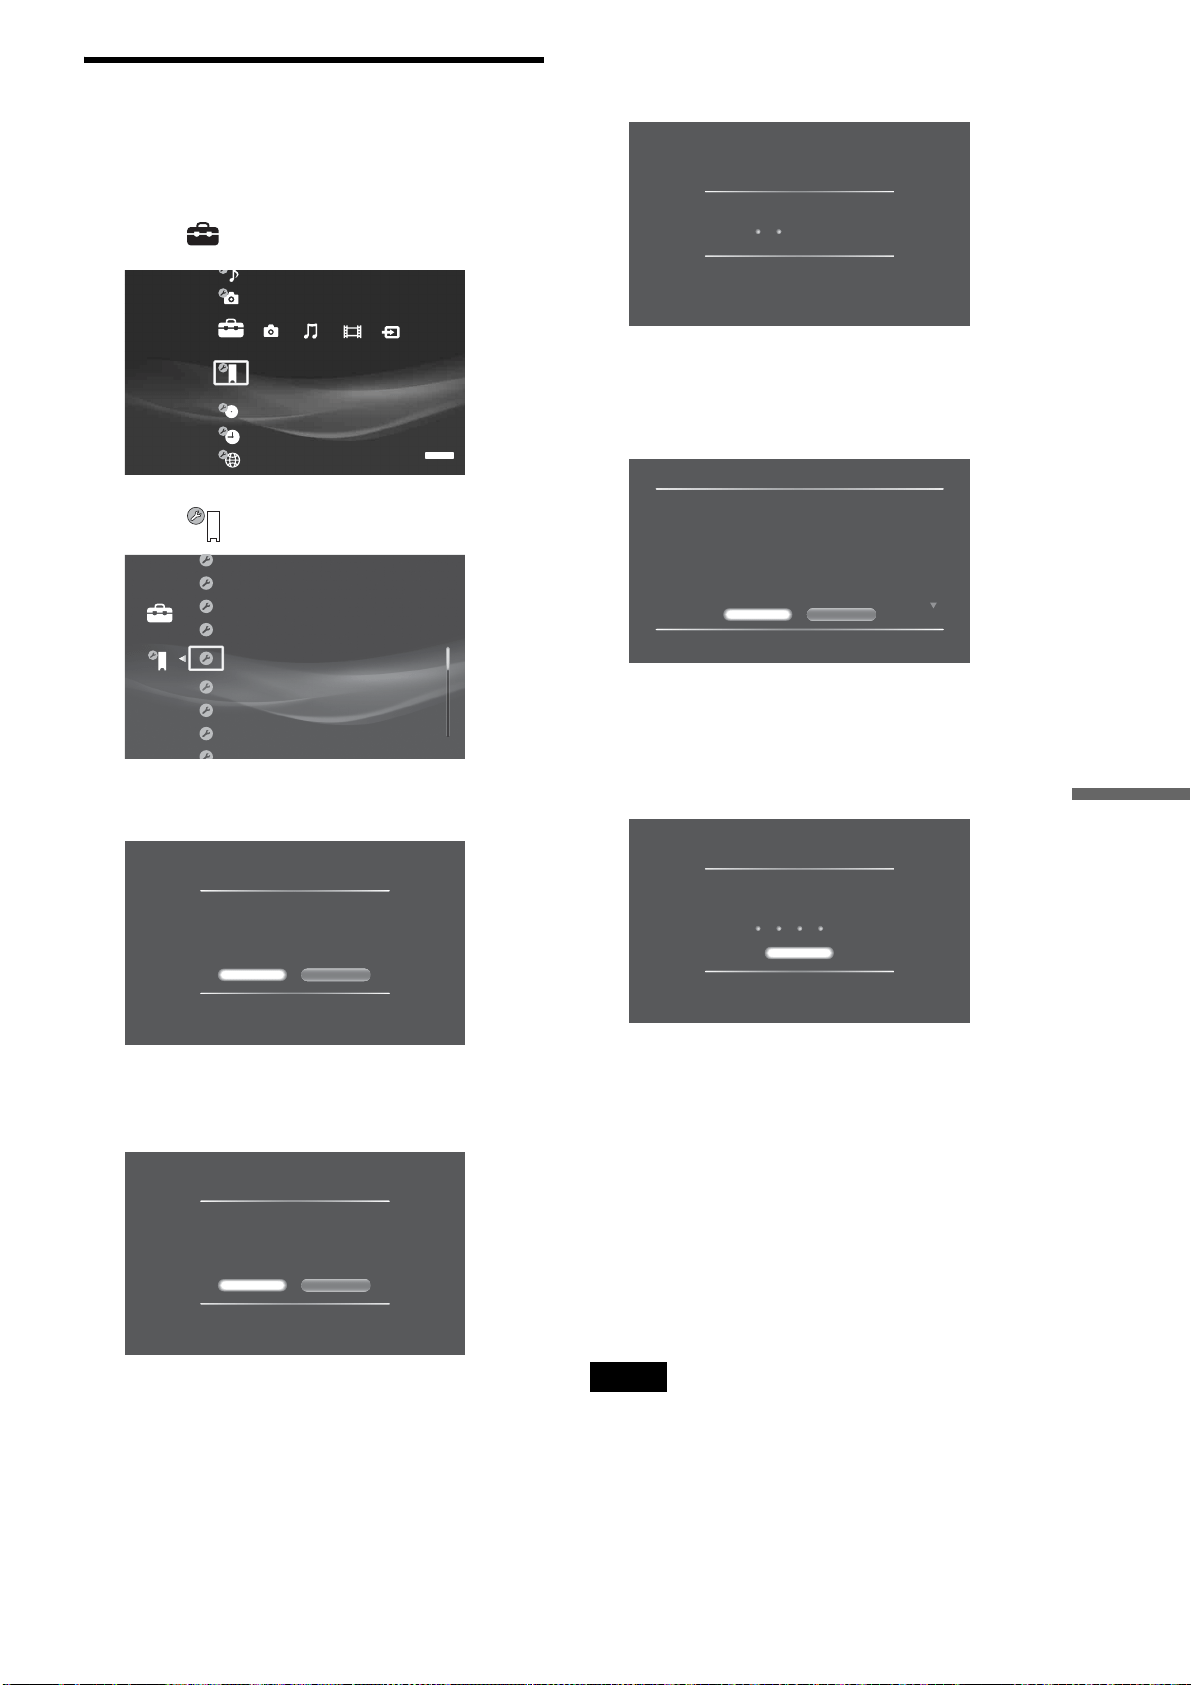
141
Additional Information
Updating the server’s software using
the network
a Press HOME to turn on the Home Menu.
b Select to display the icons.
c Select and press ENTER.
d Select [Software Update] and press ENTER.
e Select [Network Update] and press ENTER.
The network connection display appears.
f Select [Yes] and press ENTER.
The server checks the version information.
g On the version confirmation screen, select
[Yes] and press ENTER.
The Software License Agreement appears.
h After reading the content to accept the terms,
select [Agree] and press ENTER.
The software is downloaded and automatically starts
updating the software.
• When downloading the software:
– “DOWNLOADING XX%” appears on the top
or front panel display, indicating progress.
– If download fails, an error message appears on
the screen.
• When updating the software:
– “VERSION UP FINISH” appears on the top or
front panel display, indicating the update was
successful.
– If update fails, “VERSION UP FAIL” appears
on the top or front panel display, and ends the
update sequence.
Notes
• Call “Home Entertainment Server” Customer Call Center (1-877-531-
SONY (7669)) if an error message appears during software update.
• The server may automatically re-start a few times depending on the
updated content.
• Software update service may be discontinued without a prior notice.
System Settings
Settings
SERVER
Software Update
Set Password
All Media Guide Settings
Device Information
Settings
BrightBrightness of Front Panel
Off
Standard
On
HDMI Control
Standby Mode
Audio Display
Update Methods
Select a software update method.
When selecting [Network Update], you will need to
configure the network settings.
Disc Update Network Update
Network Connection
The network function is disabled during software
update. This update program is downloadable only
in the United States. When you download the
program, your device ID (MAC address) and
current software version will be sent to the
download server.
Do you want to proceed?
Ye s No
Checking for a newer version...
Please read this before downloading:
IMPORTANT - READ BEFORE DOWNLOADING ANY PROGRAM OR
ACCOMPANYING DOCUMENTATION ONLINE
DOWNLOADING ANY PROGRAM OR ACCOMPANYING DOCUMENTATION
INDICATES YOUR ACCEPTANCE OF THIS AGREEMENT. IF YOU DO NOT
AGREE WITH THIS AGREEMENT, YOU MAY NOT DOWNLOAD ANY PROGRAM
OR ACCOMPANYING ONLINE DOCUMENTATION.
SOFTWARE LICENSE AGREEMENT
Sony Electronics Inc, ("Sony") furnishes the program and accompanying online
documentation and, with its licensors, licenses their use to you, all as provided in
this Agreement.
Agree
Software User License Agreement 1/9
Decline
Software Download
Downloading software update c
To cancel, select [Cancel],
55 / 100 %
Cancel
142
Glossary
AAC (page 52)
“Advanced Audio Coding” is a digital
audio codec adapted for digital
broadcast. It features a high compression
rate and high quality audio comparable
to music CDs.
ATRAC (page 52)
“ATRAC Advanced Lossless” is a
lossless audio compression technology
that compresses and expands CD audio
data completely, thus reproducing the
original CD quality audio.
ATSC (page 56)
A technical standard for digital
broadcasts in the U.S. The specification
adapts MPEG-2 for video compression,
and AC-3 for audio compression.
AVCHD (page 11, 149)
The AVCHD format is a high definition
digital video camera format used to
record SD (standard definition) or HD
(high definition) signals of either the
1080i specification*
1
or the 720p
specification*
2
on DVDs, using efficient
data compression coding technology.
The MPEG-4 AVC/H.264 format is
adopted to compress video data, and the
Dolby Digital or Linear PCM is used to
compress audio data. The MPEG-4
AVC/H.264 format is capable of
compressing images at higher efficiency
than that of the conventional image
compression format. The MPEG-4
AVC/ H.264 format enables a high
definition (HD) video signal shot on a
digital video camera recorder to be
recorded on DVDs in the same way as
for a standard definition (SD) television
signal.
*
1
A high definition specification that
utilizes1080 effective scanning lines and
the interlace format.
*
2
A high definition specification that utilizes
720 effective scanning lines and the
progressive format.
BD-R (page 11, 148)
BD-R (Blu-ray Disc Recordable) is a
recordable, write-once Blu-ray Disc,
available in the same capacities as the
BD below. Since contents can be
recorded and cannot be overwritten, a
BD-R can be used to archive valuable
data or storing and distributing video
material.
BD-RE (page 11, 148)
BD-RE (Blu-ray Disc Rewritable) is a
recordable and rewritable Blu-ray Disc,
available in the same capacities as the
BD below. The re-recordable feature
makes extensive editing and time-
shifting applications possible.
BD-ROM (page 11, 149)
BD-ROMs (Blu-ray Disc Read-Only
Memory) are commercially produced
discs and are available in the same
capacities as the BD below. Other than
conventional movie and video contents,
these discs have enhanced features such
as interactive content, menu operations
using pop-up menus (see below),
selection of subtitle display, and
slideshow. Although a BD-ROM may
contain any form of data, most BD ROM
discs will contain movies in High
Definition format, for playback on Blu-
ray Disc players.
Blu-ray Disc (BD) (page 11)
A disc format developed for recording/
playing high-definition (HD) video (for
HDTV, etc.), and for storing large
amounts of data. A single layer Blu-ray
Disc holds up to 25 GB, and a dual-layer
Blu-ray Disc holds up to 50 GB of data.
Chapter (page 40, 81)
Sections of a picture or a music feature
that are smaller than titles. A title is
composed of several chapters.
Depending on the disc, no chapters may
be recorded.
Copy protection signals (page 98)
Copy restriction set by copyright
owners, etc.
These signals are included in some
software or TV programs and restrict
recording.
Cover Art (page 32, 77, 88)
The artwork displayed on the front cover
of pre-recorded CD, DVD, and Blu-Ray
discs.
CPRM (page 98)
“Content Protection for Recordable
Media” is a technology for protecting
digital entertainment content on
recordable media.
Downmix (page 119)
A process in which surround sounds are
converted to have fewer channels than
the original source.
DHCP (Dynamic Host Configuration
Protocol) (page 121)
A set of rules to automatically assign
settings necessary for network
communication.
Usually the router or the Internet service
provider’s server functions as the DHCP
server.
DLNA (Digital Living Network
Alliance) (page 74)
An association that formulates audio/
photo/video distribution among PCs and
other digital devices in a home network
environment, or the format itself.
DLNA certified devices are
interoperable with each other, thus
making them easy to communicate on
the network.
Dolby Digital (page 114)
Digital audio compression technology
developed by Dolby Laboratories. This
technology conforms to multi-channel
surround sound. The rear channel is
stereo and there is a discrete subwoofer
channel in this format. Dolby Digital
provides the same discrete channels of
high quality digital audio found in
“Dolby Digital” theater surround sound
systems. Good channel separation is
realized because all of the channel data is
recorded discretely and little
deterioration occurs because all channel
data processing is digital.
Dolby Surround (Pro Logic)
(page 119)
Audio signal processing technology that
Dolby Laboratories developed for
surround sound. When the input signal
contains a surround component, the Pro
Logic process outputs the front, center
and rear signals. The rear channel is
monaural.
DRM (Digital Rights Management)
(page 53)
Technologies for protecting the
copyright of digital content, mainly by
limiting its usages and copying.
DTS (page 114)
Digital audio compression technology
that DTS, Inc. developed. This
technology conforms to multi-channel
surround sound. The rear channel is
stereo and there is a discrete subwoofer
channel in this format. DTS provides the
same discrete channels of high quality
digital audio.
Good channel separation is realized
because all of the channel data is
recorded discretely and little
deterioration occurs because all channel
data processing is digital.
DTS-HD (page 59)
DTS-HD is an extended format of the
Coherent Acoustics audio coding
system, which also encompasses DTS
Digital Surround, DTS-ES, and DTS 96/
24. DTS-HD is highly flexible in
supporting the number of discrete
surround sound channels. While 7.1ch
Disc
Title
Chapter

143
Additional Information
surround sound is planned for Blu-ray
Discs, the audio signals can be
downmixed to 5.1 or 2 channels for
backward compatibility, and the
reproduced audio quality can either be at
the bit rate of DTS Digital Surround or
the lossless mode.
DVD VIDEO (page 11, 149)
A disc format that contains up to eight
hours of moving pictures on a disc the
same diameter as a CD. A single-layer
single sided DVD holds up to 4.7 GB; a
double layer single-sided DVD, 8.5 GB;
a single layer double-sided DVD, 9.4
GB; double-layer double-sided DVD, 17
GB. The MPEG 2 format is adopted for
the efficient video data compression.
The variable rate coding technology that
changes the data to be allocated
according to the status of the picture is
adopted for reproducing high-quality
pictures. Audio information is recorded
in a multi-channel format, such as Dolby
Digital, allowing for a realistic audio
presence.
DVD-R (page 11, 148)
A DVD-R is a recordable disc that is the
same size as a DVD VIDEO. Contents
can be recorded only once to a DVD-R,
and will have the same format as a DVD
VIDEO. The DVD-R has two different
modes: VR mode and Video mode.
DVDs created in Video mode have the
same format as a DVD VIDEO, while
discs created in VR (Video Recording)
mode allow the contents to be
programmed or edited.
DVD-RW (page 11, 148)
A DVD-RW is a recordable and
rewritable disc that is the same size as a
DVD VIDEO. The DVD-RW has two
different modes: VR mode and Video
mode. DVDs created in Video mode
have the same format as a DVD VIDEO,
while discs created in VR (Video
Recording) mode allow the contents to
be programmed or edited.
DVD+R (page 11, 148)
A DVD+R (read “plus R”) is a
recordable disc that is the same size as a
DVD VIDEO. Contents can be recorded
only once to a DVD+R, and will have the
same format as a DVD VIDEO.
DVD+RW (page 11, 148)
A DVD+RW (read “plus RW”) is a
recordable and rewritable disc.
DVD+RWs use a recording format that
is comparable to the DVD VIDEO
format.
Film-based software, Video-based
software (page 112)
DVDs can be classified as Film-based or
Video-based software. Film-based
DVDs contain the same images (24
frames per second) that are shown at
movie theaters. Video-based DVDs,
such as television dramas or sitcoms,
display images at 30 frames (or 60
fields) per second.
Frame (page 113)
Images that comprise moving pictures.
The moving pictures consist of 30
frames per second.
Hard disk drive (page 5, 11)
A hard disk drive is a whole mechanical
system that consists of disks and drive.
Disks are flat, circular, rigid plates
coated with a thin magnetic media.
Magnetic heads record data on the
rapidly spinning disks, and this enables
the speedy and efficient reading and
writing of data.
HDMI (High-Definition Multimedia
Interface) (page 23, 102, 105)
HDMI is an interface that supports both
video and audio on a single digital
connection. The HDMI connection
carries standard to high definition video
signals and multi-channel audio signals
to AV components such as HDMI
equipped TVs, in digital form without
degradation.
The HDMI specification supports HDCP
(High-bandwidth Digital Contents
Protection), a copy protection
technology for digital entertainment
contents for HDMI.
HDV (HDV format) (page 39)
A video format developed for DV
cassettes to record and play high-
definition pictures.
The server supports Interlace format
signals of 1080 effective scanning lines
(1080i).
When a compatible digital video camera
is connected, the server can record the
imported pictures on the HDD or a BD in
the original high-definition picture
quality.
Interlace format (page 101, 103)
Interlace format shows every other line
of an image as a single “field” and is the
standard method for displaying images
on television. The even number field
shows the even numbered lines of an
image, and the odd numbered field
shows the odd numbered lines of an
image.
IP Address (page 121)
Device ID information used according to
TCP/IP (Transmission Control Protocol/
Internet Protocol) on the network. IP
addresses are expressed as a sequence of
numbers in one to three digits separated
by dots (e.g., 192.168.0.2).
LPCM (Linear PCM) (page 52, 114)
A digital audio format that does not
cause deterioration in data compression
and expansion.
MAC Address (Media Access
Control Address) (page 117)
Unique numbers assigned to each LAN
terminal to identify devices connected to
the network.
You can check the server’s MAC
address in [Settings] – [Device
Information].
Metadata (page 137)
Content information that the AMG
database service provides in the Internet
(e.g., title names of music CDs and BD/
DVD movies). Metadata contains artist
names, genres, credits, copyright info,
product numbers, etc.
Modem (page 26)
Device used for Internet connection.
Modems are usually connected to a
router in a home environment. Either a
DSL Modem or a cable modem can be
used, depending on the line connecting
to the Internet service provider.
MPEG-2 (page 55)
One of the video data compression
schemes established by the Moving
Picture Experts Group (MPEG), which is
adopted for DVD VIDEOs and digital
broadcasts worldwide. The scheme
specifies MPEG-2 PS (Program Stream)
for recordable media such as a DVD
VIDEO, and MPEG-2 TS (Transport
Stream) for digital broadcasts and other
communications.
MP3 (page 52, 111)
An audio file format that compresses
PCM signals into 1/10 of its original
size.
Parental Control (page 118)
A function of BD-ROMs/DVD VIDEOs
to limit playback of the disc by the age of
the users according to the limitation level
in each country or area. The limitation
varies from disc to disc; when it is
activated, playback is completely
prohibited, violent scenes are skipped or
replaced with other scenes and so on.
PCM (page 114)
Pulse Code Modulation is one of the
methods for converting analog signals to
digital data. The analog signal is
sampled regularly at uniform intervals,
and then quantized to a series of symbols
in a digital code. The quality of data is
determined by the sampling frequency
per second, and the quantization bit rate.
,continued

144
Pop-up menu (page 55)
An enhanced menu operation available
on BD-ROMs. The pop-up menu
appears when MENU is pressed during
playback, and can be operated while
playback is in progress.
Progressive signals (page 101,
103)
Compared to the Interlace format that
alternately shows every other line of an
image (field) to create one frame, the
Progressive format shows the entire
image at once as a single frame. This
means that while the Interlace format can
show 30 frames/60 fields in one second,
the Progressive format can show 60
frames in one second. The overall
picture quality increases and still images,
text, and horizontal lines appear sharper.
Router (page 26)
Device that relays data flow from
network to network. Routers are usually
installed between the Internet and the
home network. Some routers are capable
of connecting multiple devices to the
Internet.
Server/client (page 74)
In this manual, “client device” refers to
devices that receive and play music
content on the home network.
And, HES-V1000 (this unit) that shares
music in response to the client's request,
is called “server.”
SESF (Self-Encoded Stream
Format) (page 56)
“Self-Encoded Stream Format” is a
format defined in the Blu-ray Disc
application specification. It contains
MPEG-2 transport stream, which is
encoded from analog SD (Standard
Definition) TV signals or re-encoded
from digital SDTV signals or digital
broadcast streams.
Title (page 77)
The longest section of a picture or music
feature on a DVD, movie, etc., in video
software, or the entire album in audio
software.
Track (page 88)
Sections of a music feature on a CD (a
song).
Specifications
System
Laser: Semiconductor laser
200 Disc Changer:
For 12 cm discs, up to 196 can be
loaded; for 8 cm discs, up to 4.
Supported memory card
Memory Stick:
Memory Stick™ (supports standard/
Duo size, Memory Stick PRO™,
Memory Stick PRO-HG, Memory
Stick Micro (M2) and high speed
data transmission)
CF:
CompactFlash
®
(TypeI/II),
MicroDrive
®
SD:
SD Memory Card, miniSD™ Card,
microSD™ Card
xD:
xD-Picture Card™
Audio characteristics (BD-ROM/
DVD-ROM/CD Playback):
Frequency response: ±2 dB (20 to 20
kHz)
Harmonic distortion: 0.01% (22 kHz
LPF)
Signal-to-noise ratio (S/N): 96 dB
(A, 22 kHz LPF)
Dynamic range: 96 dB (A, 22 kHz
LPF)
Inputs/Outputs
(Jack name: Jack type/Output level/
Load impedance)
AUDIO OUT L/R:
Phono jack/2 Vrms/10 kilo ohms
LINE OUT AUDIO (L/R):
Phono jack/2 Vrms/10 kilo ohms
DIGITAL OUT (OPTICAL):
Optical output jack/–18 dBm (wave
length 660 nm)
DIGITAL OUT (COAXIAL):
Phono jack/0.5 Vp-p/75 ohms
HDMI OUT:
HDMI 19-pin standard connector
COMPONENT VIDEO OUT(Y, P
B,
P
R):
Phono jack/Y: 1.0 Vp-p/P
B, PR:
progressive or interlace
= 0.7 Vp-p/75 ohms
LINE OUT VIDEO: Phono jack/1.0
Vp-p/75 ohms
LINE OUT S VIDEO:
4-pin mini DIN/Y: 1.0 Vp-p,
C: 0.286 Vp-p/75 ohms
LINE IN 1 AUDIO (L/R):
Phono jack/2 Vrms/Over 50 kilo
ohms
LINE 2 AUDIO (L/R) (monaural):
Phono jack/2 Vrms/Over 50 kilo
ohms
LINE IN 1, 2 VIDEO:
Phono jack/1.0 Vp-p/75 ohms
LINE IN 1, 2 S VIDEO:
4-pin mini DIN/Y:1.0 Vp-p,
C:0.286 Vp-p/75 ohms
HDV 1080i/DV IN:
i.LINK S100 4-pin connector/
HDV1080i IN, DV IN
CONTROL S IN/IR IN: Mini jack
LAN (10/100): 10BASE-T/100BASE-
TX Connector
General
Power requirements:
120 V AC, 60 Hz
Power consumption: 70 W
Dimensions (approx.):
308 × 803 × 401 mm (12
1
/
4
×
31
5
/
8
×15
7
/
8
inch) (width/height/
depth) excl. projecting parts
Mass (approx.): 48 kg (105
3
/
4
lb)
Operating temperature:
5 ºC to 35 ºC (41°F to 95°F)
Operating humidity:
25 % to 80 %
Supplied accessories
See page 22.
Specifications and design are subject to
change without notice.
Disc
Track

145
Additional Information
About Trademarks and
Copyrights
• “AVCHD” and the “AVCHD” logo are trademarks of
Matsushita Electric Industrial Co., Ltd. and Sony Corporation.
• Java and all Java-based trademarks and logos are trademarks or
registered trademarks of Sun Microsystems, Inc.
• Esmertec and Jbed are trademarks or registered trademarks of
Esmertec AG.
Copyright
©
2000-2007 Esmertec AG.
• Built with Linter Database.
Copyright
©
2003-2008 Brycen Corp.,Ltd. All rights reserved.
• HDV and HDV logo are trademarks of Sony Corporation and
Victor Company of Japan, Limited (JVC).
• , “XMB”, and “xross media bar” are trademarks of Sony
Corporation and Sony Computer Entertainment Inc.
• “Remote Commander” is a registered trademark of Sony
Corporation.
• Sony Corporation is an authorized licensee of the
CompactFlash
®
and trademarks.
• , “x-Application”, “x-Pict Story”, and “x-ScrapBook” are
trademarks or registered trademarks of Sony Corporation.
• i.LINK is a name to denote IEEE 1394. i.LINK and are the
trademarks of SONY.
• or xD-Picture card™ is a trademark of Fuji Photo Film
Co., Ltd.
• DLNA and DLNA CERTIFIED are trademarks and/or service
marks of Digital Living Network Alliance.
• HDMI, the HDMI logo and High-Definition Multimedia
Interface are trademarks or registered trademarks of HDMI
Licensing LLC.
• Pentium is a registered trademark of Intel Corporation.
• “Blu-ray Disc” and are trademarks.
• “DVD+RW,” “DVD-RW,” “DVD+R,” “DVD-R,” “DVD
VIDEO,” and “CD” logos are trademarks.
• “Memory Stick”, , “Memory Stick Duo”, “Memory
Stick PRO”, “Memory Stick PRO-HG”, “Memory Stick
Micro” and “M2” are trademarks or registered trademarks of
Sony Corporation.
• “x.v.Color” and are trademarks of Sony
Corporation.
• “BRAVIA” is a trademark of Sony Corporation.
• “BRAVIA Theatre Sync” is a trademark of Sony Corporation.
• “Microsoft,” “Windows” and “Windows Vista” are either
registered trademarks or trademarks of Microsoft Corporation
in the United States and/or other countries.
• Other system and product names are generally trademarks or
registered trademarks of the manufacturers. ™ and ® marks
are not indicated in this document.
• CompactFlash is a registered trademark of SanDisk
Corporation.
• MicroDrive is a registered trademark of the IBM Corporation.
•
© 2007 All Media Guide, LLC
Content and technology provided by All Media Guide
®
.
About i.LINK
The HDV1080i/DV IN jack on this server is an i.LINK
compliant DV IN jack. This section describes the i.LINK
standard and its features.
This device does not support the DTLA copy protection
technology.
What is i.LINK?
i.LINK is a digital serial interface for handling digital video,
digital audio and other data in two directions between equipment
having the i.LINK jack, and for controlling other equipment.
i.LINK-compatible pieces of equipment can be connected by a
single i.LINK cable. Possible applications are operations and
data transactions with various digital AV devices. When two or
more i.LINK-compatible equipment are connected to this
recorder in a daisy chain, operations and data transactions are
possible with not only the equipment that this recorder is
connected to but also with other devices via the directly
connected equipment.
Note, however, that the method of operation sometimes varies
according to the characteristics and specifications of the
equipment to be connected, and that operations and data
transactions are sometimes not possible on some connected
equipment.
◆About the name “i.LINK”
i.LINK is a more familiar term for IEEE 1394 data transport bus
proposed by SONY, and is a trademark approved by many
corporations. IEEE 1394 is an international standard
standardized by the Institute of Electrical and Electronics
Engineers.
i.LINK baud rate
i.LINK’s maximum baud rate varies according to the equipment.
Three maximum baud rates are defined:
S100 (approx. 100 Mbps*)
S200 (approx. 200 Mbps)
S400 (approx. 400 Mbps)
The baud rate is listed under “Specifications” in the instruction
manual of each device. It is also indicated near the i.LINK jack
on some equipment.
The maximum baud rate of this server is “S100.”
When the server is connected to equipment having a different
maximum baud rate, the baud rate sometimes differs from the
indicated baud rate.
* What is Mbps?
Mbps stands for megabits per second, or the amount of data that can be
sent or received in one second. For example, a baud rate of 100 Mbps
means that 100 megabits of data can be sent in one second.
i.LINK functions on this server
The HDV1080i/DV IN jack on this server is for input only. The
DV IN jack will not accept MICROMV signals from equipment
such as a MICROMV digital video camera with an i.LINK jack.
Also, i.LINK jacks on D-VHS decks are different in signal
format (MPEG TS format) and cannot be connected. For
information about connection and uses, see page 39.
For details on precautions when connecting this server and
available applications, also see the instruction manuals for the
equipment to be connected.
,continued

146
Required i.LINK cable
Use the Sony i.LINK 4-pin-to-4-pin cable (during DV importing).
The server complies with IEEE 1394-1995 and IEEE 1394a-
2000 standards.
Notes about i.LINK
• i.LINK does not automatically guarantee compatible
operations among all i.LINK devices.
Transmission of data and control information between
connected devices depends on the capability of each device.
• Normally only one device can be connected to the server with
an i.LINK cable (DV cable). If you are connecting to a DV
device that can be connected to multiple DV devices, refer to
the instructions supplied with the DV device.
• The server can be connected to Sony HDV/DV digital
camcorders (excluding DCR-VX700/VX1000 and DCR-PC7).
• You cannot connect non-Sony HDV/DV digital camcorders to
the server.
About All Media Guide
All Media Guide, based in Ann Arbor, Michigan, is the leading
authority on music, movies and games. Since 1991, the company
has provided comprehensive content and technologies to support
the physical and digital distribution of entertainment media.
With thousands of musicologists, film historians, and game
specialists contributing over the years, AMG has created the
industry's cleanest, most in-depth database of information and
original editorial content.
AMG content and technologies are licensed by leading
consumer electronics manufacturers, retailers, and Internet sites.
Visit AMG at www.allmusic.com, www.allmovie.com and
www.allgame.com
What is AMG?
AMG stands for All Media Guide, which is a company that has
database of music CDs and DVDs. The database that the AMG
has (AMG Database) contains artist names and album names for
music CDs, and movie title, director, and casts for BD/DVD
movies.
The AMG function on this server
The server uses the database service that AMG provides (“AMG
Service”) to acquire music CD/BD and DVD movie data through
the Internet as follows:
• On automatic disc registration
The server automatically selects the most pertinent data from
the search results and registers the data as the BD/DVD
information.
• On manual disc registration
The server registers data that the user selected from the search
results.
Notes
• Internet connection is required to use the AMG Service. Configure the
Internet Settings correctly (page 121).
• You will need to agree on “End User License Agreement” in the
package and “AMG Terms of Use” displayed when you firstly use
AMG Service. (i) As to “AMG Terms of Use”, press HOME and select
[Settings] – [System Settings] – [All Media Guide Settings] (page 117)
and (ii) read “End User License Agreement” carefully.
• Data will not be displayed or received if it is not registered to the AMG
Database.
• The number of the displayed cover arts of music CDs, DVD-ROMs,
and BD-ROMs are limited. Such cover arts are displayed while the
corresponding CDs, DVD-ROMs and BD-ROMs remain in the
changer.
• AMG Service is provided only to commercially available music CDs,
DVD-ROMs, and BD-ROMs.*
• AMG Service may end without a prior notice.
* Nothing will be displayed for content copied on a recordable media
such as a CD-R/CD-RW and DVD-R.
Note that no data can be acquired for music content imported to the
HDD.
147
Additional Information
TV Display Viewing Options
On wide-screen TVs or TVs with a wide-screen function, the display options will depend on the TV’s wide-mode settings as follows. See also
your TV’s manual for the wide-mode settings.
For details about High-Definition ( ) and Standard-Definition ( ) pictures, see “About video signals” (page 100).
Source pictures
On a 16:9, wide screen On a 4:3 screen
When [Video Output Aspect Ratio] is set to
[16:9] [Original] and the TV’s wide-mode setting is on [4:3]
16:9 pictures
b
16:9 pictures
b
Letterboxed 4:3 pictures
(Picture area between black bands
is 16:9)
b
or
or
Side-paneled 16:9 pictures
(Picture area between black bands
is 4:3)
b
or
or or
4:3 pictures
b
Side-paneled 16:9 pictures
(Picture area between black bands
is 4:3)
b
or
or or

148
About Removable Media
and Recording Modes
Recordable/playable discs
DVD-RWs (VR mode) and DVD-Rs (VR mode) recorded on this server are playable only on compatible devices. Note that these discs will not
play on a normal DVD player.
*1
Only when the recording mode is XP or SP and [Video Output Aspect Ratio] is set to [16:9] (page 112).
*2
You cannot record both 16:9 Letterbox pictures and 4:3 standard pictures in one title.
*3
The disc’s previous recordings will be erased after photos are copied.
a:Yes
×:No
Internal
HDD
Regular-shaped, 12 cm discs only
BD-RE BD-R
DVD-RW
(VR)
DVD-RW
(Video)
DVD-R
(VR)
DVD-R
(Video)
DVD+RW
DVD+R
DVD+R DL
Supported versions —
Ver.2.1
(single
layer)
Ver.1.1
(single
layer)
Ver.1.1, Ver1.1 CPRM,
Ver1.2, Ver1.2 CPRM
(6x-speed max)
Ver.2.0, Ver2.0 CPRM,
Ver2.1, Ver2.1 CPRM
(16x-speed max)
Up to 8x-
speed discs
Up to 16x-
speed discs
(Up to 8x-
speed for
DVD+DL)
Maximum
Recording Time
(approx)
543 hrs
26 hrs 41 min
(Single layer)
6 hrs 6 hrs 6 hrs 6 hrs 6 hrs
6hrs
(10 hrs 51
min for
DVD+R
DL)
Rewritable aa
×
aa
××
a
×
Photo Import to
HDD
— aaaaaaaa
16:9 picture
recording
aaaaa
*1
aa
*1
××
Mixed recording of
16:9 and 4:3
aaaaa
*2
aa
*2
Always
records in
4:3
Always
records in
4:3
Video playback aaaaaaaaa
Photo (JPEG)
playback
aaaaaaaaa
HDD-to-Disc Photo
Copy
— aaa
*3
a
*3
Brand-new discs only a
*3
Brand-new
discs only
(DVD+R
DL is
unusable)
Playback
compatibility
—
Playable on
many BD
devices
Playable on
many BD
devices
Playable on
VR mode
compatible
devices
Playable on
many DVD
devices
(finalizing
required)
Playable on
DVD-R VR
mode
compatible
devices
(finalizing
required)
Playable on
many DVD
devices
(finalizing
required)
Playable on
many DVD
devices
Playable on
many DVD
devices
(finalizing
required)
149
Additional Information
Playback compatibility with commercially available disc packages, and discs
recorded on other devices
The server plays both 12 cm and 8 cm discs (excluding 8 cm DVD-R DL discs).
*1
BD-R/BD-RE (dual layer) are not supported.
*2
BD-RE (Ver.2.1) and BD-R (Ver.1.1) are supported.
*3
Only DVD-RAM compliant with Ver.2.0/2.1 Video Recording formats is supported for playback.
Remove the disc from its cartridge if it is a cartridge type (except Type 1).
*4
For music CDs with the logo only.
*5
Video titles guarded with “Copy Once” signals cannot be imported.
*6
Only when the disc is finalized.
*7
For DVD-R DL discs, only videos recorded in Video mode can be played.
*8
MP3 and Linear PCM are the playable format.
*9
DVD-R DL 8 cm discs are not supported.
*10
Only BD-REs/BD-Rs recorded in BDAV format are supported. BDMV format BD-REs/BD-Rs are not supported.
*11
Only hybrid Super Audio CDs have CD layers.
Notes
The server cannot play the following discs:
– BD-ROMs without region code “A.”
– DVDs that do not contain a region code “1” or “0 (ALL).”
– Discs recorded in a color system other than NTSC.
Playback compatibility with discs recorded in AVCHD format
The server can play the following discs. However, not all discs listed below are guaranteed to play.
*1
Finalized discs only.
*2
Does not include 8 cm DVD-R DL discs.
a:Yes
×:No
BD-
ROM
Recorded
on other
devices
DVD
VIDEO
Recorded on other devices
Music
CD
*4
Recorded
on other
devices
Super
Audio
CD
*11
BD-RE/
BD-R
(single
layer)
*1/
*2
DVD-
RW
DVD-R/
DVD-R
DL
*7
DVD+R
W/
DVD+R/
DVD+R
DL
DVD-
RAM
*3
Discs
recorded
in
AVCHD
format
CD-R/
CD-RW
Video Import to
HDD
× a
*5*10
× a
*5/*6
a
*5/*6
a
*5/*6
a
*5
× ×××
Photo Import to
HDD
× aaa
*6
a
*6
a
*6
a ××a ×
Video Playback aa
a
a
*6
a
*6
a
*6
aa
*6
×××
Music Playback
*8
× a × aa
*6
a
*6
a × aa
CD layer
only
Photo Playback aa aa
*6
a
*6
a
*6
a
×
×
a ×
a:Yes
×:No
DVD-RW
DVD-R/
DVD-R DL
DVD+RW
DVD+R/
DVD+R DL
DVD-RAM
a
*1
a
*1/*2
a
*1
a
*1
a
,continued
150
List of recording modes
Recording modes and recordable time for HDD/BD
* Recordable time may differ depending on the following (SR, LR or ER only):
– when recording additional videos on an edited BD.
– when recording only still images or sound.
Recording modes and recordable time for DVD
* *Recordable time may differ depending on the following (SP, LP or EP only):
– when recording videos in addition on an edited DVD.
– when recording only still images or sound.
Recording mode Recordable time (approx)
HDD BD*
1 layer (25GB)
DR (High Definition quality)
HDV/DV IN jack connection only 44 hours 1 hour 55 minutes
XR (High quality) 69 hours 3 hours 26 minutes
SR (Standard) 137 hours 6 hours 45 minutes
LR 272 hours 13 hours 23 minutes
ER (Long duration) 543 hours 26 hours 41 minutes
Recoding mode Recordable time (approx)
DVD**
DVD(except DVD+R DL) DVD+R DL
XP (High quality) 1 hour 1 hour 48 minutes
SP (Standard) 2 hours 3 hours 37 minutes
LP 4 hours 7 hours 14 minutes
EP (Long duration) 6 hours 10 hours 51 minutes
151
Additional Information
Supported memory card types
The following memory cards can be used with the unit
*1
.
*1
Not all memory cards are guaranteed to work.
Operation is not assured if nonsupported memory cards are used.
*2
Up to 8 GB of Sony “Memory Stick” are assured to be operable on
this server. However, not all “Memory Stick” are guaranteed to
function.
*3
Parallel data transfer (high-speed data transfer) is supported. Actual
transfer speed may vary depending on media.
*4
An adaptor (not supplied) is required.
*5
Copyright protect functions are not supported. SDHC Memory Cards
are not supported.
*6
Actual transfer speed is the same as “Memory Stick PRO”.
*7
Up to 8 GB of CompactFlash card are assured to be operable on this
server.
*8
Up to 8 GB of SD memory Card are assured to be operable on this
server.
*9
Up to 2 GB of xD-Picture card are assured to be operable on this
server.
Notes on using “Memory Stick”
• Do not eject a “Memory Stick” while reading data.
• Data may be damaged if:
– You eject a “Memory Stick” or turn off the server while the it is
reading data.
– You use a “Memory Stick” in a place where susceptible to static
electricity or electric noise.
• We recommend that you make a backup copy of important
data.
• Do not touch the terminal of the “Memory Stick” with your
fingers or metallic objects.
• Do not bend, drop, or impact a “Memory Stick.”
• Do not disassemble or modify a “Memory Stick.”
• Keep a “Memory Stick” away from water.
• Do not use or store a “Memory Stick” under an unfavorable
condition as below:
– Extremely hot place (such as in a parked car with windows closed in
summer, or a spot under direct sunlight)
– Humid place
– Place near corrosive substances
Note on using memory cards
Memory cards can only be used for import and playback of
photos.
The server does not import, play, or record video and music
content with any of the memory cards.
Memory Stick
*2
Memory Stick
®
Memory Stick Duo
™
Memory Stick PRO
™
*3
Memory Stick PRO Duo
™
*3
Memory Stick PRO-HG Duo
™
*6
Memory Stick Micro (M2)
*3
*4
CF
*7
CompactFlash
®
TypeI/II
MicroDrive
®
SD
*5 *8
SD Memory Card
miniSD
™
Card
microSD
™
Card
*4
xD-Picture Card
*9
xD-Picture Card
™
,continued
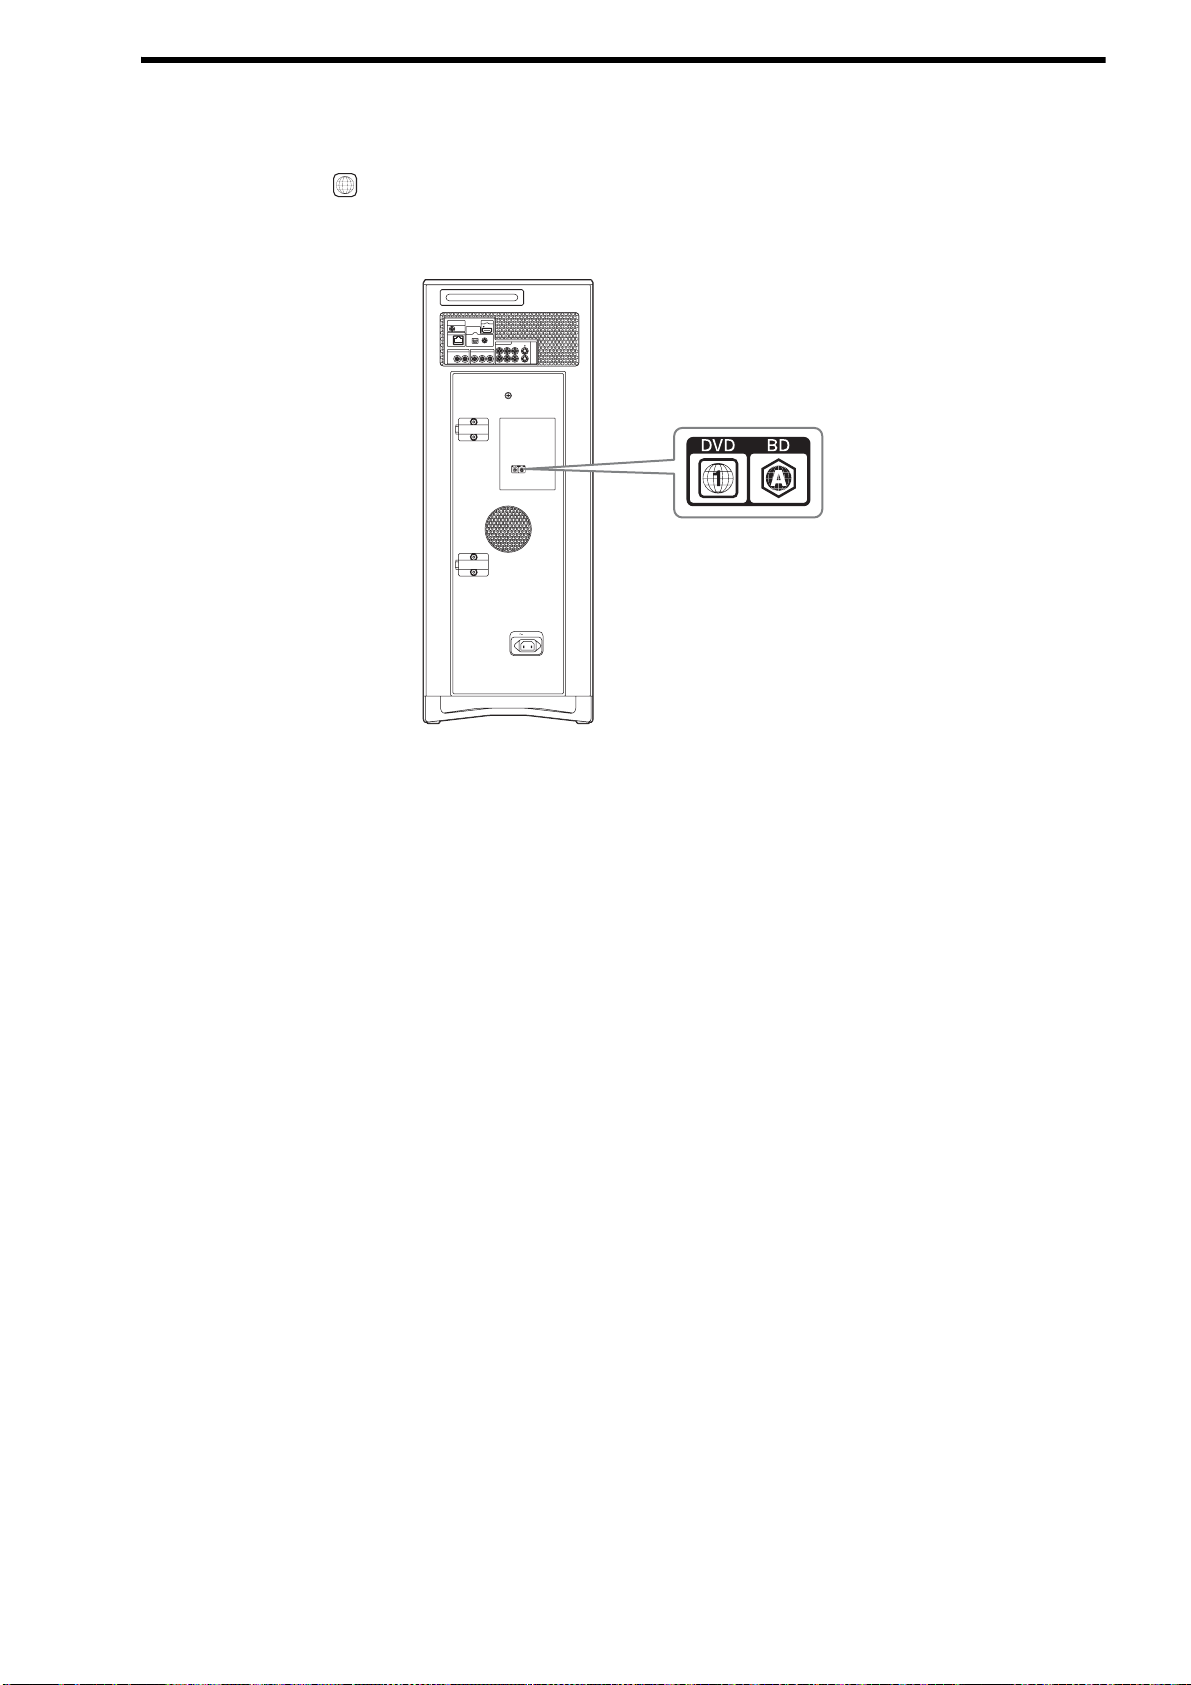
152
Region code
Your server has a region code printed on the back of the unit and will only play commercial BDs/DVDs (playback only) labeled with identical
region codes. This system is used to protect copyrights.
Commercial DVDs labeled will also play on this server.
If you try to play any other BD/DVD, the message “Playback of this disc is prohibited by area restriction” will appear on the TV screen.
Depending on the commercial BD/DVD, there may be no region code indication, even though playing the commercial BD/DVD is prohibited
by area restrictions.
ALL
PUSH/OPEN
AC IN
CONTROL S IN/
IR IN
HDMI OUT
COMPONENT VIDEO OUT
AUDIO OUT
R
R-AUDIO-L VIDEO
LINE
IN 1
OUT
S VIDEO
YP
B
P
R
LAN
(
10/100
)
OPTICAL COAXIAL
DIGITAL OUT
PCM/DTS/
DOLBY DIGITAL
L

153
Additional Information
Language Code
List
See page 118 for details.
The language spellings conform to the
ISO 639: 1988 (E/F) standard.
Code Language
1027 Afar
1028 Abkhazian
1032 Afrikaans
1039 Amharic
1044 Arabic
1045 Assamese
1051 Aymara
1052 Azerbaijani
1053 Bashkir
1057 Byelorussian
1059 Bulgarian
1060 Bihari
1061 Bislama
1066 Bengali; Bangla
1067 Tibetan
1070 Breton
1079 Catalan
1093 Corsican
1097 Czech
1103 Welsh
1105 Danish
1109 German
1130 Bhutani
1142 Greek
1144 English
1145 Esperanto
1149 Spanish
1150 Estonian
1151 Basque
1157 Persian
1165 Finnish
1166 Fiji
1171 Faroese
1174 French
1181 Frisian
1183 Irish
1186 Scots Gaelic
1194 Galician
1196 Guarani
1203 Gujarati
1209 Hausa
1217 Hindi
1226 Croatian
1229 Hungarian
1233 Armenian
1235 Interlingua
1239 Interlingue
1245 Inupiak
1248 Indonesian
1253 Icelandic
1254 Italian
1257 Hebrew
1261 Japanese
1269 Yiddish
1283 Javanese
1287 Georgian
1297 Kazakh
1298 Greenlandic
1299 Cambodian
1300 Kannada
1301 Korean
1305 Kashmiri
1307 Kurdish
1311 Kirghiz
1313 Latin
1326 Lingala
1327 Laothian
1332 Lithuanian
1334 Latvian; Lettish
1345 Malagasy
1347 Maori
1349 Macedonian
1350 Malayalam
1352 Mongolian
1353 Moldavian
1356 Marathi
1357 Malay
1358 Maltese
1363 Burmese
1365 Nauru
1369 Nepali
1376 Dutch
1379 Norwegian
1393 Occitan
1403 (Afan)Oromo
1408 Oriya
1417 Punjabi
1428 Polish
1435 Pashto; Pushto
1436 Portuguese
1463 Quechua
1481 Rhaeto-Romance
1482 Kirundi
1483 Romanian
1489 Russian
1491 Kinyarwanda
1495 Sanskrit
1498 Sindhi
1501 Sangho
1503 Singhalese
1505 Slovak
Code Language
1506 Slovenian
1507 Samoan
1508 Shona
1509 Somali
1511 Albanian
1512 Serbian
1513 Siswati
1514 Sesotho
1515 Sundanese
1516 Swedish
1517 Swahili
1521 Tamil
1525 Telugu
1527 Tajik
1528 Thai
1529 Tigrinya
1531 Turkmen
1532 Tagalog
1534 Setswana
1535 Tonga
1538 Turkish
1539 Tsonga
1540 Tatar
1543 Twi
1557 Ukrainian
1564 Urdu
1572 Uzbek
1581 Vietnamese
1587 Volapük
1613 Wolof
1632 Xhosa
1665 Yoruba
1684 Chinese
1697 Zulu
1703 Not specified
Code Language

154
Index
Words in brackets appear in the on-
screen displays.
Numerics
[48kHz/96kHz PCM] 114
A
AAC 52
[A-B Erase]
57, 81
[Add Video]
65
[Album Name]
88
[Albums]
38
[All Media Guide Settings]
28, 117
ATRAC
52
[Audio DRC]
119
[Audio Language]
118
[Audio Output ATT]
114
[Audio Settings]
114
[Auto Chapter Mark]
82, 111
[Auto Display]
116
[Auto-Group to Album]
111
AVCHD
142
AVCHD files
11, 112, 113
B
Batteries 27
BD
54, 93, 99
[BD Digital Audio Out]
119
[BD Parental Control]
118
[BD/DVD Menu Language]
118
BD/DVD Movies
54
[BD/DVD Viewing Settings]
118
BD-R
142
BD-RE
142
BD-ROM
142
[Black Level (COMPONENT OUT)]
113
[Black Level (VIDEO OUT)]
113
[Blank Disc]
35
Blu-ray Disc
142
‘BRAVIA’ Theatre Sync
24
[Brightness of Front Panel]
116
C
Call Guide 110
[Cancel]
78, 90
CF
144
[Change Genre]
77, 88, 89
[Change Release Date]
77, 88
[Change Theme]
65
Chapter
142
[Cinema Conversion Mode]
112
Cleaning cloth
4, 22
[Clear All]
77, 88, 89
[Combine]
81
[Combine Titles]
57, 81
Component video cable
103
Connecting
the video cords 23
CONTROL S jack
104
[Convert to Video Title]
68
Copy HDD to Disc
9
[Copy Multiple]
61
Copy Photos
8
[Copy to Disc]
57, 61, 65
[Create Playlist]
57, 81
Create x-Pict Story HD
8
Cursor mode
64
D
DATA CD 69
Date and Time Settings
120
[Digital Audio Output]
114
Disc
4
Disc Information
33
[Disc Manager]
110
[Divide]
81
[Divide Title]
57, 81
Dolby Digital
142
[Downmix]
119
DTS
142
DTS-HD
142
Dust-tight seals
20
DV
39
[DVD Parental Control]
118
DVD VIDEO
143
[DVD Wide Mode]
119
DVD+R
143
DVD+R DL
11
DVD+RW
143
DVD-R
143
DVD-RAM
11
DVD-RW
143
E
[Easy Setup] 123
[Edit]
57, 65, 81
Edit
50
[Edit Chapter]
57, 81
[ER]
40
Erase
50
[Erase All]
38
[Erase Chapter]
57
[Erase Multiple]
61
[Erase Titles]
55, 57, 81
External Input
9
[External Input Rec mode]
111
F
Files 38
Film based software
143
Folder
50
[Format]
93
[Function/Edit]
55
G
[Group Content] 55
H
Hard disc drive 11
HDD
38, 76
[HDD Initialization]
117
HDMI
143
[HDMI Audio Output]
114
HDMI cable
22, 23
[HDMI Control]
116
HDMI Control function
24, 116
[HDMI Resolution]
112
HDV
39
[HDV/DV Import Settings]
111
I
[Import] 67
Import Disc to HDD
9
[Import Multiple]
43, 45
[Import Settings]
111
[Information/Settings]
55, 57, 65
[Initialize Personal Settings]
124
Interlace format
143
Internet
26
[Internet Settings]
121
L
LAN cable 26
Line 1
9
Line 2
9
[Lock]
34
LPCM
47, 52
[LR]
40
M
Manufacturer Code 127
Memory Stick
144
Memory Stick Duo
144
Memory Stick Micro (M2)
144
Memory Stick PRO
144
Memory Stick PRO-HG Duo
144
microSD Card
144
miniSD Card
144
MP3
47, 52
Music
69
Music CD
11
[Music Import Settings]
111
“Music Transfer”
49
N
[Network Settings] 121
[Newly Registered]
71
O
Oldest First 55
[Output Resolution Priority]
112
P
Page mode 64
[Pause Mode]
113
Personal Videos
41
Photo
60, 86
[Photo Capture]
8
[Photo Settings]
115
[Play]
55, 65
[Play From Beginning]
55
[Playlist Settings]
40
Power cord
27
Pro Logic
142
Progressive format
144
[Protect]
34, 55
[Protection Cancel]
80
R
[Rec Mode] 40
[Recent First]
55
[Recorded]
40
[Remaining]
38
Remote
15, 27, 126
Remote commander
22
[Rename Album]
88
[Rename Artist]
88
[Rename Cast]
77

155
Additional Information
[Rename Composer] 89
[Rename Conductor]
89
[Rename Director]
77
[Rename Producer]
77
[Rename Title]
77
[Rename Track]
89
[Repeat]
73
[Reset to Factory Default]
124
Resetting
124
[Rotate (left)]
87
[Rotate (right)]
87
Router
26
S
S Video cable 104
[Sample Album]
8
[Sample Display]
115
Scan
15
SD Memory Card
36
[Set Chapter Marks]
82
[Set Password]
117
[Settings]
108
Shuffle
73
Slideshow
69
[Slideshow Effect]
115
[Slideshow Pace]
61
Slow
15
[Software Update]
116
[Sort By]
55
[SR]
40
[Standby Mode]
116
[Stereo 1]
40
[Stereo 2]
40
Stereo audio and video cable
25, 104
[Still Pictures]
61
[Subtitle Language]
118
[System Settings]
116
T
Title 144
Title List
54
[Title Total]
38
[Track Import]
46
Troubleshooting
134
TypeI/II
144
U
[Unknown Disc] 33, 35
[Unreadable Disc]
35
V
Video based software 143
Video cable
101
[Video Input 1]
112
[Video Output Aspect Ratio]
112
[Video Settings]
112
[View]
61
W
Wireless bridge 26
WMA
52
X
x.v.Color 24
xD-Picture Card
36
x-Pict Story HD
66
[x-Pict Story HD Time Display]
115
[XR]
40
x-ScrapBook
64
Y
[YCbCr/RGB(HDMI)] 112
YELLOW button
15
