Loading ...
Loading ...
Loading ...
4.
a. Crosscutting
(1) Heeling to the right will tend to slide the
workpiece toward the right along the rip
fence, as the cut is being made, and make a
square cut almost impossible.
(2) Heeling to the left will tend to slide the board
to the left along the fence.
b. Miter Cutting - Same as crosscutting, except to a
lesser or greater degree, depending upon the angle.
c. In-Ripping
(1) Heeling to the right will force the workpiece
against the rip fence.
(2) Heeling to the left will force the workpiece
away from the fence.
d. Out-Ripping - The exact reverse of in-ripping.
e. Checking and Adjusting to Eliminate "Heeling".
(1) Loosen the guard clamp knob and tilt the
guard upward at the front to expose the saw
blade, as shown in figure 75.
(2) Place a square against the rip fence and the
saw blade as shown in figure 75. The long leg
of the square must be held firmly against the
rip fence and table top and the short leg must
not touch any of the teeth on the saw blade.
(3) tf the square does not touch the
hollow-ground blade at points shown in figure
75, a heel condition exists (either to the left
or right). To correct the condition, proceed as
follows:
(a) Remove the left-hand carriage cover
(figure 75),
ib) Loosen the yoke clamp handle.
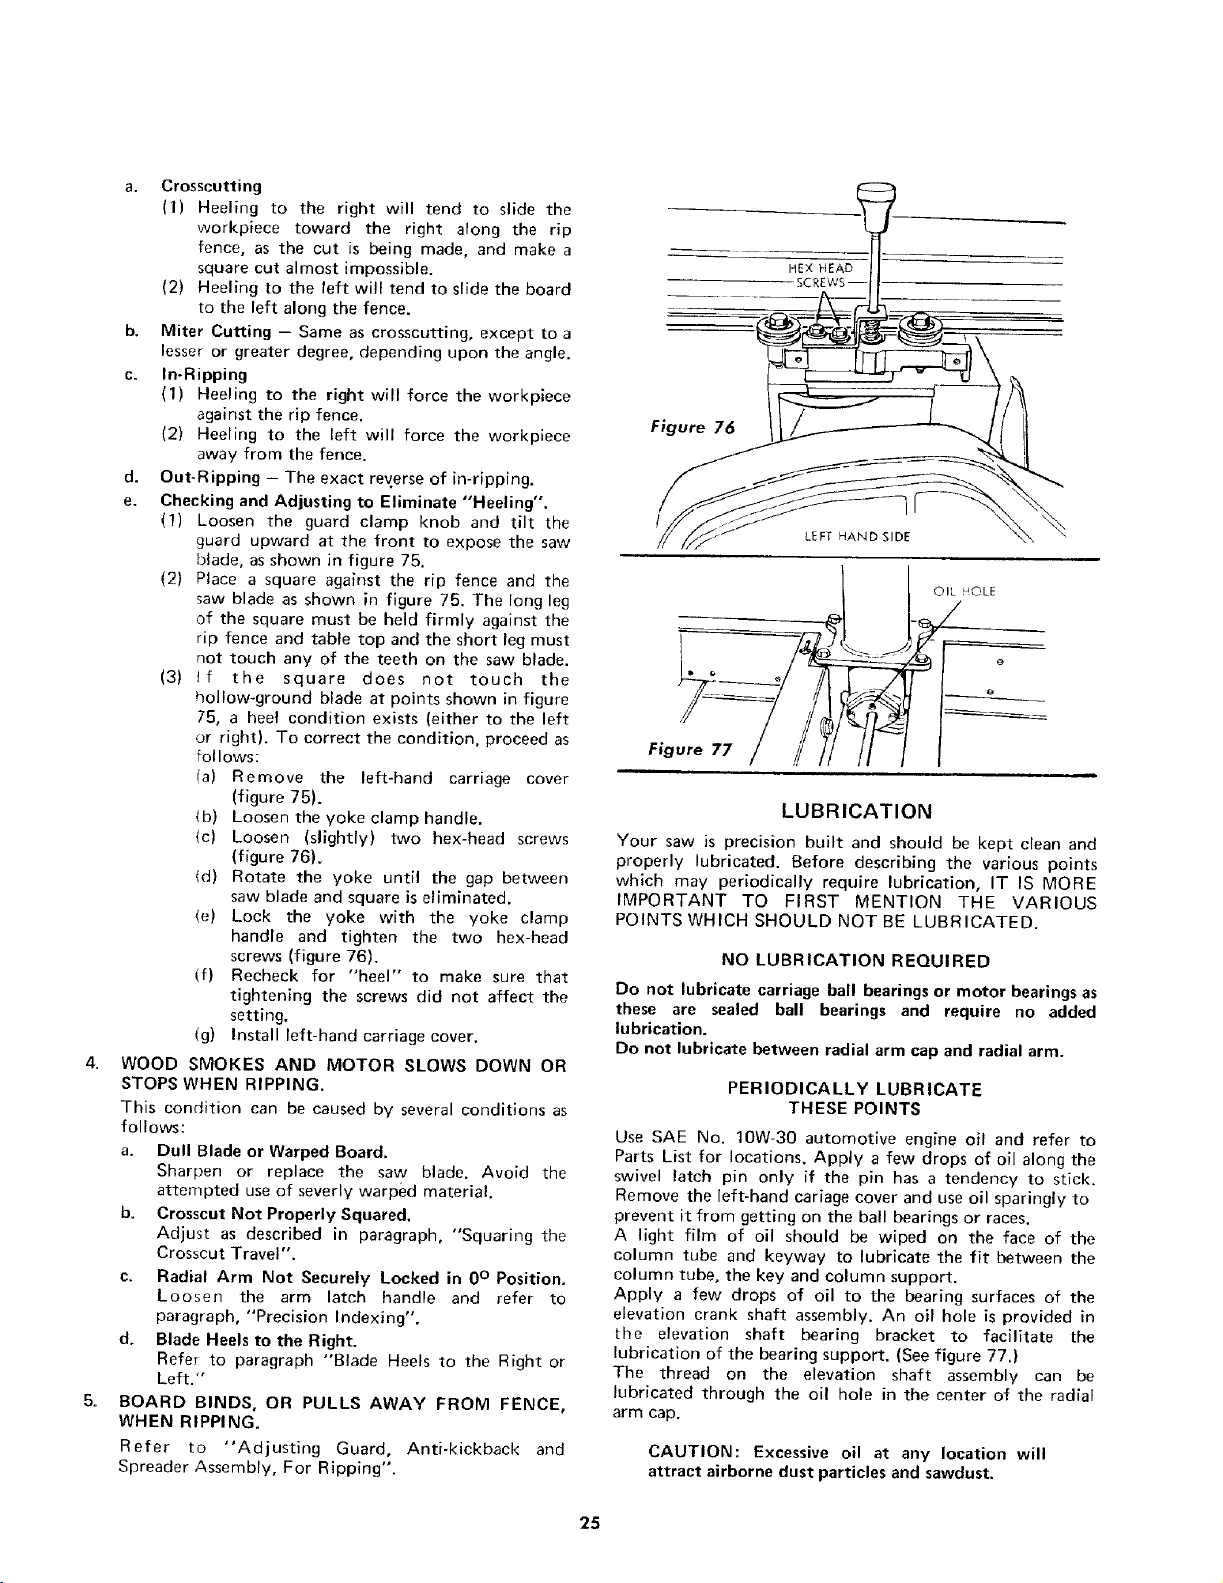
!c) Loosen (slightly) two hex-head screws
(figure 76).
_d) Rotate the yoke until the gap between
saw blade and square is eliminated.
<e) Lock the yoke with the yoke clamp
handle and tighten the two hex-head
screws (figure 76).
(f) Recheck for "heel" to make sure that
tightening the screws did not affect the
setting.
(g) Install left-hand carriage cover.
WOOD SMOKES AND MOTOR SLOWS DOWN OR
STOPS WHEN RIPPING.
This condition can be caused by several conditions as
follows:
a. Dull Blade or Warped Board.
Sharpen or replace the saw blade. Avoid the
attempted use of severly warped material.
b. Crosscut Not Properly Squared.
Adjust as described in paragraph, "Squaring the
Crosscut Travel".
c. Radial Arm Not Securely Locked in 0° Position.
Loosen the arm latch handle and refer to
paragraph, "Precision Indexing".
d. Blade Heels to the Right.
Refer to paragraph "Blade Heels to the Right or
Left."
BOARD BINDS, OR PULLS AWAY FROM FENCE,
WHEN RIPPING.
Refer to "Adjusting Guard, Anti-kickback and
Spreader Assembly, For Ripping".
HEX HEAD
SCREWS--
Figure 76
LEFT HAND SIDE
OIL _OLE
LUBRICATION
Your saw is precision built and should be kept clean and
properly lubricated. Before describing the various points
which may periodically require lubrication, IT IS MORE
IMPORTANT TO FIRST MENTION THE VARIOUS
POINTS WHICH SHOULD NOT BE LUBRICATED.
NO LUBRICATION REQUIRED
Do not lubricate carriage ball bearings or motor bearings as
these are sealed ball bearings and require no added
lubrication.
Do not lubricate between radial arm cap and radial arm.
PERIODICALLY LUBRICATE
THESE POINTS
Use SAE No. 10W-30 automotive engine oil and refer to
Parts List for locations. Apply a few drops of oil along the
swivel latch pin only if the pin has a tendency to stick.
Remove the left-hand cariage cover and use oil sparingly to
prevent it from getting on the ball bearings or races.
A light film of oil should be wiped on the face of the
column tube and keyway to lubricate the fit between the
column tube, the key and column support.
Apply a few drops of oil to the bearing surfaces of the
elevation crank shaft assembly. An oil hole is provided in
[he elevation shaft bearing bracket to facilitate the
lubrication of the bearing support. (See figure 77.)
The thread on the elevation shaft assembly can be
lubricated through the oil hole in the center of the radial
arm cap.
CAUTION: Excessive oil at any location will
attract airborne dust particles and sawdust.
25
Loading ...
Loading ...
Loading ...