Loading ...
Loading ...
Loading ...
2_RM [&ECH klAN tt_
LATCH
HANDLE
BEvEl lOCK _rdO_
Figure 28
Figure 30
Figure 3 !
Figure 32
Figure 33
MJTER
SCA[E
ZHNG
SCREWS
C.
d.
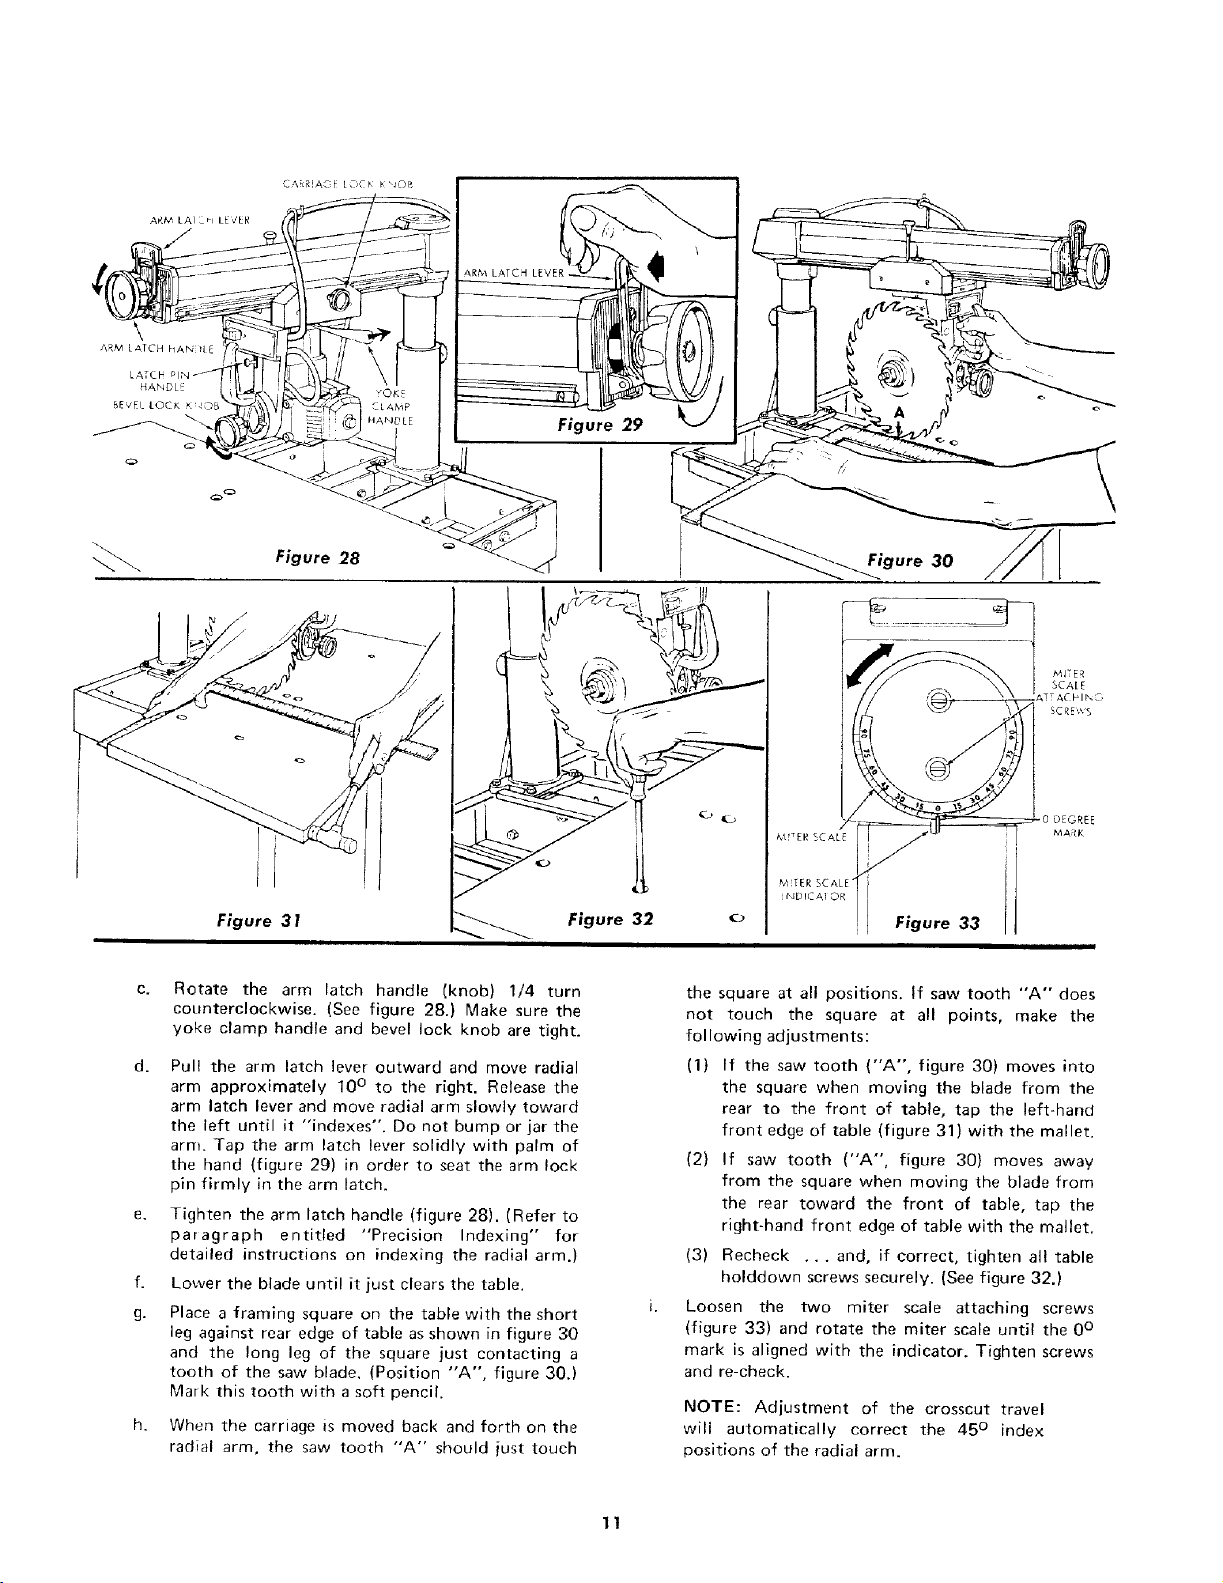
Rotate the arm latch handle (knob) 1/4 turn
counterclockwise. (See figure 28.) Make sure the
yoke clamp handle and bevel lock knob are tight.
Pull the arm latch lever outward and move radial
arm approximately 10 ° to the right. Release the
arm latch lever and move radial arm slowly toward
the left until it "indexes". Do not bump or jar the
arm. Tap the arm latch lever solidly with palm of
the hand (figure 29) in order to seat the arm lock
pin firmly in the arm latch.
e. Tighten the arm latch handle (figure 28). (Refer to
paragraph entitled "Precision Indexing" for
detailed instructions on indexing the radial arm.)
f. Lower the blade until it just clears the table.
g. Place a framing square on the table with the short
leg against rear edge of table as shown in figure 30
and the long leg of the square just contacting a
tooth of the saw blade. (Position "A", figure 30.)
Mark this tooth with a soft pencil.
When the carriage is moved back and forth on the
radial arm, the saw tooth "A" should just touch
the square at all positions. If saw tooth "A" does
not touch the square at all points, make the
following adjustments:
(1) If the saw tooth ("A", figure 30) moves into
the square when moving the blade from the
rear to the front of table, tap the left-hand
front edge of table (figure 31) with the mallet.
(2) If saw tooth ("A", figure 30) moves away
from the square when moving the blade from
the rear toward the front of table, tap the
right-hand front edge of table with the mallet.
(3) Recheck ... and, if correct, tighten all table
holddown screws securely. (See figure 32.)
Loosen the two miter scale attaching screws
(figure 33) and rotate the miter scale until the 0°
mark is aligned with the indicator. Tighten screws
and re-check.
NOTE: Adjustment of the crosscut travel
will automatically correct the 45 ° index
positions of the radial arm.
11
Loading ...
Loading ...
Loading ...