Loading ...
Loading ...
Loading ...
8 Philips · NeoPix 320
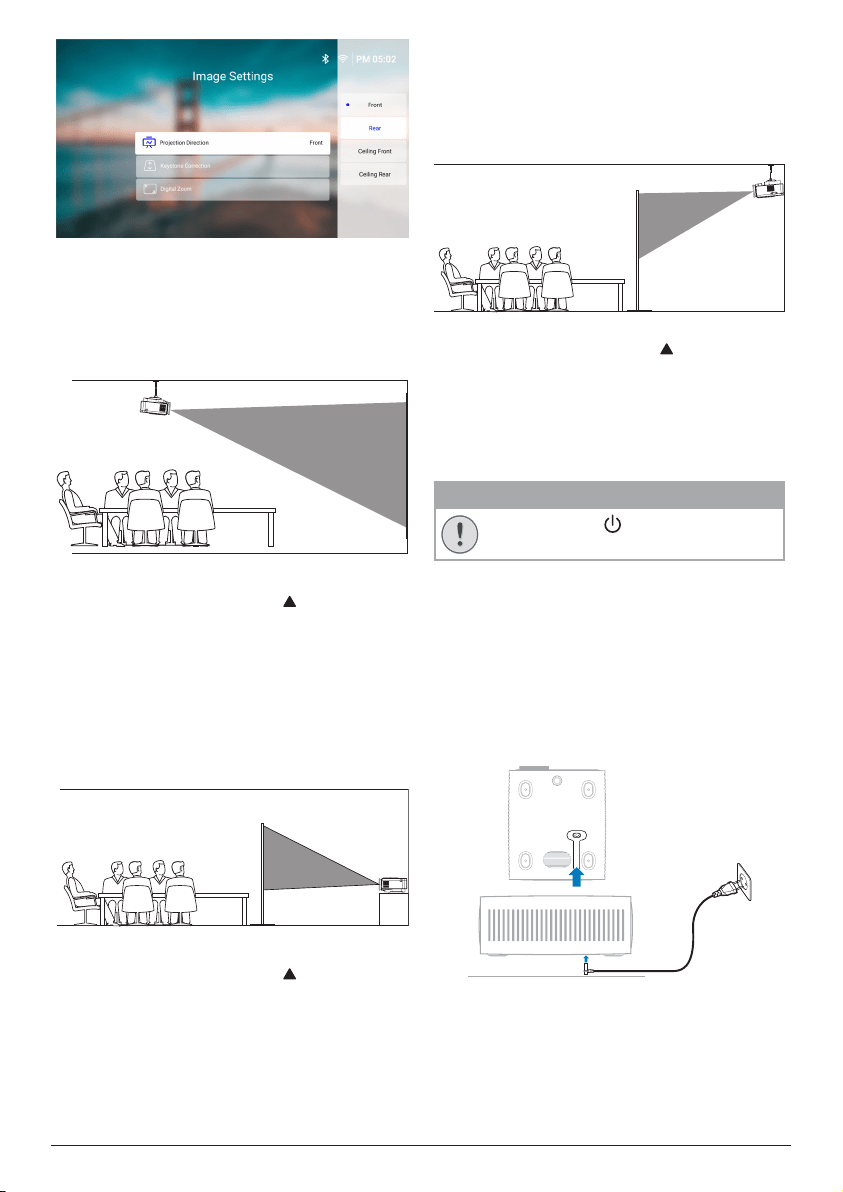
Ceiling Front
1 Mount the projector on the ceiling with
upside up in front of the projection screen.
A projector mount is required to mount the
projector on ceiling.
2 From the home screen, open the Quick
Settings panel by pressing on the
projector/remote control one or more times.
Then select Image > Projection Direction >
Ceiling Front.
Rear
1 Place the projector on a table behind the
projection screen. A special rear projection
screen is required.
2 From the home screen, open the Quick
Settings panel by pressing on the
projector/remote control one or more times.
Then select Image > Projection Direction >
Rear.
Ceiling Rear
1 Mount the projector on ceiling with upside
up behind the projection screen. To mount
the projector on ceiling behind the screen,
a projector mount and a special rear
projection screen are required.
2 From the home screen, open the Quick
Settings panel by pressing on the
projector/remote control one or more times.
Then select Image > Projection Direction >
Ceiling Rear.
Connect to power supply
CAUTION!
Always use the button to turn the
projector on and off.
1 Select a supplied power cable with the
correct plug (EU/UK/US).
2 Connect the power cable to the DC power
jack at the bottom of the projector.
3 Connect the power cable to an electrical
socket.
• The power LED on the projector lights
up in red.
b
c
Loading ...
Loading ...
Loading ...