Loading ...
Loading ...
Loading ...
12 Philips · NeoPix 320
4 Use home screen
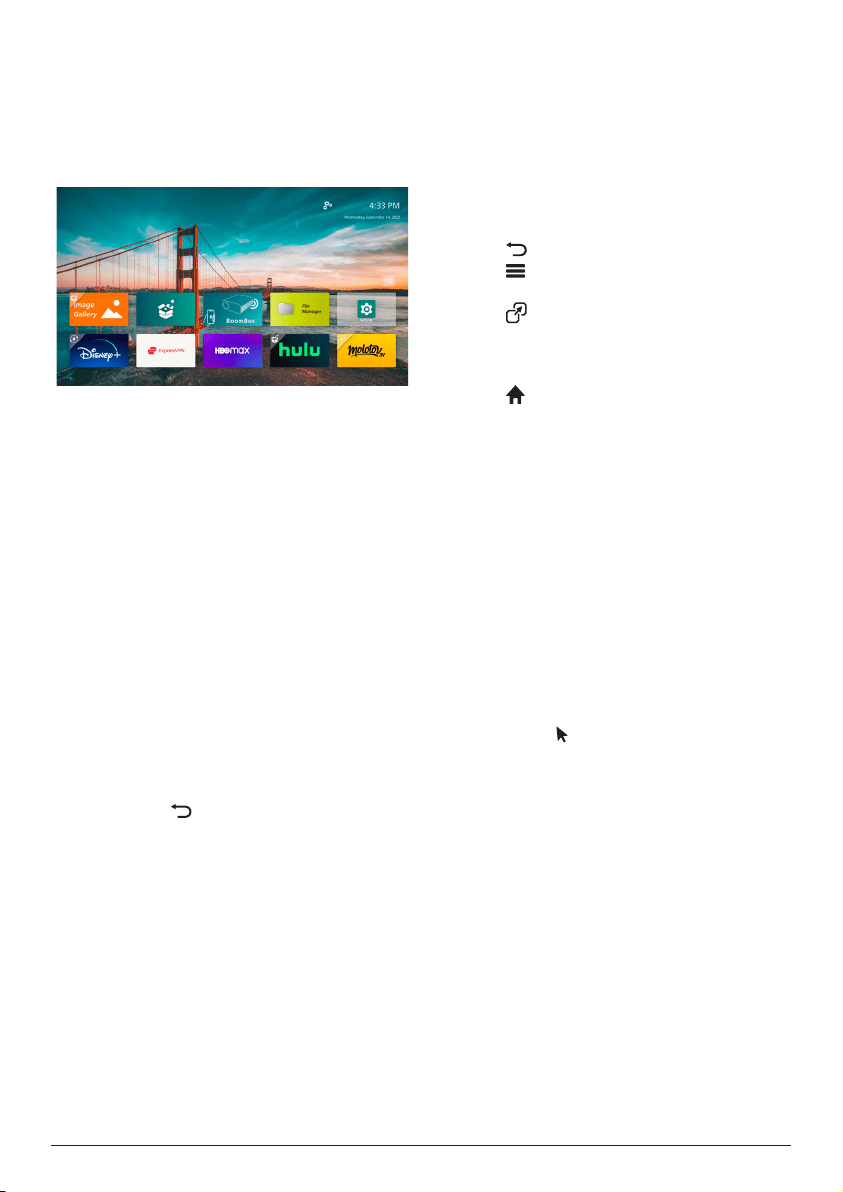
You will see the home screen of the built-in
operating system after setting up or turning on
the projector. The home screen is the jumping-
off point for starting all activities on the
projector.
From the home screen, you can:
• Open and configure the pre-installed apps.
For more details, see Open and configure
apps, page 13.
• Change the projector settings. For more
details, see Change projector settings,
page 22.
• View the date and time in upper-right
corner. You can toggle between the 12-hour
and 24-hour time formats by selecting the
time and pressing the OK button.
Navigate home screen
You can navigate the home screen using one of
the following:
• The remote control. For more deails, see
Navigate home screen with the remote
control, page 12.
• The control panel on the top of the
projector. Use the navigation buttons, OK
button and to navigate the home screen.
These buttons work in the same way as
those on the remote control.
• A USB input device such as a USB mouse or
keyboard. To learn how to connect and use
a USB input device, see Connect to a USB
mouse, keyboard or gamepad, page 14.
• A Bluetooth input device such as a
Bluetooth mouse or keyboard. To learn how
to connect a Bluetooth mouse or keyboard,
see Connect to a Bluetooth device, page
16�
Navigate home screen with the
remote control
The remote control gives you immediate and
easy access to everything on the home screen.
• Press the navigation button to select an
item (e.g. an app, a setting or a button) on
the screen.
• Press the OK button to confirm a selection
or change the value for the current setting.
• Press to return to the previous screen.
• Press to view more options when an app
is selected.
• Press to open the list of recently opened
apps. To switch to another app in the list,
select the app and then press the OK
button.
• Press to return to the home screen. Tip:
If the current input source is HDMI, pressing
this button will also switch the input source
back to Philips OS.
Use the on-screen pointer
The on-screen pointer gives you an alternative
way to select an item (e.g. an app, a setting or a
button) on the screen. It takes the place of the
navigation buttons on the remote control.
Connect the remote control via Bluetooth
If you did not connect the remote control to the
projector via Bluetooth during the setup (see
Set up the projector system, page 10) or
the remote control became disconnected, you
must make the connection before using the on-
screen pointer.
When you press on the remote control,
the projector will prompt you to connect the
remote control if it is disconnected. When this
happens, follow the on-screen instructions to
connect the remote control to the projector.
Notes:
• You can make the connection only when
Bluetooth is enabled on the projector.
Bluetooth is enabled by default. If it is
disabled, follow the instructions in Connect
to a Bluetooth device, page 16 to
enable it.
• On the Bluetooth setting screen, the remote
control appears as Philips AirMote.
• The LED indicator near the top of the
remote control lights up when you press a
button. It lights up in red when the remote
control is disconnected and blue when the
remote control is connected.
Loading ...
Loading ...
Loading ...