Loading ...
Loading ...
Loading ...
24 Philips · NeoPix 320
3 P
ress / or / to select a value for the
menu item.
4 Press
the OK button to make the change.
Note: For some menu items such as Digital
Zoom, the change takes effect once you
select a different value.
5 Press one or more times to exit the
projector's settings menu.
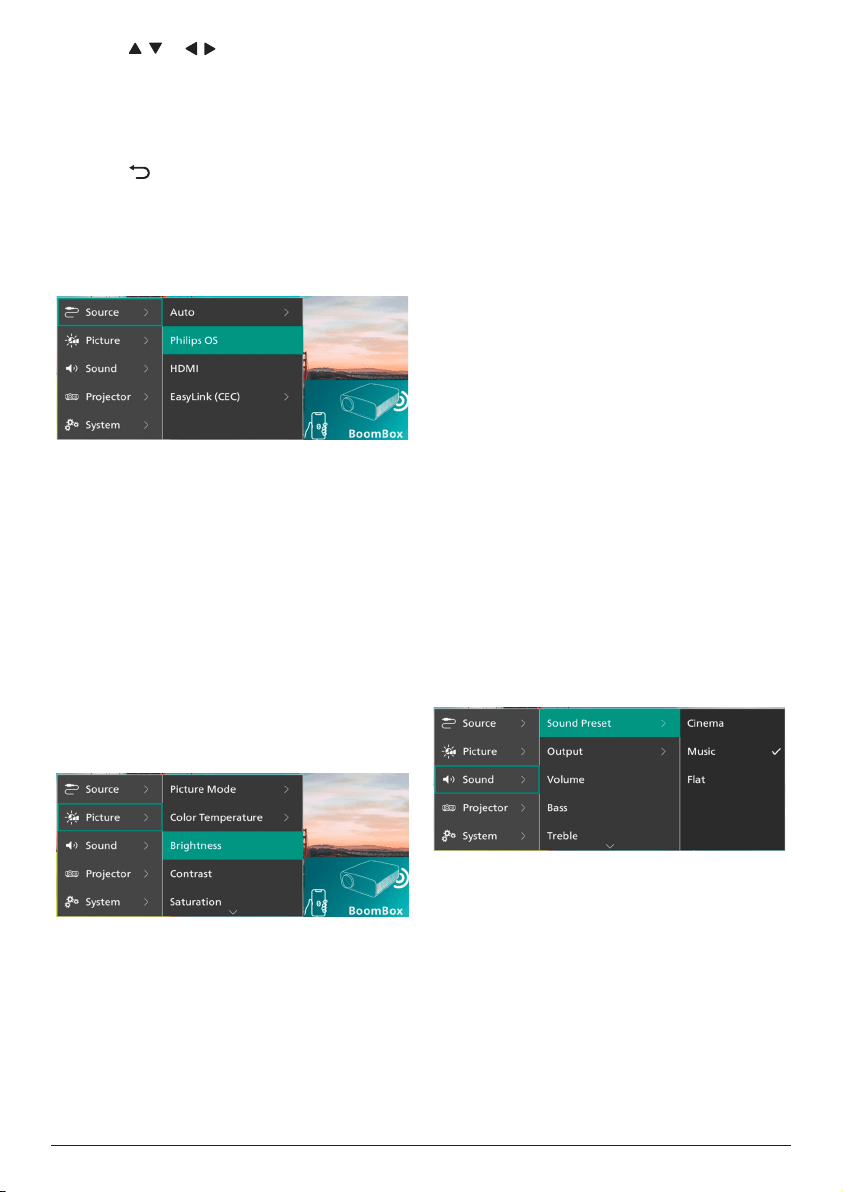
Input source settings
You can view and change the following input
source settings.
• Auto: Choose whether to let the projector
automatically switch to the correct input
source. The default value is On.
• Philips OS: Select this to use the internal
Philips OS as the input source. This is the
default input source.
• HDMI: Select this to use the device
connected to the projector's HDMI port as
the input source.
• EasyLink (CEC): Choose to enable or
disable HDMI™ CEC (Consumer Electronics
Control). The default value is Enabled.
Picture settings
You can view and change the following picture
settings.
• Picture Mode: You can set the projector
to use the following picture modes,
depending on your viewing environment or
preferences. After selecting a picture mode,
you can modify its settings.
• Standard: Display the picture with
normal brightness, contrast, saturation,
hue and sharpness levels.
• Vivid: Sharpen the image by increasing
the contrast, saturation and sharpness.
• Cinema: Optimize the settings for
movies.
• User: Define your own settings.
• Color Temperature: You can set the
projector to use the following color
temperature types. After selecting a color
temperature type, you can modify its
settings.
• Cool: Make the picture more bluish.
• Standard: Use a moderate color
temperature.
• Warm: Make the picture more reddish.
• User: Define your own settings.
• Brightness: Adjust the screen's overall
brightness.
• Contrast: Adjust the contrast of the bright
and dark areas of the image.
• Saturation: Adjust the intensity of the
colors.
• Hue: Adjust the hue of the colors.
• Sharpness: Adjust the sharpness of the
image.
• Red Gain: Adjust the gain for red.
• Green Gain: Adjust the gain for green.
• Blue Gain: Adjust the gain for blue.
• Reset to Default: Select Yes to reset all the
picture settings above.
Sound settings
You can view and change the following sound
settings.
• Sound Preset: You can set the projector to
use the following sound presets, depending
on your environment, audio type or
preferences. After selecting a sound preset,
you can modify its settings.
• Cinema: Optimize the settings for
movies.
• Music: Optimize the settings for music.
• Flat: Set both the bass and treble levels
to medium levels.
• Output: Select the projector's audio output
type.
Loading ...
Loading ...
Loading ...