Loading ...
Loading ...
Loading ...
It is recommended that you have a qualified electri-
cian replace the two prong outlet with a properly
grounded three prong outlet.
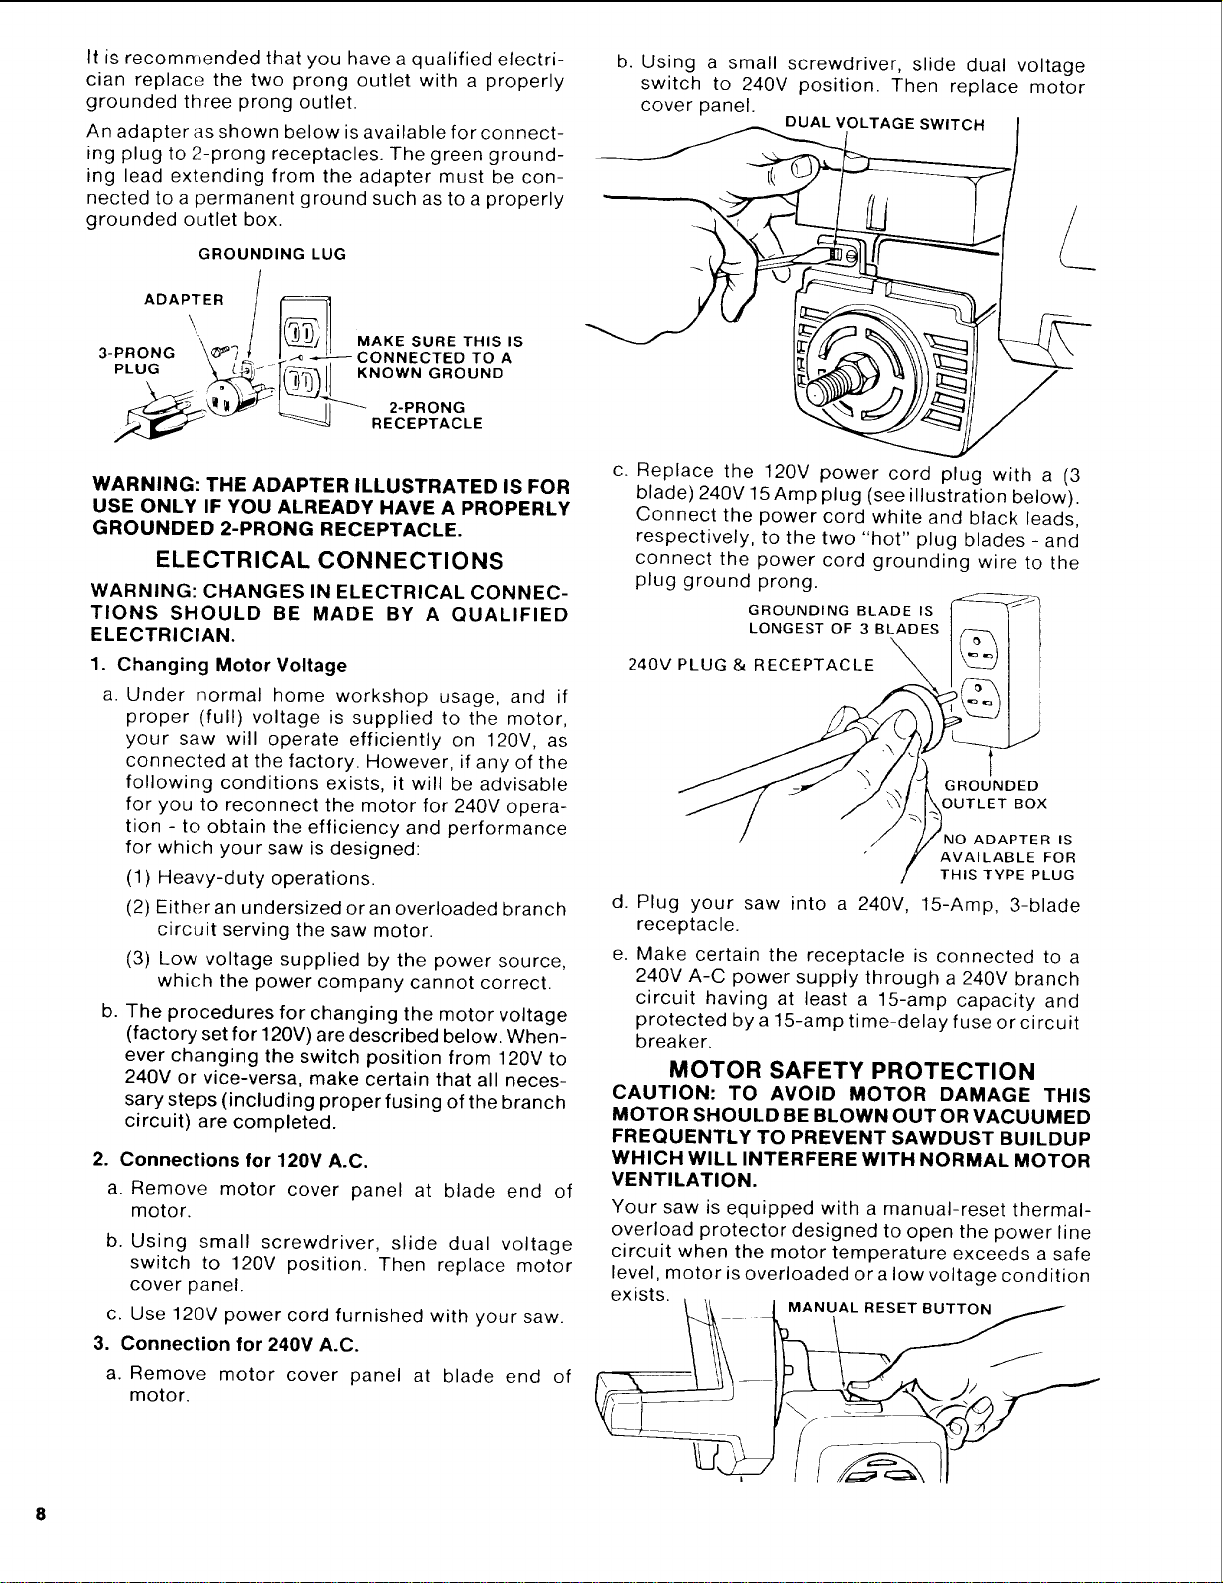
An adapter as shown below is available for connect-
ing plug to 2-prong receptacles. The green ground-
ing lead extending from the adapter must be con-
nected to a permanent ground such as to a properly
grounded outlet box.
GROUNDING LUG
ADAPTER /
"\ _ MAKE SURE THIS IS
3-PRONG
__ONNECTED TO A
PLUG _r_/._.._,_ KNOWN GROUND
RECEPTACLE
b. Using a small screwdriver, slide dual voltage
switch to 240V position. Then replace motor
cover panel.
DUAL VOLTAGE SWITCH
L
WARNING: THE ADAPTER ILLUSTRATED IS FOR
USE ONLY IF YOU ALREADY HAVE A PROPERLY
GROUNDED 2-PRONG RECEPTACLE.
ELECTRICAL CONNECTIONS
WARNING: CHANGES IN ELECTRICAL CONNEC-
TIONS SHOULD BE MADE BY A QUALIFIED
ELECTRICIAN.
1. Changing Motor Voltage
a,
Under normal home workshop usage, and if
proper (full) voltage is supplied to the motor,
your saw will operate efficiently on 120V, as
connected at the factory. However, if any of the
following conditions exists, it will be advisable
for you to reconnect the motor for 240V opera-
tion - to obtain the efficiency and performance
for which your saw is designed:
(1) Heavy-duty operations.
b.
(2) Either an undersized oran overloaded branch
circuit serving the saw motor.
(3) Low voltage supplied by the power source,
which the power company cannot correct.
The procedures for changing the motor voltage
(factory set for 120V) are described below. When-
ever changing the switch position from 120V to
240V or vice-versa, make certain that all neces-
sary steps (including proper fusing of the branch
circuit) are completed.
2. Connections for 120V A.C.
a. Remove motor cover panel at blade end of
motor.
b. Using small screwdriver, slide dual voltage
switch to 120V position. Then replace motor
cover panel.
c. Use 120V power cord furnished with your saw.
3. Connection for 240V A.C.
a. Remove motor cover panel at blade end of
motor.
c. Replace the 120V power cord plug with a (3
blade) 240V 15 Amp plug (see illustration below).
Connect the power cord white and black leads,
respectively, to the two "hot" plug blades - and
connect the power cord grounding wire to the
plug ground prong.
GROUNDING BLADE IS
LONGEST OF 3 BLADES
240V PLUG & RECEPTACLE
GROUNDED
OUTLET BOX
ADAPTER IS
AVAILABLE FOR
THIS TYPE PLUG
d. Plug your saw into a 240V, 15-Amp, 3-blade
receptacle.
e. Make certain the receptacle is connected to a
240V A-C power supply through a 240V branch
circuit having at least a 15-amp capacity and
protected by a 15-amp time-delay fuse or circuit
breaker.
MOTOR SAFETY PROTECTION
CAUTION: TO AVOID MOTOR DAMAGE THIS
MOTOR SHOULD BE BLOWN OUT OR VACUUMED
FREQUENTLY TO PREVENT SAWDUST BUILDUP
WHICH WILL INTERFERE WITH NORMAL MOTOR
VENTILATION.
Your saw is equipped with a manual-reset thermal-
overload protector designed to open the power line
circuit when the motor temperature exceeds a safe
level, motor is overloaded or a low voltage condition
exists.
1 _ )MANUAL RESET BUTTON
Loading ...
Loading ...
Loading ...