Loading ...
Loading ...
Loading ...
a.
b,
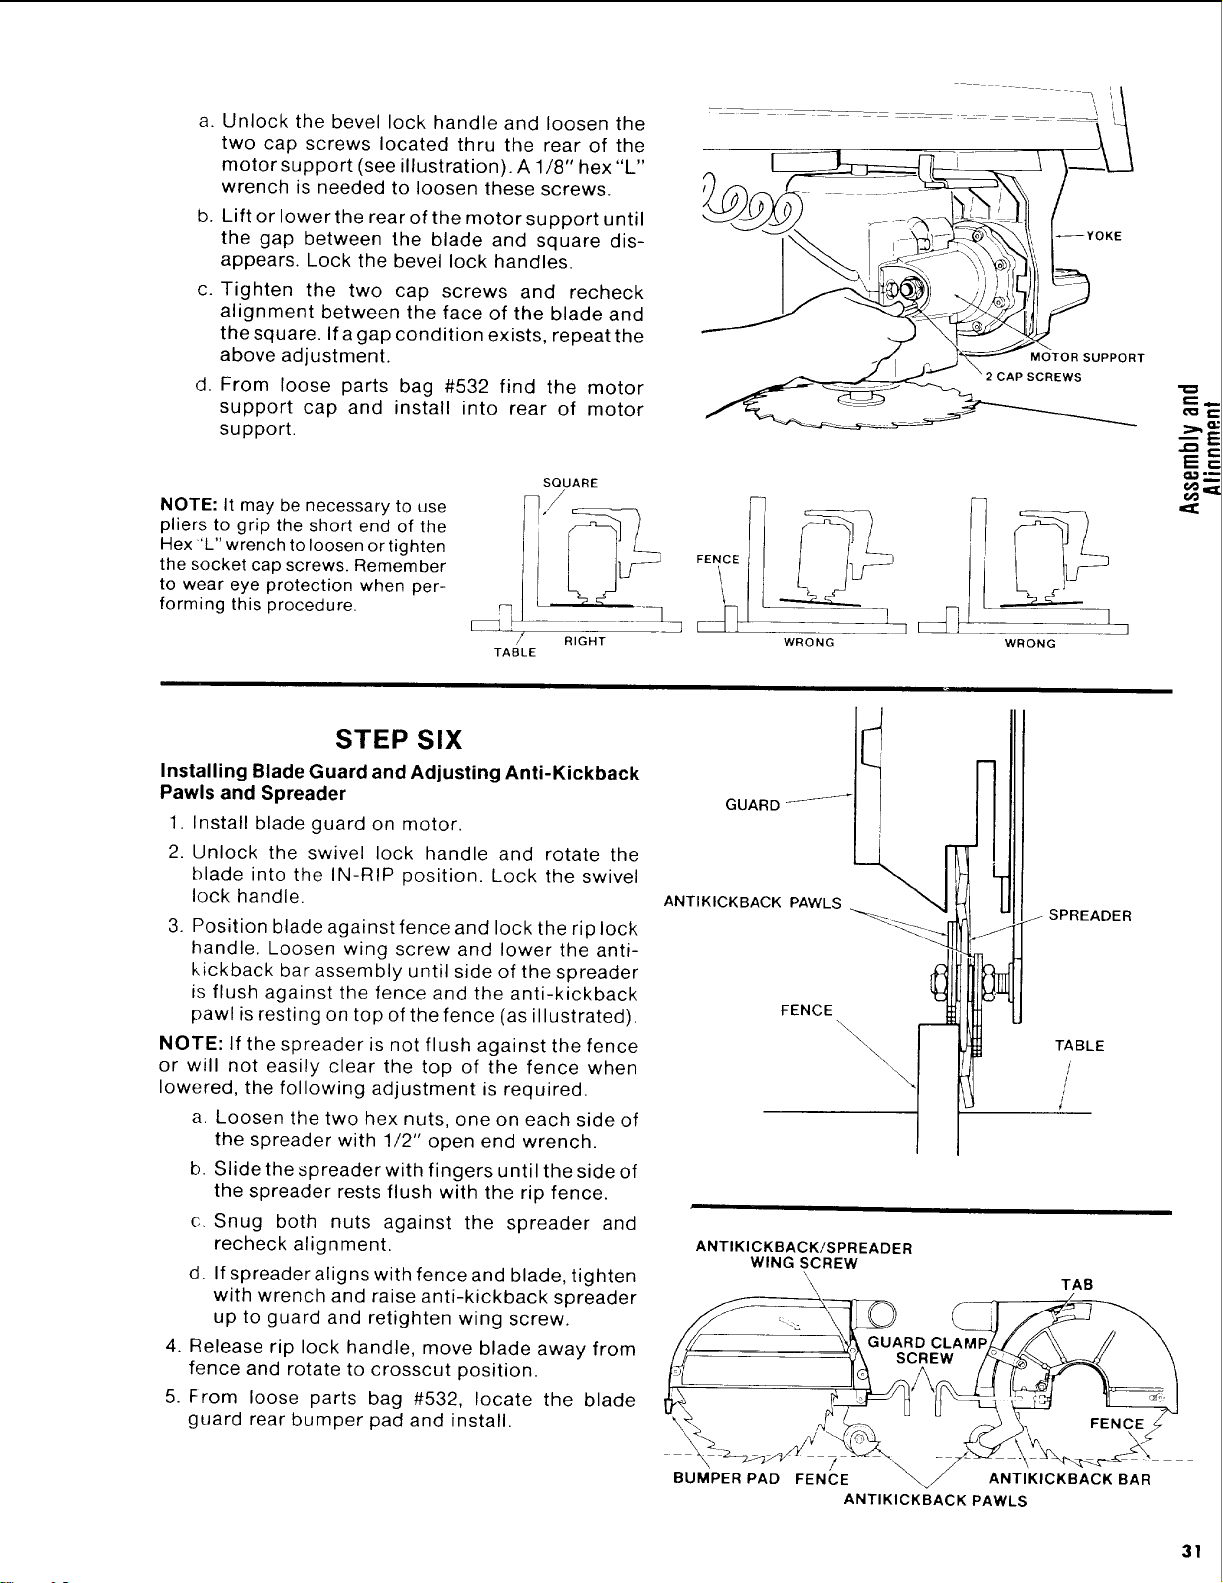
Unlock the bevel lock handle and loosen the
two cap screws located thru the rear of the
motor support (see illustration). A 1/8" hex "L"
wrench is needed to loosen these screws.
Lift or lower the rear of the motor support until
the gap between the blade and square dis-
appears. Lock the bevel lock handles.
c. Tighten the two cap screws and recheck
alignment between the face of the blade and
the square. If a gap condition exists, repeat the
above adjustment.
d. From loose parts bag #532 find the motor
support cap and install into rear of motor
support.
_YOKE
MOTOR SUPPORT
_AP SCREWS
NOTE: It may be necessary to use
pliers to grip the short end of the
Hex "L" wrench to loosen or tighten
the socket cap screws. Remember
to wear eye protection when per-
forming this procedure.
/
TABLE
SQUARE
RIGHT WRONG WRONG
E==
STEP SIX
Installing Blade Guard and Adjusting Anti-Kickback
Pawls and Spreader
1. Install blade guard on motor.
2. Unlock the swivel lock handle and rotate the
blade into the IN-RIP position. Lock the swivel
lock handle.
3. Position blade against fence and lock the rip lock
handle. Loosen wing screw and lower the anti-
kickback bar assembly until side of the spreader
is flush against the fence and the anti-kickback
pawl is resting on top of the fence (as illustrated).
NOTE: If the spreader is not flush against the fence
or will not easily clear the top of the fence when
lowered, the following adjustment is required.
a. Loosen the two hex nuts, one on each side of
the spreader with 1/2" open end wrench.
b. Slide the spreader with fingers until the side of
the spreader rests flush with the rip fence.
c. Snug both nuts against the spreader and
recheck alignment.
d. If spreader aligns with fence and blade, tighten
with wrench and raise anti-kickback spreader
up to guard and retighten wing screw.
4. Release rip lock handle, move blade away from
fence and rotate to crosscut position.
5. From loose parts bag #532, locate the blade
guard rear bumper pad and install.
GUARD-_-_-_-
ANTIKICKBACK PAWLS
FENCE
i
J_ SPREADER
\_ TABLE
it'
/
/
ANTIKICKBACK/SPREADER
WING SCREW
\, TAB
/ \
PAD FENCE _ ANTIKICKBACK BAR
BUMPER
ANTIKICKBACK PAWLS
31
Loading ...
Loading ...
Loading ...