Loading ...
Loading ...
Loading ...
STEP FIVE
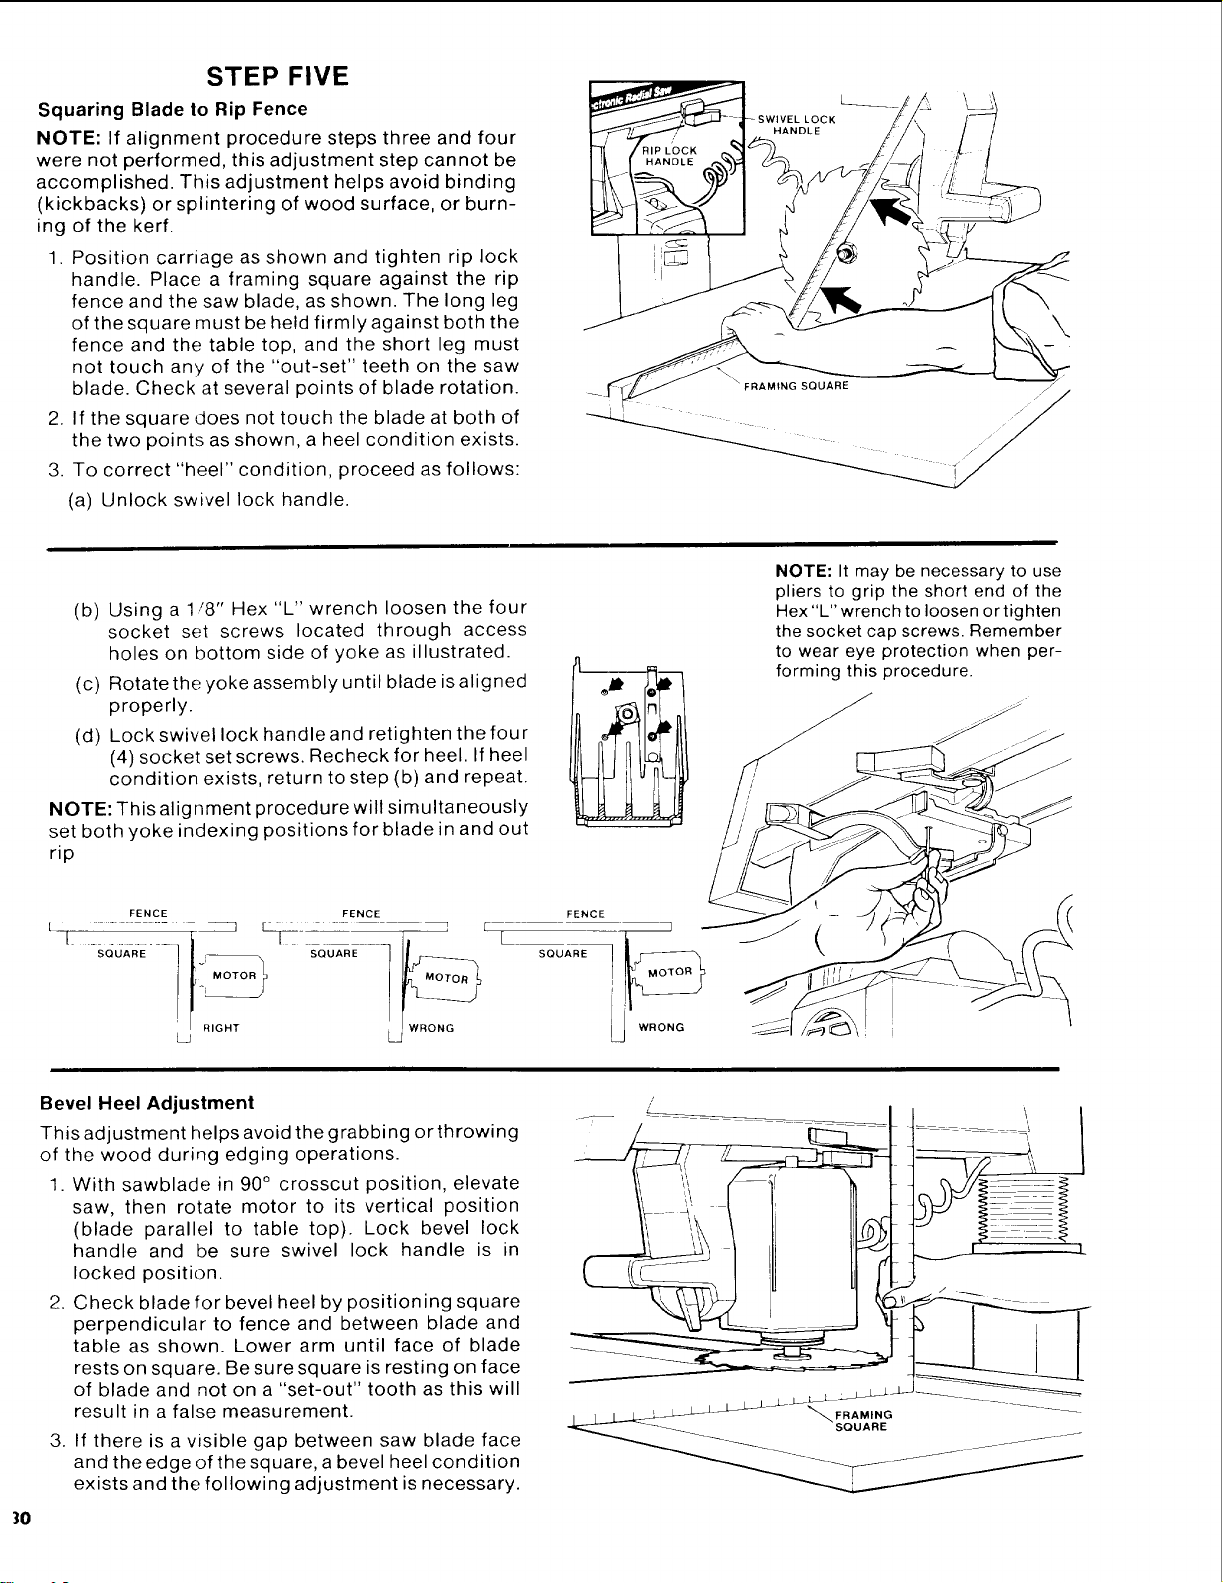
Squaring Blade to Rip Fence
NOTE: If alignment procedure steps three and four
were not performed, this adjustment step cannot be
accomplished. This adjustment helps avoid binding
(kickbacks) or splintering of wood surface, or burn-
ing of the kerf.
1. Position carriage as shown and tighten rip lock
handle. Place a framing square against the rip
fence and the saw blade, as shown. The long leg
of the square must be held firmly against both the
fence and the table top, and the short leg must
not touch any of the "out-set" teeth on the saw
blade. Check at several points of blade rotation.
2. If the square does not touch the blade at both of
the two points as shown, a heel condition exists.
3. To correct "heel" condition, proceed as follows:
(a) Unlock swivel lock handle.
FRAMING SQUARE
\
(b) Using a 1/8" Hex "L" wrench loosen the four
socket set screws located through access
holes on bottom side of yoke as illustrated.
(c) Rotate the yoke assembly until blade is aligned
properly.
(d) Lock swivel lock handleand retighten the four
(4) socket set screws. Recheck for heel. If heel
condition exists, return to step (b) and repeat.
NOTE: This alignment procedure will simultaneously
set both yoke indexing positions for blade in and out
rip
NOTE: It may be necessary to use
pliers to grip the short end of the
Hex "L" wrench to loosen or tighten
the socket cap screws. Remember
to wear eye protection when per-
forming this procedure.
FENCE FENCE
1" -SO'UARE .... ._ h-SQUARE-----,i_ L
/ _RIG_T WRONG
L_ L_
FENCE
]
SQUARE MO_TOR
Bevel Heel Adjustment
This adjustment helps avoid the grabbing or throwing
of the wood during edging operations.
1. With sawblade in 90 ° crosscut position, elevate
saw, then rotate motor to its vertical position
(blade parallel to table top). Lock bevel lock
handle and be sure swivel lock handle is in
locked position.
2. Check blade for bevel heel by positioning square
perpendicular to fence and between blade and
table as shown. Lower arm until face of blade
rests on square. Be sure square is resting on face
of blade and not on a "set-out" tooth as this will
result in a false measurement.
3. If there is a visible gap between saw blade face
and the edge of the square, a bevel heel condition
exists and the following adjustment is necessary.
/
Loading ...
Loading ...
Loading ...