Loading ...
Loading ...
Loading ...
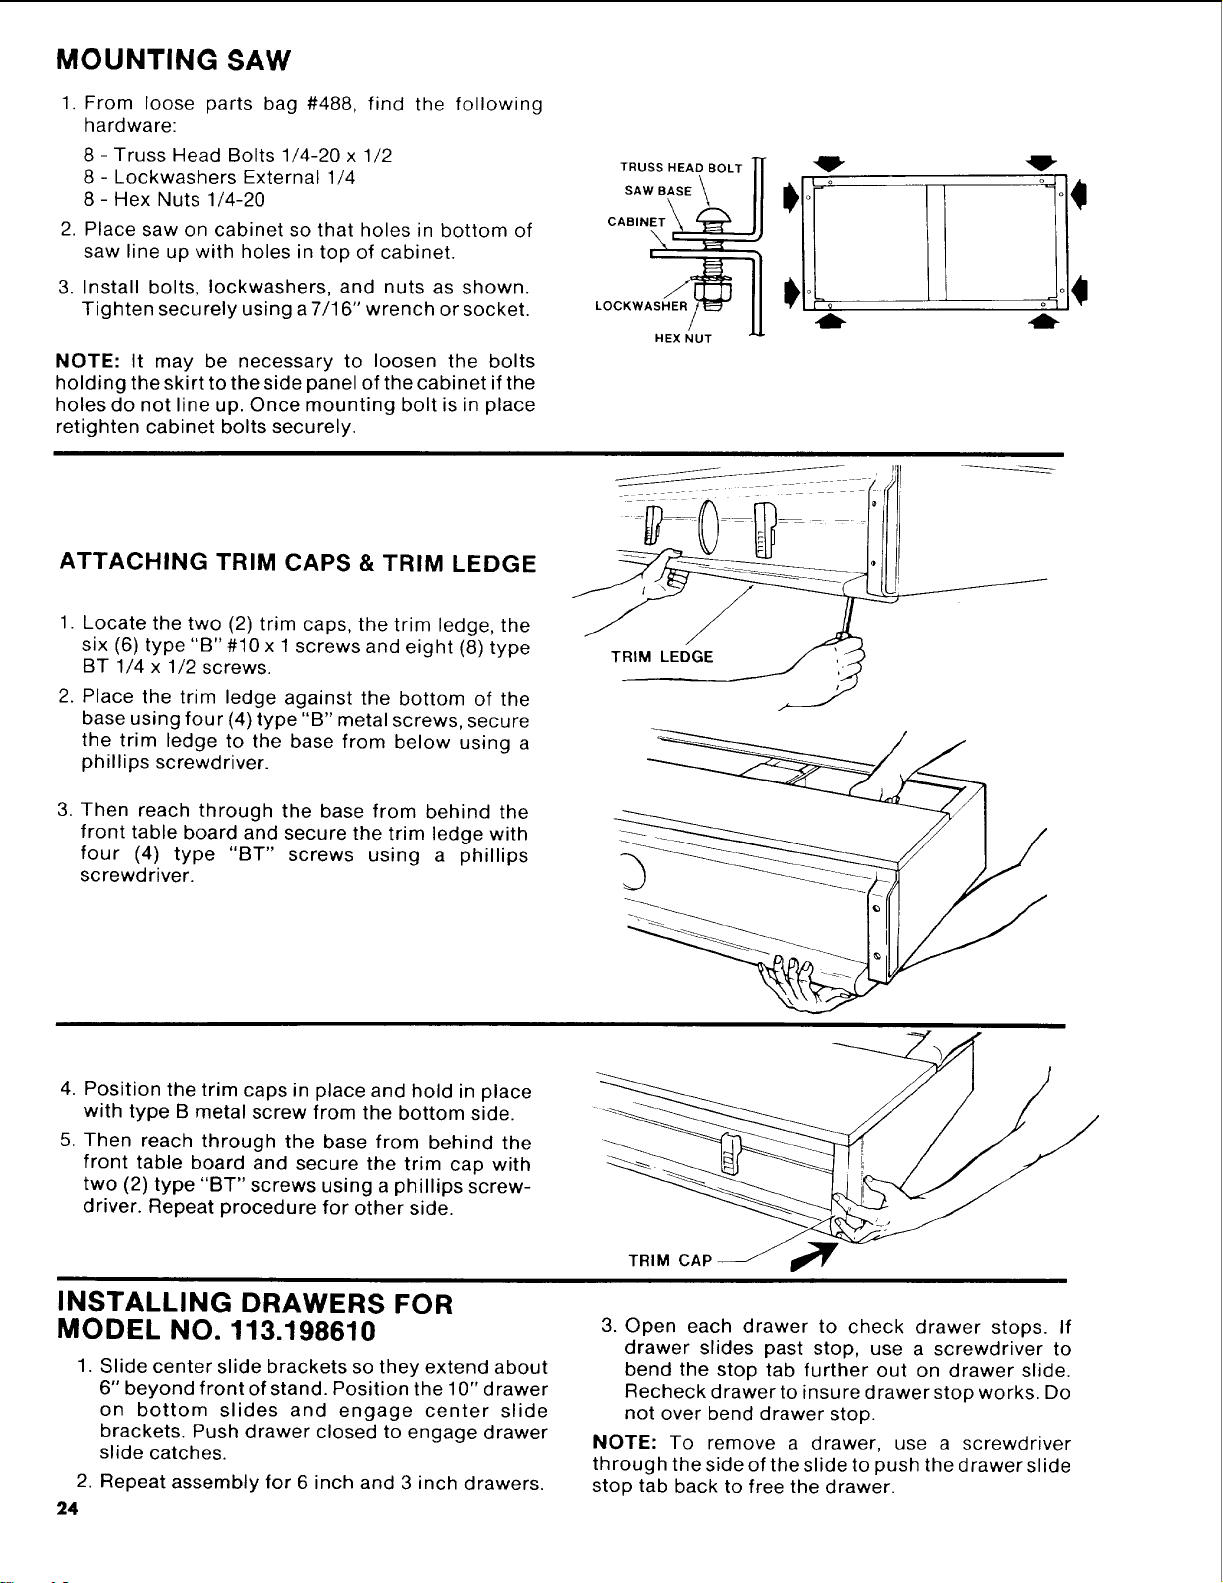
MOUNTING SAW
1. From loose parts bag #488, find the following
hardware:
8 - Truss Head Bolts 1/4-20 x 1/2
8 - Lockwashers External 1/4
8- Hex Nuts 1/4-20
2. Place saw on cabinet so that holes in bottom of
saw line up with holes in top of cabinet.
3. Install bolts, Iockwashers, and nuts as shown.
Tighten securely using a 7/16" wrench or socket.
NOTE: It may be necessary to loosen the bolts
holding the skirt to the side panel of the cabinet if the
holes do not line up. Once mounting bolt is in place
retighten cabinet bolts securely.
ATTACHING TRIM CAPS & TRIM LEDGE
1. Locate the two (2) trim caps, the trim ledge, the
six (6) type "B" #10 x 1 screws and eight (8) type
BT 1/4 x 1/2 screws.
2. Place the trim ledge against the bottom of the
base using four (4) type "B" metal screws, secure
the trim ledge to the base from below using a
phillips screwdriver.
3. Then reach through the base from behind the
front table board and secure the trim ledge with
four (4) type "BT" screws using a phillips
screwdriver.
T.uss.EAOBO,TIf 4_" "_"
sws'Ill° //°!1
HEX NUT
TRIM LEDGE
4. Position the trim caps in place and hold in place
with type B metal screw from the bottom side.
5. Then reach through the base from behind the
front table board and secure the trim cap with
two (2) type "BT" screws using a phillips screw-
driver. Repeat procedure for other side.
TRIM CAF
INSTALLING DRAWERS FOR
MODEL NO. 113.198610
1. Slide center slide brackets so they extend about
6" beyond front of stand. Position the 10" drawer
on bottom slides and engage center slide
brackets. Push drawer closed to engage drawer
slide catches.
2. Repeat assembly for 6 inch and 3 inch drawers.
24
3. Open each drawer to check drawer stops. If
drawer slides past stop, use a screwdriver to
bend the stop tab further out on drawer slide.
Recheck drawer to insure drawer stop works. Do
not over bend drawer stop.
NOTE: To remove a drawer, use a screwdriver
through the side of the slide to push the drawer slide
stop tab back to free the drawer.
Loading ...
Loading ...
Loading ...