Loading ...
Loading ...
Loading ...
maintenance and lubrication
MAINTENANCE
WARNING: FOR YOUR OWN SAFETY, TURN
POWER SWITCH "OFF'AND REMOVE PLUG FROM
POWER SOURCE OUTLET BEFORE MAINTAINING
OR LUBRICATING YOUR SAW.
When you receive your new Craftsman radial saw, it
requires no lubrication. The radial saw has been
partially aligned and all bearings are lubricated and
sealed for life. In time, however, in order to keep your
saw in perfect working order and accurate, it will be
necessary to lubricate and realign. In fact your radial
saw needs more of a cleaning than a lubrication.
Make sure the teeth of the ANTIKICKBACK pawls
(key #9 on p. 68) are always sharp. If they become
dull they must be replaced. With a 1/2 inch wrench or
socket remove the 5/16 hex nut and old pawls.
Reassemble new pawls and spreader to antikickback
bar. Check spreader for proper alignment and correct
if necessary. (Follow procedure on page 31.)
CLEANING
Periodically remove any heavy build-up of sawdust
that may accumulate on the saw. The absorbing
tendency of sawdust will draw lubricants away from
the areas where they are needed. Clean the carriage
bearings and trackig surfaces. If packed sawdust
and grease accumulate repeatedly on carriage bear-
ings and track inspect the wipers (key #4 p. 64) for
wear and replace if necessary. (For access to wipers
see "Swivel lock adjustment" p. 47.)
CAUTION: To avoid motor damage the motor should
be blown out or vacuumed frequently to prevent
sawdust build-up which will interfere with normal
motor ventilation.
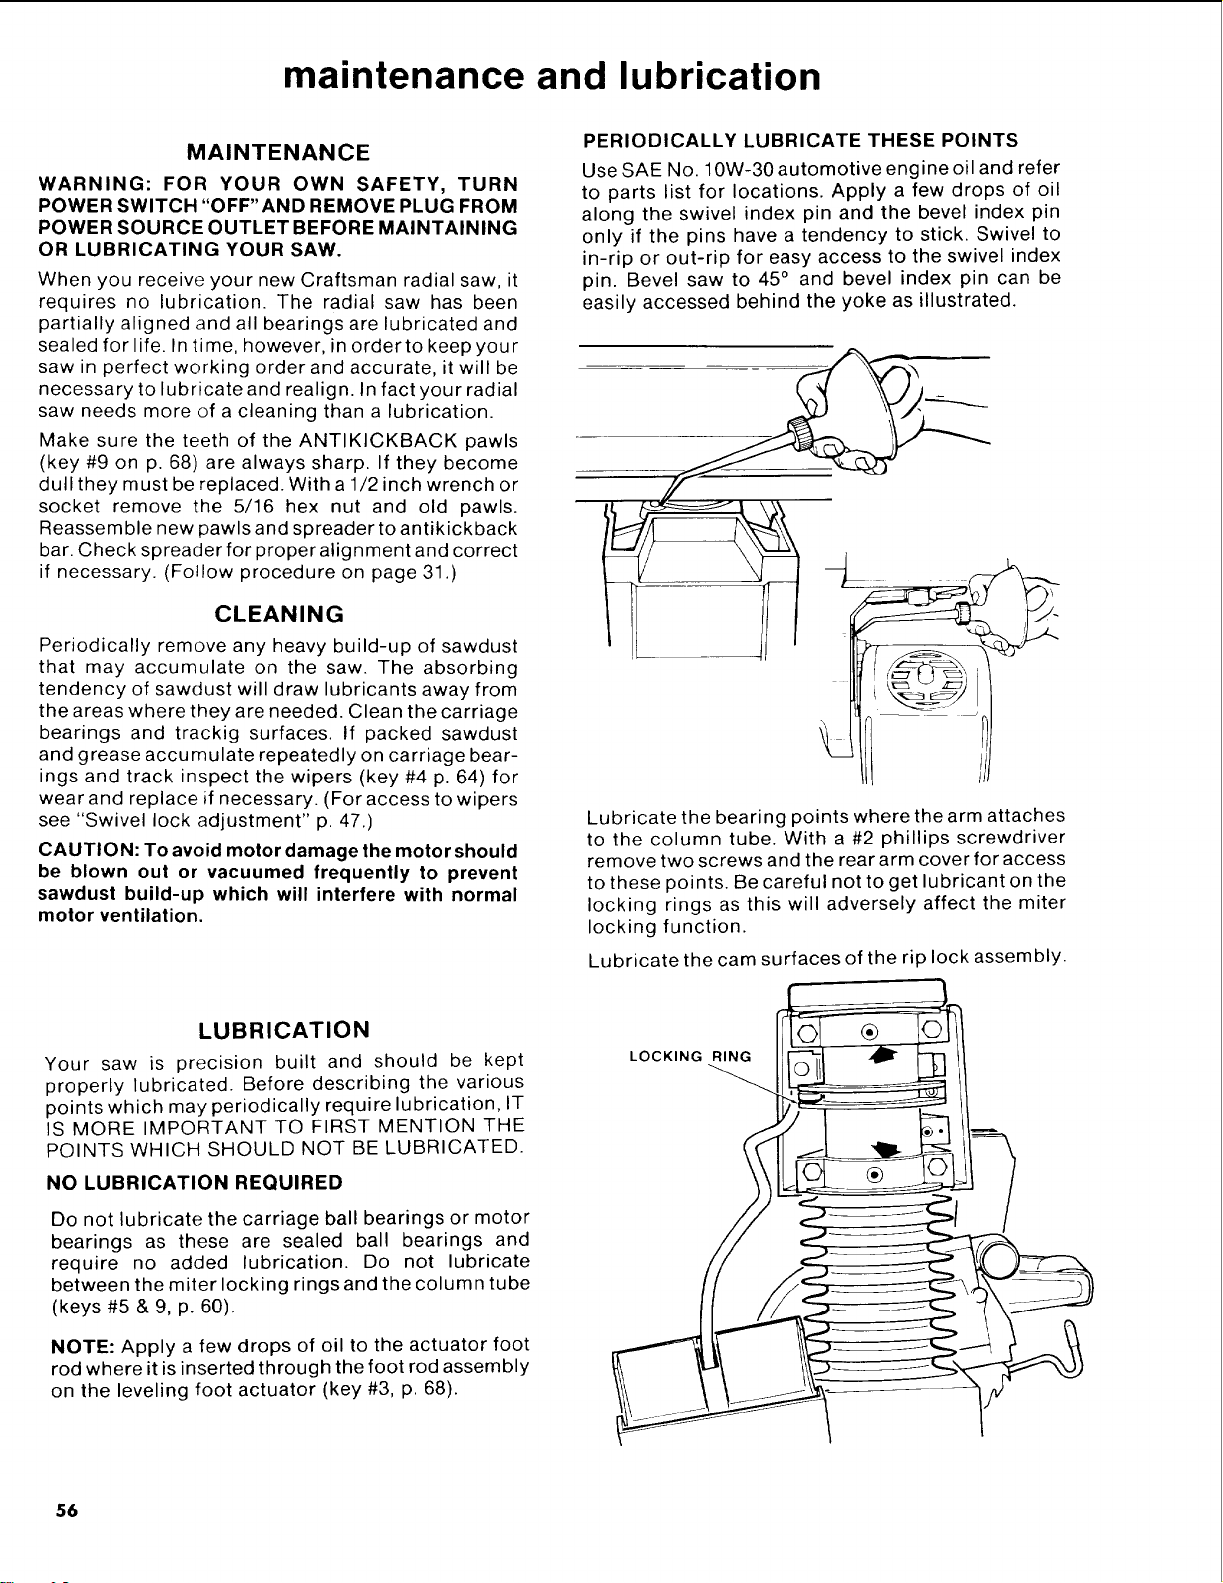
PERIODICALLY LUBRICATE THESE POINTS
Use SAE No. 10W-30 automotive engine oil and refer
to parts list for locations. Apply a few drops of oil
along the swivel index pin and the bevel index pin
only if the pins have a tendency to stick. Swivel to
in-rip or out-rip for easy access to the swivel index
pin. Bevel saw to 45° and bevel index pin can be
easily accessed behind the yoke as illustrated.
Lubricate the bearing points where the arm attaches
to the column tube. With a #2 phillips screwdriver
remove two screws and the rear arm cover for access
to these points. Be careful not to get lubricant on the
locking rings as this will adversely affect the miter
locking function.
Lubricate the cam surfaces of the rip lock assembly.
LUBRICATION
Your saw is precision built and should be kept
properly lubricated. Before describing the various
points which may periodically require lubrication, IT
IS MORE IMPORTANT TO FIRST MENTION THE
POINTS WHICH SHOULD NOT BE LUBRICATED.
NO LUBRICATION REQUIRED
Do not lubricate the carriage ball bearings or motor
bearings as these are sealed ball bearings and
require no added lubrication. Do not lubricate
between the miter locking rings and the column tube
(keys #5 & 9, p. 60).
NOTE: Apply a few drops of oil to the actuator foot
rod where it is inserted through the foot rod assembly
on the leveling foot actuator (key #3, p. 68).
LOCKING RING
56
Loading ...
Loading ...
Loading ...