Loading ...
Loading ...
Loading ...
6. Lay the arbor wrench on the work tableunderthe
motor shaft. Carefully lower the arm with the
elevation handle until the motor shaft is just
touching the arbor wrench. The wrench should
slide back and forth with only slight contact with
motor shaft.
NOTE: When moving the arm from the left side to the
right it is necessary to move the motor along the arm
to check the front table at several points from front to
back.
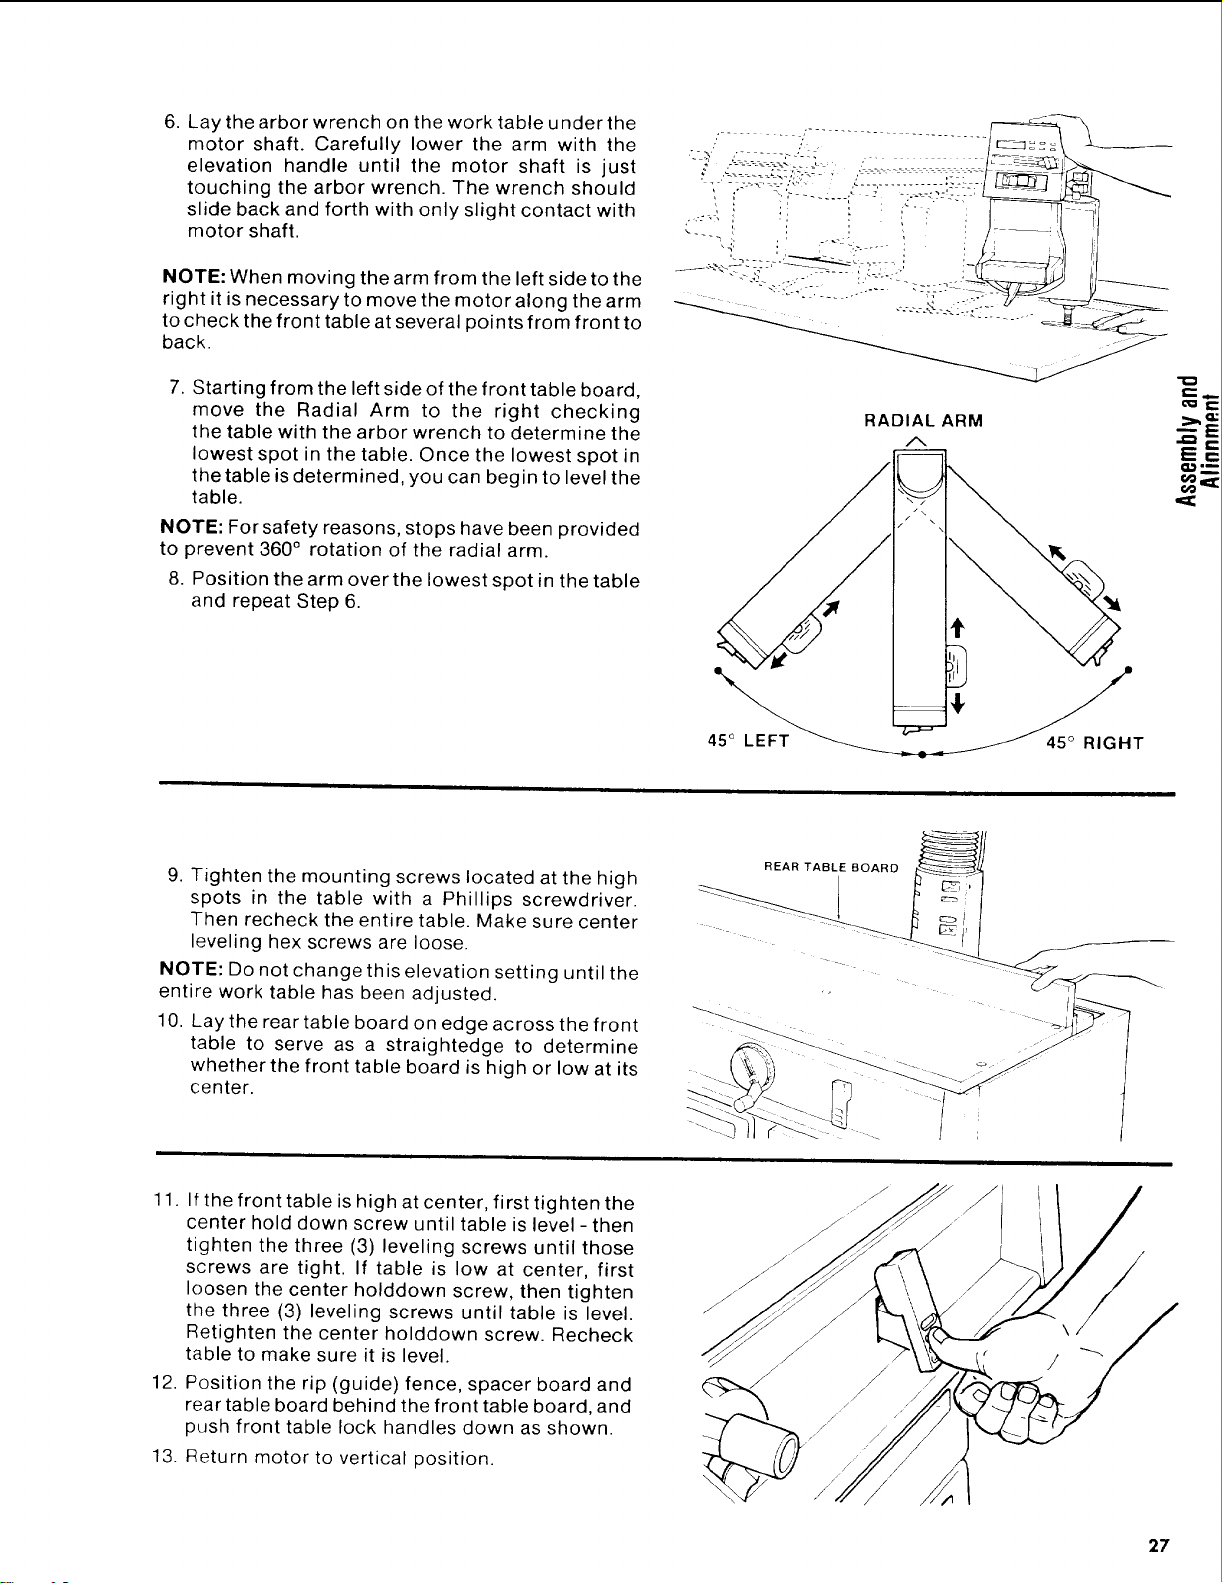
7. Starting from the left side of the front table board,
move the Radial Arm to the right checking
the table with the arbor wrench to determine the
lowest spot in the table. Once the lowest spot in
the table is determined, you can begin to level the
table.
NOTE: For safety reasons, stops have been provided
to prevent 360 ° rotation of the radial arm.
8. Position the arm over the lowest spot in the table
and repeat Step 6.
RADIAL ARM
/%
/
€
-
45° LEFT_""_7 _ T
--_E
E==
ooi=I:
9. Tighten the mounting screws located at the high
spots in the table with a Phillips screwdriver.
Then recheck the entire table. Make sure center
leveling hex screws are loose.
NOTE: Do not change this elevation setting until the
entire work table has been adjusted.
10. Lay the rear table board on edge across the front
table to serve as a straightedge to determine
whether the front table board is high or low at its
center.
REAR TABLE BOARD _
11. If the front table is high at center, first tighten the
center hold down screw until table is level - then
tighten the three (3) leveling screws until those
screws are tight. If table is low at center, first
loosen the center holddown screw, then tighten
the three (3) leveling screws until table is level.
Retighten the center holddown screw. Recheck
table to make sure it is level.
12. Position the rip (guide) fence, spacer board and
rear table board behind the front table board, and
push front table lock handles down as shown.
13. Return motor to vertical position.
27
Loading ...
Loading ...
Loading ...