Loading ...
Loading ...
Loading ...
SEWING THE STITCHES
Utility Stitches
151
3
d
Lower the presser foot and start sewing.
When sewing is finished, the machine sews
reinforcement stitches and stops automatically.
e
Use the eyelet punch to make a hole in the
center of the stitching.
Multi-directional Sewing
(Straight Stitch and Zigzag Stitch)
Use these stitch patterns to attach patches or
emblems to pant legs, shirt sleeves, etc.
a
Remove the flat bed attachment to use the
free-arm.
b
Select and attach monogramming foot
“N”.
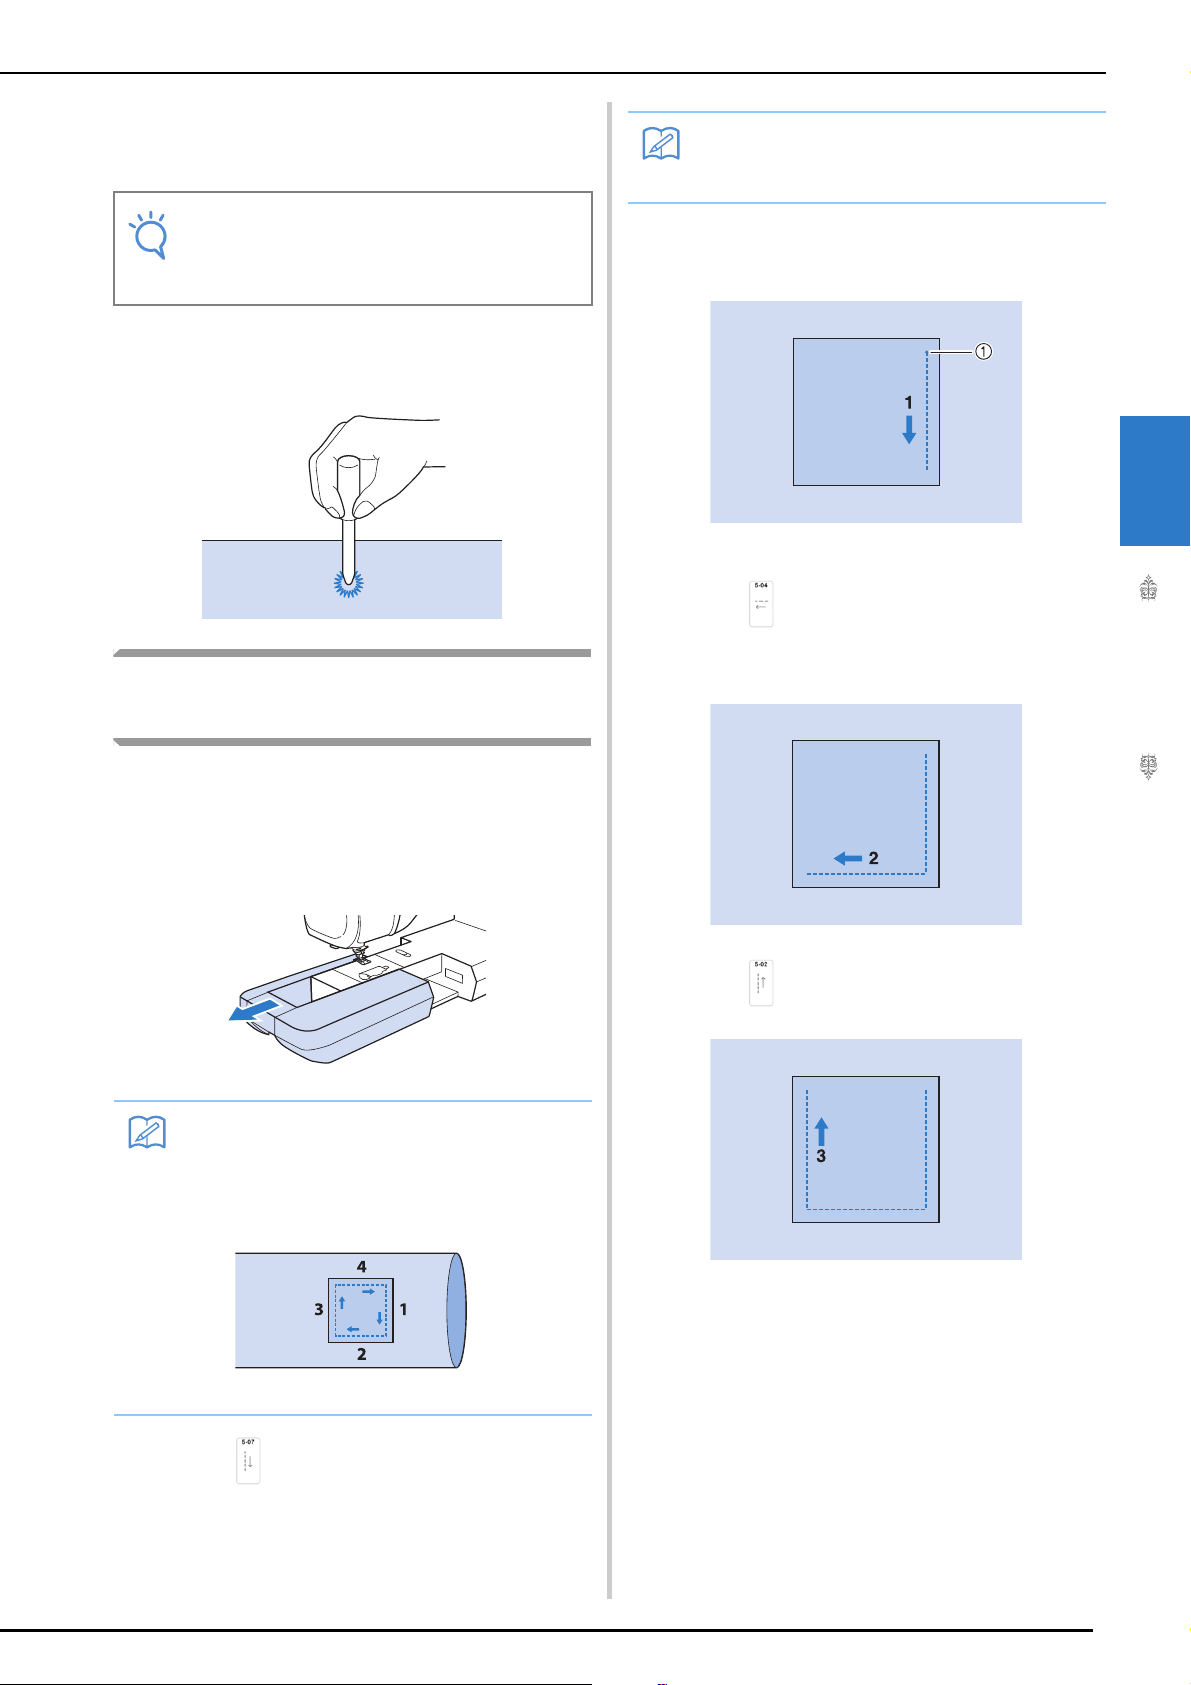
c
Set the needle in the fabric at the sewing
start point, and sew seam “1” as shown.
a Start Point
d
Select and sew seam “2” as shown.
* The fabric will move sideways, guide the fabric by
hand to keep sewing straight.
e
Select and sew seam “3” as shown.
The fabric feeds forward while stitching backward.
Note
• If the stitch pattern comes out poorly, make
adjustments to “SEWING STITCH
PATTERNS” on page 163.
Memo
• Insert the tubular piece of fabric onto the
free-arm, and then sew in the order shown
in the illustration.
Memo
• For details on each stitch, refer to “STITCH
SETTING CHART” on page 218.
Loading ...
Loading ...
Loading ...