Loading ...
Loading ...
Loading ...
SEWING THE STITCHES
Utility Stitches
141
3
One-step Buttonholes
With one-step buttonholes, you can make
buttonholes appropriate to the size of your button.
One-step buttonholes are sewn from the front of
the presser foot to the back, as shown below.
a Reinforcement stitching
a
Select a buttonhole stitch, and attach
buttonhole foot “A+”.
CAUTION
• When attaching and removing buttonhole foot
“A+”, do not apply excessive force to the
presser foot, otherwise it may be damaged. In
addition, be careful not to hit the needle when
attaching and removing buttonhole foot “A+”,
otherwise the needle may break.
Note
• Before attaching the presser foot, check
that there is enough thread in the bobbin.
• When the presser foot is attached, the
compartment of the flat bed attachment
cannot be opened. Be sure to first remove
any necessary accessories.
• Sew trial stitches on fabric that is the same
as that used in your project, referring to
“Fabric/Thread/Needle Combinations” on
page 71.
• The built-in camera detects the position of
buttonhole foot “A+”. Do not touch the
camera. (Refer to “NAMES OF MACHINE
PARTS AND THEIR FUNCTIONS” on
page 12.)
• Do not peel the “A+” sticker off buttonhole
foot “A+” or cover the sticker with the upper
thread, etc., otherwise the camera cannot
detect the presser foot or buttonholes
cannot be sewn.
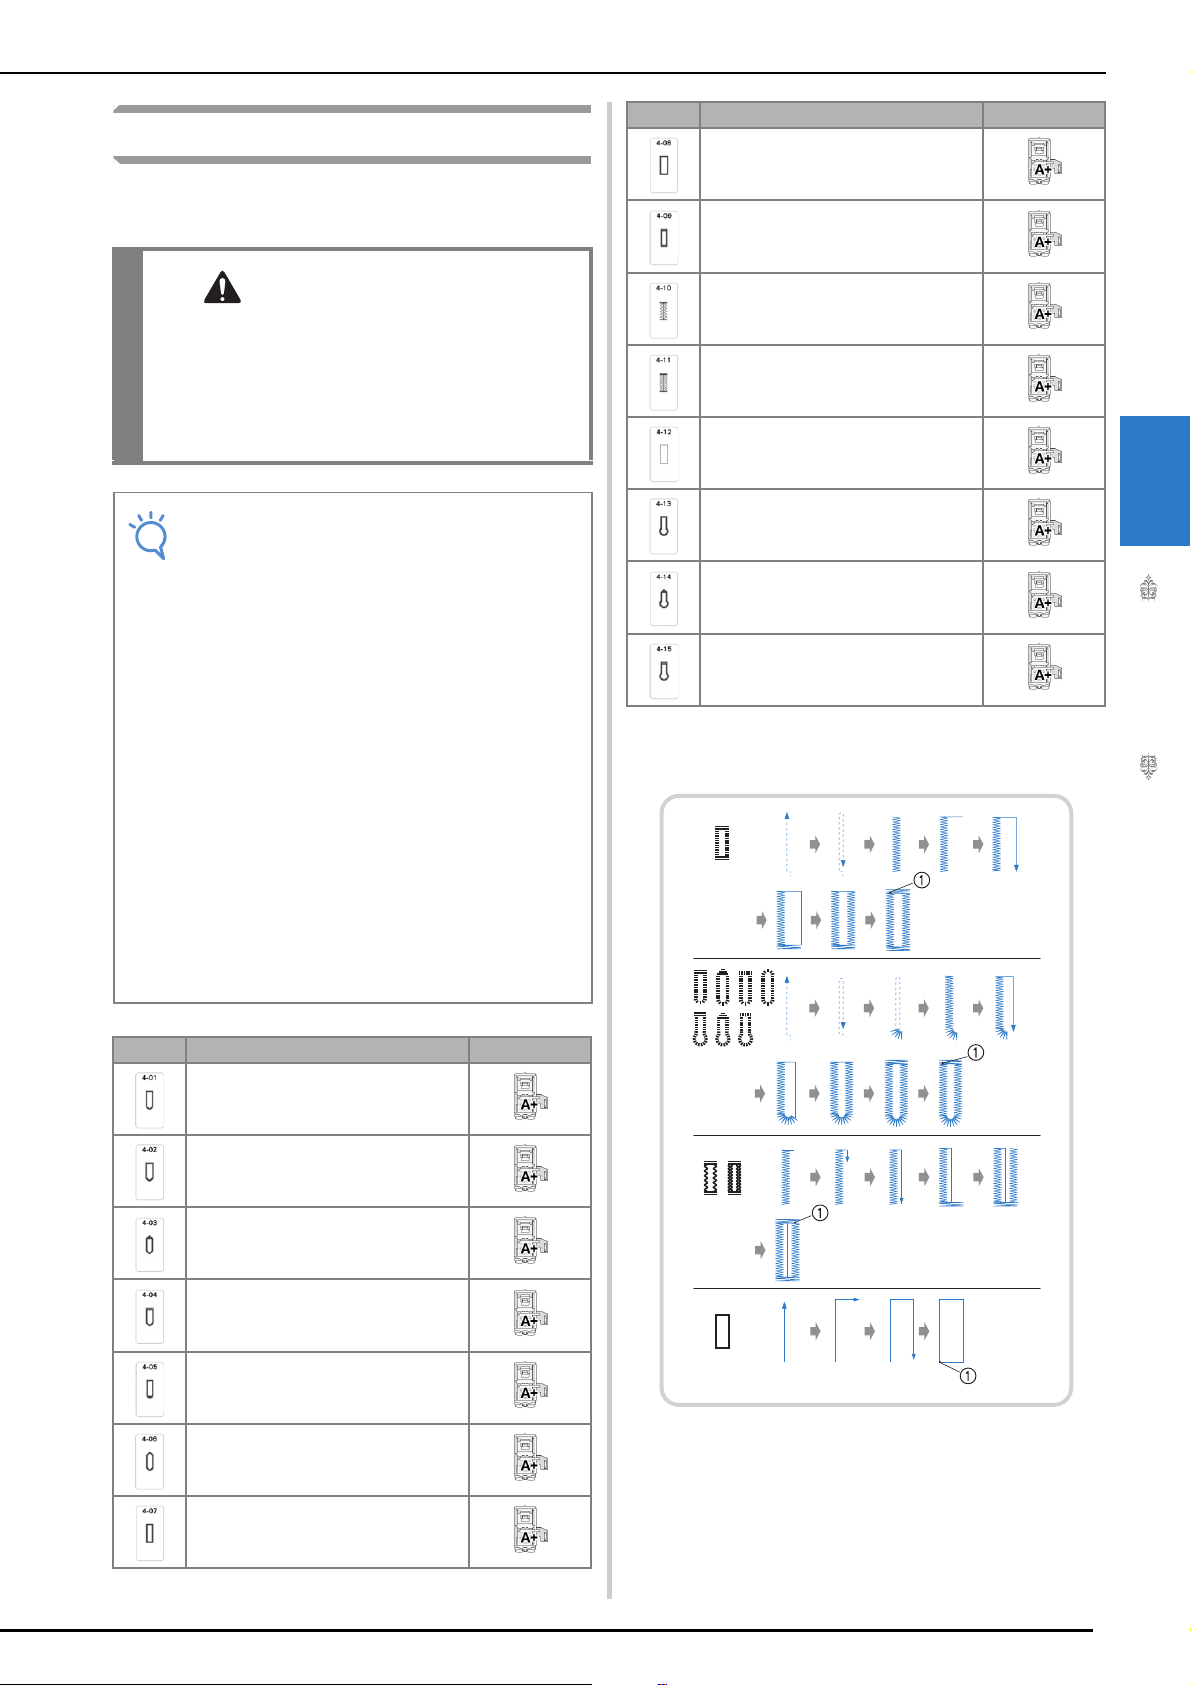
Stitch Stitch name Presser foot
Narrow rounded buttonhole
Wide round ended buttonhole
Tapered round ended buttonhole
Round ended buttonhole
Round ended buttonhole
Round double ended buttonhole
Narrow squared buttonhole
Wide squared buttonhole
Squared buttonhole
Stretch buttonhole
Heirloom buttonhole
Bound buttonhole
Keyhole buttonhole
Tapered keyhole buttonhole
Keyhole buttonhole
Stitch Stitch name Presser foot
Loading ...
Loading ...
Loading ...