Loading ...
Loading ...
Loading ...
28
Attaching the embroidery frame
holder
Attach the embroidery frame holder to the
carriage.
a
Use the embroidery frame holder
appropriate for the embroidery frame that
you are using. (Refer to page 82.)
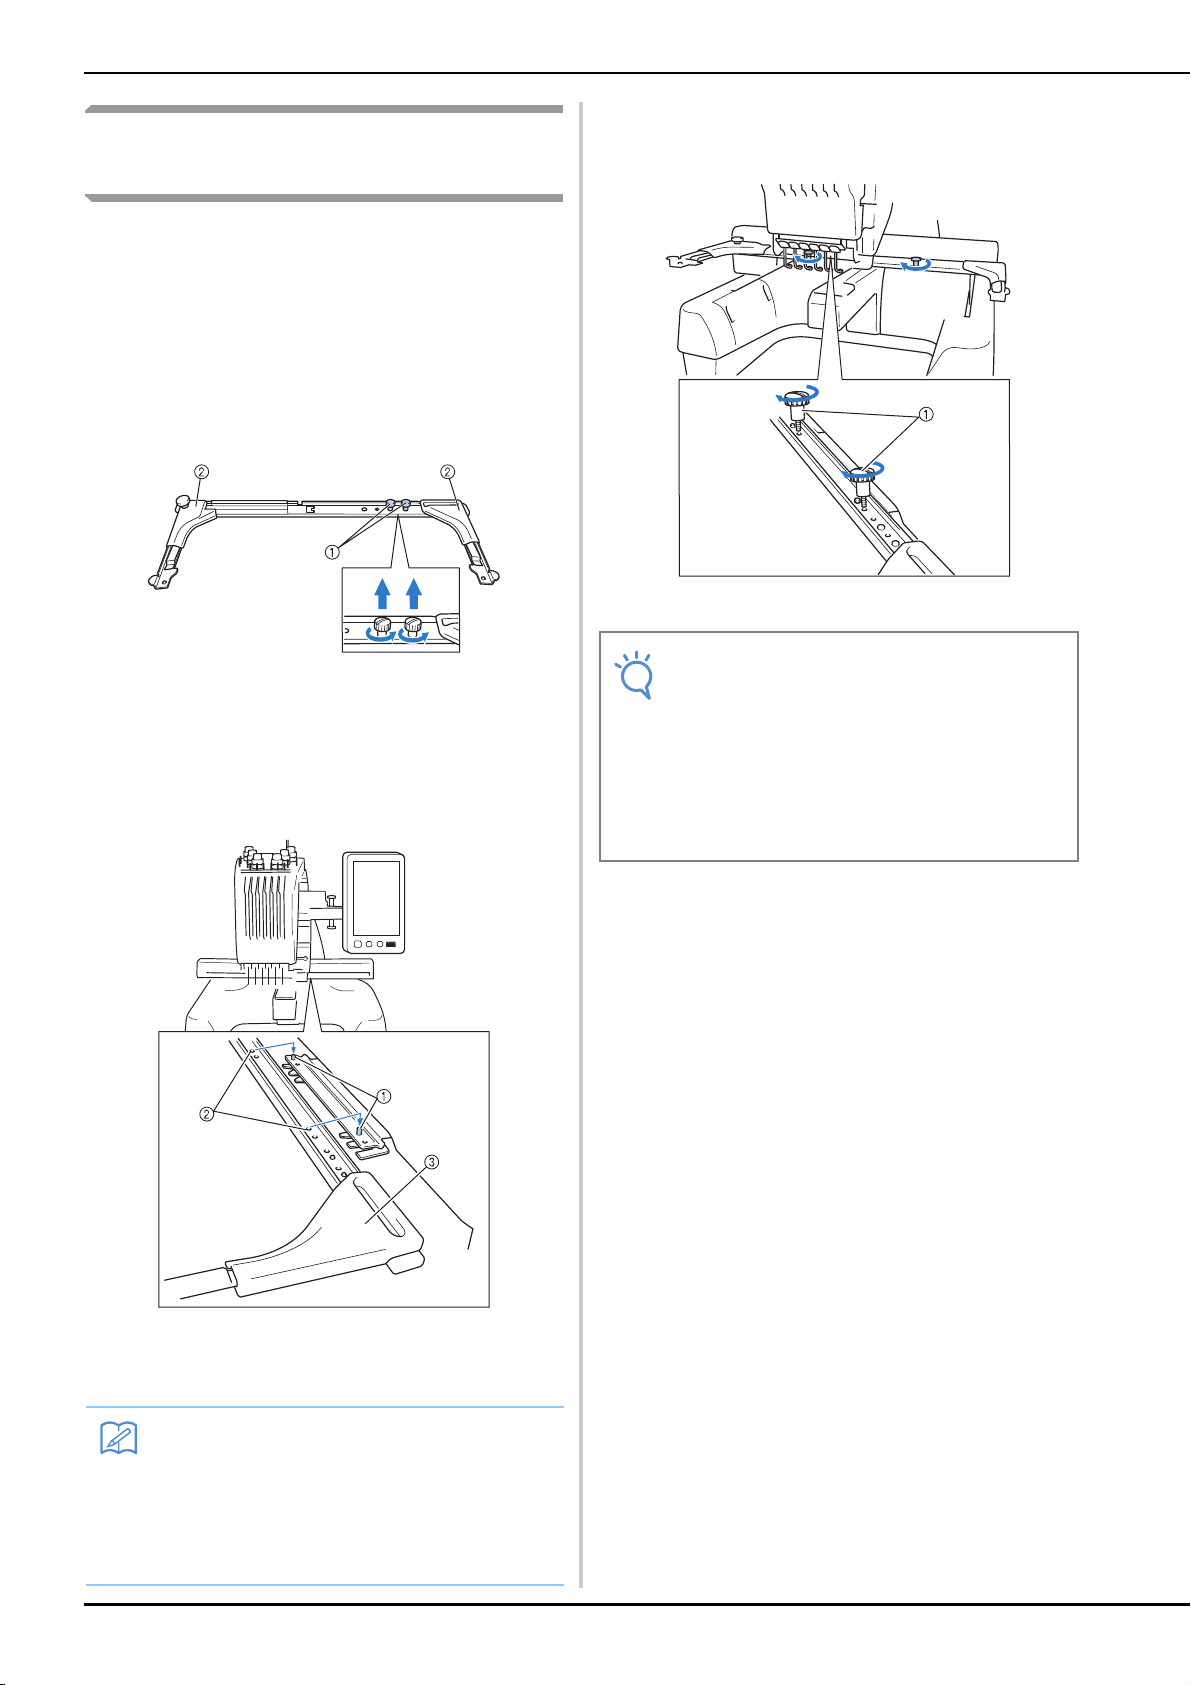
b
Remove the two thumb screws of the
embroidery frame holder.
1 Thumb screws
2 Corner covers
c
Align the holes in the embroidery frame
holder with the pins on the frame-mounting
plate of the carriage.
1 Pins on the frame-mounting plate
2 Holes in the embroidery frame holder
3 Corner covers
d
Secure the embroidery frame holder with
the two thumb screws removed in step
b .
1 Thumb screws
This completes the preparation of the machine.
Memo
• Each embroidery frame holder has different
color of corner cover.
Holder A: White corner covers
Holder B: Light gray corner covers
Holder C: Dark gray corner covers
(Optional)
Note
• Using the disc-shaped screwdriver
included, firmly tighten the thumb screws.
• Two types of embroidery frame holders are
included with this machine. Embroidery
frame holder A is used with the four
included embroidery frames. (Refer to
“Correctly Using the Embroidery Frames”
on page 80 for the details.)
Loading ...
Loading ...
Loading ...