Loading ...
Loading ...
Loading ...

196
e
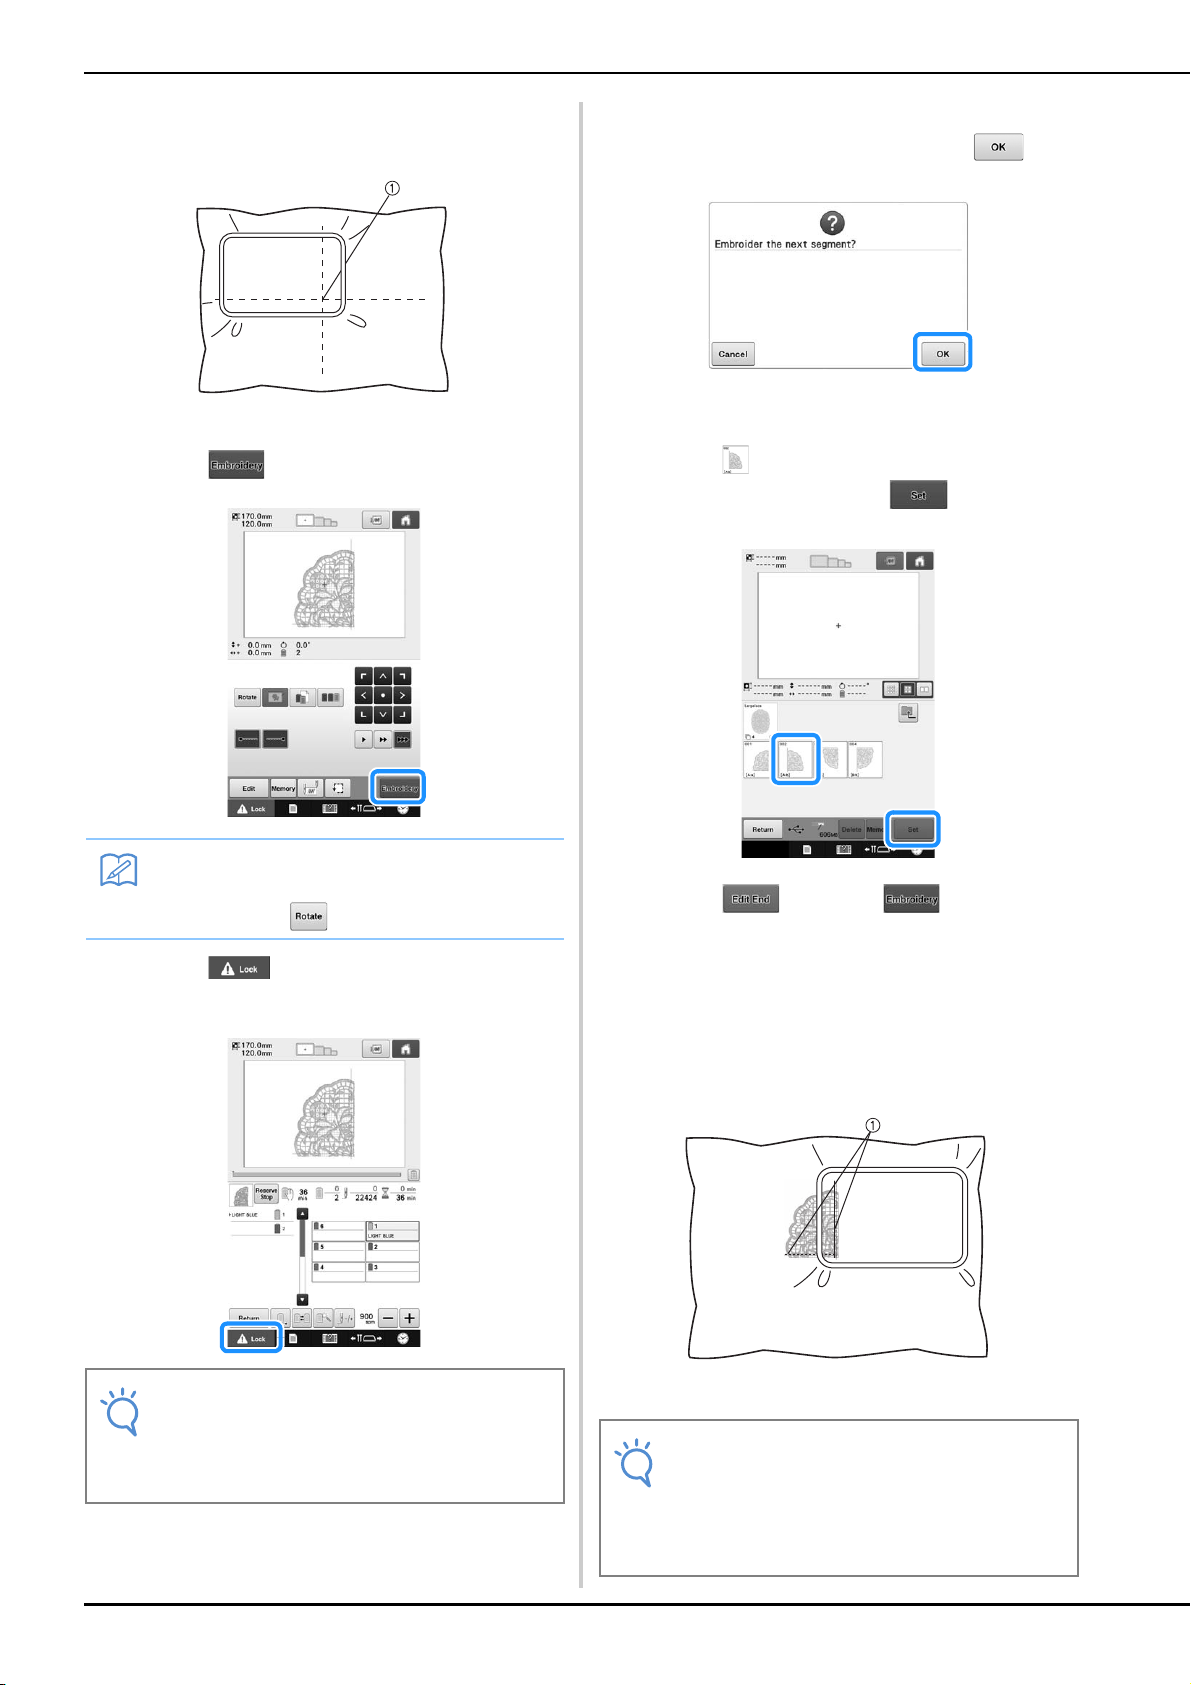
Hoop the appropriate part of the fabric. In
this case, hoop upper-left part of the fabric.
1 Center of fabric
f
Touch .
g
Touch , and then press the start/stop
button to embroider the pattern section.
h
When embroidering is finished, the
following screen appears. Touch .
A screen appears so that a section of the large-size
embroidery pattern can be selected.
i
Touch to select the next section of the
pattern, and then touch .
j
Touch , and then .
k
Hoop the fabric for the next design section
aligning on the alignment stitching. In this
case, align the left side of the hoop on the
right side of the design section embroidered
in step
f.
1 Alignment stitching
Memo
• The pattern can be rotated to either the left
or right when is touched.
Note
• The last step of the stitching of the pattern
section will be an alignment stitching. Use
this stitching for placement of adjacent
pattern section.
Note
• Make sure that the alignment stitching is
completely within the embroidery field. Set
the embroidery sheet inside the embroidery
frame and align the grid with the alignment
stitching for easier placement.
Loading ...
Loading ...
Loading ...