Loading ...
Loading ...
Loading ...
SELECTING/EDITING/SAVING PATTERNS
165
5
g
After making the desired changes, touch
.
The pattern editing screen appears again.
■ Assigning thread marks
By sewing thread marks, you can easily align
patterns when sewing a series. When sewing is
finished on a pattern, a thread mark in the shape of
an arrow will be sewn using the final thread. When
sewing a series of patterns, use the point of this
arrow for positioning the following designs to be
sewn.
a
Touch .
b
Touch .
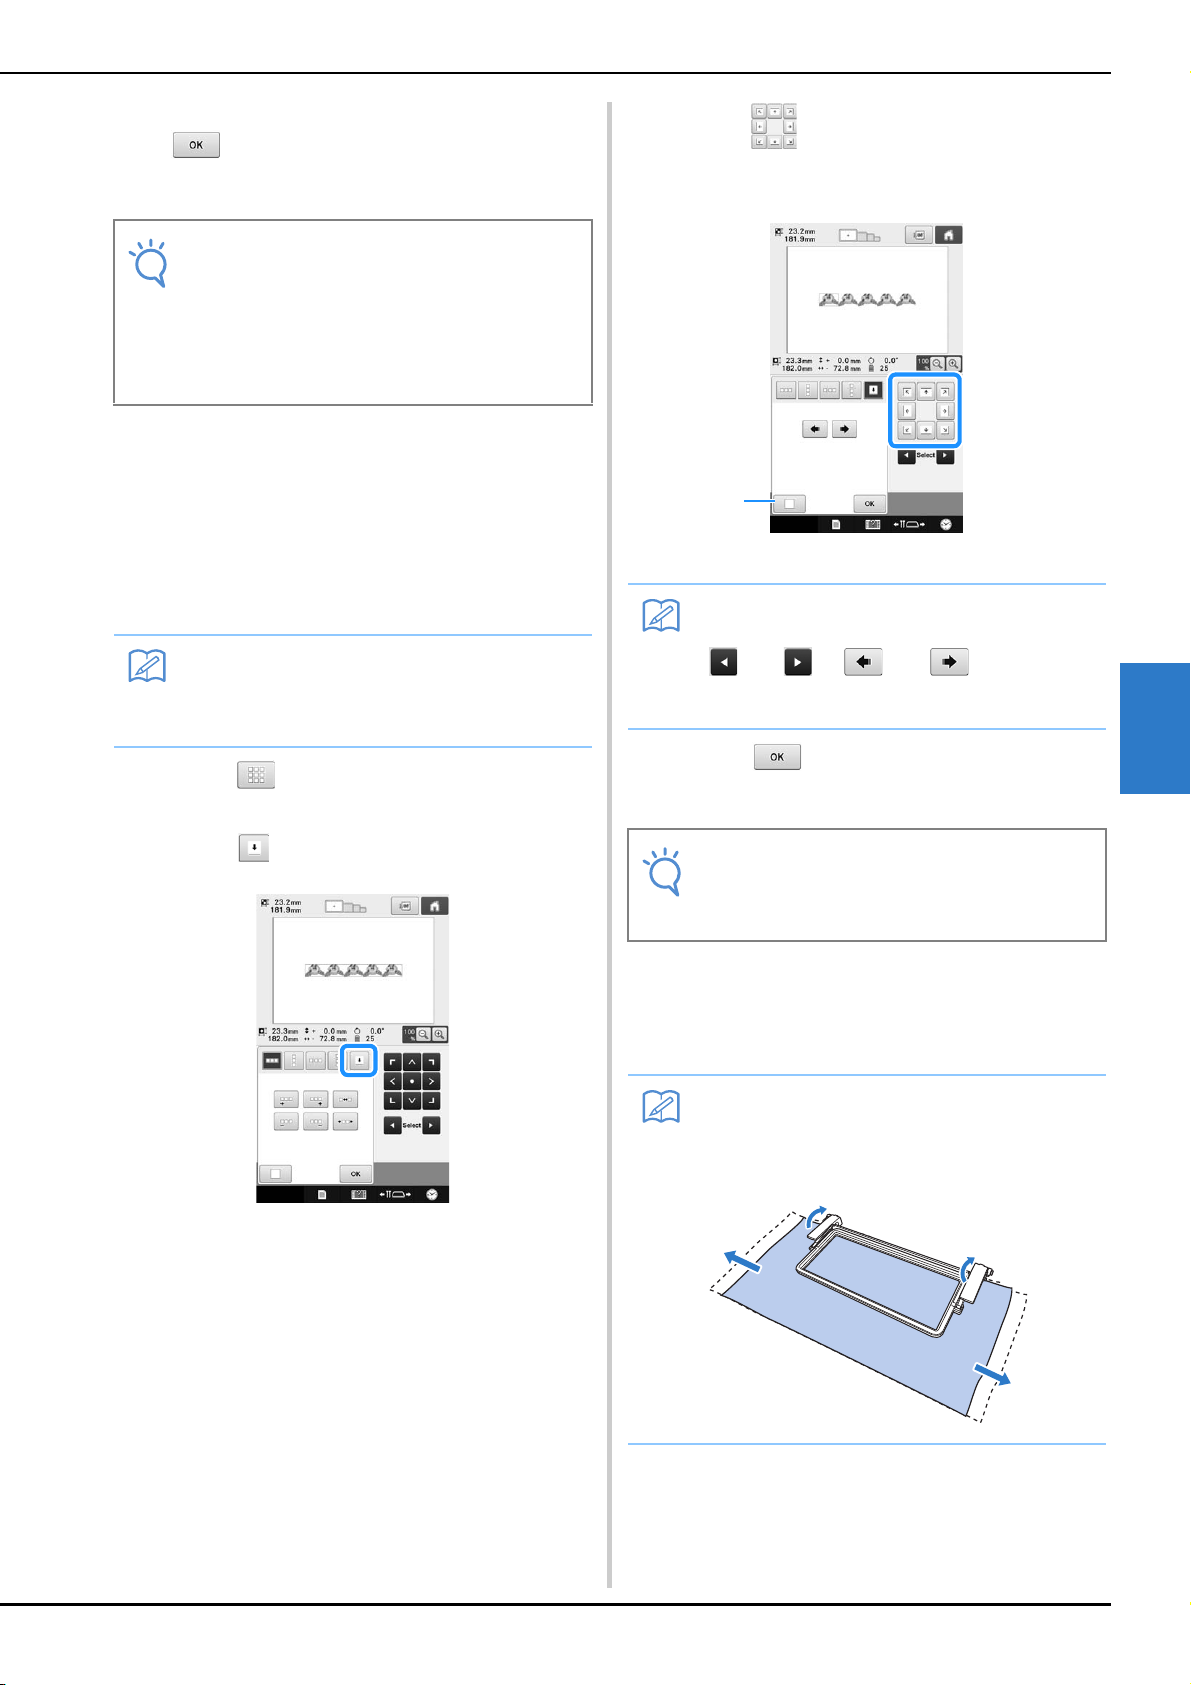
c
Touch to select the thread mark to be
sewn.
1 Touch to cancel thread mark setting.
d
Touch .
■ Embroidering the pattern repeatedly
After creating the repeated pattern, rehoop the
embroidery frame and keep sewing for the next
pattern.
Note
• Once you have cut a repeated pattern into
separate elements, you cannot return to the
original repeated pattern.
• Each element can be edited separately in
the edit screen. Refer to “Selecting the
pattern to be edited” on page 147.
Memo
• When repeatedly sewing individual patterns,
thread marks can be sewn around the
perimeter of the pattern only.
Memo
• When there are two or more elements, use
and or and to select a
pattern that you want to assign a thread
mark(s) to.
Note
• If the combined border pattern is rotated in
the embroidering settings screen, the
thread mark will be removed.
Memo
• The optional border frame allows you to
easily rehoop the fabric without removing
the embroidery frame from the machine.
1
Loading ...
Loading ...
Loading ...