Loading ...
Loading ...
Loading ...
EMBROIDERING SETTINGS
115
4
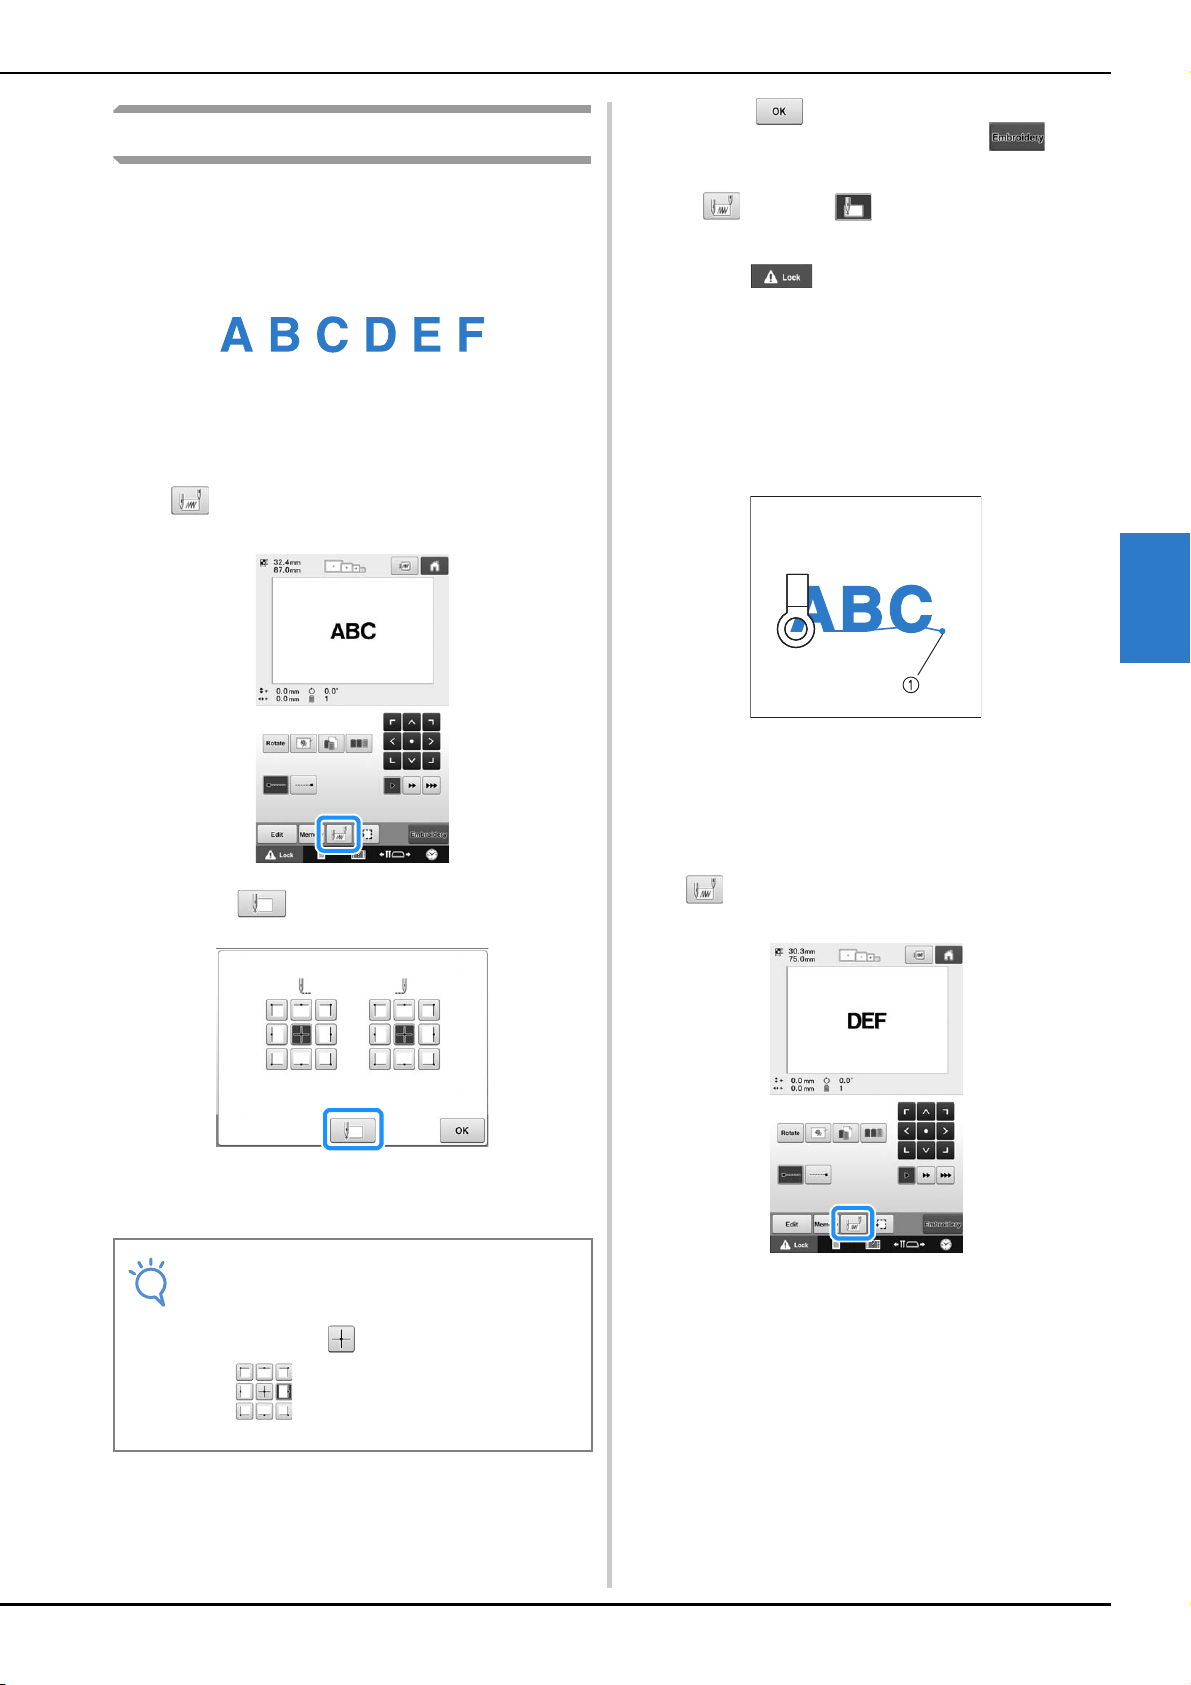
Embroidering linked characters
Follow the procedure described below to
embroider linked characters in a single row when
the pattern extends beyond the embroidery frame.
Example: Linking “DEF” to the characters “ABC”
a
Select the character patterns for “ABC”.
b
In the embroidering settings screen, touch
.
c
Touch .
The needle bar is positioned in the lower-left corner
of the pattern. The embroidery frame moves so that
the needle is positioned correctly.
d
Touch to return to the embroidering
settings screen, and then touch
to
continue to the embroidering screen.
changes to while the starting point is set
in the lower-left corner of the pattern.
e
Touch , and then press the start/stop
button to begin embroidering.
f
After the characters are embroidered, cut
the threads, remove the embroidery frame,
and then attach the embroidery frame again
so that the remaining characters (“DEF”)
can be embroidered.
1 End of the embroidering
g
As in step a, select the character patterns
for “DEF”.
h
In the embroidering settings screen, touch
.
Note
• To cancel the starting point setting and
return the starting point to the center of the
pattern, touch .
• Use to select a different starting
point for embroidering.
Loading ...
Loading ...
Loading ...