Loading ...
Loading ...
Loading ...
68
Installation Procedure
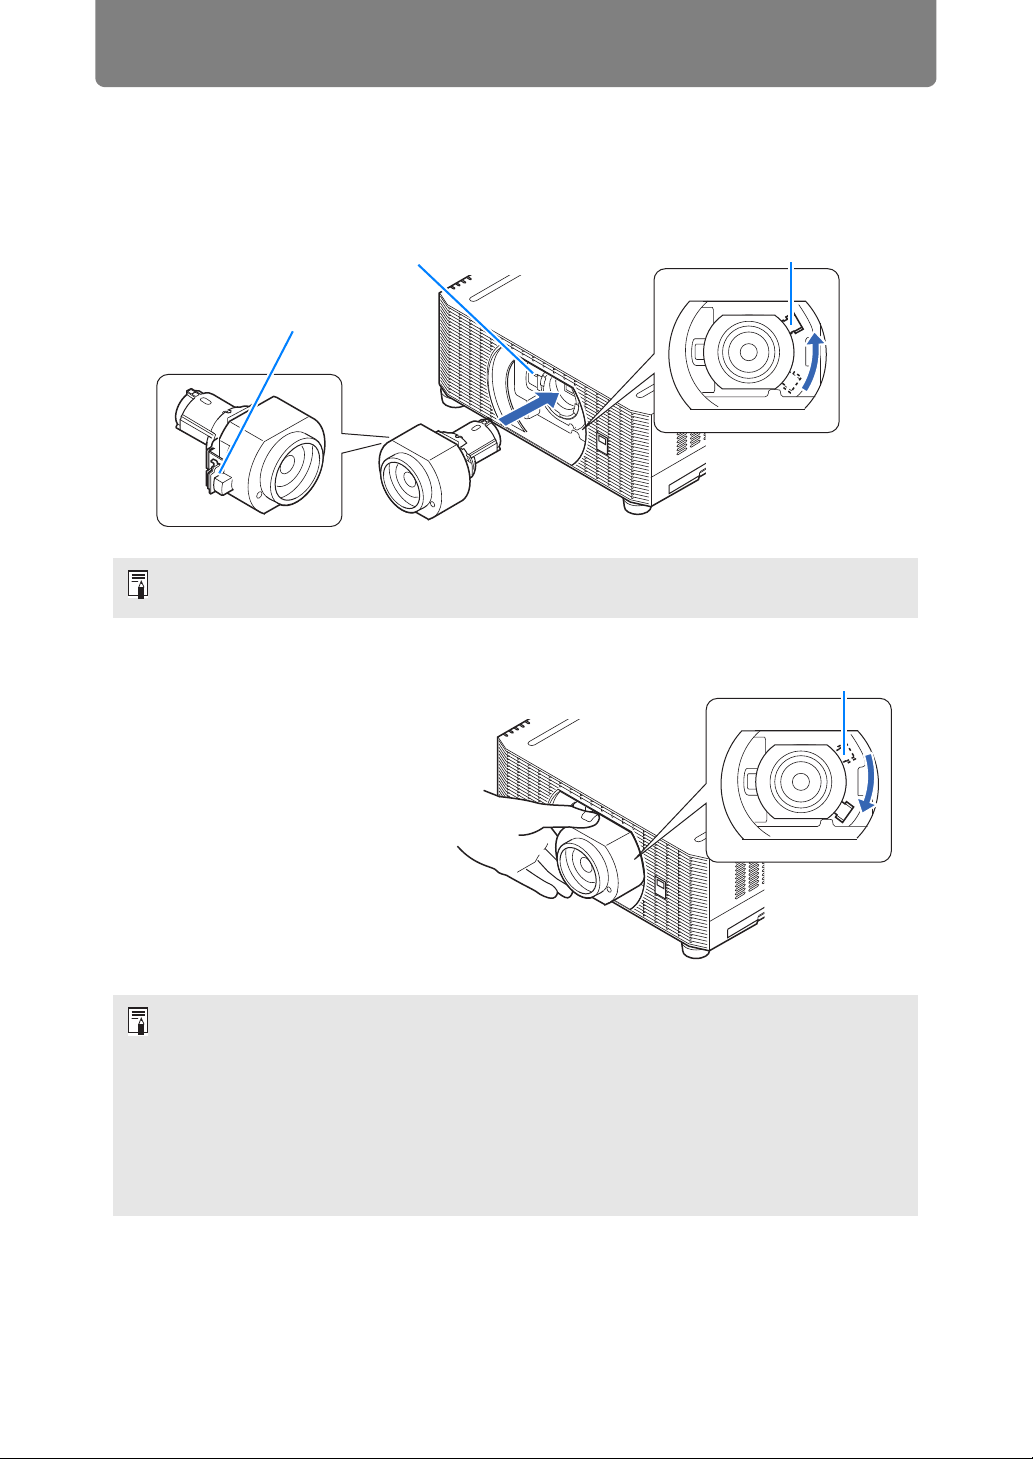
■ Installing the Lens Unit
1 After confirming that the lens lever is raised, hold the lens unit with the
lens connector on the left side and insert it in the projector, keeping the
lens connector aligned with the connector in the projector.
2 Turn the lens lever
clockwise to secure the
lens unit.
Keep the lens unit level as you insert it straight into the projector. Inserting it crooked may
prevent the lens lever from moving freely or make projection blurry.
• When securing the lens unit, make sure it is fully inserted in the projector, and then turn
the lens lever clockwise (toward the bottom, as shown) to secure it. If it is not fully
inserted, this may prevent the lens lever from moving freely or make projection blurry.
• The projector stores certain information about lenses. This information must be set
again when lenses are replaced.
After lens replacement, lens shift reset is performed automatically when the projector is
restarted. However, when reinstalling the same type of lens, perform lens shift reset
manually (P158).
• Also refer to instructions included with the replacement lens.
Connector
Lens connector
Lens lever
Lens lever
Loading ...
Loading ...
Loading ...