Loading ...
Loading ...
Loading ...
109
Special Arrangements
Installation Guide Special Arrangements
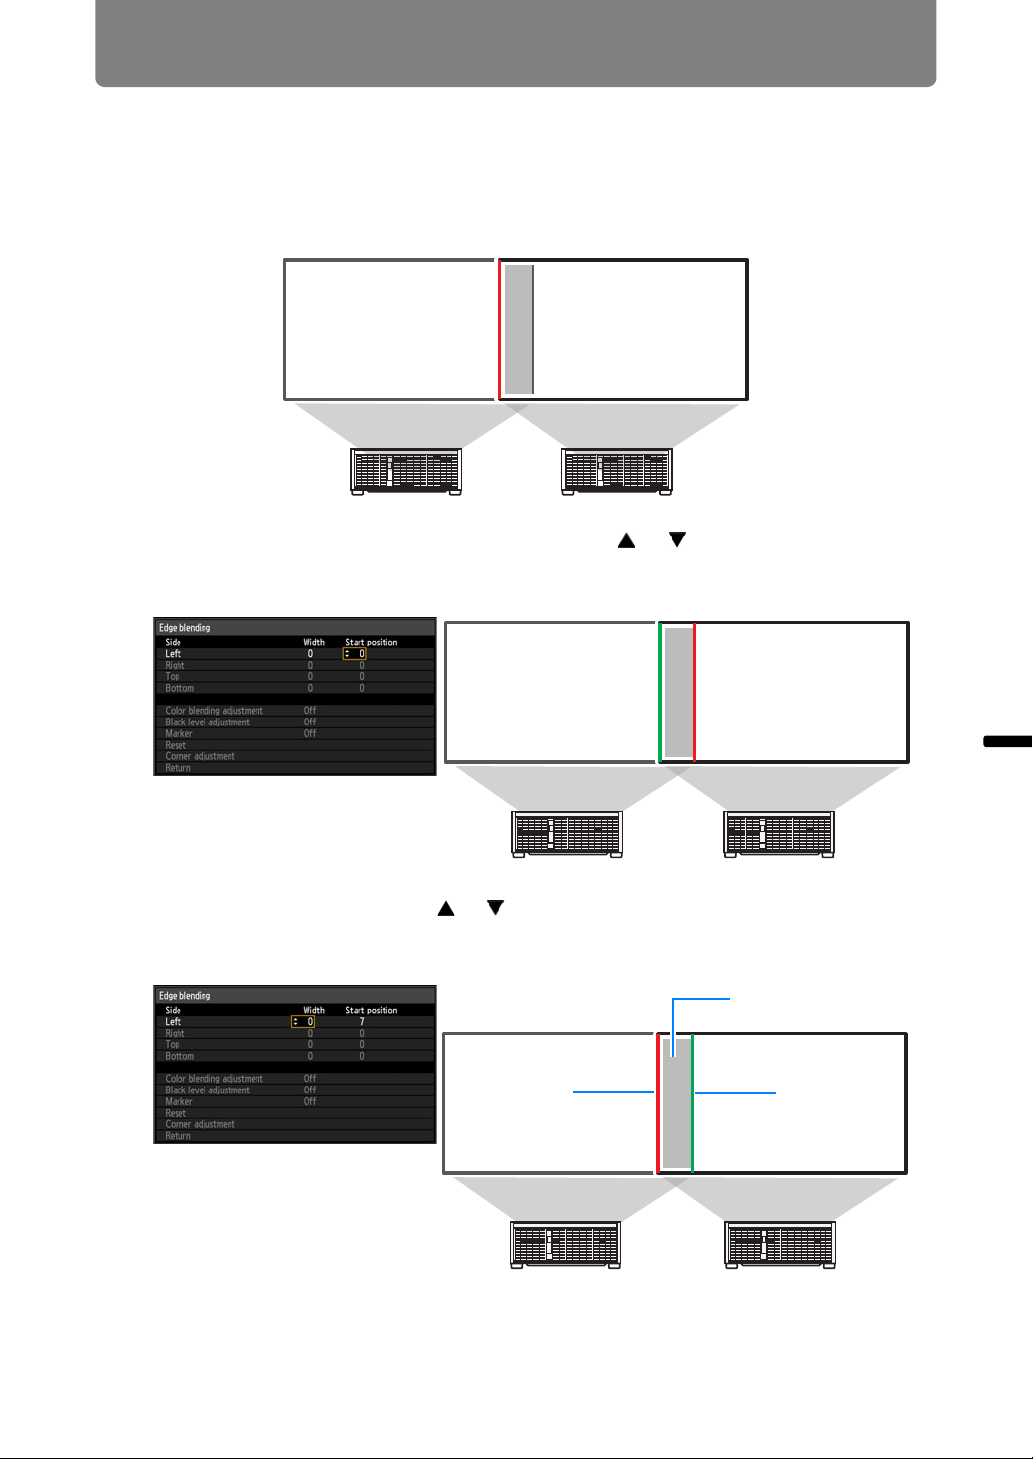
2 Set [Marker] to [On].
Marker lines are projected on the images. The red marker indicates the start
position for adjustment, and the green marker, the end position.
Initially, only the red marker is visible when you prepare for edge blending,
because it is projected over the green marker.
3 In [Side], select [Start position] and use the [ ] / [ ] buttons to move the
start marker to the outer edge of the overlapping area.
Do this for each edge; on the top, bottom, left, and right.
4 Select [Width] and use the [ ] / [ ] buttons to move the end marker to the
inner edge of the overlapping area.
Do this for each edge; on the top, bottom, left, and right.
Start marker
Blending area
End marker
Loading ...
Loading ...
Loading ...