Loading ...
Loading ...
Loading ...
1
2
CLICK
2
3
CLICK
4
CLICK
5
CLICK
6
7
8
9
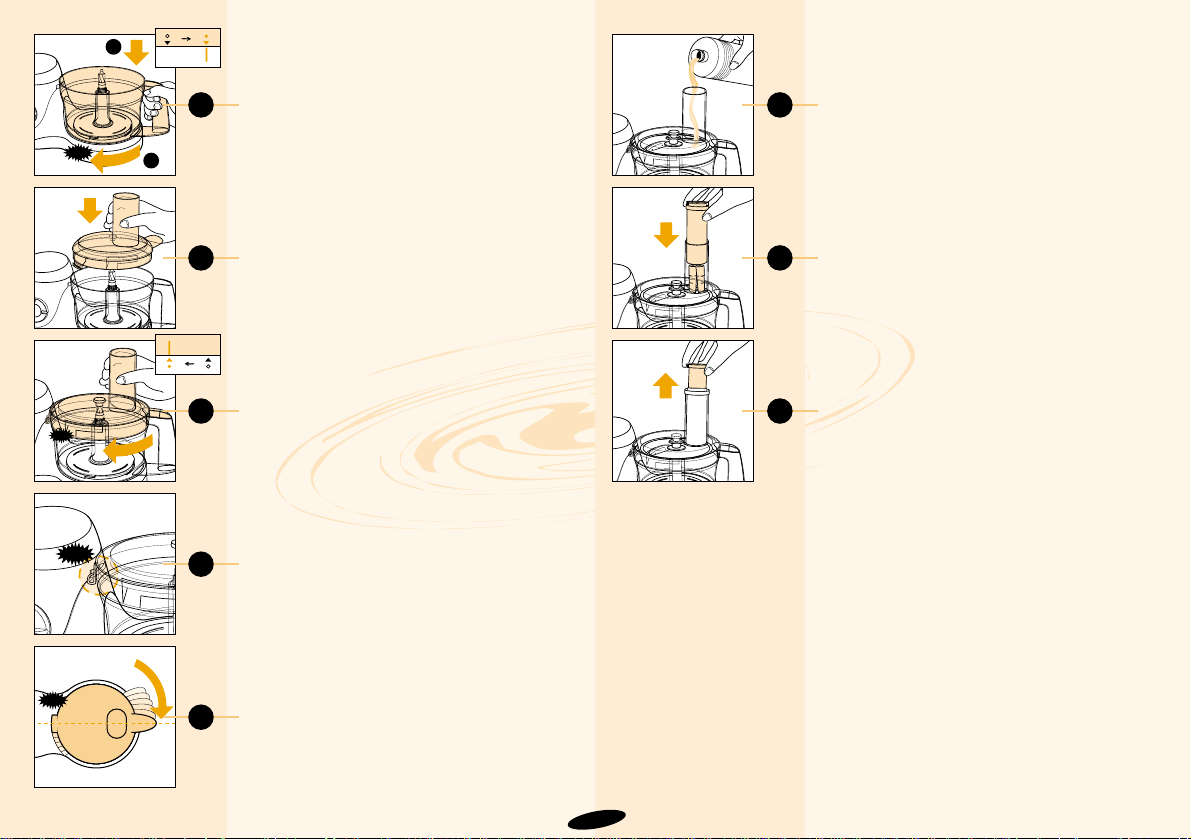
Placing the bowl (B) (fig. 2)
- Put the bowl on the food processor as
shown (1)
- Turn the handle in the direction of the
arrow until the bowl cannot be moved any
further and you hear a ‘click’(2).
Placing the lid (C)
- Put the lid on the bowl as shown in fig. 3.
- Turn the lid with some force in the direction
of the arrow until the lid will not move any
further and you hear a ‘click’ (fig. 4-5).
- Make sure that the mark on the lid and the
arrow on the bowl are directly opposite
each other. The projection of the lid will
now cover the opening in the handle of the
bowl (fig. 6).
Chute (N) and pusher (O)
• The chute can be used to add liquid and
solid ingredients (fig. 7).
• Use the pusher to push ingredients through
the chute (fig. 8).
• You can also use the pusher to close the
chute while the appliance is running to
prevent dust or drops of liquid from
escaping through the chute.
• The pusher has been provided with a
second small pusher.
- This small pusher can be removed (fig. 9)
to create a narrower chute.
- A narrower chute may be handy when you
want to cut e.g. carrots or when the amount
of ingredients used is too small to use the
normal chute.
Please note that you should only use the
small pusher when the larger pusher has
been placed in the chute.
Built-in safety lock (F)
The motor unit as well as the accessories
have been provided with marks. The
appliance will only function if the arrow on
the appliance is placed directly opposite the
mark on the lid (C) and on other accessories.
In this position, the projection of the lid and
of the accessories will cover the opening in
the handle of the bowl.
5
Loading ...
Loading ...
Loading ...