Loading ...
Loading ...
Loading ...
EN - 52
Manual Network Settings
1.
Press [ (home) ], then select “Setup”
“Network”
“Manual Network Settings”,
then press [ OK ].
Setup
Network Settings Assistant
Manual Network Settings
Connection Test
Setting Status
Network Selection
Wireless
Wireless Network Setting • Auto
IP Configuration
• IP Setting Mode
Proxy Configuration • Proxy Setting
■
For Wireless Connection
2.
Select “Network Selection” using [ / ] ,
then press [ OK ].
3.
Select “Wireless” using [ / ] , then press
[ OK ].
4.
Select “Wireless Network Setting” using
[
/ ] , then press [ OK ].
You will be asked to Select “Auto” or “Manually Enter Your
SSID”. Select an adequate Method according to your Wireless
Router and Settings.
Auto
5.
Select “Auto” using [ / ] , then press
[ OK ].
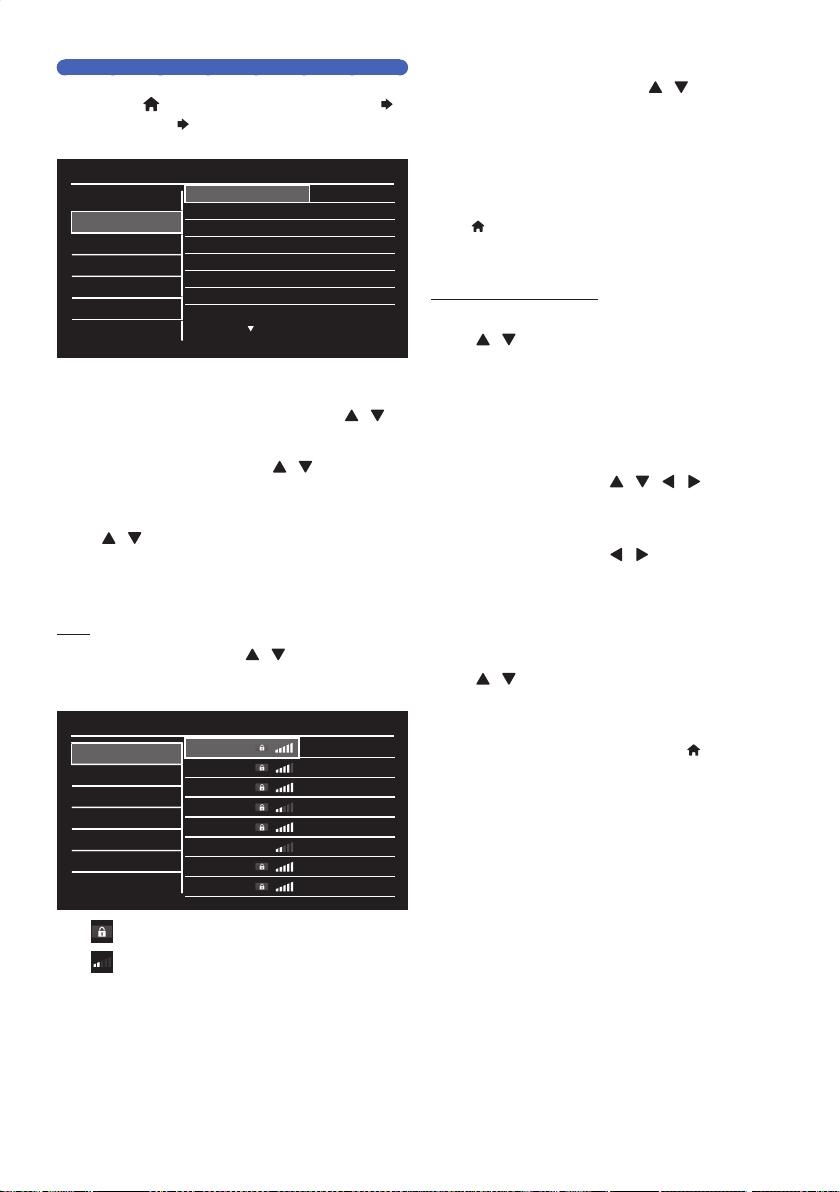
• Access Points List will be Displayed.
Setup
Auto
Manually Enter Your SSID
Router1
• Enter Key
Router2
• Select
Router3 • Enter Key
Router4
• Enter Key
Router5
• Enter Key
Router6
• Start Now
Router7 • Enter Key
Router8
• Enter Key
appears next to the SSID (Access Point) that is
Protected with Security.
shows the Access Point’s Signal Strength.
6.
Select an Access Point to which you wish to
Connect this Unit using [
/ ] , then press
[ OK ].
If you select an Access Point with “Enter Key”, “Start
Now”, or “Select”...
For “Enter Key”: WEP / WPA / WPA2 key entry Screen will
appear. Refer to Step
6 to 9 in ‘Manual’ on page 50.
For “Start Now”: Connection Test will Start. If Connection Test
passes, press [ OK ] to Complete the Network Setup, then
press [
(home) ] Repeatedly to Exit.
For “Select”: WPS Connection Method Screen will appear. Refer
to Step
4 to 9 on page 50.
Manually Enter Your SSID
5.
Select “Manually Enter Your SSID” using
[
/ ] , then press [ OK ].
• SSID Entry Screen will appear.
6.
Enter the SSID using the On screen
Keyboard.
• For details on how to use the On screen Keyboard,
refer to ‘Guide to the On Screen Keyboard’ on page 45.
7.
Select “OK” using [ / / / ] , then
press [ OK ].
• Confirmation Message will appear.
8.
Select “Yes” using [ / ] , then press
[ OK ].
9.
Press [ OK ] on the SSID.
• List of Security Methods will be Displayed.
10.
Select an adequate Security Method using
[
/ ] , then press [ OK ].
If you Select “None”…
Connection Test will Start. If Connection Test passes, press [ OK ]
to Complete the Network Setup, then press [
(home) ]
Repeatedly to Exit.
If you select “WEP” or “WPA/WPA2”…
WEP / WPA / WPA2 Key Entry Screen will appear. Refer to
Steps
6 to 9 in ‘Manual’ on page 50.
■
Wired Connection
Refer to ‘For Wired Connection’ on page 51.
Continued on next page.
EEC30UHPhilipsSmartDVRv1EN.indb52EEC30UHPhilipsSmartDVRv1EN.indb52 2013/09/1315:38:552013/09/1315:38:55
Loading ...
Loading ...
Loading ...