Loading ...
Loading ...
Loading ...
2-65
COPIER
Contents
6
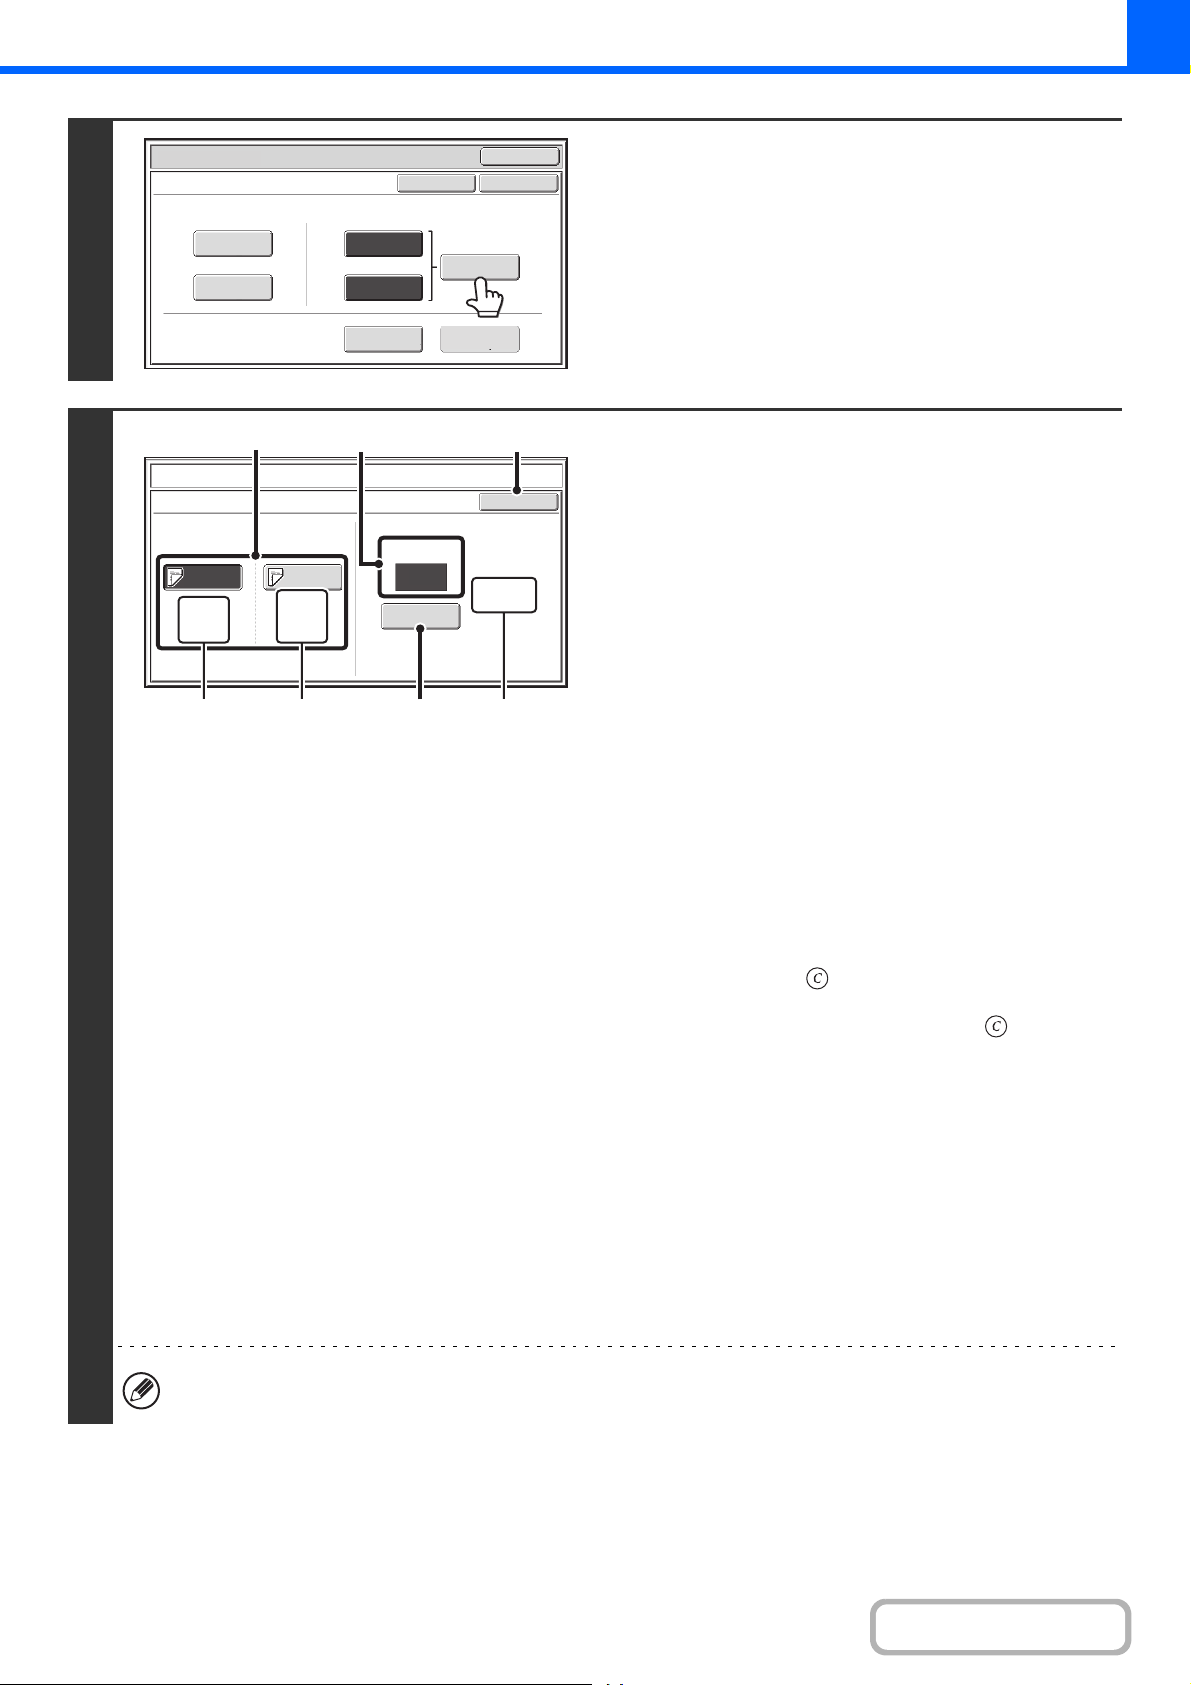
Touch the [Insertion Settings] key.
7
Specify the pages where inserts A and B
will be inserted.
(1) Touch the [Insertion Type A] key or the
[Insertion Type B] key.
Specify the page where the highlighted insert will be
inserted.
(A) This shows the tray selected for insert type A and the
paper size and type.
(B) This shows the tray selected for insert type B and the
paper size and type.
When the [Insertion Type A] key is highlighted, the insert
sheet insertion settings are applied to [Insertion Type A].
When the [Insertion Type B] key is highlighted, the insert
settings are applied to [Insertion Type B].
(2) Enter the page number where the insert
sheet will be inserted with the numeric
keys.
For more information, see "Inserts (copying of 1-sided
originals)" (page 2-155) and "Inserts (copying of 2-sided
originals)" (page 2-155).
The [CLEAR] key ( ) can be pressed to return the
setting of the selected item to the default value. If you
make a mistake, press the [CLEAR] key ( ) and then
enter the correct number.
(3) Touch the [Enter] key.
(C) This shows the total number of inserts. Up to 100
insert sheets can be inserted. To insert multiple
inserts, touch the [Enter] key after entering each
insertion page number (insertion position) with the
numeric keys.
(4) To insert another insert sheet, repeat steps
(1) to (3).
(5) Touch the [OK] key.
If both sides of the insert will be copied on, label sheets, transparency film, and tab paper cannot be used. If not copied
on, tab paper can be inserted.
Special Modes
OK
OK
Cancel
Front
Cover
Back
Cover
Insertion
Type B
Insertion
Type A
Insertion
Settings
Tray Settings
Inserts Setting
Cover Setting
Covers/Inserts
Page Layout
Covers/Inserts
Insertion Settings
OK
Insertion
Type B
Insertion
Type A
10
Insertion
Total:4
8½x11
Plain
Tray 1
Bypass
Tray
8½x11
Plain
Enter
Insertion Page
(1) (5)(2)
(A)
(B) (C)(3)
Loading ...
Loading ...
Loading ...