Loading ...
Loading ...
Loading ...
31
INSTALLATION
ENGLISH
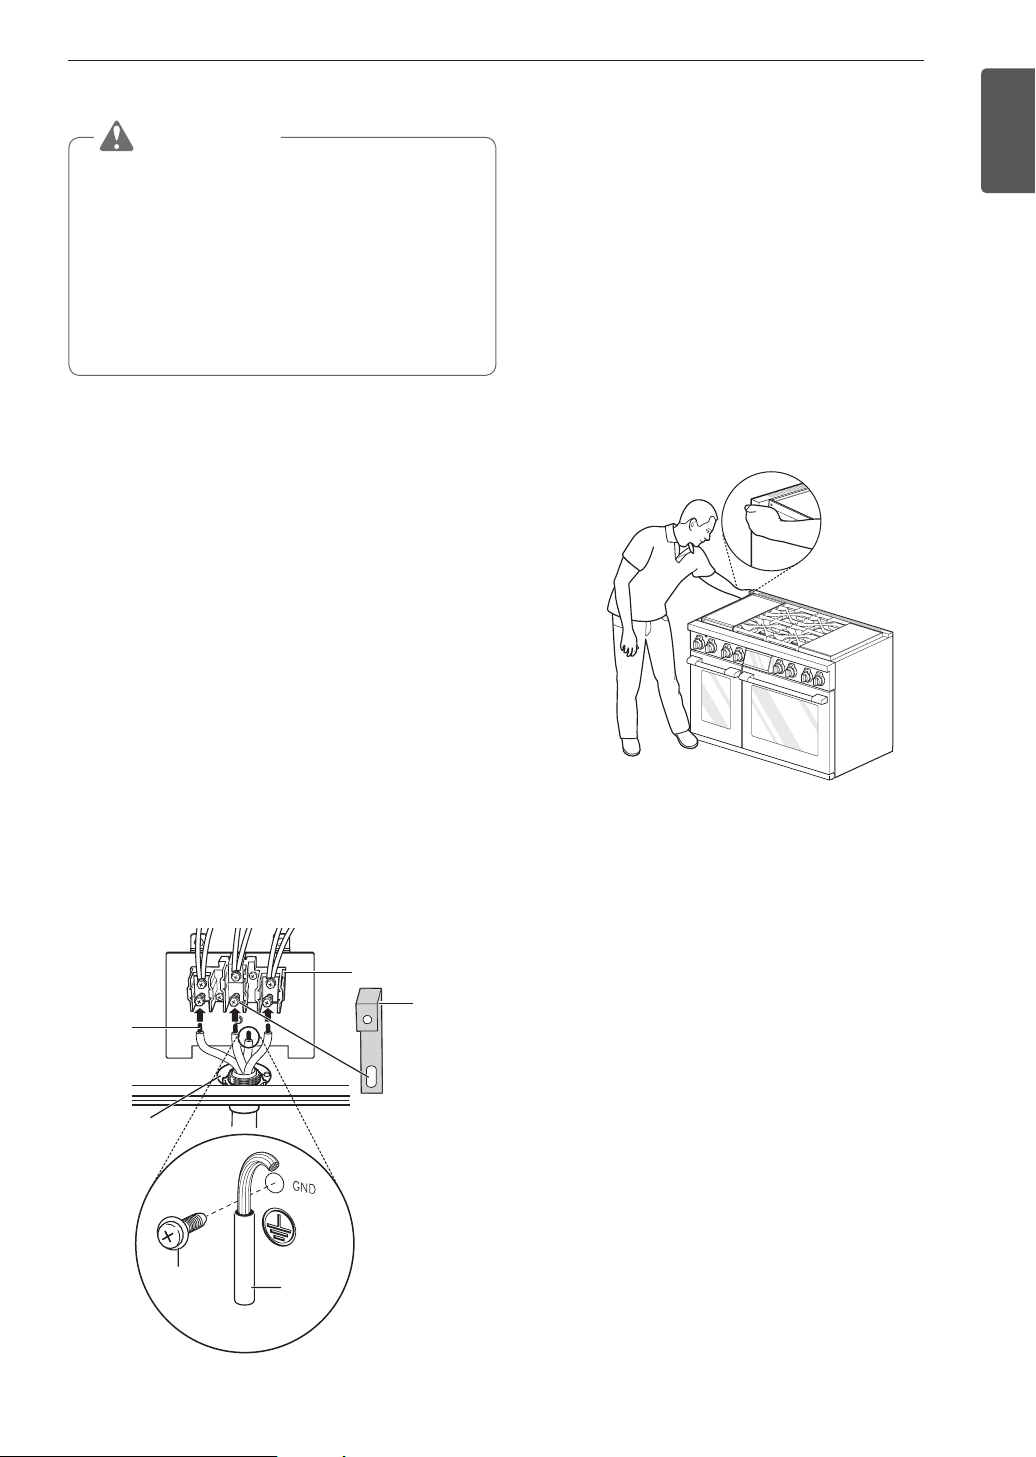
4-Wire Connection: Conduit
WARNING
•
The white middle (neutral) wire of the power
cord or 4-wire conduit has to be connected
to the middle post of the main terminal
block. The other two wires of the power
cord or conduit have to be connected to
the outside posts of the main terminal
connection block. The 4th ground wire
(green) must be connected to the frame of
the range with the ground screw. Failure
to do so can result in electrical shock, severe
personal injury or death.
1
Follow the instructions for installing the conduit
under 3-Wire Connection: Conduit until the strain
relief and bracket are installed. Do not install the
conduit without a strain relief.
2
Loosen the 2 lower left and right screws from the
terminal block. Remove the lower center screw.
Do not discard any screws.
3
Remove the ground screw and bend the end of
the ground strap up so the slot is over the hole
of the center screw removed in step 2.
4
Attach the ground (green) bare wire end to
the range frame and secure it in place with the
ground screw.
5
Insert the bare wire (white/neutral) end through the
center terminal block opening. The center screw
now attaches the bent up ground strap to the block.
6
Insert the two side bare wire ends into the left
and the right terminal block openings. Tighten
the 3 screws securely into the terminal block.
(approximately 35 - 50 IN-LB)
4-Wire Conduit Connection
Terminal
block
Black White Red
Ground
strap
Wire
ends
Conduit
connection
plate
Bend strap
up and
attach
Ground
wire
Ground
screw
If screws are not tightened securely, it can result in
electrical spark and severe personal injury or death.
Engaging the Anti-tip Device
•
Move the range close enough to the opening to
plug into the receptacle.
•
Slide the range into position ensuring that the back
leg slides under the anti-tip bracket. The range
should sit flush against the back wall when properly
installed.
•
Carefully attempt to tip the range forward to ensure
that the anti-tip bracket is engaged properly. If
properly installed, the anti-tip bracket will prevent
the range from being tipped. If the range can be
tipped, reinstall the range until the anti-tip bracket is
properly installed and the range will not tip forward.
•
Turn on electrical power. Check the range for
proper operation.
Loading ...
Loading ...
Loading ...