Loading ...
Loading ...
Loading ...
En
39
Changing the settings
! If the [WAKE UP (UTILITY)] button is pressed, the standby mode is
canceled.
! By default, the auto standby function is enabled.
1 Press the [WAKE UP (UTILITY)] button for over 1
second.
The utilities screen appears on a display of this unit.
2 Use the rotary selector to select and enter [AUTO
STANDBY].
3 Use the rotary selector to select and enter [ON] or
[OFF].
— ON: Enables the auto standby function.
— OFF: Disables the auto standby function.
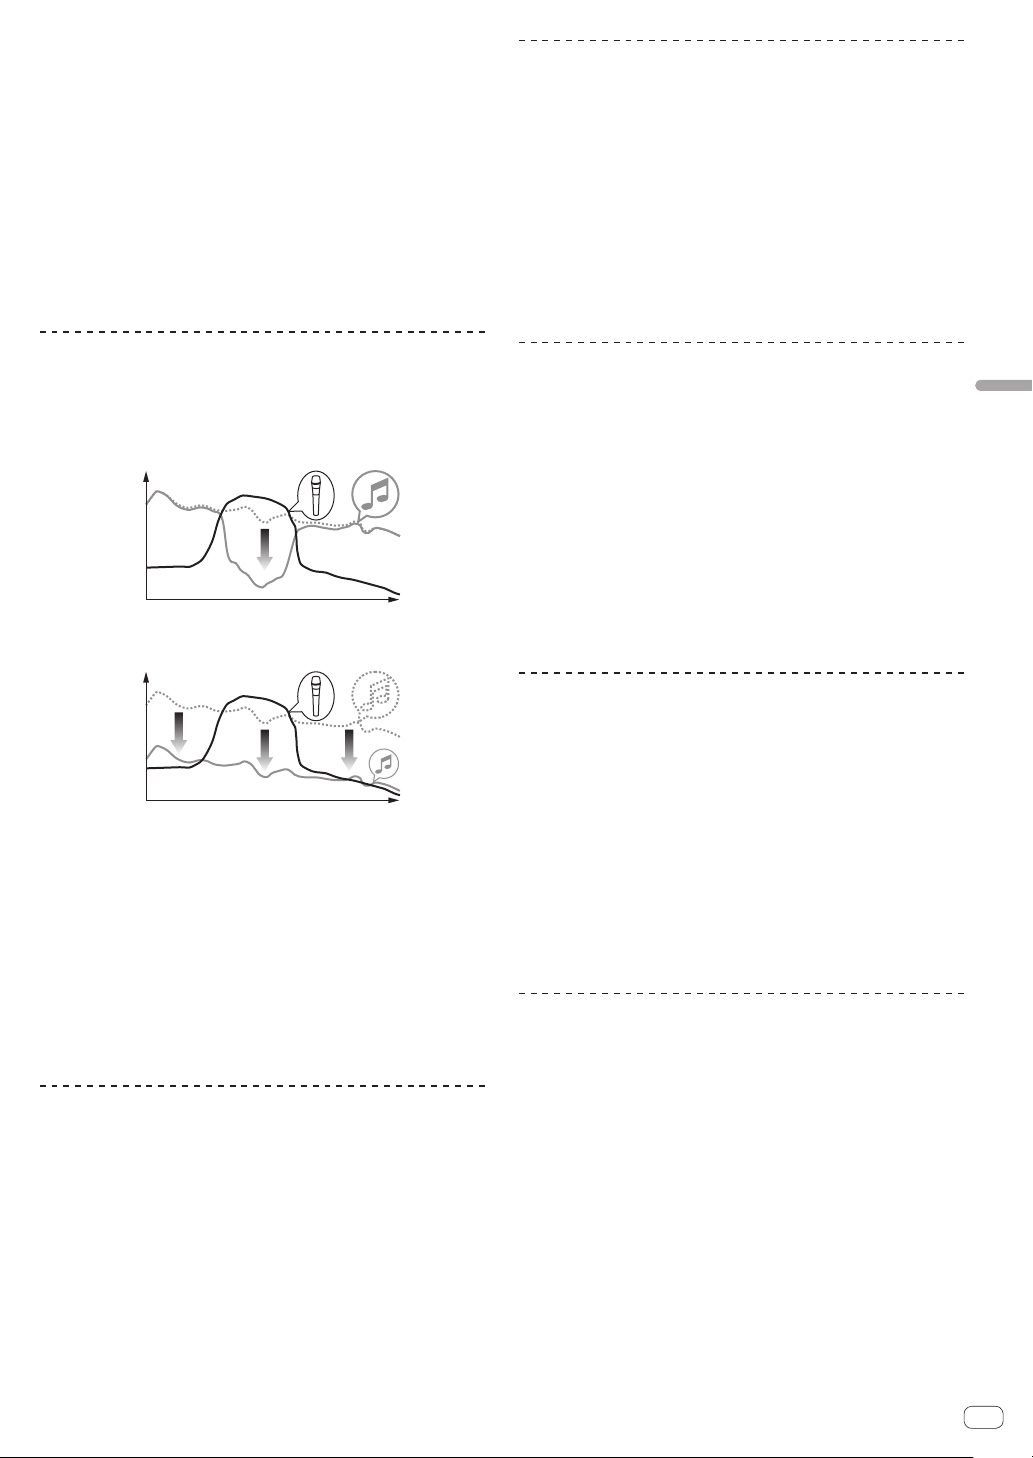
Changing the talk over function setting
About talk over mode
The talk over function has the two modes described below.
Advanced talk over mode: Sound other than the microphone channel is
output with only the midrange attenuated per the talk over level setting.
dB
Frequency
Normal talk over mode: Sound other than the microphone channel is
output attenuated per the talk over level setting.
dB
Frequency
! By default, the advanced talk over mode is set.
1 Press the [WAKE UP (UTILITY)] button for over 1
second.
The utilities screen appears on a display of this unit.
2 Use the rotary selector to select and enter [MIC TALK
OVER MODE].
3 Use the rotary selector to select and enter
[ADVANCED] or [NORMAL].
— ADVANCED: Advanced talk over mode
— NORMAL: Normal talk over mode
Changing the talk over function level
Sets the talk over function’s sound attenuation level.
! By default, the level is set to -18 dB.
1 Press the [WAKE UP (UTILITY)] button for over 1
second.
The utilities screen appears on a display of this unit.
2 Use the rotary selector to select and enter [TALK
OVER LEVEL].
3 Use the rotary selector to select and enter one of [-6
dB], [-12 dB], [-18 dB], and [-24 dB].
Adjusting the crossfader cut lag
Adjust the play (cut lag) of both ends of the crossfader. Adjustment can
be made from 0.5 mm to 3.7 mm in 0.1 mm increments.
! By default, the level is set to 1.0 mm.
1 Press the [WAKE UP (UTILITY)] button for over 1
second.
The utilities screen appears on a display of this unit.
2 Use the rotary selector to select and enter [CROSS
FADER CUTLAG].
3 Use the rotary selector to select and enter a value
from [0.5 mm] to [5.7 mm].
Setting the microphone output of the
booth monitor
! By default, it is set to output microphone sound from the [BOOTH]
terminal.
1 Press the [WAKE UP (UTILITY)] button for over 1
second.
The utilities screen appears on a display of this unit.
2 Use the rotary selector to select and enter [MIC OUT
TO BOOTH].
3 Use the rotary selector to select and enter one of
[OFF], [-18 dB], [-15 dB], [-12 dB], [-9 dB], [-6 dB], [-3 dB]
and [0 dB].
Changing the peak limiter setting
Lessens sudden, unpleasant digital clipping of the master output.
! By default, the peak limiter is set to enabled.
1 Press the [WAKE UP (UTILITY)] button for over 1
second.
The utilities screen appears on a display of this unit.
2 Use the rotary selector to select and enter [PEAK
LIMITER].
3 Use the rotary selector to select and enter [ON] or
[OFF].
— ON: Enables peak limiter.
— OFF: Disables peak limiter.
Adjusting the brightness of jog ring
You can adjust the brightness of the illumination around the jog dial.
! The same setting is applied to the jog dials on the left and right
decks.
! By default, it is set to bright light.
1 Press the [WAKE UP (UTILITY)] button for over 1
second.
The utilities screen appears on a display of this unit.
2 Use the rotary selector to select and enter [JOG
BRIGHTNESS].
3 Use the rotary selector to select and enter one of
[OFF], [1] (Dark), and [2] (Bright).
Loading ...
Loading ...
Loading ...