Loading ...
Loading ...
Loading ...
2
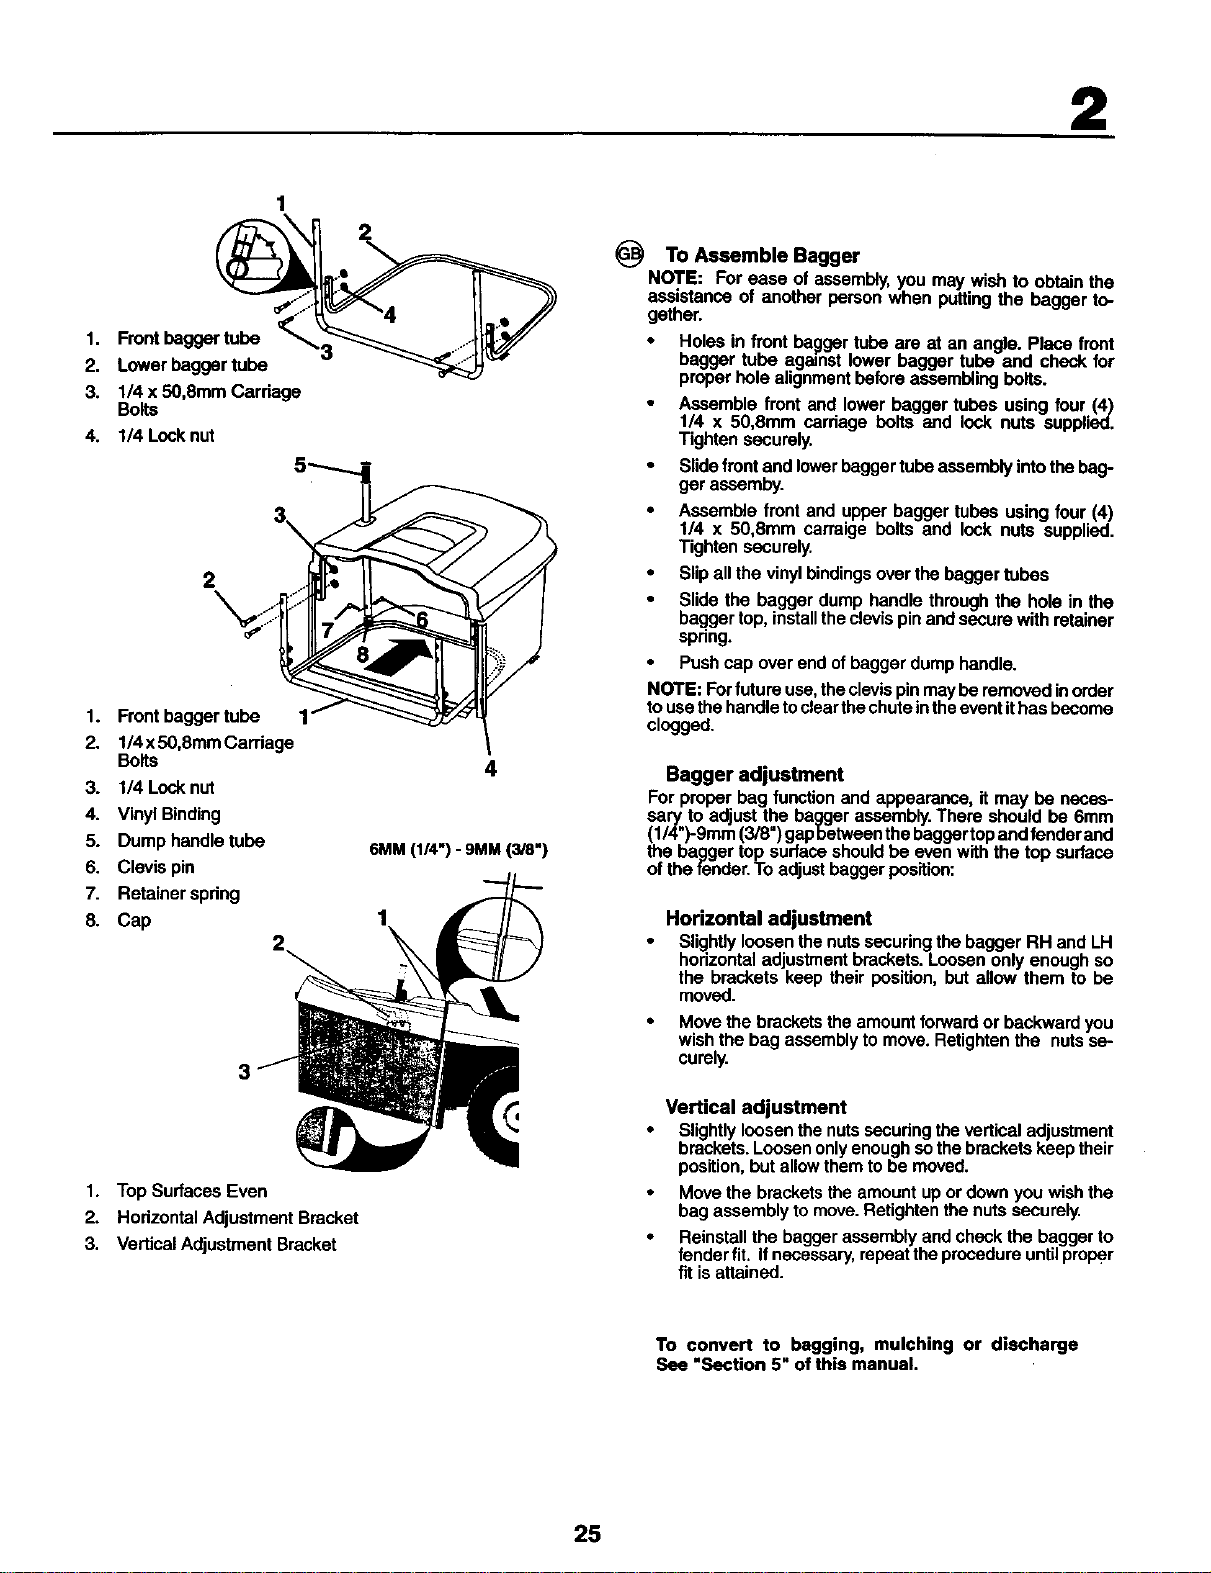
1. Frontbeggertube
2. Lowerbaggertube
3. 1/4x 50,8mmCarriage
Bolts
4. 1/4 Lock nut
2
1. Front bagger tube
2. 1/4 x50,8mm Carriage
Bolts
3. 1/4 Lock nut
4. Vinyl Binding
5. Dump handle tube
6. Clevis pin
7. Retainer spdng
8. Cap
4
6MM (1/4") - 9MM (3/8")
1. Top Surfaces Even
2. Hodzontal Adjustment Bracket
3. Vertical Adjustment Bracket
To Assemble Bagger
NOTE: For ease of assembly, you may wish to obtain the
assistance of another person when putting the bagger to-
gether.
• Holes in front bagger tube are at an angle. Place front
bagger tube against lower bagger tube and check for
proper hole alignment before assembling belts.
Assemble front and lower bagger tubes using four (4)
1/4 x 50,8mm carnage bolts and lock nuts supplied.
Tighten securely.
• Slide front and lowerbagger tube assembly into the bag-
ger assemby.
• Assemble front and upper bagger tubes using four (4)
1/4 x 50,8mm carraige belts and lock nuts supplied.
Tighten securely,
• Slip all the vinyl bindingsover the bagger tubes
• Slide the bagger dump handle through the hole in the
ba_.gertop, installthe clevispin and secure with retainer
spnng.
Push cap over end of bagger dump handle.
NOTE: Forfuture use, the clevispin may be removed inorder
to usethe handle toclear the chuteinthe event ithas become
clogged.
Bagger adjustment
For proper bag function and appearance, it may be neces-
sary to adjust the bagger assembly. There should be 6mm
(1/4")-9mm (3/8") gap between the baggertop and fender and
the bagger top surface should be even with the top surface
of the tender. To adjust bagger position:
Horizontal adjustment
Slightly loosen the nuts securing the bagger RH and LH
horizontal adjustment brackets. Loosen only enough so
the brackets keep their position, but allow them to be
moved.
Move the brackets the amount forward or backward you
wish the bag assemblyto move. Retighten the nutsse-
curely.
Vertical adjustment
• Slightly loosen the nuts secudng the vertical adjustment
brackets. Loosen only enough so the brackets keep their
position, but allow them to be moved.
• Move the brackets the amount up or down you wish the
bag assembly to move. Retighten the nuts securely.
• Reinstall the bagger assembly and check the bagger to
fender fit, Ifnecessary, repeat the procedure until proper
fit is attained.
To convert to bagging, mulching or discharge
See "Section 5" of this manual.
25
Loading ...
Loading ...
Loading ...