Loading ...
Loading ...
Loading ...
Whenplacingfoodona rack,pulltherackouttothe
stopposition.Theracksaredesignedtolockandnot
tiltwhenpulledforward.
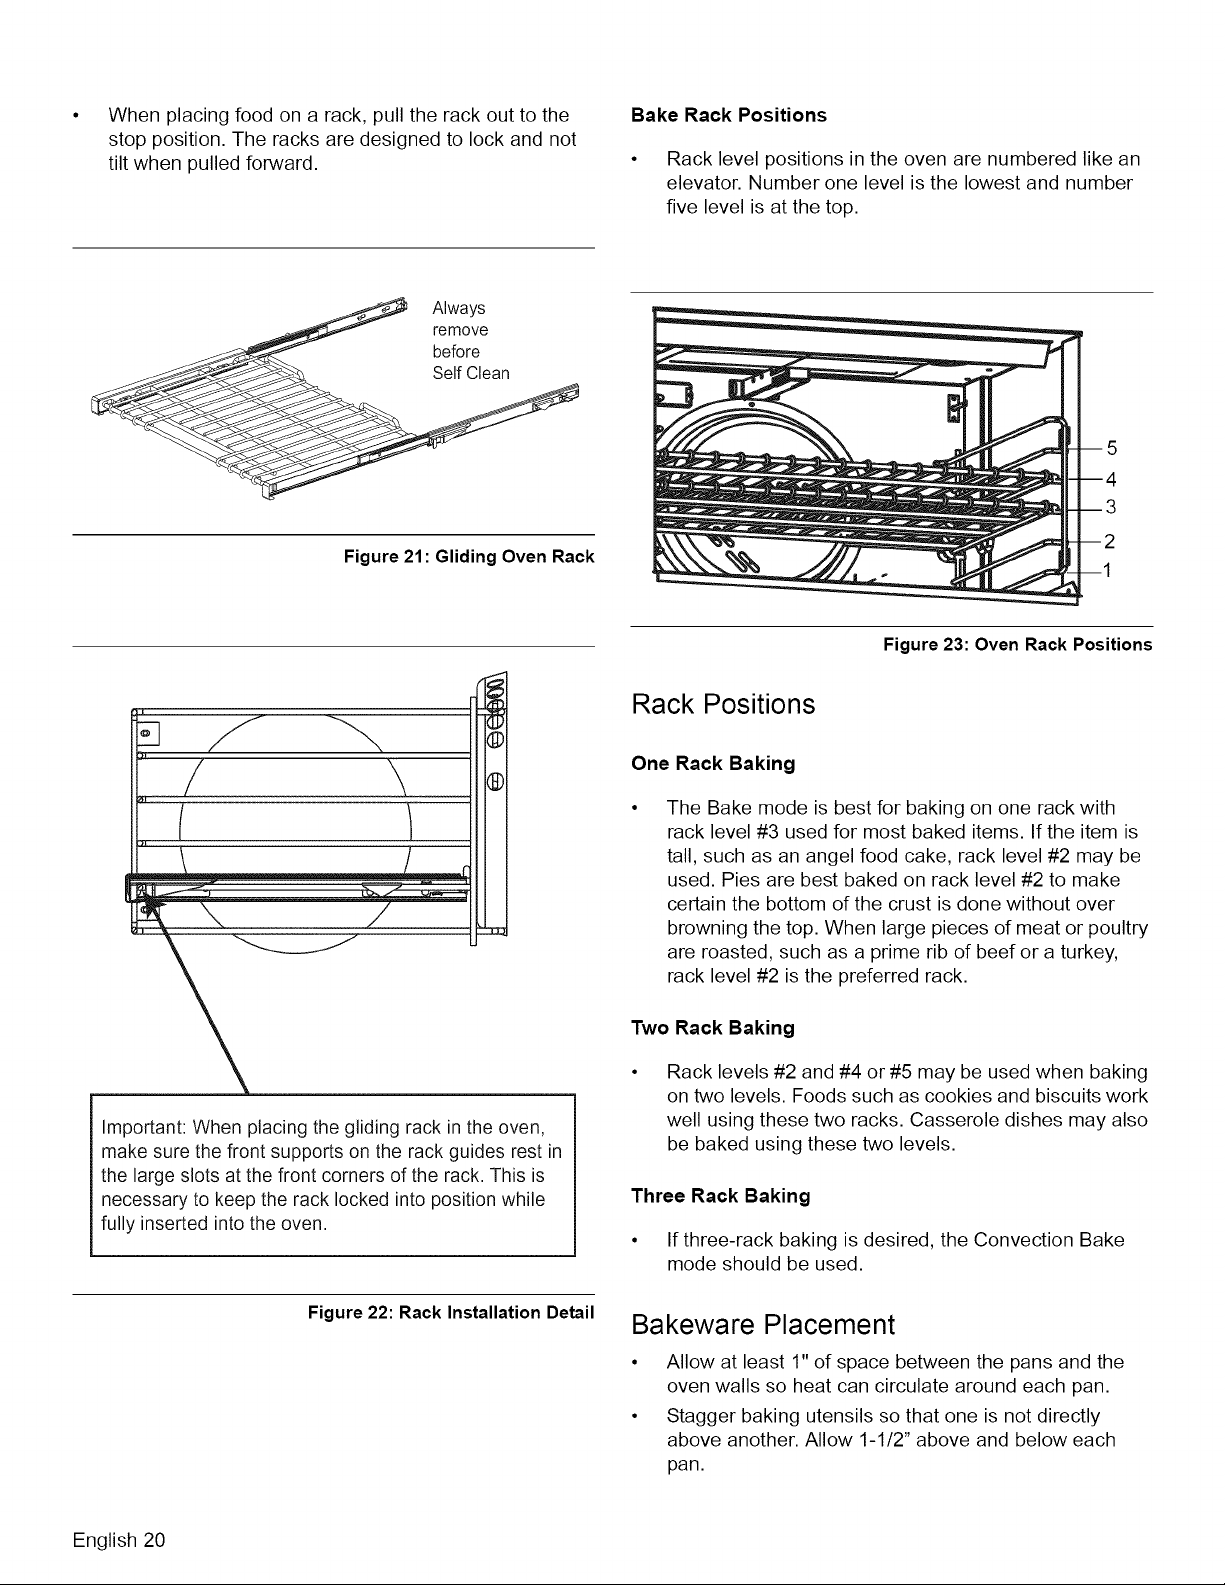
Bake Rack Positions
• Rack level positions in the oven are numbered like an
elevator. Number one level is the lowest and number
five level is at the top.
Always
remove
before
Self Clean
Figure 21: Gliding Oven Rack
3_
Important: When placing the gliding rack in the oven,
make sure the front supports on the rack guides rest in
the large slots at the front corners of the rack. This is
necessary to keep the rack locked into position while
fully inserted into the oven.
Figure 22: Rack Installation Detail
Figure 23: Oven Rack Positions
Rack Positions
One Rack Baking
The Bake mode is best for baking on one rack with
rack level #3 used for most baked items. If the item is
tall, such as an angel food cake, rack level #2 may be
used. Pies are best baked on rack level #2 to make
certain the bottom of the crust is done without over
browning the top. When large pieces of meat or poultry
are roasted, such as a prime rib of beef or a turkey,
rack level #2 is the preferred rack.
Two Rack Baking
Rack levels #2 and #4 or #5 may be used when baking
on two levels. Foods such as cookies and biscuits work
well using these two racks. Casserole dishes may also
be baked using these two levels.
Three Rack Baking
• If three-rack baking is desired, the Convection Bake
mode should be used.
Bakeware Placement
• Allow at least 1" of space between the pans and the
oven walls so heat can circulate around each pan.
• Stagger baking utensils so that one is not directly
above another. Allow 1-1/2" above and below each
pan.
English 20
Loading ...
Loading ...
Loading ...