Loading ...
Loading ...
Loading ...
Operation
●
R
emo
v
e the key in the direction of arrow
2
.
●
Place cover
B
in the lock in the direction
of
arr
o
w
3
›
›› Fig. 219
›
››
.
●
Check that the detachable ball is securely
att
ac
hed ›
›› page 240, Checking proper at-
tachment.
CAUTION
●
After r
emoving the key, always place the
cover over the lever's lock. If the lock be-
comes soiled it will be impossible to insert
the key.
●
Keep the towing bracket device's housing
cavity clean at all times. Dirtiness can pre-
vent the detachable ball from being properly
secured!
●
If the detachable ball is removed, always
place the cap on the hook's housing.
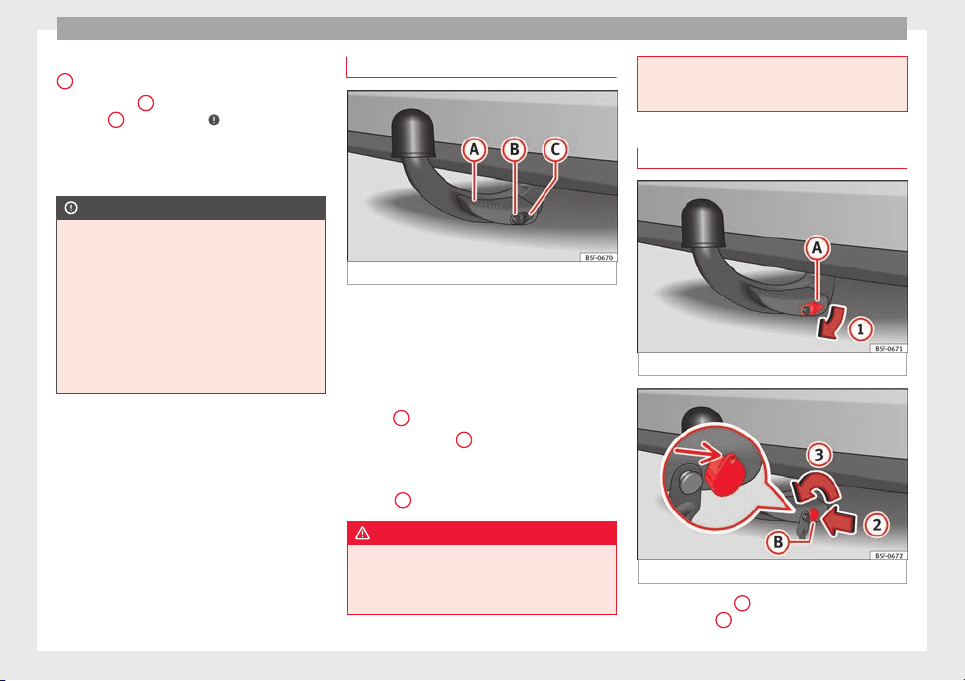
Checking proper attachment
Fig. 220 Detachable ball properly attached.
Whenever you go to use the detachable ball,
m
ak
e s
ure that it is properly attached first.
Detachable ball properly attached.
●
The detachable ball will not fall out of the
housing cavity after a major “knock or jerk”.
●
Lever
A
›
›
› Fig. 220
is fully raised.
●
The release bolt
B
›
›
› Fig. 220
is sticking
fully out (the red and green part is visible).
●
The key has been removed.
●
Cover
C
›
›
› Fig. 220
is placed over the lock.
WARNING
●
When remov
ing the detachable ball, keep
your hands well away from the reach of the
lever's rotation to avoid getting your fingers
caught.
●
The tow
ing bracket device should only be
used if the detachable ball has been properly
locked!
Removing the detachable ball - Step 1
Fig. 221 Removing the lock cover.
Fig. 222 Releasing the lock.
●
Remove cover
A
from the lock in the direc-
tion of
arr
o
w
1
›
›
› Fig. 221
.
240
Loading ...
Loading ...
Loading ...