Loading ...
Loading ...
Loading ...
5) Select the xed area that needs to be adjusted and drag the mouse to adjust its posion.
6) Click Stop Drawing.
4.
Enter Area Name and select ROI Level.
Note
The higher the ROI level is, the clearer the image of the detected area is.
5.
Click Save.
6.
Oponal: Select other area codes and repeat the steps above if you need to draw mulple xed
areas.
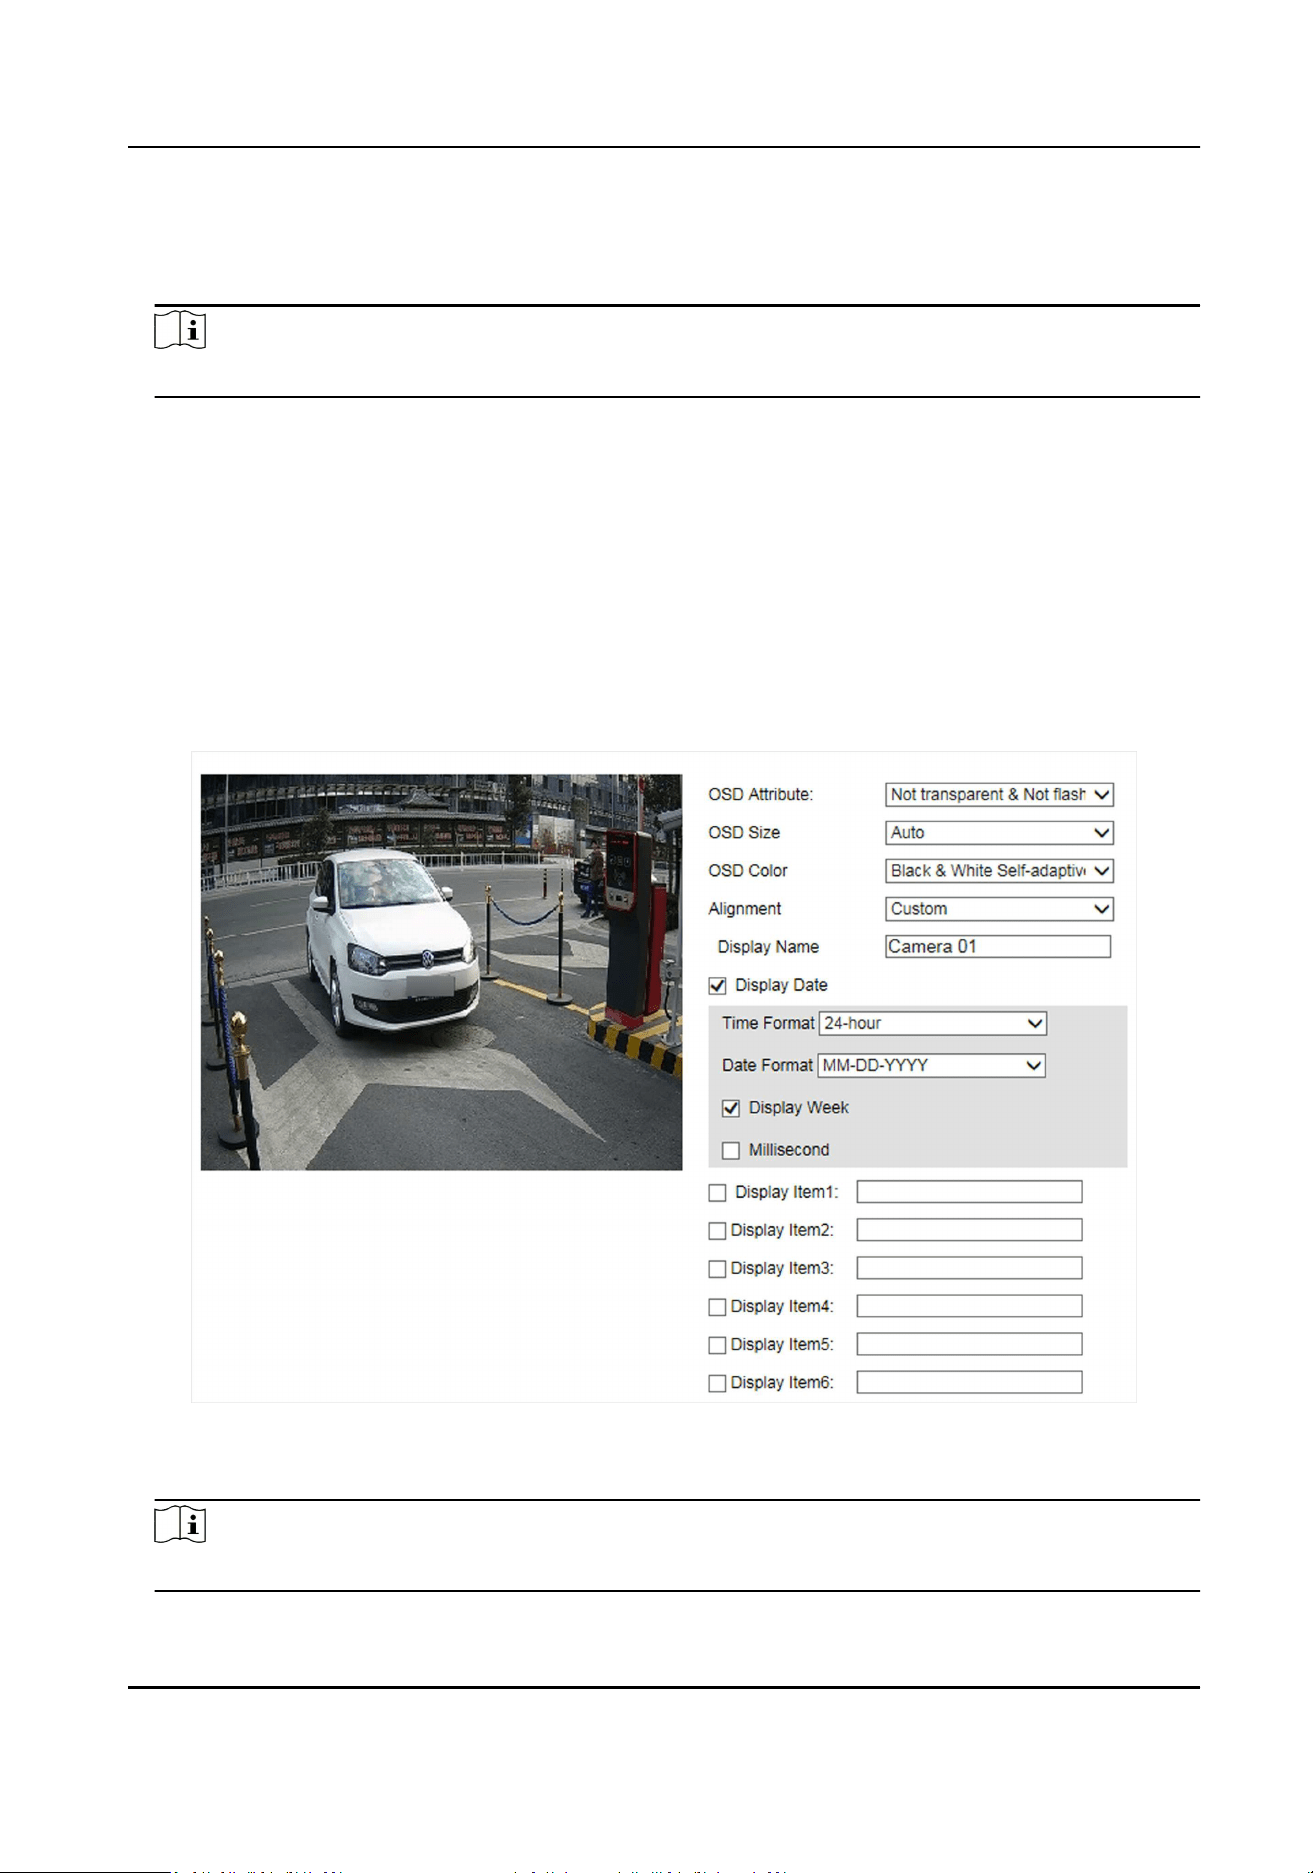
7.5 Set OSD
You can customize OSD informaon on the live view.
Steps
1.
Go to Conguraon → Device Conguraon → Text Overlay → OSD Sengs .
Figure 7-4 Set OSD
2.
Set OSD aribute, size, color, etc.
Note
The supported funcons vary with dierent models. The actual device prevails.
Entrance and Exit Capture Camera User Manual
45
Loading ...
Loading ...
Loading ...