Loading ...
Loading ...
Loading ...

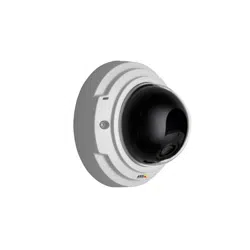
AXIS P3354
Setting Up the Product
• Fixed to use a fixed gain.
When Shutter and Gain are both set to Auto, it is possible to set the Priority between low motion blur and low noise manually and to
use a diff erent Priority in Normal Light and in Low Light.
Example
Consider an area where people or vehicles move during the day, but where there s hould be n o movements during night. To be able to,
for example, recognize faces or license plates, move the normal light priority slider toward low motion blur. At nighttime, motion
detection is more important than identification. Motion blur is acceptable and since low light can cause a lot of noise, mo ve
the low light priority slider toward low noise.
Example
If stora ge sp ace or bandw idth is limite d, try using a low er ga in. This will reduce im age noise a nd produce smaller image files.
Iris adjustment
Select Enable automatic iris adjustment to automatically compensate for changing light conditions. T his option is not available
if a fixed iris is used.
Use the Iris adjustment slider to set the preferred F-value. The scale rep resents the amount the iris is open. If set to 0, the iris
is opened a s much as possible. If set to 100, the iris is closed as much as possible. The actual F-value is shown below the
slider. If a utom atic iris adjustment is enabled , the iris will stay at this position as long as light conditions are favorable. If light
conditions change, the iris will ad just itself to the best iris setting s. If automatic iris adjustment is disable d, the iris will lock on
the set position regardless of light conditions
Day/Night
The IR cut filter prevents infrared (IR) light fro m reaching the image sensor. In poor lighting conditions, for example at night, or
when using an IR lamp, set the IR cut filter to Off. This increase s light sensitivity and allows the product to “see” infrared light. The
image is shown in black and white when the IR cut filter is off.
If using automatic Exposure control,settheIRcutfilter to Auto to automatically switch between On and Off accordingtothe
lighting conditions.
The Day/Night shift level bar help s determine when the camera will shift from day mode to night mode. Normally, the cam era
automatically changes mode from d ay to night when ver y dark (level 100 in the sli
der). B y setting Day/Night shift level to a
lower value, the ca mer a will change to night m od e earlier.
View Area
A view area is a cropped part of the full view. The view area is treated as a video source in Live View and has its own video
stream and PTZ setti n gs.
When setting up a view area it is recommende d that the video stream resolutio n is the same size as or smaller than the view are a
size. Setting the video str
eam resolution larger than the view area size implies digitally scaled up video after sensor capture,
requiring more bandwid th without adding image information.
To enable a view area, go to Video > Camera Settings and select Ena ble View Area.
To configure the view area:
1. Go to Video > View A rea .
2. Select an Aspect ratio and a Video stream resolution.
3. Use the mouse to move and resize the view area.
4. Select Enable PTZ to enable digital PTZ for the view area.
5. Click Save to save the settings.
Tip:
17
Loading ...
Loading ...
Loading ...
