Loading ...
Loading ...
Loading ...
SDS1000X-E&SDS1000X-U User Manual
229
WWW.SIGLENT.COM
Vari-level Sweep Operation
1. Press Utility button on the front panel to enter the UTILITY function menu, and
then press the Next Page soft key to enter the second page. Press Bode Plot Ⅱ
to enter the BODE PLOT function menu. Press Config to enter Configure menu.
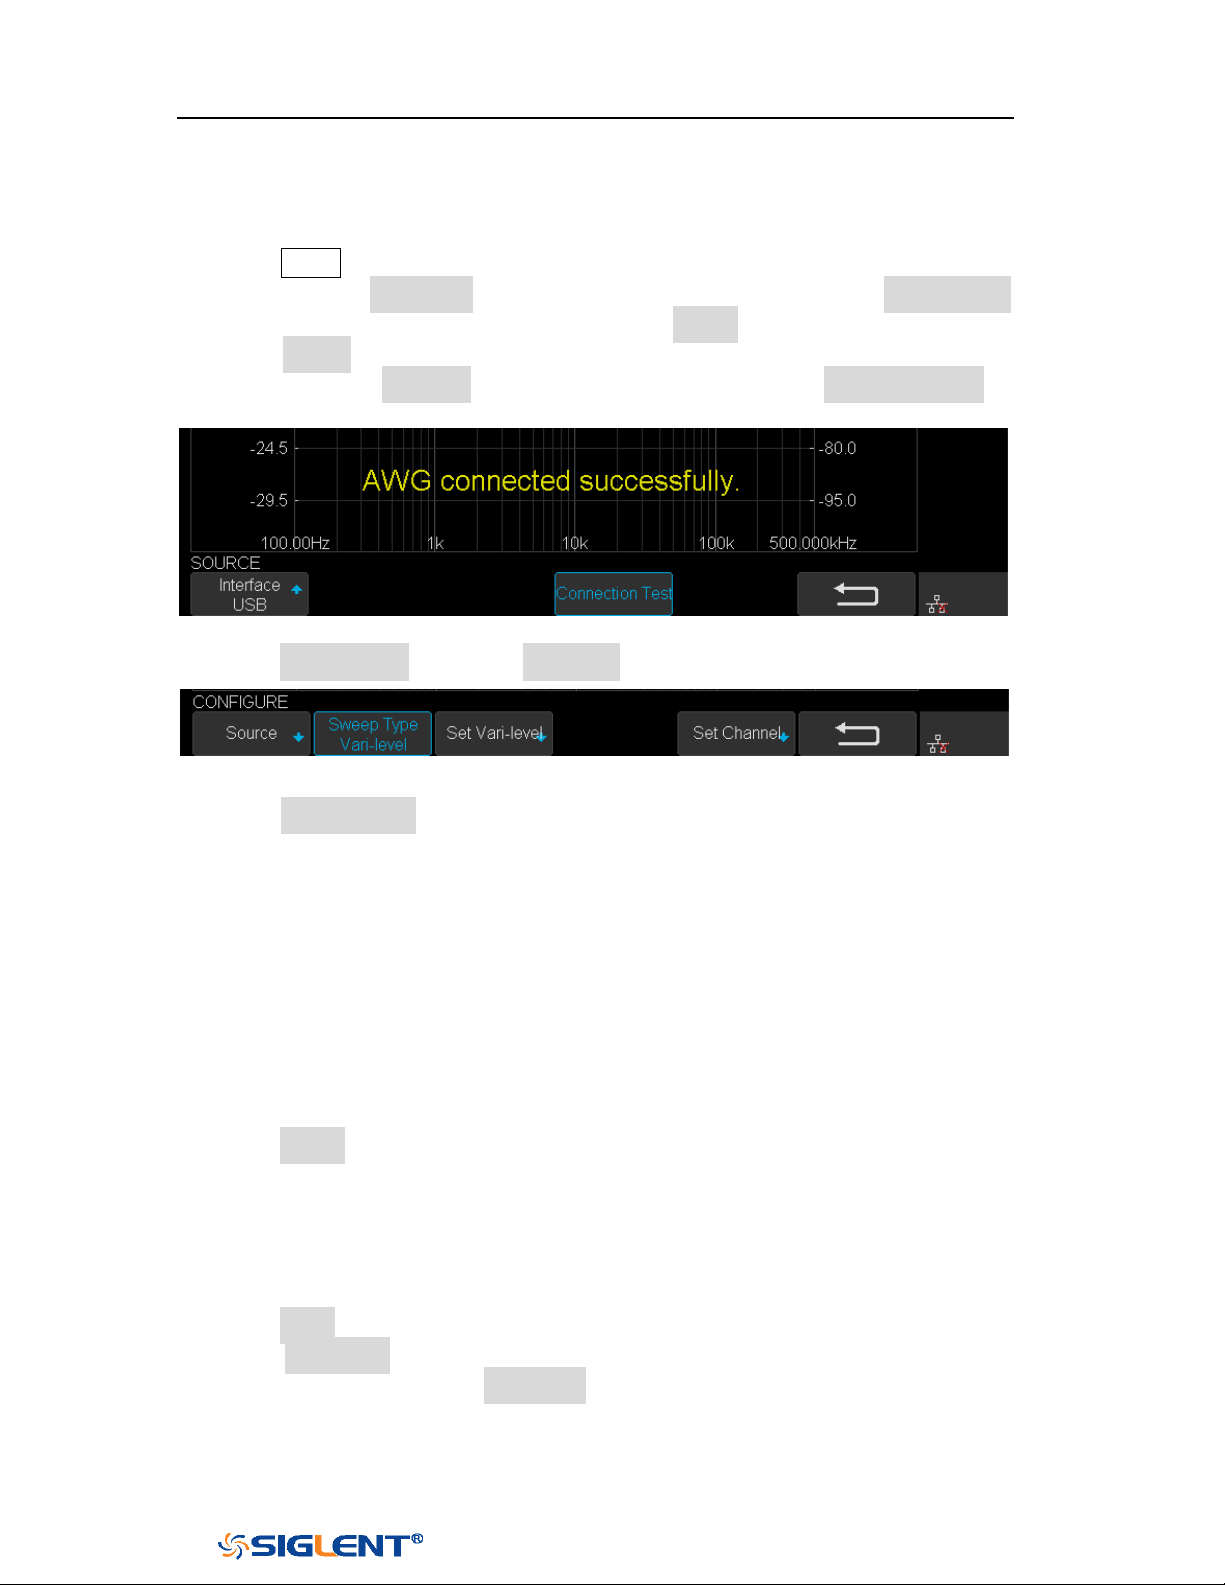
2. Press Source to enter Source menu to select the waveform generator. In this
example, press Interface to select “USB”, and then press Connection Test to
verify setting. Then return to the Configure menu.
Figure 161 Bode Plot Interface Connection
3. Press Sweep Mode to select “Vari-level”.
Figure 162 Vari-level Configure Menu
4. Press Set Vari-level to enter Vari-level editor. On the left side of the editor is a
spreadsheet which is used to specify the relationship between frequency and
amplitude. On the right side is an automatically generated stimulus voltage vs.
frequency plot.
5. The operation principle of Vari-level is simple. User specifies a series of joint,
which is defined by a given frequency and corresponding amplitude. In
between two adjacent joints, the frequency points and their corresponding
amplitude are calculated automatically by linear interpolation. The frequency
of the joints is sequential, so the frequency of the posterior joint is always
higher than the frequency of the anterior joint. And always, the first and the
last joint defines the start and stop frequency.
6. Press Profile and use the Universal Knob to select “Profile A”. As you can see,
up to 4 profiles can be saved.
7. In this example, I will demonstrate how to specify a Vari-level profile widely
used in testing power supply loop response. The profile is a 4-joint- polyline
with large stimulus amplitude in low frequency and small amplitude in high
frequency, and gradual amplitude in intermediate frequency.
8. Press Joints and use the Universal Knob to set the number of joint to 4.
9. Press Edit Table to activate the spreadsheet editor. When the spreadsheet
editor is activated, press Edit Table will cycle the cursor between frequency,
amplitude and the entire column. Then use the Universal Knob to adjust the
frequency, the amplitude, or to select the column to be edited. Press the
Loading ...
Loading ...
Loading ...