Loading ...
Loading ...
Loading ...
13.3. Macro Assign
To set up a Macro, Shift-touch the Macros M1/M2 pad. Its LED will pulse white, as will the LED
ladder for the Bend Touch Strip. That indicates you're working with Macro 1. If you want to
set up Macro 2, just touch the Wheel Touch Strip so its LED ladder pulses white. The Display
will tell you which Macro you're editing, and the Sound Edit button will light dim white.
The Display will prompt you to choose a control and change it. You can just grab the
appropriate knob or encoder and give it a tweak; it will immediately be assigned to one of
the four modulation slots in the Macro.
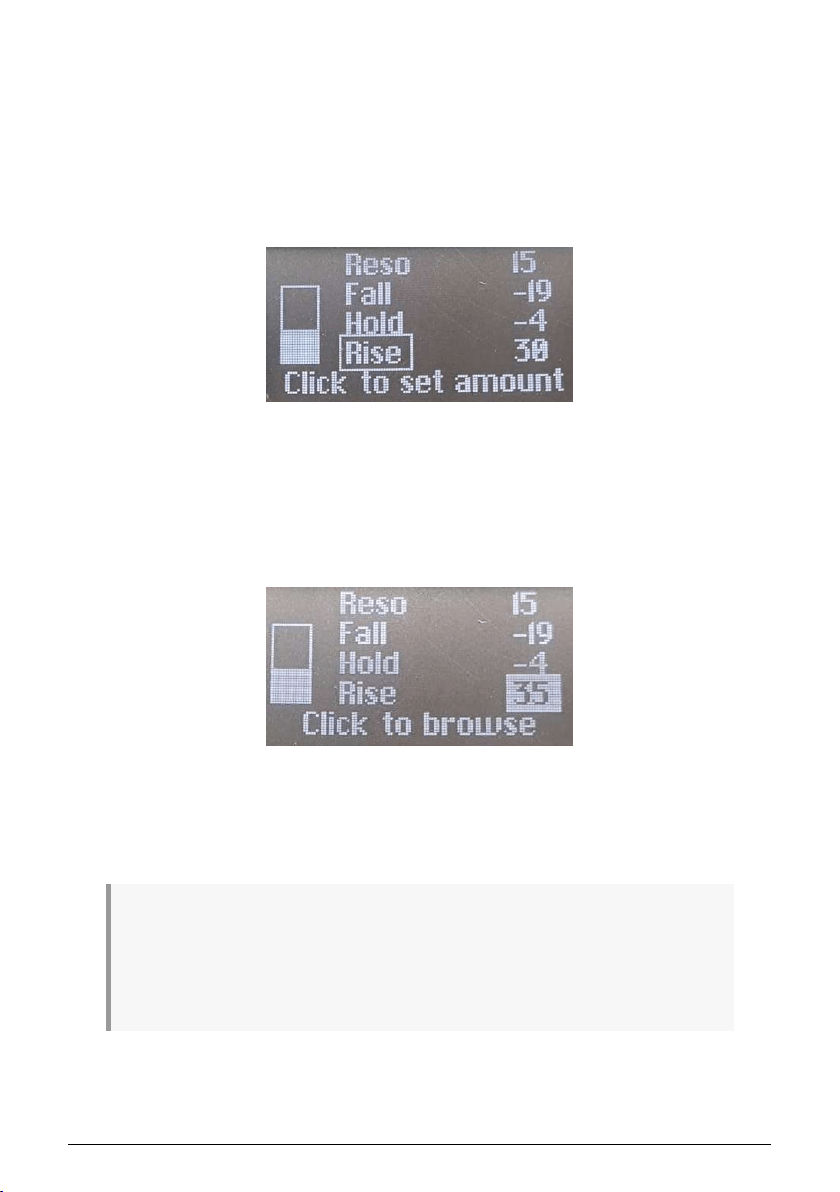
Now set the amount of modulation you want the Macro to add. You can either click the
Preset/Edit encoder to jump from the name of the current modulation to its amount, and
tweak it that way, or simply use the knob or encoder on the front panel that controls that
parameter.
Modulation amounts can be set from 0 to either -100 or +100. Remember, that is an offset
to the stored value of the parameter.
When you're working with Macros, it's a good idea to occasionally stop editing the Macros, turn
them both down to 0, and then save your Preset. That way, you can always be sure that the Preset will
be recalled just as you need it to be, and you will always have a "safe place" to come back to if your
Macros get out of hand. Alternatively if you want to test new parameters but you are afraid of breaking
the preset. Use the macros as a preview to see how it could affect the sound. Setting the Macro back to
0 will take you back to the original sound, without breaking the preset.
Macro Assign display for browsing
modulation slots. The current slot is
framed with a box.
Macro Assign display for setting
modulation amounts
81 Arturia - User Manual MiniFreak - Macros
Loading ...
Loading ...
Loading ...