Loading ...
Loading ...
Loading ...
3. MEET THE MINIFREAK: AN OVERVIEW
Now it's time to learn our way around the MiniFreak!
In this chapter, we'll take a look at the front and rear panels of the MiniFreak. In later
chapters, we'll explain what the controls in each section do, and how to use them, but we'll
start with a basic understanding of the different control types.
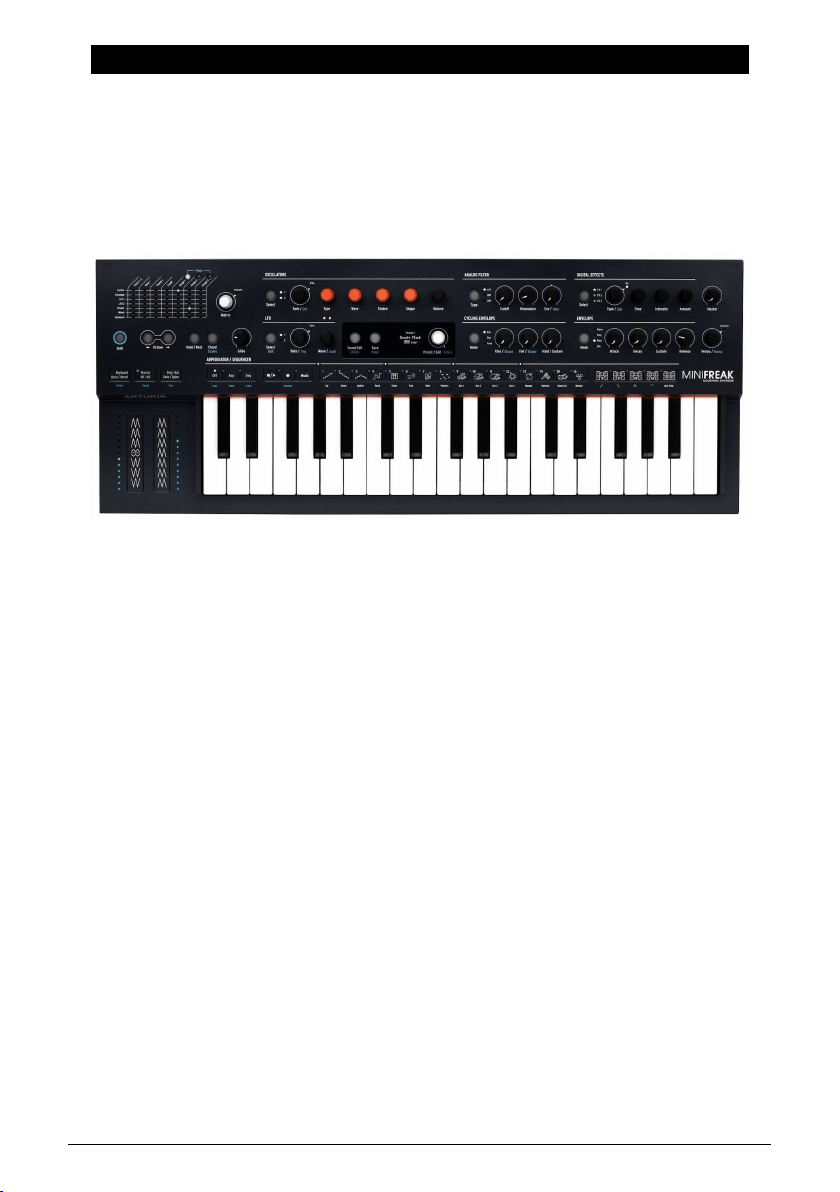
3.1. The Front Panel
We'll start at the top left of the front panel and work our way across, section by section and
row by row.
We'll name the controls in bold; when a control has two names separated by a slash, e.g.
Tune/Oct, the second function is applied while Shift is held down (shown in blue on the panel
of your MiniFreak).
An
encoder
steps through specific settings, one by one. Usually encoders have a second
"click+turn" or "click+push" function activated by pressing the encoder; often these will have
an indicator LED to show their status.
Buttons
are pretty self-explanatory; some are active only when held down (
momentary
),
while others have to be pushed once to enable them, then again to disable them (
toggle
).
Usually button status is indicated with a white LED; the Sound Edit/Utility button lights blue
when the Utility menu is selected.
Another type of button is the
capacitive button
, which senses your touch but has no moving
parts. Each of the 30 capacitive buttons on the Touch Strip has a multicolor LED to indicate
activation or function type.
Arturia - User Manual MiniFreak - Meet the MiniFreak: An overview 6
Loading ...
Loading ...
Loading ...