Loading ...
Loading ...
Loading ...

Audio Plug-ins
Three sections of parameters let you manage VST Effects, enabled plug-ins, and external
audio processes.
– VST Effects: A list at top lets you manually add and remove VST plug-in effects directories, if
necessary. VST effects aren’t installed in a standard location, so it may sometimes be necessary to
add a newly installed directory of VST plug-ins that you’ve just installed on your system.
– Available Plug-ins: Once you’ve added one or more VST directories to the list, a second list
underneath shows all audio plug-ins that are available within these directories. Each plug-in on the
list has a checkbox that shows whether or not it’s currently enabled. Any VST plug-ins that cause
DaVinci Resolve to crash while loading them during startup will be automatically disabled. You
can use this list to see which plug-ins have been disabled, for troubleshooting purposes, and to
reenable such “blacklisted” plug-ins by turning their checkboxes back on.
– Setup External Audio Processes: While working in the Fairlight page, you have the ability to
process an audio file using a third-party application, if necessary, in the event you need to use
another application’s capabilities to create an effect or solve an issue that can’t be accomplished
in the Fairlight page itself. To do this, you must first add one or more applications to the External
Audio Process list in the Audio Plug-ins panel of the System Preferences.
NOTE: VST is a trademark of Steinberg Media Technologies GmbH.
To add an External Audio Process:
1 Click the Add button.
2 Double-click the text in the Name column and change the name to that of the application or
process you’re going to link to.
3 Click once in the Path column, and then use the file dialog to locate and select the application or
script you want to use as the external audio process.
4 Open the drop-down menu in the Type column, and choose how you want the selected audio
process to work: Reveal (open the application), Command Line (use from Terminal), or Clipboard
(copy the audio clip file path to the clipboard to paste into the open command of an application
or utility).
5 When you’re done, click Save, and restart DaVinci Resolve if you’re prompted to.
Control Panels
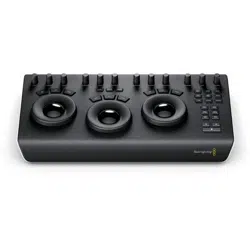
Two sections let you specify which Color Grading Panel and Audio Console is connected
to your workstation.
– Color Grading Panel: A menu lets you choose which color grading panel you have connected to
your workstation. Some panels expose additional controls.
If you have a DaVinci Resolve Mini or Micro Panel, leave this setting set to None and these panels
will be auto-detected by Resolve when you plug them in.
If you have a control panel that connects via USB, choose your panel from the list.
If you have a DaVinci Resolve Mini Panel connected over Ethernet, choose “DaVinci Resolve Mini
Panel (Ethernet)” and then choose your panel from the drop-down that appears.
If you’re using a JLCooper Eclipse, choose “JLCooper Eclipse CX” and then enter the IP and Port
number into the fields that appear.
Chapter 4System and User Preferences 95
Loading ...
Loading ...
Loading ...
