Loading ...
Loading ...
Loading ...
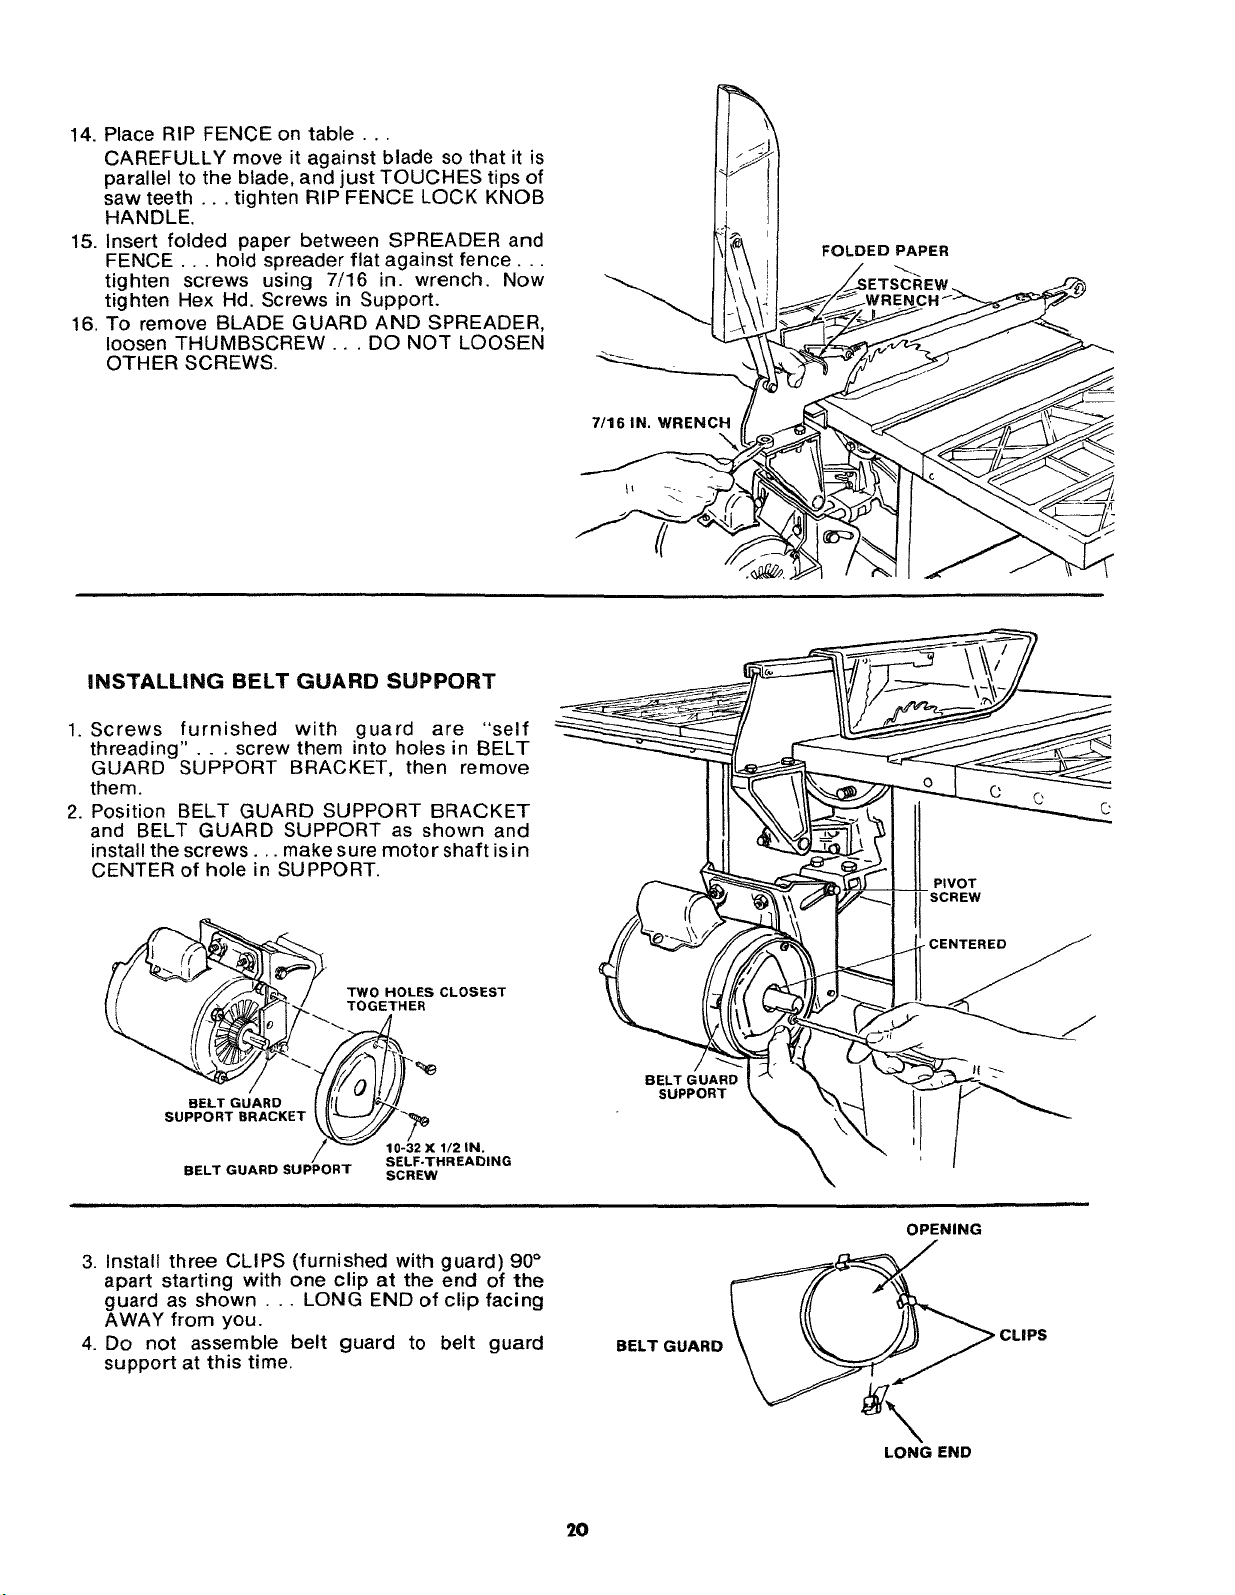
14.PlaceRIPFENCEon table...
CAREFULLYmoveitagainstbladesothatit is
paralleltotheblade,andjustTOUCHEStipsof
sawteeth.., tightenRIPFENCELOCKKNOB
HANDLE.
15.Insertfolded paperbetweenSPREADERand
FENCE... holdspreaderflatagainstfence...
tighten screws using 7/16 in. wrench.Now
tightenHexHd.Screwsin Support.
16.To removeBLADEGUARDANDSPREADER,
loosenTHUMBSCREW... DONOTLOOSEN
OTHERSCREWS.
7/16 IN. WRENCH
\
FOLDED PAPER
INSTALLING BELT GUARD SUPPORT
1. Screws furnished with guard are "self
threading" . . . screw them into holes in BELT
GUARD SUPPORT BRACKET, then remove
them.
2. Position BELT GUARD SUPPORT BRACKET
and BELT GUARD SUPPORT as shown and
install the screws.., make sure motor shaft is in
CENTER of hole in SUPPORT.
_' TWO HOLES CLOSEST
....TOGETHER
BELT GUARD SUPPORT SCREW
BELT GUARD
SUPPORT
O
0
PIVOT
SCREW
3. Install three CLIPS (furnished with guard) 90 °
apart starting with one clip at the end of the
guard as shown . .. LONG END of clip facing
AWAY from you.
4. Do not assemble belt guard to belt guard
support at this time.
BELT GUARD
OPENING
CLIPS
LONG END
2O
Loading ...
Loading ...
Loading ...