Loading ...
Loading ...
Loading ...
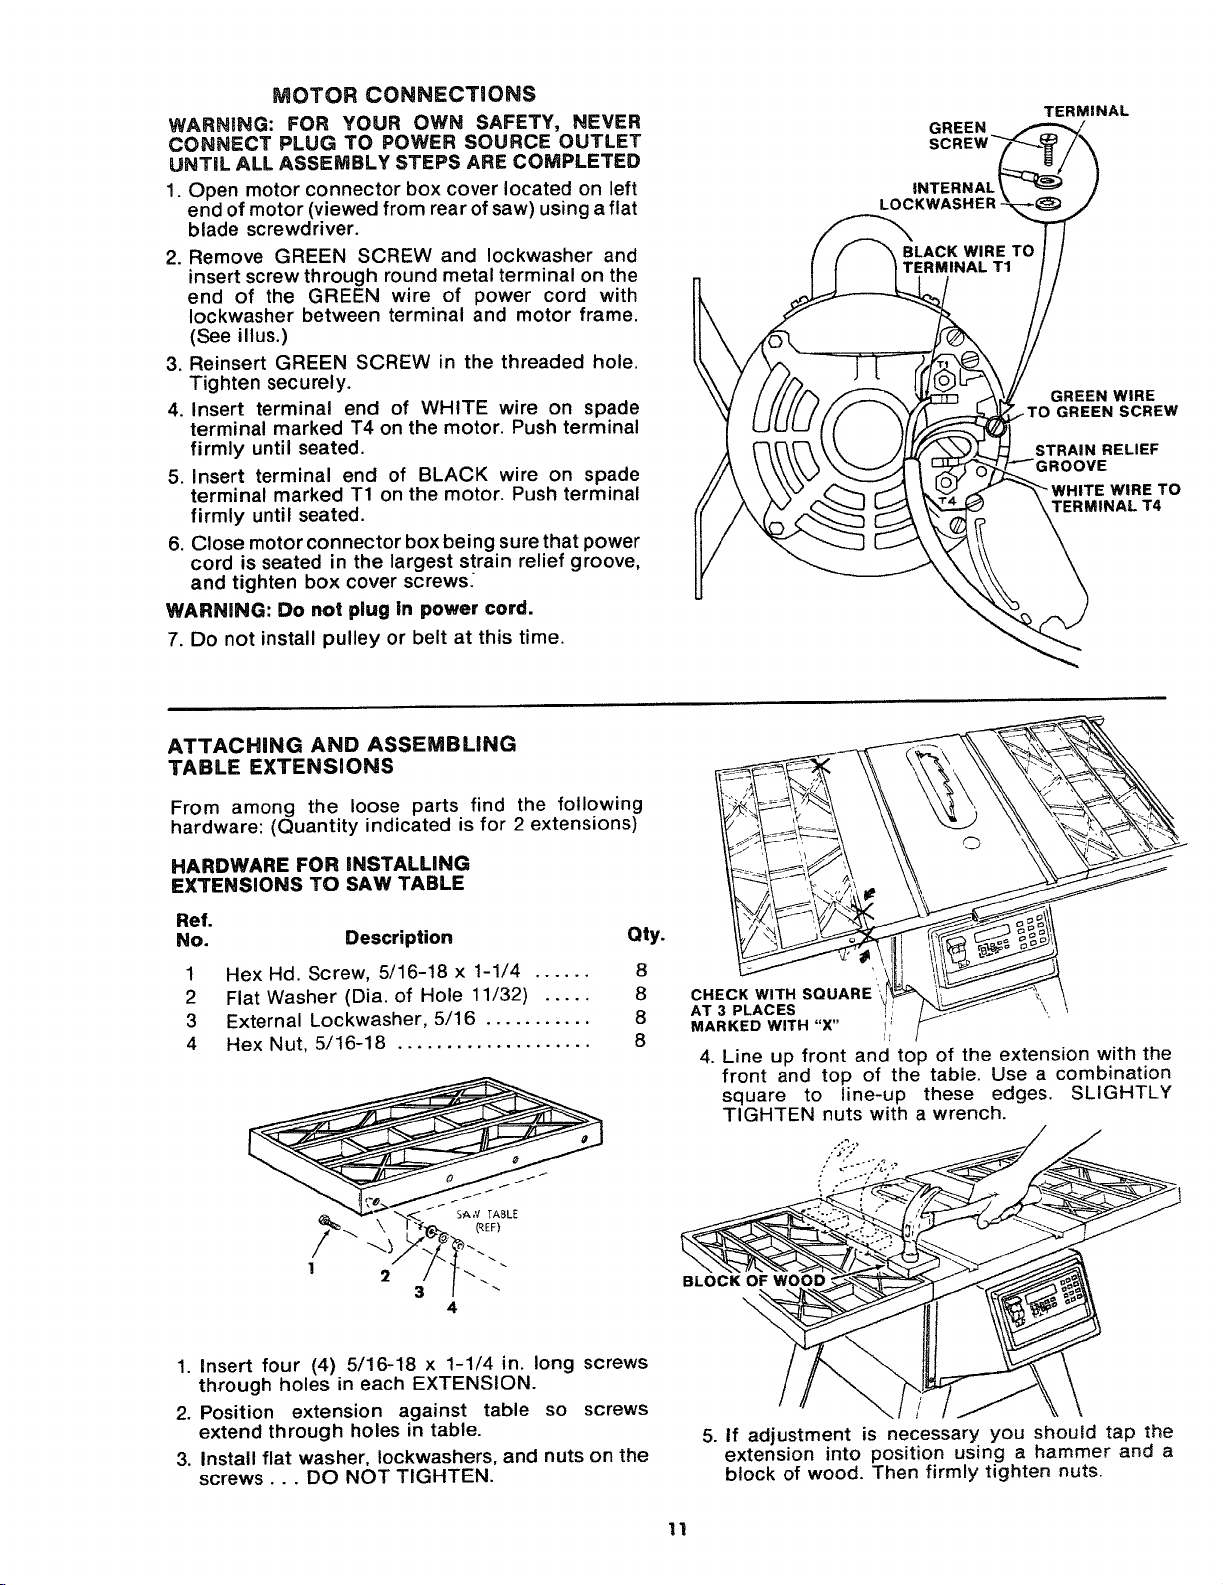
MOTOR CONNECTIONS
WARNING: FOR YOUR OWN SAFETY, NEVER
CONNECT PLUG TO POWER SOURCE OUTLET
UNTIL ALL ASSEMBLY STEPS ARE COMPLETED
1. Open motor connector box cover located on left
end of motor (viewed from rear of saw) using a flat
blade screwdriver.
2. Remove GREEN SCREW and Iockwasher and
insert screw through round metal terminal on the
end of the GREEN wire of power cord with
Iockwasher between terminal and motor frame.
(See illus.)
3. Reinsert GREEN SCREW in the threaded hole.
Tighten securely.
4. Insert terminal end of WHITE wire on spade
terminal marked T4 on the motor. Push terminal
firmly until seated.
5. insert terminal end of BLACK wire on spade
terminal marked T1 on the motor. Push terminal
firmly until seated.
6. Close motor connector box being sure that power
cord is seated in the largest strain relief groove,
and tighten box cover screws
WARNING: Do not plug in power cord.
7. Do not install pulley or belt at this time.
GREEN WIRE
_TO GREEN SCREW
STRAIN RELIEF
)OVE
"WHITE WIRE TO
TERMINAL T4
ATTACHING AND ASSEMBLING
TABLE EXTENSIONS
From among the loose parts find the following
hardware: (Quantity indicated is for 2 extensions)
HARDWARE FOR INSTALLING
EXTENSIONS TO SAW TABLE
Ref.
No. Description
1 Hex Hd. Screw, 5/16-18 x 1-1/4 ......
2 Flat Washer (Dia. of Hole 11/32) .....
3 External Lockwasher, 5/16 ...........
4 Hex Nut, 5/16-18 ....................
Qty.
8
8
8
8
3
4
1. Insert four (4) 5/16-18 x 1-1/4 in. long screws
through holes in each EXTENSION.
2. Position extension against table so screws
extend through holes in table.
3. Install flat washer, Iockwashers, and nuts on the
screws... DO NOT TIGHTEN.
, __-_ __.-_'.__)_\
Ij F "
AT 3 PLACES
MARKED WITH "X"
4. Line up front and top of the extension with the
front and top of the table. Use a combination
square to line-up these edges. SLIGHTLY
TIGHTEN nuts with a wrench.
BLOCK OF WOOD
\
5. if adjustment is necessary you should tap the
extension into position using a hammer and a
block of wood. Then firmly tighten nuts.
11
Loading ...
Loading ...
Loading ...