Loading ...
Loading ...
Loading ...
City Series CC40E-11 | 81
installation
Optional Birchwood Log Set Installation
920-074
02.28.19
Read the instructions below carefully and refer to the images. If the logs are broken do not use the unit until they are replaced. Broken
logs can interfere with pilot operation.
Improper positioning of the logs may create carbon build-up and can alter the unit's performance which is not covered under warranty.
*Dark brown paint is included if touch ups are required.
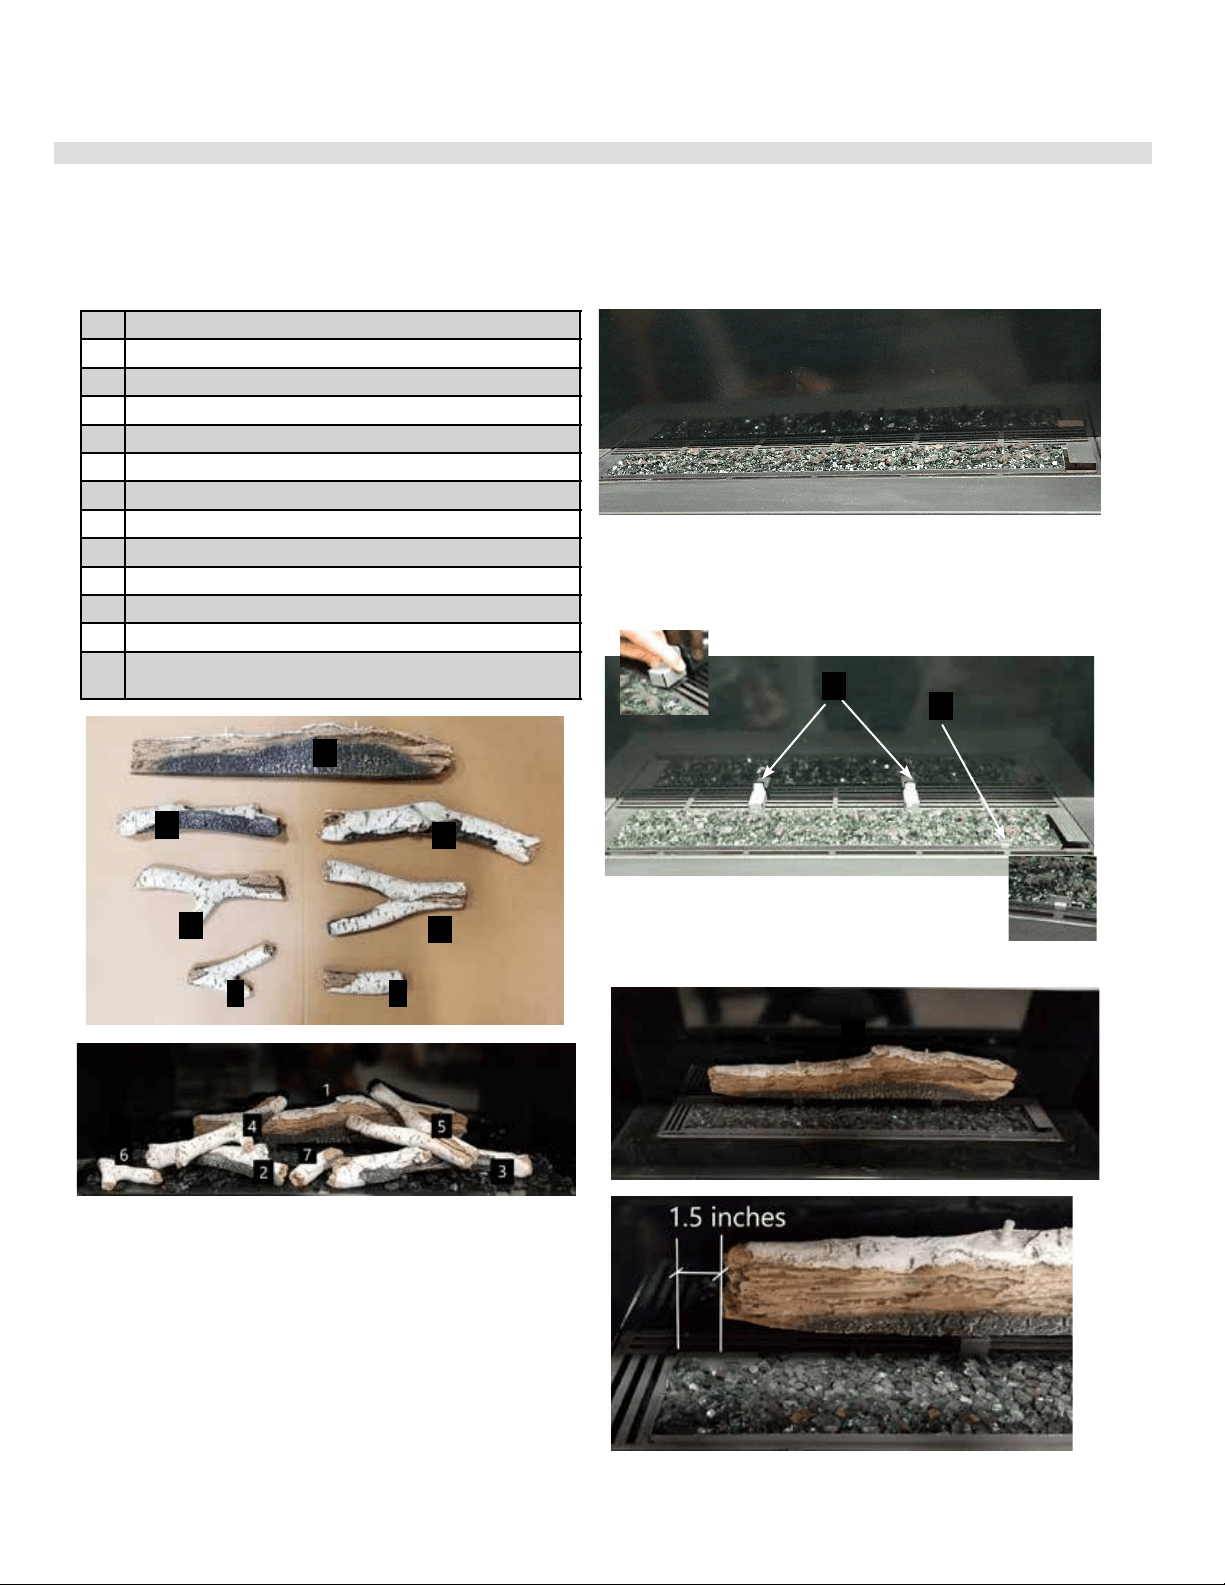
1 Rear Log
2 Left Log
3 Right Log
4 Left Cross Log
5 Right Cross Log
6 Front Left Log Piece
7 Front Right Log Piece
8 Log Brackets (2) Part # 656-047
9 Log Brackets (1) Part # 476-103/F
Lava rock (purchased separately from log set)
1.5 lb Black Fireglass (purchased separately from log set)
Glowing wool (supplied with unit) Part # 946-634
3/4" Crushed black glass or iceburg chips
(purchased separately from log set)
1
3
5
2
4
6 7
1. S hut off gas and electrical supply, allow unit to cool to room temperature.
2. Remove safety glass and firebox glass (see manual).
3. Carefully remove the logs from the packaging and unwrap them.
The logs are fragile, handle with care—never force into position.
4. Install Black Fireglass (1.5lb) and glowing wool on the burner as
shown below.
Log Guides - location of log guides,
2 rear - 1 front
5. Clip on the log guides - position the rear guides by centering over the
second and fourth vertical lines at the back of the burner. The front
log guide clips on to the front edge of the burner on the right side as
shown below.
Log 1 in position
Burner covered with Fireglass and glowing wool
1
6. Centre Log 1 and rest on installed rear log guides—with pins facing up.
8
9
1
CITY LINE
OPTIONAL BIRCHWOOD LOG SET INSTALLATION
Loading ...
Loading ...
Loading ...