Loading ...
Loading ...
Loading ...
City Series CC40E-11 | 43
installation
919-773a
04.24.17
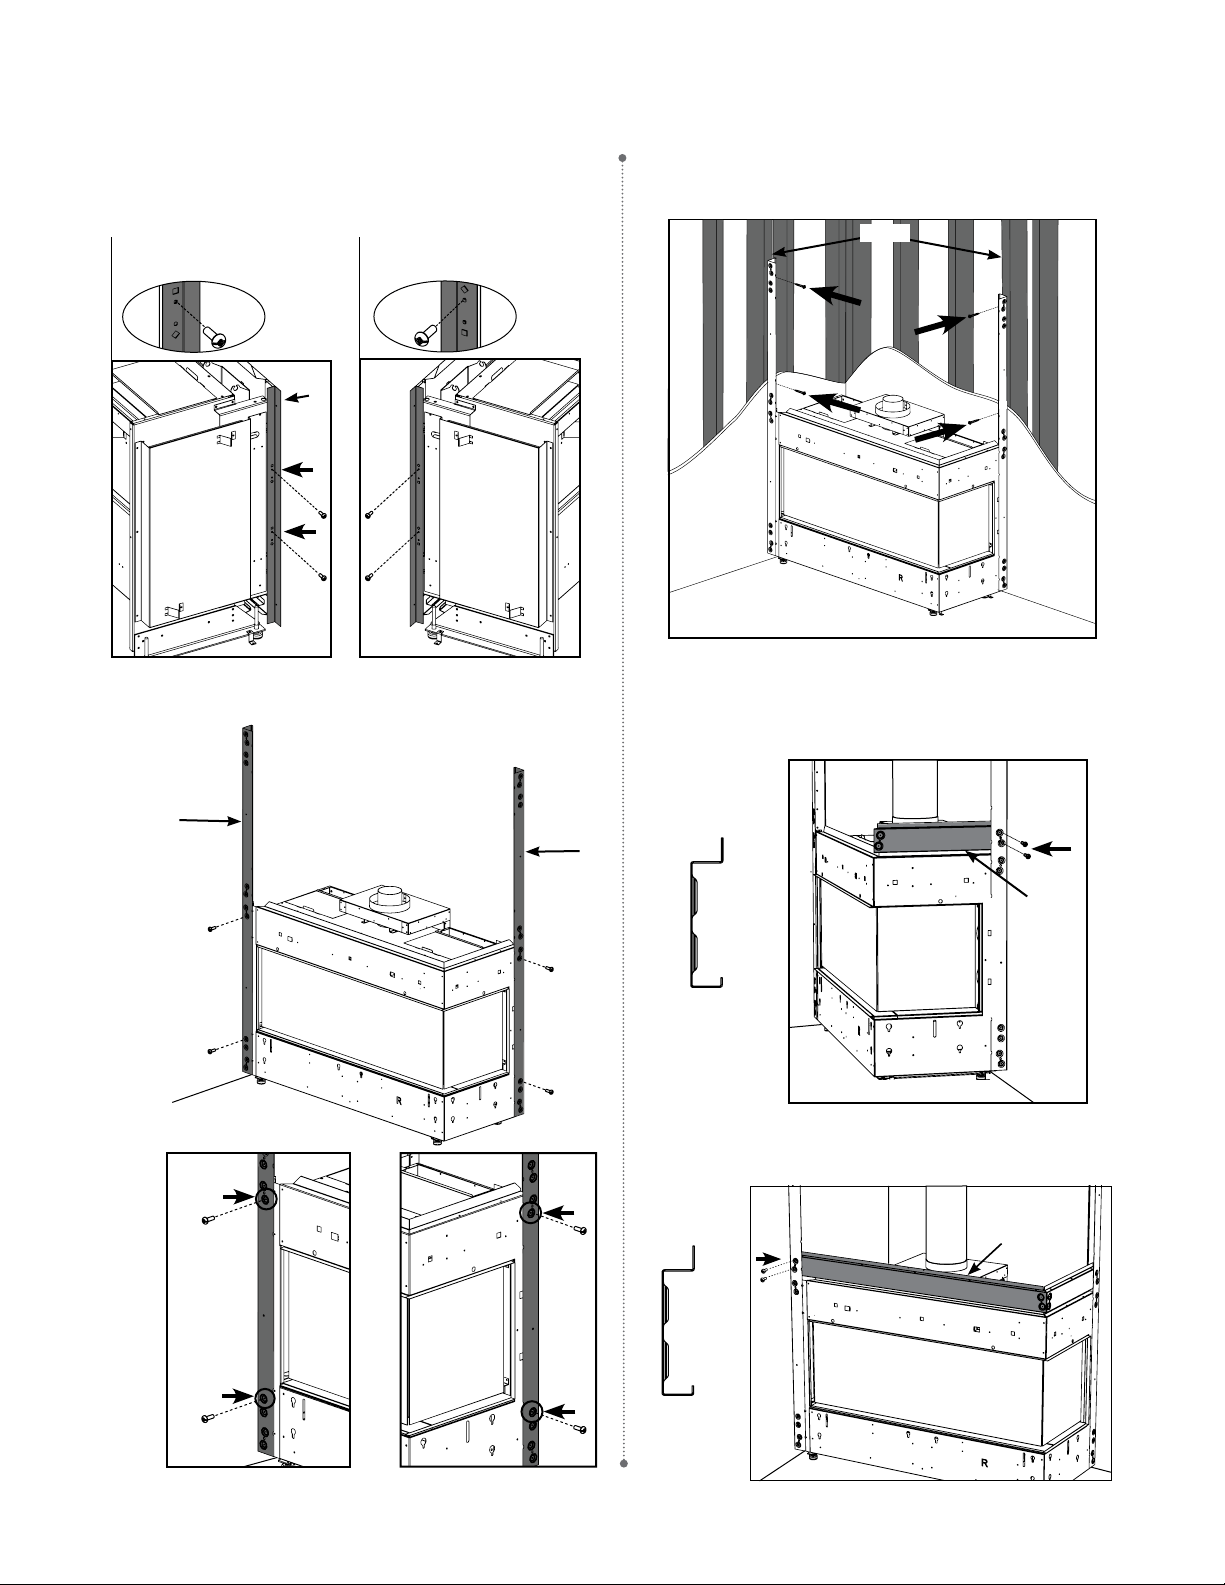
5. Slide unit against wall and line up part C's with studs in the wall.
Attach both part C's to studs with at least two screws each; one at
the top, and one near the unit (as seen below).
8. Identify E (see diagram below), attach E to front corner C with 2 screws
as shown below.
D
C
C
4. Install 2 x part C's onto parts A & B respectively, identify the holes to
be used, attach to the unit with 2 screws each.
Part D Profi le
3. Install B to the side of the unit, use the holes corresponding with the
appropriate shape (diamond or square depending on which unit you
have) using the diagrams below. Attach B to the side of the unit and
install 2 screws in locations shown below.
E
Part E Profi le
6. Install venting before proceeding further with framing kit construction.
Refer to manual for venting instructions.
7. Identify D, attach to back corner C with 2 screws as shown below.
B
CC40RE
Holes next to squares
CC40LE
Holes next to diamonds
Studs
2
CITY SERIES
Loading ...
Loading ...
Loading ...