Loading ...
Loading ...
Loading ...
76 | City Series CC40E-11
maintenance
Enamel Panel Installation
919-743
11.25.16
CC40RE/CC40LE ENAMEL PANEL INSTALLATION
Black Enamel Panels — Handling Instructions
• Black Enamel panels must be inspected for scratches and dimples prior to installation.
All claims to be recorded at this time.
Claims for damage after installation will not receive consideration.
• Black Enamel panels will discolor a little during normal operation. This is normal and should not be considered a defect.
*
All hand and finger marks MUST be cleaned off with a soft cloth. Use an ammonia based cleaner (ie. glass cleaner) to remove any fingerprints before
applying heat to the unit.
Failure to do this will result in burn stain on panels which you will be unable to remove and will not be protected by product warranty.
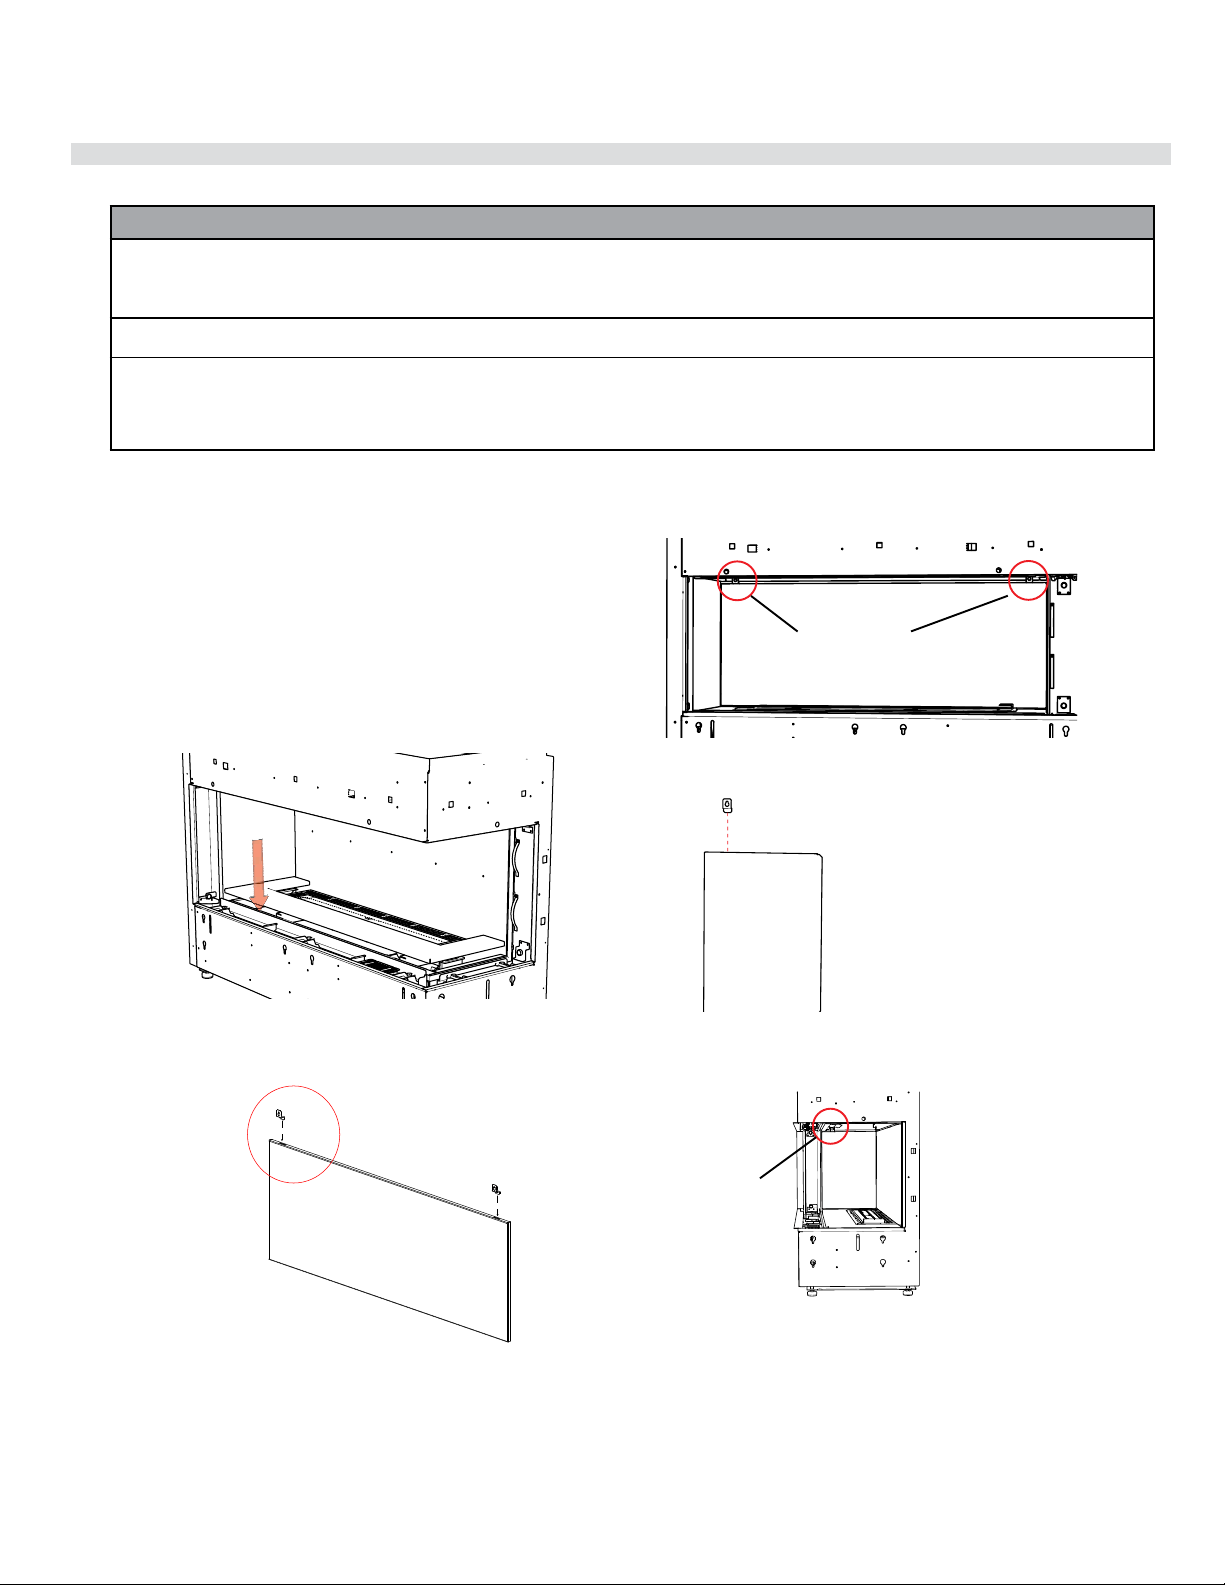
1. Install inner lower base panel.
2. Install panel clips into the slots at the top of the back panel as shown.
4. Install panel clip into the slots at the top of the side panel as shown.
3. Manoeuvre in back panel to the back wall of the unit—secure in place
with 2 panel clips and 2 screws.
5. Manoeuvre in side panel to the side wall of the unit—secure in place
with 1 panel clip and 1 screw.
The CC40RE/CC40LE can be equipped with optional enamel panels.
There are 4 outer panels and 3 inner panels.
NOTE: CC40RE shown in diagrams—CC40LE panels install in the same
order. Installed panels for the CC40LE will appear as mirror images of
diagrams shown below.
Turn off unit and allow to cool to room temperature. Remove the safety
glass and firebox glass — see manual for instructions
6. Reverse steps to remove panels.
Panel Clips
Panel Clip
tooltip
CC40RE/CC40LE INNER PANELS
1
CITY LINE
Loading ...
Loading ...
Loading ...