Loading ...
Loading ...
Loading ...
City Series CC40E-11 | 73
installation
919-742
11.07.16
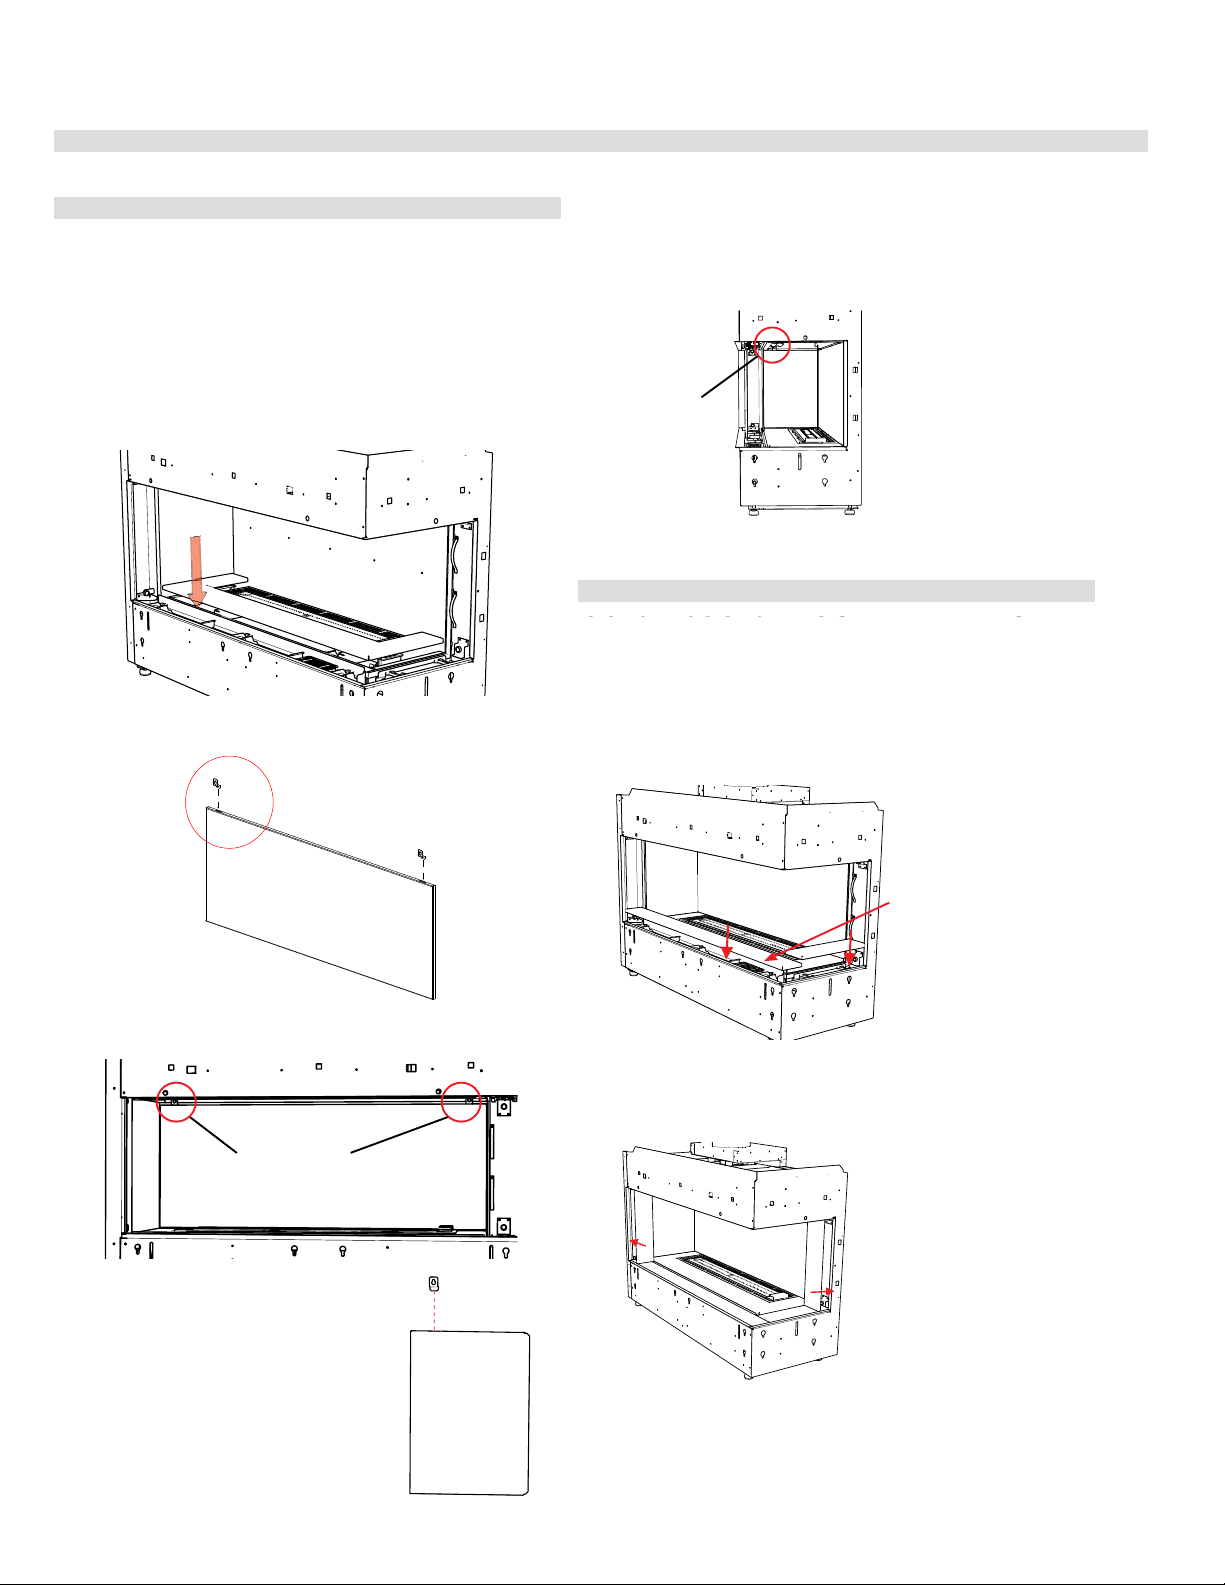
CC40RE/CC40LE INNER PANELS
1. Install inner lower base panel.
2. Install panel clips into the slots at the top of the back panel as shown.
4. Install panel clip into the slots at the top of the
side panel as shown.
3. Manoeuvre in back panel to the back wall of the unit—secure in place
with 2 panel clips and 2 screws.
5. Manoeuvre in side panel to the side wall of the unit—secure in place
with 1 panel clips and 1 screws.
CC40RE/CC40LE OUTER PANELS
Outer side panel install
Outer base panel install
Note: Install inner safety glass prior to installation of outer panels-see
instructions in manual
1. Attach Regency logo to the right hand side of outer front panel. The
magnets will be positioned under the outer front base panel to secure
the logo. The logo should be about 3 inches from the right hand corner
of the outer base. Install outer front and side base panel.
2. Install side panels - the side panels are secured in place by existing
magnets in the unit.
The CC40RE/CC40LE can be equipped with optional steel inner panels.
There are 4 outer panels and 3 inner panels.
NOTE: CC40RE shown in diagrams—CC40LE panels install in the same
order. Installed panels for the CC40LE will appear as mirror images of
diagrams shown below.
Turn off unit and allow to cool to room temperature. Remove the safety
glass and firebox glass — see manual for instructions.
3. Install outer safety glass.
4. Reverse steps to remove panels.
6. Reverse steps to remove panels.
tooltip
Panel Clips
Panel Clip
Location of
Regency Logo
tooltip
1
CITY SERIES
Inner Panels
Outer Panels
Painted Panel Installation
Loading ...
Loading ...
Loading ...