Loading ...
Loading ...
Loading ...
City Series CC40E-11 | 71
installation
LP Conversion Instructions
920-040
02.13.19
1
CITY SERIES
CONVERSION FROM NG TO LP
CV40E/ CB40E/CC40E-11 using SIT 885 NOVA Gas Valve
Caution: The gas supply shall be shut off prior to disconnecting the
electrical power, before proceeding with the conversion.
Always let the appliance cool to room temperature before servicing.
1. Remove the outer panels and safety glass — see manual.
2. Remove inner ceramic glass — see manual.
3. Remove inner panels — see manual.
4. Remove all media installed on burner (glass, logs or stones, etc).
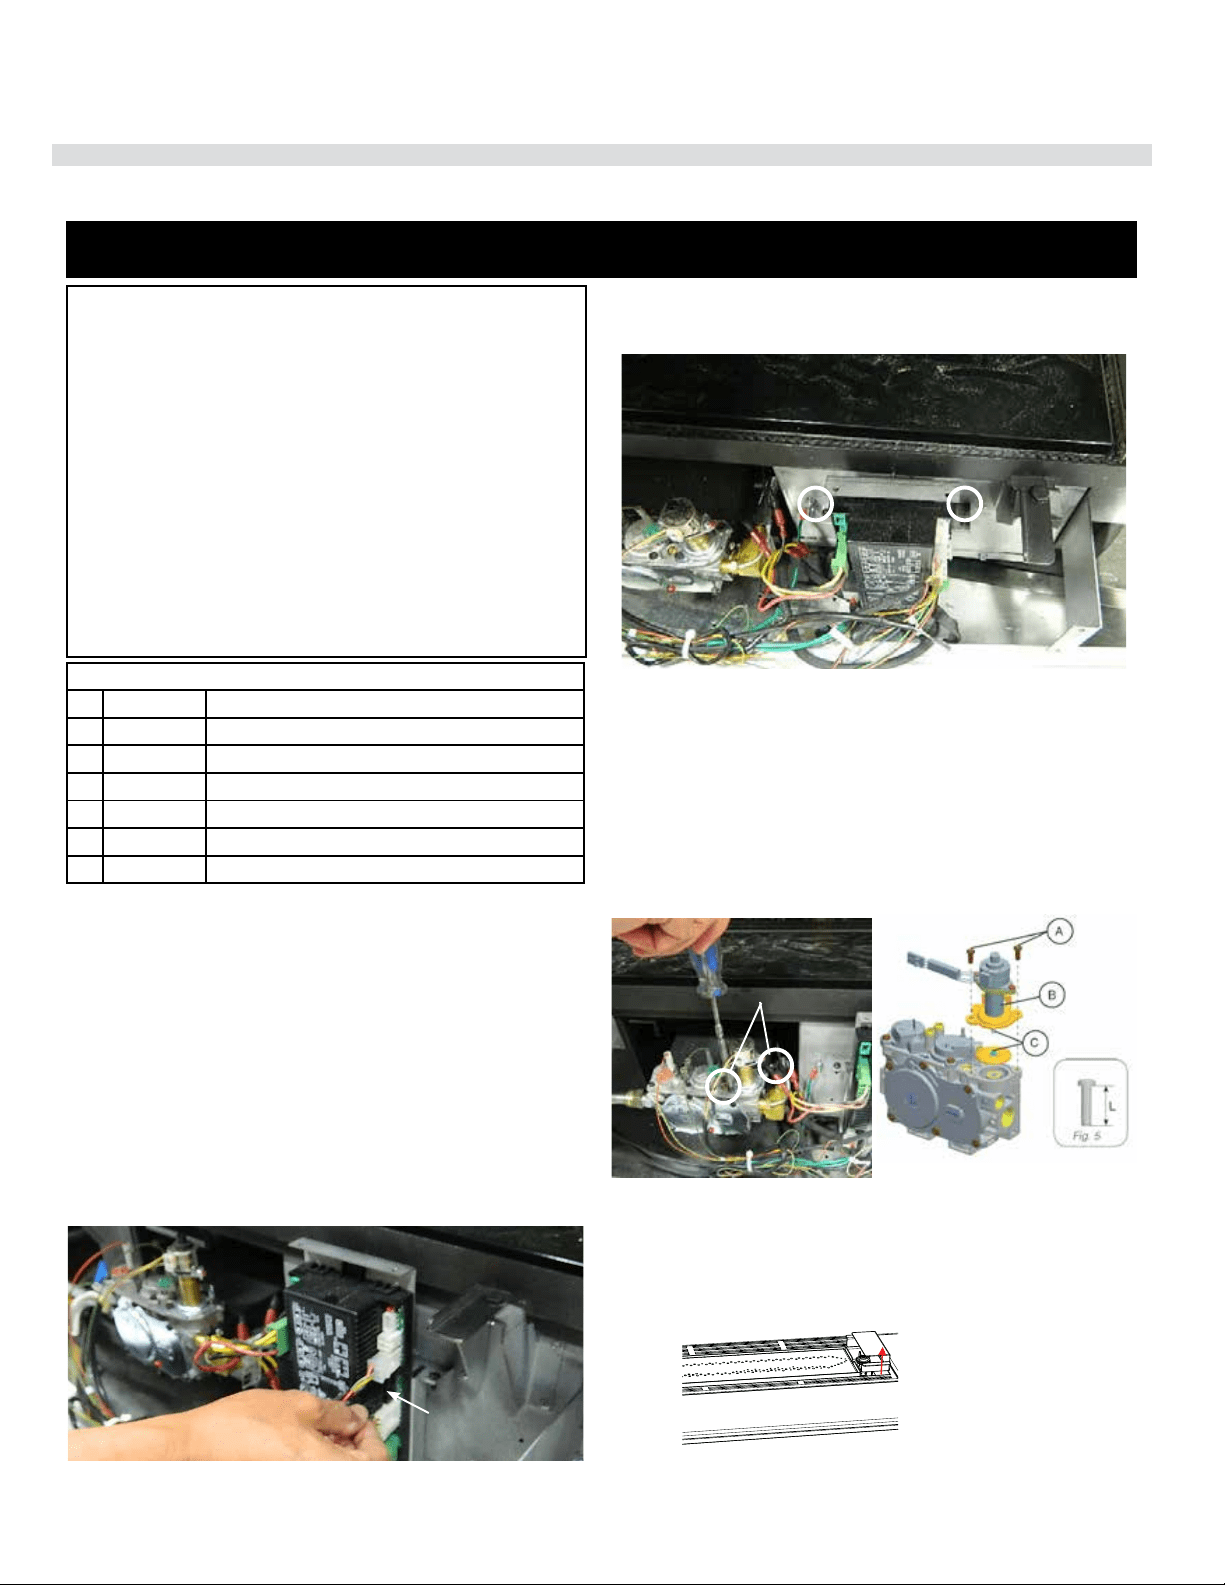
5. Disconnect the Cable coming from the Pressure Regulator Motor.
6. If unable to access this Cable - undo 2 screws securing the IFC Board
and slide out of unit to access cable.
WARNING
This conversion kit shall be installed by a qualified
service agency in accordance with the manufac-
turer’s instructions and all applicable codes and
requirements of the authority having jurisdiction.
If these instructions is not followed exactly, a fire,
explosion or production of carbon monoxide may
result causing property damage, personal injury
or loss of life. The qualified service agency is re-
sponsible for the proper installation of this kit. The
installation is not proper and complete until the
operation of the converted appliance is checked as
specified in the manufacturer’s instructions sup-
plied with the kit.
THIS CONVERSION MUST BE DONE BY A QUALIFIED GAS FITTER
IF IN DOUBT DO NOT DO THIS CONVERSION!
Cable from motor
Conversion Kit 657-977 includes:
1 911-191 Stepper Motor LP for 885 SIT
1 904-947 Orifice #53
1 910-037 Pilot Orifice #30
1 918-590 Decal - Conversion to LP
1 908-528 Label Propane
1 904-529 5/32" long Allen Key
1 920-040 Instruction Sheet
7. Remove and discard 2 Pressure regulator screws (A)using a (T20 or slot
screwdriver,) Pressure Regulator (B) and Spring and Diaphragm (C)
(see below).
8. Ensure the rubber gasket, which is prefitted as part of the Assembly,
is properly positioned. Install the new Pressure Regulator using the 2x
M4 x .7 screws supplied. Tighten the screws to 25lb-in. In the event that
the screw threads are cross threaded or stripped, replace the valve as-
sembly.
Install the enclosed propane identification label to the valve body where it
can be easily seen.
Pressure
regulator
screws
9. Re-attach the Pressure Regulator wire (disconnected in Step 6), and re-
situate the IFC, secure the screws that fasten the IFC Mounting Brackets.
10. Remove pilot hood by lifting up and off.
Loading ...
Loading ...
Loading ...